
Subscribe to Our Youtube Channel
Related Manuals for Janome Memory Craft 200E MC 200E


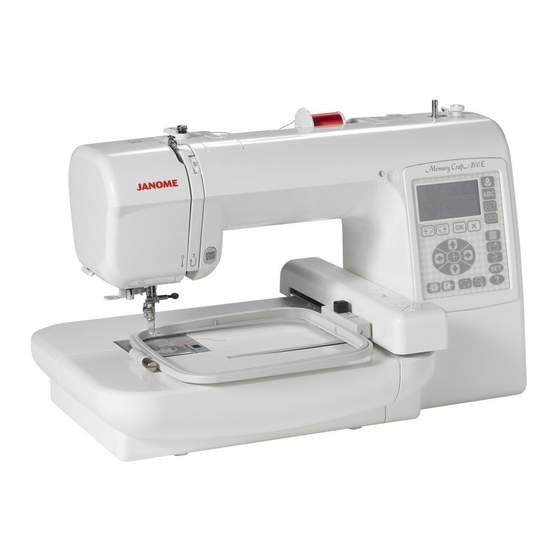
Summary of Contents for Janome Memory Craft 200E MC 200E
-
Page 1: Instruction Manual
Janome 200E Embroidery Machine Instruction Manual Janome Memory Craft 200E Instruction Manual MC 200E www.janomeflyer.com 200E Owners Manual/ User Guide... -
Page 2: Important Safety Instructions
Janome 200E Embroidery Machine Instruction Manual IMPORTANT SAFETY INSTRUCTIONS This sewing machine is not a toy. Do not allow children to play with this machine. The machine is not intended for use by children or mentally infirm persons without supervision. -
Page 3: Table Of Contents
Janome 200E Embroidery Machine Instruction Manual Table of contents Name of parts .............. 2 Saving the file ............. 39 Standard accessories ..........3 Saving in internal memory ......... 39 Name of file ............39-40 GETTING READY TO SEW Saving in USB memory (optional) ......41 Connecting the power supply ........ -
Page 4: Name Of Parts
Janome 200E Embroidery Machine Instruction Manual Name of parts Function panel LCD screen LCD brightness adjusting dial Spool holder (large) Spool pin Bobbin thread guide Thread take-up lever Thread tension dial Face plate Thread cutter & thread holder Thread guide plate... -
Page 5: Standard Accessories
Janome 200E Embroidery Machine Instruction Manual Standard Accessories Bobbin Lint brush Additional spool pin Felt Spool stand Spool holder (Large) Spool holder (Small) Scissors Screwdriver Screwdriver Set of needles Embroidery hoop Instruction book Template sheets Power supply cord Instructional movie CD Soft cover www.janomeflyer.com... -
Page 6: Getting Ready To Sew Connecting The Power Supply
Janome 200E Embroidery Machine Instruction Manual GETTING READY TO SEW Connecting the power supply Turn off the power switch and insert the machine plug into the machine socket. Insert the power supply plug into the wall outlet and turn the power switch on. -
Page 7: Start/Stop Button
Janome 200E Embroidery Machine Instruction Manual Start/stop button Press this button to start or to stop the machine. q Start/stop button NOTE: Lower the If you press the start/stop button without lowering the Presser Foot. presser foot, a warning message appears on the LCD screen. -
Page 8: Winding The Bobbin
Janome 200E Embroidery Machine Instruction Manual Winding the bobbin Removing the bobbin z Slide the hook cover plate release button to the right, and remove the hook cover plate. x Lift out the bobbin from the bobbin holder. q Hook cover plate release button... -
Page 9: Winding The Bobbin
For safety purposes, the motor will stop automatically after running for two minutes. CAUTION Use the Janome plastic bobbin for horizontal hook machines (marked with J). Using other bobbins, such as prewound paper bobbins, may cause stitching problems or damage the bobbin case. -
Page 10: Inserting The Bobbin
Janome 200E Embroidery Machine Instruction Manual Inserting the bobbin z Place the bobbin in the bobbin holder with the thread running off in a counterclockwise direction. q Thread w Bobbin holder * Refer to the threading chart shown on the hook cover plate. -
Page 11: Threading The Machine
Janome 200E Embroidery Machine Instruction Manual Threading the machine Raise the presser foot lifter. Turn the handwheel to bring the needle to its highest position. Draw the thread around and under the thread guide while holding the thread at the spool. Then draw the thread down through the right channel of the thread tension dial. -
Page 12: Needle Threader
Janome 200E Embroidery Machine Instruction Manual Needle threader Lower the presser foot. Depress the needle threader knob as far as it will go. The hook comes out through the needle eye from behind. q Needle threader knob w Hook Draw the thread down around the threader guide and under the hook. -
Page 13: Drawing Up The Bobbin Thread
Janome 200E Embroidery Machine Instruction Manual Drawing up the bobbin thread z Raise the presser foot lifter. Hold the needle thread with your finger. q Needle thread w Bobbin thread x Turn the handwheel one complete turn towards you. Draw the needle thread to bring up a loop of the bobbin thread. -
Page 14: Changing The Needle
Janome 200E Embroidery Machine Instruction Manual Changing the needle CAUTION Always make sure to turn the power switch off and disconnect the machine from the power supply before changing the needle. z Turn off the power switch. Raise the needle by turning the handwheel and lower the presser foot. -
Page 15: Adjusting The Thread Tension
Janome 200E Embroidery Machine Instruction Manual Adjusting the thread tension Balanced thread tension A small amount of needle thread shows on the wrong side of the fabric. When the needle thread tension is too tight The bobbin thread shows on the right side of the fabric. -
Page 16: Adhesive (Iron-On) Stabilizer
Janome 200E Embroidery Machine Instruction Manual Stabilizers To obtain the best quality embroidery, it is important to use stabilizers. Types of stabilizer Tear-away Stabilizer is made from a fiber that will tear easily. Use tear-away stabilizers for stable woven fabrics. After stitching, tear away the stabilizer so that the small portion left in the back of the stitching will not affect the wear. -
Page 17: Key Operations
Janome 200E Embroidery Machine Instruction Manual KEY OPERATIONS Adjusting the brightness of the LCD screen q LCD brightness adjustment dial w LCD screen CAUTION: Do not press the surface of the LCD Screen or function panel with a hard or sharp object such as a pencil, screwdriver or the like. - Page 18 Janome 200E Embroidery Machine Instruction Manual i Editing key Press this key to open the editing window. You can resize, rotate, flip and combine the pattern to create your own original embroidery design. o File save key Press this key to save the lettering or edited design as a file.
-
Page 19: Setting Mode
Janome 200E Embroidery Machine Instruction Manual Setting mode Machine settings Pressing the SET key will open the custom setting windows. You can set the following 8 functions to your preference. q Page keys Maximum Press the next page key to display the next page and... - Page 20 Janome 200E Embroidery Machine Instruction Manual 4. Thread selection Thread There are four brands of embroidery threads to choose selection from. Press the corresponding key of the thread you wish to use. The color code of the selected brand will be...
- Page 21 Janome 200E Embroidery Machine Instruction Manual c Press the OK key. Press v Press the USB file open key. Press b Press the cross mark. Press mark n Press the trace key. Press m Press the OK key to confirm the adjustments and exit the setting mode.
- Page 22 Janome 200E Embroidery Machine Instruction Manual 7. Language Selection You can select one of the following 11 languages by pressing the corresponding key. English Francais q English Italiano w French Espanol e Spanish Nederlands Deutsch r Italian t Dutch y German...
-
Page 23: Help Key
Janome 200E Embroidery Machine Instruction Manual HELP key Press this key to view the help topics for basic opera- tions. z Press the help key. q Help key x Press the help topic you want to see. w Help topics... -
Page 24: Setting The Fabric In The Embroidery Hoop
Janome 200E Embroidery Machine Instruction Manual Setting the fabric in the embroidery hoop z Attach a stabilizer to the wrong side of the fabric. Mark the centerlines on the right side of the fabric with tailor’s chalk. q Fabric w Centerlines... -
Page 25: Attaching The Embroidery Hoop To The Machine
Janome 200E Embroidery Machine Instruction Manual Attaching the embroidery hoop to the machine To attach z Raise the presser foot. x Place the prepared hoop on the machine. Position the hoop by aligning the notches of the hoop with the carriage pins. -
Page 26: Selecting Built-In Designs
Janome 200E Embroidery Machine Instruction Manual Selecting built-in designs z Your Memory Craft provides you with 14 pages of 55 ready-to-sew built-in designs. Press the pattern selection key to select the pattern you wish to sew. To view the next page, press the next page key. -
Page 27: Starting To Sew Embroidery
Janome 200E Embroidery Machine Instruction Manual Starting to sew embroidery z Press the pattern selection key to select the desired 19 min pattern. 4 Colors 90x99mm 140x140 x Adjust the hoop position with the jog keys q so that the needle drop position comes right above the center of the centerlines w on the fabric. -
Page 28: When The Upper Thread Has Broken Or Run Out While Sewing
Janome 200E Embroidery Machine Instruction Manual 4 5 6 v Lower the presser foot. Press the Start/Stop button and sew 5 to 6 stitches. b Press the start/stop button again to stop the machine. Raise the presser foot. Trim the thread. -
Page 29: Lettering Embroidery
Janome 200E Embroidery Machine Instruction Manual Lettering embroidery Selecting fonts You can select one of 3 styles of font and border patterns. Press the lettering key q. The font selection window will open w. q Lettering key w Font selection window Press one of the following keys to select the desired font or border pattern. -
Page 30: To Enter Lettering
Janome 200E Embroidery Machine Instruction Manual To enter lettering (For example: “Green”) z Press the q key twice to select “G”. x Press the page key w to select lower case letters. H I J SIZE c Press the e key 3 times to select “r”. -
Page 31: Ready To Sew Screen
Janome 200E Embroidery Machine Instruction Manual Ready to sew screen q Lettering embroidery design r een w Sewing time in minutes 4min color e Number of colors change 1Color r Lettering size A B C 140x140 67x19mm t Hoop size... -
Page 32: To View A Long Lettering
Janome 200E Embroidery Machine Instruction Manual To view a long lettering If the lettering is too long to display on the ready to sew ABCDEFGHI screen, press the page key to show the hidden 6min color change characters. 1Color A B C... -
Page 33: Editing Mode
Janome 200E Embroidery Machine Instruction Manual Editing mode The editing function allows you to modify and combine embroidery patterns from the built-in memory or USB memory to create your own original designs. Press the edit key q and the editing window w for the standard hoop will open. -
Page 34: Selecting The Pattern To Edit
Janome 200E Embroidery Machine Instruction Manual Selecting the pattern to edit Example: Select the embroidery #51. z Press the built-in design key. q Built-in design key 140x140 x Select the pattern #51. w Pattern #51 The editing window shows the relative size and placement of the pattern with a square block y instead of the pattern image. -
Page 35: Magnifier Key
Janome 200E Embroidery Machine Instruction Manual Magnifier key z Press the magnifier key to view the design image of the selected pattern. 100% q Magnifier key 140x140 x The center of the magnified image will be displayed. w Center part of the magnified image c Press the jog key (up) to scroll up the image. -
Page 36: Resizing The Pattern
Janome 200E Embroidery Machine Instruction Manual Resizing the pattern 100% You can change the size of the embroidery pattern from 90% to 120% of the original pattern size. The size will 140x140 change 10% each time you press – or + key. -
Page 37: Combining Patterns
Janome 200E Embroidery Machine Instruction Manual Combining patterns (For example: pattern #51 and lettering) z Press the edit key q. x Press the built-in design key w. 140x140 c Select the pattern #51 e. v Press the jog key r to move the embroidery pattern to the right. - Page 38 Janome 200E Embroidery Machine Instruction Manual b Press the built-in design key w. 100% 140x140 n Select the pattern #51 e. m Press the flip key t. 100% 140x140 , Press the flip to the right key y to flip the embroidery pattern.
- Page 39 Janome 200E Embroidery Machine Instruction Manual ⁄1 Press the magnifier key o and view the placement of the embroidery patterns. ⁄1 100% 140x140 ⁄2 Press the exit key !0 to return to the editing window. ⁄2 !0 Exit key ⁄3 Press the lettering key !1 .
- Page 40 Janome 200E Embroidery Machine Instruction Manual ⁄7 Press the jog keys !3 to move the letters down. !3 Jog keys 100% 140x140 ⁄8 Confirm the layout of the embroidery by pressing the magnifier key o. o Magnifier key 100% 140x140 ⁄9 Press the exit key !0 to return to the editing window.
-
Page 41: Saving The File
Janome 200E Embroidery Machine Instruction Manual Saving the file An original embroidery design created in the editing mode can be saved as a file in the built-in memory or USB memory. 100% Saving in internal memory 140x140 z Press the file-save key q. - Page 42 Janome 200E Embroidery Machine Instruction Manual v Enter “2”. b Press the OK key r. 2 3 4 7 8 9 n Press the OK key r to save the file under the new name. When you attempt to save a file when the name already The same file exists, the confirmation message will appear.
- Page 43 Janome 200E Embroidery Machine Instruction Manual v Enter “2”. b Press the OK key r. 2 3 4 7 8 9 n Press the OK key r to save the file under the new name. When you attempt to save a file when the name already The same file exists, the confirmation message will appear.
-
Page 44: Saving In Usb Memory (Optional)
Janome 200E Embroidery Machine Instruction Manual Saving in USB memory (Optionl) USB memory can be used to save the stitch data. z Insert the USB memory q into the USB socket w. q USB memory w USB socket x Press the file save key. -
Page 45: Creating A New Folder
Janome 200E Embroidery Machine Instruction Manual Creating a new folder You can create your own folder and assign the desired name to it. EMBF 1 / 1 z Press the folder key q. q Folder key x Enter the folder name. -
Page 46: Opening A File From The Internal Memory
Janome 200E Embroidery Machine Instruction Manual Opening a file from the internal memory To open the saved files, press the internal memory key and the open file window will open. z Press the internal memory key q. x File list will be displayed. - Page 47 Janome 200E Embroidery Machine Instruction Manual Opening a file from USB memory (Optional) z Insert the USB memory q into the USB socket w. q USB memory w USB socket x Press the USB memory key. The file-open window will open.
-
Page 48: Care And Maintenance
Janome 200E Embroidery Machine Instruction Manual CARE AND MAINTENANCE Cleaning the hook race WARNING: Turn the power switch off and unplug the machine before cleaning. NOTE: Do not dismantle the machine in any way other than what is explained in this section. -
Page 49: Troubleshooting
Janome 200E Embroidery Machine Instruction Manual TROUBLESHOOTING Problem: Cause: Reference: The machine is noisy 1 Threads have been caught in the hook mechanism. See page 45. The needle thread breaks. 1 The needle thread is not threaded properly. See pages 9. - Page 50 Janome 200E Embroidery Machine Instruction Manual Problem: Cause: Reference: Pattern selection keys 1 Key position is not adjusted properly. See page 18. do not work. 2 The control circuit is not working correctly. Turn the switch off and turn it on again.
-
Page 51: Design Charts
Janome 200E Embroidery Machine Instruction Manual DESIGN CHARTS www.janomeflyer.com 200E Owners Manual/ User Guide... - Page 52 Janome 200E Embroidery Machine Instruction Manual www.janomeflyer.com 200E Owners Manual/ User Guide...
- Page 53 Janome 200E Embroidery Machine Instruction Manual FONTS GOTHIC SCRIPT CHELTENHAM BORDER DESIGNS www.janomeflyer.com 200E Owners Manual/ User Guide...
- Page 54 Janome 200E Embroidery Machine Instruction Manual 856-800-005 www.janomeflyer.com 200E Owners Manual/ User Guide...
Need help?
Do you have a question about the Memory Craft 200E MC 200E and is the answer not in the manual?
Questions and answers