JAMO DMR 70 User Manual
Hide thumbs
Also See for DMR 70:
- Specifications (1 page) ,
- Brochure (24 pages) ,
- Instruction manual (144 pages)
Table of Contents
Advertisement
Quick Links
Advertisement
Table of Contents

Subscribe to Our Youtube Channel
Related Manuals for JAMO DMR 70


Summary of Contents for JAMO DMR 70
- Page 1 DVD Receiver DMR 70...
- Page 2 In case of 525 or 625 progressive scan picture problems, it is recommended that the user switch the connection to the “standard definition” output. If there are questions regarding our Tv- set compatibility with this model 525p and 625p DVD-player, please contact your Jamo dealer.”...
- Page 3 english français deutsch dansk svenska suomi español italiano nederlands...
-
Page 4: Table Of Contents
WMA, MP3 and JPEG files from disc or directly from USB. You’ll find out more about these new possibilities later in this manual (alternatively seek out the latest info online at www.jamo.com). Whatever your needs, we’re sure that your new DMR 70 will prove a gateway to amazing home entertainment experiences for many years to come. -
Page 5: Introduction
Introduction Make sure the following accessories are included with your DMR 70 DVD-Receiver Jamo DMR 70 Batteries 5 x Speaker wires (color coded) Remote control for the remote control S-Video SCART Audio cable / (not provided with European (provided with European models) -
Page 6: Connecting The System
Connecting the system Refer to the illustration below to connect speakers, subwoofer and antennas. To install the DMR 70 into your current TV sys- tem, refer to the three configuration examples. Choose from one of them or make your own combination. - Page 7 S-Video configuration Video is connected through the S-Video cable to the flatscreen TV. Audio is connected from the TV to the DMR 70. If a Satellite receiver, set top box, VCR, PC, Games console or MP3 player has digital or analogue audio output, you can connect it directly to the DMR 70.
-
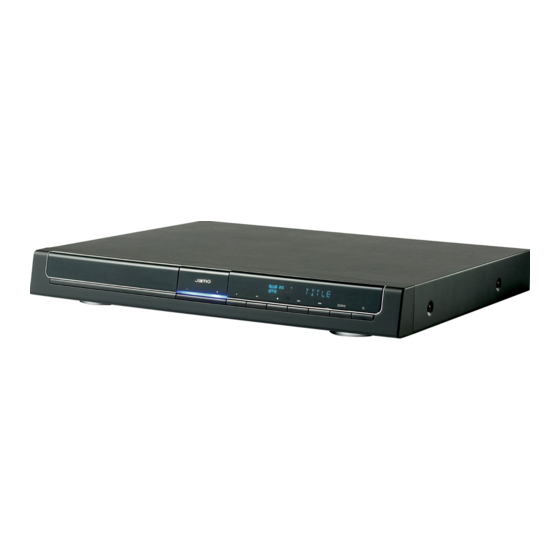
Page 8: Front Panel Layout
Please note that not all functions are available on all media. 1. Load Press to open and close the disc tray. LOAD 2. Standby AUDIO DVD / USB Turns the DMR 70 on and off VIDEO HDMI 3. Audio Switches between the Audio inputs: AUX, Optical and RADIO Coaxial. - Page 9 25. Forward Selects next Track/Chapter/Program 12. Setup Enters the DMR 70 setup menu, press again to exit. 26. Rewind Disc and MP3 toggles between x2, x4, x8, x16, x32 rewind. 13. Sound Radio mode: Press and hold down, - the previous radio sta- Press to select individual volume levels for Front Left, Front tion detected will play.
-
Page 10: System Setup
System Setup To access the DMR 70 setup menu, press “SETUP”. Use / / / to browse through the menus, and press “OK” to select an item. To exit System Setup, press “SETUP”. General Setup Some changes can only be managed in General and Language setup if the DVD/CD disc is stopped, by pressing “STOP”... -
Page 11: Language Setup
Some changes can only be managed in General and Language setup if the DVD/CD disc is stopped, by pressing “STOP” twice, or if the disc tray is open. This sets the OnScreen Display language for the DMR 70. OSD LANGUAGE Default setting is: ENGLISH. -
Page 12: Audio Setup
Selects your speaker size for: • Front • Centre • Surround Select SMALL if using Jamo speakers: A 102, A 402. Select MEDIUM if using Jamo speakers: A 405, A 407. For subwoofer setting refer to owners manual for subwoofer. SPEAKER DELAY Selects the delay time for surround sound audio for: •... -
Page 13: Video Setup
Video Setup TV TYPE Select the colour system that matches your TV. This also al- lows playback of a disc that uses a different video standard (PAL or NTSC). • PAL - For PAL-system TV. • NTSC – For NTSC-system TV. •... -
Page 14: Radio
Radio This is an overview of the buttons used when finding and storing FM and AM radio stations. Make sure the ‘RADIO’ button is pressed. Find a radio station Press and hold the Rewind or Fast Forward on the remote until the frequency indicator starts to change, then release. The system automatically tunes to the next strong radio station. -
Page 15: Troubleshooting
Troubleshooting If the DMR 70 appears to be faulty, first consult this troubleshooting guide before calling for service. Refer also to the corresponding instructions in this manual. WARNING Under no circumstances should you attempt to repair the system yourself. Symptom... -
Page 16: Service And Warranty
In no circumstances shall Jamo be liable in contract, tort (including negligence) or breach of statutory duty or otherwise for loss of profits, loss of revenue, loss of data, loss of business or loss of anticipated savings or for any consequential loss whatever.
Need help?
Do you have a question about the DMR 70 and is the answer not in the manual?
Questions and answers
My DRM 70 woofer's transformer is burnt, please let me know the secondary side voltage of the transformer, so that I can repair the same by replacing the transformer.