Table of Contents
Advertisement
Advertisement
Table of Contents

Related Manuals for JAMO DMR 61


Summary of Contents for JAMO DMR 61
- Page 1 DVD Receiver DMR 61...
-
Page 2: Table Of Contents
USB or memory card. You’ll find out more about these new possibilities later in this manual (alternatively seek out the latest info online at www.jamo.com). Whatever your needs, we’re sure that your new DMR 61 will prove a gateway to amazing home entertainment experiences for many years to come. -
Page 3: Introduction
Introduction Make sure the following accessories are included with your DMR 61 SOURCE DVD-Receiver Jamo DMR 61 Batteries 30m / 98ft of speaker cable for the remote control Remote control S-Video SCART Audio cable / (not provided with European (provided with European models) -
Page 4: Connecting The System
Connecting the system Refer to the illustration below to connect speakers, subwoofer and antennas. To install the DMR 61 into your current TV sys- tem, refer to the three configuration examples. Choose from one of them or make your own combination. - Page 5 S-Video configuration Video is connected through the S-Video cable to the TV. Audio is connected from the TV to the DMR 61. If a Satellite receiver, set top box, VCR, PC, Games consol or MP3 player has digital or analogue audio output, you can connect it directly to the DMR 61.
-
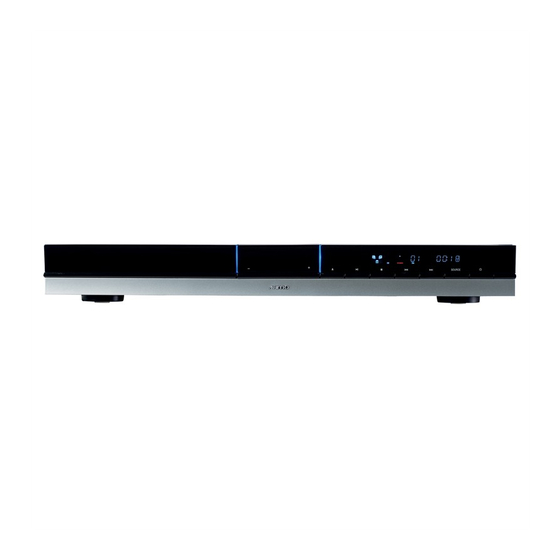
Page 6: Front Panel Layout
Front panel layout SOURCE 1. Aux out 3. Volume up 5. Play 7. Previous 9. Source 2. Volume down 4. Open/Close 6. Stop 8. Next 10. Standby Remote control layout 1. Standby 2. Numerical keys, 0 to 9 3. Goto 4. -
Page 7: System Setup
System Setup To access the DMR 61 setup menu, press “SETUP”. Use / / / to browse through the menus, and press “OK” to select an item. To exit System Setup, press “SETUP”. TV SYSTEM Choose between NTSC and PAL video output from the DMR... -
Page 8: Language Setup
SYSTEM SETU P TV SYSTEM VIDEO TV TYPE DEFAULT RESTORE EXIT SETUP Language Setup OSD LANGUAGE This sets the OnScreen Display language for the DMR 61. Default setting is: ENGLISH. LANGUAGE SETUP OSD LANG. ENGLISH AUDIO LANG. GERMAN FRENCH SUBTITLE LANG. -
Page 9: Speaker Setup
MENU LANGUAGE If available on the DVD, this function allows you to select the desired Menu language. LANGUAGE SETUP Default setting is: ENGLISH. OSD LANG. ENGLISH AUDIO LANG. GERMAN SUBTITLE LANG. FRENCH MENU LANG ITALIAN SPANISH EXIT SETUP PORTUGESE DUTCH Speaker Setup CENTRE DELAY Selects the Centre-channel delay time for Dolby Digital audio. -
Page 10: Hdmi Audio
HDMI AUDIO Turn “On” to get HDMI audio output signal through HDMI. Default setting is: OFF. SPEAKER SETUP CENTER DELAY SURROUND DELA Y DYNAMIC RANGE HDMI AUDI O TEST SPEAKERS EXIT SETU P TEST SPEAKERS Press this to test that all your speakers are connected cor- rectly. -
Page 11: Getting Started
Getting Started This is an overview of the most frequently used buttons on the remote control for the DMR 61. Standby Button Standby will turn the DMR 61 on and off Amplifier Buttons GOTO MUTE Press mute if instant silence is needed. -
Page 12: Playing Dvd And Cd
Playing DVD and CD This is an overview of the buttons on the remote control that are most frequently used when playing an ordinary DVD or CD. GOTO GOTO MUTE GOTO is used together with the numeric buttons 0-9. When playing a DVD or CD: •... -
Page 13: Playing Back Files
Playing back files from Disc, USB and Card reader If you insert a Disc, USB device or memory card (SD-, MMC-, MS- and SM-cards) with mp3-, wma-, jpg-, divx-files, your DMR 61 will switch to File Playback mode. Choosing a file mode When in File Playback mode, you will be able to choose between 3 modes, which are: •... -
Page 14: Advanced Functions
Advanced Functions Here’s a brief description of the Advanced Function buttons. Please note that not all functions are available on all media. AUDIO - Audio Use this function to choose between the available audio tracks on the film. Nor- mally you can also choose Audio on the DVD menu. SUB-T - Subtitle Use this function to choose from the subtitles available on the DVD. -
Page 15: Radio
Radio - Basic operation If the antennas are correctly connected, you should be able to listen to both FM and AM radio. This is an overview of the buttons frequently used when playing FM or AM radio. GOTO MUTE MENU SETUP COAX FM / AM... - Page 16 Radio - Advanced operation This is an overview of the buttons used when finding and storing FM and AM radio stations. Store a radio station GOTO MUTE To store a radio station manually, do the following: 1. After finding a station, press “GOTO”. 2.
-
Page 17: Troubleshooting
Troubleshooting If the DMR 61 appears to be faulty, first consult this troubleshooting guide before calling for service. Refer also to the corresponding instructions in this manual. WARNING Under no circumstances should you attempt to repair the system yourself. Symptom... -
Page 18: Service And Warranty
Important: Never send the product to be repaired without prior agreement. If the DVD player is STILL UNDER WARRANTY, Jamo will pay freight costs back and forth between the dealer and the Jamo authorised service centre. Any other freight must be paid for by the customer.
Need help?
Do you have a question about the DMR 61 and is the answer not in the manual?
Questions and answers