Table of Contents
Advertisement
Quick Links
Products by
G-FORCE, Inc.
www.gforce-hobby.jp
Mare-kanda Bld.9F, 1-3-1, Kajicho, Chiyoda-ku,
Tokyo, 101-0044, JAPAN
Copyright © 2014 G FORCE, Inc. All Right Reserved.
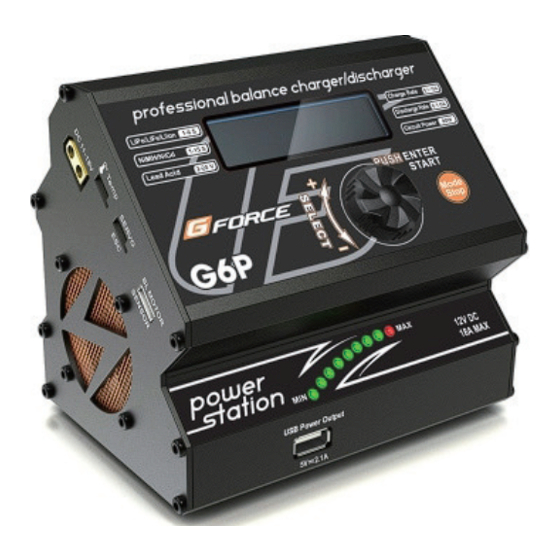
G6P
Professional Balance Charger / Discharger
AC/DC FAST CHARGER
Professional Balance Charger / Discharger
Lithium Battery Meter / Motor RPM Tester /
Servo Tester
INSTRUCTION
MANUAL
with POWER SUPPLY
Version 1.0
Advertisement
Table of Contents

Subscribe to Our Youtube Channel
Related Manuals for GForce G6P

Summary of Contents for GForce G6P
-
Page 1: Instruction Manual
MANUAL Professional Balance Charger / Discharger Products by AC/DC FAST CHARGER G-FORCE, Inc. with POWER SUPPLY www.gforce-hobby.jp Professional Balance Charger / Discharger Mare-kanda Bld.9F, 1-3-1, Kajicho, Chiyoda-ku, Tokyo, 101-0044, JAPAN Lithium Battery Meter / Motor RPM Tester / Servo Tester Copyright ©... -
Page 2: Table Of Contents
TABLE OF CONTENTS INTRODUCTION...................... SPECIAL FEATURES..................... WARNING AND SAFETY NOTES................. LITHIUM BATTERY CONNECTION DIAGRAM ............ PROGRAM FLOW CHART..................OPERATION......................LITHIUM BATTERY (LiPo/LiFe/LiIon) PROGRAM........... Charging Lithium Battery at Balance Mode............... -
Page 3: Introduction
Built-in External Power Supply before using this product, as it covers a wide range of information on G-force G6P power system comes with built-in external power supply. operating and safety. Or please do use this product in company with a... - Page 4 SPECIAL FEATURES SPECIAL FEATURES duration of charging, whereas 'store' state can control the final voltage Delta-peak Sensitivity for NiMH/NiCd of your battery, so as to store for a long time and protect useful time of Delta-peak sensitivity for NiMH/NiCd battery: The automatic charge the battery.
-
Page 5: Warning And Safety Notes
WARNING AND SAFETY NOTES WARNING AND SAFETY NOTES These warnings and safety notes are particularly important. Please Batteries installed in a device or which are electrically linked to follow the instructions for maximum safety; otherwise the charger and other components the battery can be damaged or at worst it can cause a fire. - Page 6 WARNING AND SAFETY NOTES WARNING AND SAFETY NOTES Please bear in mind the following points before commencing charging: Did you select the appropriate program suitable for the type of battery you are charging? Did you set up adequate current for charging or discharging? Have you checked the battery voltage? Lithium battery packs can be wired in parallel and in series, i.e.
- Page 7 WARNING AND SAFETY NOTES WARNING AND SAFETY NOTES Charging Discharging During charge process, a specific quantity of electrical energy is The main purpose of discharging is to clean the residual capacity fed into the battery. The charge quantity is calculated by multiplying of the battery, or to reduce the battery' voltage to a defined level.
-
Page 8: Lithium Battery Connection Diagram
This diagram shows the correct way to connect your battery to the G You can connect the AC power cord directly to the AC socket and then force G6P while charging in the balance charge program mode only. switch on the power supply. For attaching directly 12V car batteries, it is critically important that you use a fully charged 13.8V car battery. -
Page 9: Program Flow Chart
PROGRAM FLOW CHART PROGRAM FLOW CHART... -
Page 10: Operation
OPERATION LITHIUM BATTERY(LiPo/LiFe/LiIon)PROGRAM The most important tool to operate the charger is the rotary dial and These programs are only suitable for charging and discharging lithium the button. batteries with a nominal voltage of 3.7V, 3.6V and 3.3V per cell. These batteries need to adopt different charge technique which is termed as constant voltage(CV) and constant current(CC) method. -
Page 11: Charging Of Lithium Battery
LITHIUM BATTERY(LiPo/LiFe/LiIon)PROGRAM LITHIUM BATTERY(LiPo/LiFe/LiIon)PROGRAM This screen displays the number of cells you S is the number of cells set by you at the set up and the processor detects. R shows previous screen. If both numbers are the number of cells detected by the charger identical you can start charging process. -
Page 12: Storage' Control Of Lithium Battery
LITHIUM BATTERY(LiPo/LiFe/LiIon)PROGRAM LITHIUM BATTERY(LiPo/LiFe/LiIon)PROGRAM identical you can start charging process. If previous screen to recheck the number of not, press button to go back to previous cells of the battery pack before going ahead. screen to recheck the number of cells of the battery pack before going ahead. -
Page 13: Nimh/Nicd Battery Program
NIMH/NICD BATTERY PROGRAM NIMH/NICD BATTERY PROGRAM These programs are for charging or discharging NiMH (Nickel-Metal- The screen displays the current state of Hydride) or NiCd (Nickel-Cadmium) battery. charging. To stop the process, press Mode/Stop CHARGING OF NIMH NICD BATTERY button once. The audible sound indicates the end of The charger will charge NiMH and NiCd batteries using the charge process. -
Page 14: Charge/Discharge & Discharge/Charge Cycle Of Nimh/Nicd Battery
NIMH/NICD BATTERY PROGRAM PB( LEAD-SULPHURIC ACID) BATTERY PROGRAM This is programmed for charging Pb (lead-sulphuric acid) battery with The screen indicates the discharging state. nominal voltage from 2 to 20V. Pb batteries are totally different from You can rotate the Start/Enter dial to alter NiMH or NiCd batteries. -
Page 15: Using The Charge Control Software "Charge Master
“Micro USB” plug which can connect to charger directly. Set the discharge current, which can be adjusted The “Charge Master” can be download from www.gforce-hobby.jp (0.1A-5.0A). Set the discharge voltage, which can be adjusted... -
Page 16: Lithium Battery Meter
BATTERY MEMORY SET LITHIUM BATTERY METER The user can check battery's total voltage, the highest voltage, the Set the terminal voltage, which can be lowest voltage and each cell's voltage. adjusted(4.18-4.30V). Please connect the battery to the charger main battery lead to battery socket and balance wires to balance socket. -
Page 17: Motor Rpm Tester
MOTOR RPM TESTER SERVO TESTER The charger can test motor RPM. Please do as follows, The charger can check whether the servo works. Please do as follows, Connect the motor and ESC. Connect the battery to the power. Switch off the ESC and connect it to the battery. Connect the servo to the servo port in left side of the charger. -
Page 18: System Set Up
SYSTEM SET UP SYSTEM SET UP It will be operated with the default value of the essential user settings by 11.9, set this number as the value for when it is connected to a DC 11~18V battery for the first time. The safety timer setting. -
Page 19: Various Information During The Process
VARIOUS INFORMATION DURING THE PROCESS WARNING AND ERROR MESSAGE It incorporates a variety of functions for the systems to verify processes Press and hold the Start/Enter dial for 3 seconds and the state of the electronics. In case of an error the screen will to load the factory set. -
Page 20: Specification
SPECIFICATION INSTRUCTION MANUAL FOR EXTERNAL POWER SUPPLY The external 230W/12A power supply can be the power source of the Input Voltage: AC Input: 100-240V /DC Input: 11-18V upper charger, but can also be used separately. It can converts Controls: Enter/Start Rotary Dial, Mode/Stop Button Display Type: 63.40*14.54mm LCD screen standard household 100-240V to 12V DC power and can supply max Display Backlight: Blue... - Page 21 INSTRUCTION MANUAL FOR EXTERNAL POWER SUPPLY INSTRUCTION MANUAL FOR EXTERNAL POWER SUPPLY OPERATION SPECIFICATIONS Note: The charger is powered on even if you use the power supply Input Voltage……………………………………………… …100-240V AC … separately and the power consumption is less than 1W. Input AC Frequency…………………………………………………50-60Hz To use the power supply after you connect the device to it, set POWER Output Voltage…………………………………………………12V DC±0.2V...
-
Page 22: The Set Contains
LiFe 100~10000 LiLon 100~10000 NiCd 100~10000 NiMH 100~10000 100~10000 1. G force G6P Power System 2. XH Adaptor 3. DC Cable 4. Dean Connector with Banana Plug Cable 5. Tamiya Charging Cable 6. 3pin XH-TP/FP Adaptor Cable 7. Power Cord... - Page 23 MAXIMUM CIRCUIT POWER CHART Battery Type No. of Cells Charge Voltage (V dc) Max Charge Current (A) 3.3-4.2 6.6-8.4 9.9-12.6 13.2-16.8 16.5-21 19.8-25.2 2.8-3.6 5.4-7.2 8.4-10.8 11.2-14.4 14-18 16.8-21.6 3-4.1 6-8.2 9-12.3 12-16.4 15-20.5 18-24.6 10.5 13.5 16.5 19.5 22.5 2-20V 4-10...
Need help?
Do you have a question about the G6P and is the answer not in the manual?
Questions and answers