Kapsys SmartVision User Manual
Hide thumbs
Also See for SmartVision:
- Quick start manual (2 pages) ,
- User manual (93 pages) ,
- User manual (107 pages)

Subscribe to Our Youtube Channel
Related Manuals for Kapsys SmartVision


Summary of Contents for Kapsys SmartVision
-
Page 1: User Guide
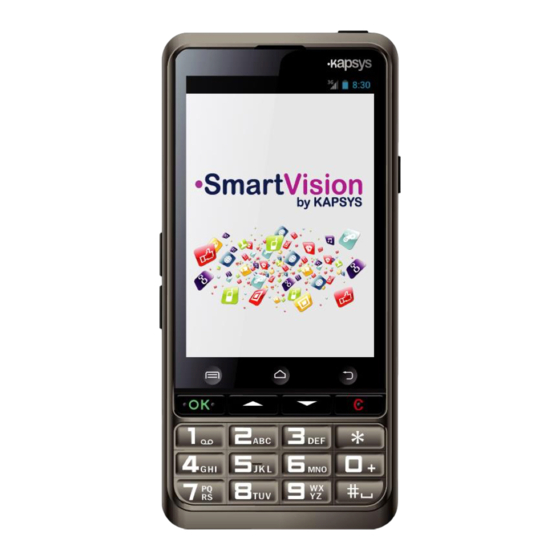
SmartVision SmartVision Lite USER GUIDE SmartVision – User Guide (Rev. 2.4)Smart Vision 1336... -
Page 2: Introduction
SmartVision. How to use this material This User guide describes SmartVision’s main features and operating modes. Features are described in a generic manner without reference to the more specific requirements of the advanced accessibility mode (default mode) which are fully described in the "Accessibility... -
Page 3: Content Of The Box
Two stereo earphones with microphone and a push-to-talk button. A protective case This list of accessories may vary depending on the country, device configuration or model version. : Not available on SmartVision Lite. SmartVision – User Guide (Rev. 2.4)Smart Vision 1336... -
Page 4: Table Of Contents
E-Mail Settings People SOS Function Kapten Assistance Calendar Alarm Clock Camera Calculator Gallery Video Player Magnifier Sound recorder Music Browser FM Radio Search Downloads Legal notice and Warranty Troubleshooting About this document SmartVision – User Guide (Rev. 2.4)Smart Vision 1336... -
Page 5: Introducing Smartvision
"Menu". “Home” in the middle: press to go back to the "Home screen" any time. “Back” on the right: press to go "Back" to the previous screen. SmartVision – User Guide (Rev. 2.4)Smart Vision 1336... - Page 6 Right side: The voice control key is located on the right side of your SmartVision. Press briefly this key to send a voice command and press and hold if you want to write a message through dictation.
- Page 7 The emergency orange button is located on the back panel top left. Push down this button to start an emergency instance. On the right of this SOS button are found the camera lens and a port for amplified listening. SmartVision – User Guide (Rev. 2.4)Smart Vision 1336...
-
Page 8: Installation
The SIM Card is issued by a telephone service provider when you take out your telephone contract. Please note: only Mini-SIM (2-FF) Cards are supported by SmartVision. If you have a different SIM card, please ask your telephone service provider to replace it with a Mini SIM. - Page 9 1. Insert first the bottom of the battery into the slots. 2. Snap the battery into place. 3. Put back the rear panel fitting the top part first. 4. Snap firmly and close your device. SmartVision – User Guide (Rev. 2.4)Smart Vision 1336...
- Page 10 If you don’t want to remove the protective case to charge the device, you may use the USB port located on the right side of the device. : Not available on SmartVision Lite. SmartVision – User Guide (Rev. 2.4)Smart Vision 1336...
- Page 11 (screen off), or back to awake mode (screen on). In sleep mode, SmartVision’s screen is off but its features remain enabled. You can still receive incoming calls, messages, emails and navigation instructions. Please note: as a default setting, the handset automatically switches to screen off mode after two minutes of inactivity in order to save the battery.
- Page 12 Unlocking the PIN on the SIM Card The SIM Card has a 4 digit identification code called PIN. PIN helps you lock your SIM Card to avoid fraudulent use of your SmartVision. To unlock the SIM Card and access the various functions in your...
-
Page 13: Keypad, Touchscreen And Voice Control
(See page 5). Please note: the advanced accessibility mode (preset on your SmartVision) supports additional keypad shortcuts for easy navigation through the screens and interact with yours smartphone, they are described in the "Accessibility... - Page 14 By default "Explore by touch" is live in SmartVision. This feature has the effect of modifying the behaviour of the touch screen interface to suit the persons with vision impairment. The rest of this section describes how to use the standard touchscreen interface when that feature is disabled.
- Page 15 Zooming in/out (available on specific applications such as Image Viewer, Email, etc.): Use two fingers to touch the screen, pinch inwards to zoom out, and pinch outward to zoom in. SmartVision – User Guide (Rev. 2.4)Smart Vision 1336...
-
Page 16: Accessibility Mode
"Hash Mark" key then press "volume up" key: increases the volume of the ringtone. Press and hold the "Hash Mark" key then press "volume down" key: decreases the volume of the ringtone. SmartVision – User Guide (Rev. 2.4)Smart Vision 1336... - Page 17 Press and hold the "" down key to go back to the home screen at anytime (same as "Home screen" Press and hold the "C" key to go back to the previous screen (same as "Back" SmartVision – User Guide (Rev. 2.4)Smart Vision 1336...
- Page 18 You can also move your finger down and to the middle of the screen, the voice over feature will indicate "Home screen". Press the "OK" key without removing your finger from the screen. SmartVision – User Guide (Rev. 2.4)Smart Vision 1336...
- Page 19 "OK" key without removing your finger from the screen. How to scroll a list, place your finger on the screen and slide it up or down to scroll a page or a list upwards or downwards. SmartVision – User Guide (Rev. 2.4)Smart Vision 1336...
- Page 20 The list of active applications will be announced by the text-to-speech feature. Please note: from the list of active applications, you can select an application to directly access it. SmartVision – User Guide (Rev. 2.4)Smart Vision 1336...
- Page 21 “ABC” key Pressing "Back" will close the virtual keypad. Please note: use the "C" key on the physical keypad to erase a typing mistake at anytime. SmartVision – User Guide (Rev. 2.4)Smart Vision 1336...
-
Page 22: Voice Interface
To activate the voice mode, look for the voice control key located on the right side of your handset, press it. SmartVision’s voice interface integrates the latest generation voice recognition technology which makes it the major asset of this smartphone. The voice interface... - Page 23 Voice command A voice command is an audio instruction given by the user using their own voice. The purpose is to obtain audio information from your SmartVision, enable or disable a functionality, or perform more complex operations on the unit.
- Page 24 Command" window opens, say clearly the keyword, for example "What time is it?" The answer is given by SmartVision’s text-to-speech functionality, for example: "It’s1:46pm". Here are two additional examples of voice commands. You want to make a call to Paul Thomas 1.
- Page 25 Gives the NFC current status (connected or disconnected) Ringtone status? Gives the ring mode current setting (standard, silence, meeting). Phone status? Gives the telephone operation mode (Wi-Fi, GPS, Bluetooth). : Not available on SmartVision Lite. SmartVision – User Guide (Rev. 2.4)Smart Vision 1336...
- Page 26 Thomas". "Call" followed by the name of the contact and "Mobile" or "Office": a call is made to the named contact on his/her mobile or office line. Example: "Call Paul Thomas Mobile". SmartVision – User Guide (Rev. 2.4)Smart Vision 1336...
- Page 27 With the "Dictation" window displayed, speak out clearly and audibly: "Would you like to come over for lunch next Sunday?" 3. Release the voice control key when dictation is complete. 4. The dictated text is shown in the text field. SmartVision – User Guide (Rev. 2.4)Smart Vision 1336...
- Page 28 You are free to use the 3 interfaces on your SmartVision, either separately or in turn. You can start with the touchscreen mode and continue with the voice control mode or the other way round, as described in the example below.
-
Page 29: Screen Reading
Please note: slide your finger from left to right, then from right to left to get a voice over full description of the screen, your finger must remain on the screen for the command to work. SmartVision – User Guide (Rev. 2.4)Smart Vision 1336... -
Page 30: Home Screen
To go back to the home screen, press the “Home” key , the middle button below the display. The Home screen presents SmartVision’s six basic functions. "Phone" is an application for making calls, recording missed calls and accessing your voicemail. -
Page 31: The Notification Status Bar
“2” key. Samples of status icons: Battery level of charge indicator. Network signal strength indicator. Wi-Fi signal strength indicator. Samples of notification icons: You have unread messages. Missed call. You have voice messages. SmartVision – User Guide (Rev. 2.4)Smart Vision 1336... - Page 32 To flick the panel open, slide your finger from the top of the display towards the bottom, your finger must remain on the screen throughout the command for it to work. SmartVision's settings are available on the upper part of the notification panel. These are, from left to right: Activate / Deactivate Wi-Fi connection.
-
Page 33: Applications
From the home screen, press the "Applications" icon and find a list of all the applications available in your SmartVision. These applications are listed by alphabetical order. To start an application, scroll the list until you reach the desired application and select it. -
Page 34: Favorites
Favorites The "Favorites" application is SmartVision’s most convenient functionality and is available from the home screen. It works like a directory in which your preferred applications or the ones you use most frequently are stored. Creating afavorite For example, add the "Calculator" application into "Favorites". - Page 35 Please note: in the same manner as for listing the applications, if you wish a matrix format (lines/columns), press the "Menu" button, and click on "By matrix". SmartVision – User Guide (Rev. 2.4)Smart Vision 1336...
-
Page 36: Telephone
4. The screen shows that the call is in progress. Press the "End" key at the end of the call, or the "C" key to hang up. The unit will display "End". SmartVision – User Guide (Rev. 2.4)Smart Vision 1336... - Page 37 (on the left side of your smartphone).To switch back to audio mode, press and hold the voice control key again. SmartVision – User Guide (Rev. 2.4)Smart Vision 1336...
- Page 38 "Cell Broadcast": receive messages from the network. "Minute reminder": have a beep sound every minute while on a call. "TTY Mode": activate or deactivate data transfer mode. SmartVision – User Guide (Rev. 2.4)Smart Vision 1336...
- Page 39 To set up your voicemail, please click on "Phone". Press the "Menu" button, and click on "Settings", then on "Voicemail". Enter the number for the voice mail supplied by your telephone service provider and confirm. SmartVision – User Guide (Rev. 2.4)Smart Vision 1336...
- Page 40 Blue arrow to indicate an incoming call, either accepted or rejected by you. Green arrow to indicate an outgoing call made by you. Red arrow to indicate a missed call. SmartVision – User Guide (Rev. 2.4)Smart Vision 1336...
- Page 41 You can also call back a missed call from the notification panel , as follows: Open the notification panel. Select the missed call alert, you will instantly reach the "History" menu of your smartphone. SmartVision – User Guide (Rev. 2.4)Smart Vision 1336...
-
Page 42: Messaging
"To" input field using the keypad, or select one or more recipients in the "People" list, or choose your contact(s) from the "Favorite" menu. 4. When the recipient’s details are entered, click on "Write Message". The "Type message" screen appears. SmartVision – User Guide (Rev. 2.4)Smart Vision 1336... - Page 43 Please note: if you wish to attach an image or a video to your message, click on the attach symbol at the screen bottom left, or press the "Menu" button. SmartVision – User Guide (Rev. 2.4)Smart Vision 1336...
- Page 44 You have received a message, which is notified to you by the "Messaging" icon flagged with a red bubble containing a number, on the home screen. An alert is also displayed in the notification panel. SmartVision – User Guide (Rev. 2.4)Smart Vision 1336...
- Page 45 "OK" key on the keypad. A context menu opens, click on "Delete" to remove the selected item. You can also access the discussion thread and message related options by pressing the "Menu" button. SmartVision – User Guide (Rev. 2.4)Smart Vision 1336...
-
Page 46: E-Mail
You must now configure the following options for your Email account: Email Fetch frequency, Notification, Automatic download, etc…, Click on "Next" to end the procedure. Synchronisation of your account is started, and your inbox appears. SmartVision – User Guide (Rev. 2.4)Smart Vision 1336... - Page 47 Please note: some Email accounts may have special configuration options, please refer to our websitewww.kapsys.com, section "Support", for more details. Sending an email 1. From the home screen, click on the "E-Mail" application. The Inbox is displayed. 2. Click on "Compose".
- Page 48 Click on the new email. Emails that are unread are placed on top of the list and flagged with To read the contain of an email you can also use the “text mode” option through “menu” , this option allows a better and easier vocalization. SmartVision – User Guide (Rev. 2.4)Smart Vision 1336...
- Page 49 Managing email accounts You can add, edit or remove Email accounts in your SmartVision. If you wish to modify an account configuration, press the "Menu" button, click on "Settings", and select the account to be edited. If you wish to remove an account, press the "Menu"...
-
Page 50: Settings
"Display": configure the display settings (font size, brightness, wallpaper, etc.). "Storage": manage storage usage by application. "Battery": monitor battery usage "Apps": manage the applications installed in your product. "Accounts& sync": manage your email accounts and synchronisation. SmartVision – User Guide (Rev. 2.4)Smart Vision 1336... - Page 51 "TTS voice": chooses a male or female voice. "Speech Recognition": enables or disables the voice recognition mode via the voice control key located on the unit right side. SmartVision – User Guide (Rev. 2.4)Smart Vision 1336...
- Page 52 Please note that this operation is not instantaneous and requires a complete upgrade of the system Please note: enable or disable "Explore by touch" feature is also available with “On direct access via a long press on the Off” button. SmartVision – User Guide (Rev. 2.4)Smart Vision 1336...
- Page 53 4. If you wish to connect to a secure Wi-Fi network, please enter a password. 5. Click on "Connect", an icon will appear in the status bar indicating that the unit is connected to the Wi-Fi network . SmartVision – User Guide (Rev. 2.4)Smart Vision 1336...
- Page 54 2. Select "General". 3. Select "Voice call ringtone". 4. Select to listen to a ringtone. 5. Once your choice is made, press the "Menu" button, then click on "Apply" to save your change. SmartVision – User Guide (Rev. 2.4)Smart Vision 1336...
- Page 55 Please note: to adjust the volume on your SmartVision, use the up and down volume keys on the left side of your handset. The volume control will apply to the audio source currently in use. Airplane mode The airplane mode disables all sources of radio frequency on the device (Wi-Fi, Bluetooth, cellular network, etc.).
- Page 56 However, you can also check for available updates manually by selecting the "About phone "option, "System updates" from the "Settings" application. SmartVision – User Guide (Rev. 2.4)Smart Vision 1336...
-
Page 57: People
If you want to assign a photo to this contact, click on the grey area on top of the record. SmartVision suggests you to either take a picture now or choose one from the Gallery icon. SmartVision – User Guide (Rev. 2.4)Smart Vision 1336... - Page 58 Field". Editing a contact Scroll the list until you reach the contact to be edited, select this contact. The contact’s record is displayed. Press the "Menu" button, and click on "Edit". SmartVision – User Guide (Rev. 2.4)Smart Vision 1336...
- Page 59 Favorite Contact "Favorite" Contact is a very convenient function of your SmartVision. It allows you to choose among all your contacts those you wish to get in touch with very easily."Favorite" Contact works like a mini directory that you can easily access from the "Phone"...
- Page 60 The "Favorites0" application reserved for preferred applications. Find a Contact If you wish to quickly access one of the People saved on your SmartVision, you can use the search option: From the "People" application, click on "Menu" From the list of options, click on "Search". A search input box is displayed in the top bar.
- Page 61 To avoid problems with specific format of contacts stored on the SIM card, the SIM contacts are not displayed by default in the SmartVision. To view, edit and use contacts from the SIM card, it is necessary to import them previously in the internal memory of SmartVision.
- Page 62 6. Select the contacts you want to save in the phone's internal memory and complete the import by selecting "OK". Please note: you can also select all the contacts from the SIM card via the "Menu" key, then "Select All" SmartVision – User Guide (Rev. 2.4)Smart Vision 1336...
-
Page 63: Sos Function
(10 au maximum). Warning: KAPSYS shall not be held liable for any damage, either direct or indirect, in the event the SOS feature fails to operate due to a technical problem with the unit or the telephone network being unavailable. - Page 64 (30 seconds by default). "Send Message", programmes the sending of SMS to your emergency numbers. SmartVision – User Guide (Rev. 2.4)Smart Vision 1336...
- Page 65 Location", reports your geographical location in the message, if the information is available when the emergency call is sent. "Message text", customises the contents of the message to be sent to your emergency numbers. SmartVision – User Guide (Rev. 2.4)Smart Vision 1336...
-
Page 66: Kapten
As a result, we cannot guarantee that the instructions given by the navigation system are accurate. SmartVision – User Guide (Rev. 2.4)Smart Vision 1336... - Page 67 Kapten application's settings by pressing the "Menu" button, then clicking on "Parameters", then "System" and "Default Country". Please note: loading the application may take time depending on the size of the map installed on your unit. SmartVision – User Guide (Rev. 2.4)Smart Vision 1336...
- Page 68 Selecting a destination Regardless of the navigation mode you have chosen, you must now select a destination among the suggested destinations below: SmartVision – User Guide (Rev. 2.4)Smart Vision 1336...
- Page 69 "Step by step" Input: in this mode, you must enter the various details of your destination address in successive stages, i.e. town/city name, then street name and street number. Select "Step by Step Entry" to access this input method and proceed step by step. SmartVision – User Guide (Rev. 2.4)Smart Vision 1336...
- Page 70 The calculated route will be described as a road book. Navigate using the up and down arrows included in the road book and listen to the navigation instructions for your trip. SmartVision – User Guide (Rev. 2.4)Smart Vision 1336...
- Page 71 Please note that information is provided for convenience only and does not take into account the topography and possible dangers you may come across such as rivers, bridges, barriers, or similar obstacles. Kapsys decline any and all liability for damages either direct or indirect resulting from the use of this mode.
- Page 72 In free navigation mode, information on your environment is available in real time. Once this mode is enabled, the Kapten application announces the street you are on and described the next intersection to you. SmartVision – User Guide (Rev. 2.4)Smart Vision 1336...
- Page 73 A K-Tag is a geographical marker that includes: A geographical location or an address A voice memo to identify your K-Tag A category A "favorite" attribute (used for direct access)as a navigation destination. SmartVision – User Guide (Rev. 2.4)Smart Vision 1336...
- Page 74 1. When you have defined a geographical position for your K-Tag, you can assign a voice memo in order to find it more easily. Please select the option "Enter voice memo for your KTAG", then speak after the beep. SmartVision – User Guide (Rev. 2.4)Smart Vision 1336...
- Page 75 K-Tag identification. 2. Select the category you wish to assign this K-Tag to: "Contact", "Hotel and restaurant", "Transportation", etc… 3. Lastly, Kapten suggests that you define your K-Tag as a "Favorite". SmartVision – User Guide (Rev. 2.4)Smart Vision 1336...
- Page 76 GPS Signal Gives GPS signal strength. POI around Indicates Point of interests of any category around your current position. Current speed Gives your current speed. SmartVision – User Guide (Rev. 2.4)Smart Vision 1336...
- Page 77 Destinations": clears the addresses selected from the list of previous trips. "Restore default settings" restores the Kapten application factory settings. "Reset the Product": resets all settings and clears all personal data saved in the Kapten application (Recent trips, K-Tags). SmartVision – User Guide (Rev. 2.4)Smart Vision 1336...
- Page 78 (None, 1, 3, 5 or 10 minutes). "Direct guidance when destination is reached": enables or disables automatic switch to Direct Guidance at the end of a pedestrian or car navigation session. SmartVision – User Guide (Rev. 2.4)Smart Vision 1336...
-
Page 79: Assistance
Please note: to find out more about VNC compatible applications, please visit our websitewww.kapsys.com, under Support, and SmartVision by KAPSYS. The support person will take control of your smartphone via the pc keyboard and mouse: SmartVision – User Guide (Rev. 2.4)Smart Vision 1336... - Page 80 Arrow keys are used to navigate through screens and menus on your SmartVision. is used to select an item on the SmartVision’s screen. The mouse left button Click on the "Ends with assistance" option on your smartphone to stop the sharing session at any time.
-
Page 81: Calendar
To disable, modify or remove the alarm, click on the item and press and hold the "OK" key to access the context menu. SmartVision – User Guide (Rev. 2.4)Smart Vision 1336... -
Page 82: Camera
"Multi-select" lets you select several items of the gallery to be shared or removed. "Settings" lets you manage the Gallery options: image size, sorting order and confirmation of deletion for photos and videos. SmartVision – User Guide (Rev. 2.4)Smart Vision 1336... -
Page 83: Video Player
Player" application is used to view videos stored in the phone internal memory or a micro SD card on your SmartVision. The micro SD is a removable memory card used for storing information, it extends the overall storage capacity of your smartphone. -
Page 84: Sound Recorder
Then select from the window "Rename the record" or "Delete Record". Music The "Music" application allows you to play music or voice memos stored on your phone memory or micro SD card. SmartVision – User Guide (Rev. 2.4)Smart Vision 1336... -
Page 85: Browser
To write or read an NFC Tag, bring the back side of your smartphone close to the tag, a beep will notify you that the action was registered. SmartVision – User Guide (Rev. 2.4)Smart Vision 1336... -
Page 86: Ocr
More the beeps are distant from each other, near you are from the horizontality. In "Camera" mode: frame and focus the text document. Take a picture of it by pressing the shutter button. Click on "Confirm" to launch optical character recognition. SmartVision – User Guide (Rev. 2.4)Smart Vision 1336... -
Page 87: Fm Radio
"From gallery": Select a document stored in the photo gallery on your SmartVision. Character recognition will start instantly. Once the text is converted, you can browse it using the up ""and down "" keys on the keypad. You can press the "Menu"... -
Page 88: Legal Notice And Warranty
3. WARRANTY – LIMITATION OF LIABILITY GUARANTOR The guarantor is Kapsys, manufacturer of the device, with registered office at 790, avenue du Docteur Maurice Donat, Mougins Sophia Antipolis (06250), France. SmartVision – User Guide (Rev. 2.4)Smart Vision 1336... - Page 89 Articles L.211-1 et seq. of the French Consumer Code. Kapsys warrants to the initial purchaser that the product, from the date of purchase, is free from any defects in workmanship and materials when it is used under normal conditions and according to its intended purpose.
- Page 90 6. CUSTOMER SERVICE For more details, please contact your vendor’s Customer Service or send us a mail to : Service Clients KAPSYS – 790 avenue du Docteur Maurice Donat 06250 MOUGINS SOPHIA ANTIPOLIS, France. You can also visit our website: www.kapsys.com.
- Page 91 Kapsys cannot be held liable in the event of any technical or publishing errors or omissions contained herein, or in the event of accidental or indirect loss or damage resulting from the product operation or from using this document.
-
Page 92: Troubleshooting
Check that the battery is inserted. It must be inserted before plugging in the charger. Make sure you are using the battery and charger provided by KAPSYS. When abroad, check that the electrical current is compatible. My mobile phone will not connect to a network: Try connecting from another location. - Page 93 (click on "Phone", "Menu" , "Settings", and "Voicemail"). Try later if the network is busy. SIM card locked You have entered 3 incorrect PIN codes, contact your telephone service providers to obtain the PUK code. SmartVision – User Guide (Rev. 2.4)Smart Vision 1336...
-
Page 94: About This Document
Kapsys cannot be held liable in the event of any technical or publishing errors or omissions contained herein. Kapsys makes every effort to continuously improve the quality and functions of its products.
Need help?
Do you have a question about the SmartVision and is the answer not in the manual?
Questions and answers
I can not get the sound to go up like it did when i first got it what can i do to fix this problem