Table of Contents
Advertisement
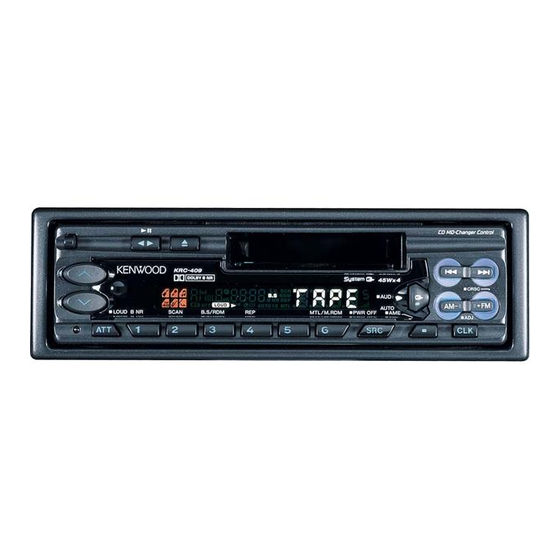
KRC-409
KRC-309S
CASSETTE RECEIVER
INSTRUCTION MANUAL
AMPLI-TUNER-LECTEUR DE CASSETTE
MODE D'EMPLOI
RADIO CASETE
MANUAL DE INSTRUCCIONES
RADIO CASSETE
MANUAL DE INSTRUÇÕES
Take the time to read through this instruction manual.
Familiarity with installation and operation procedures will help you obtain the best
performance from your new cassette-receiver.
For your records
Record the serial number, found on the back of the unit, in the spaces designated on the
warranty card, and in the space provided below. Refer to the model and serial numbers
whenever you call upon your KENWOOD dealer for information or service on the product.
Model KRC-409/309S Serial number
© B64-1826-00 (KW)
Advertisement
Table of Contents

Related Manuals for Kenwood KRC-309S


Summary of Contents for Kenwood KRC-309S
-
Page 1: Instruction Manual
Record the serial number, found on the back of the unit, in the spaces designated on the warranty card, and in the space provided below. Refer to the model and serial numbers whenever you call upon your KENWOOD dealer for information or service on the product. Model KRC-409/309S Serial number... -
Page 2: Table Of Contents
Contents Safety precautions...3 General features Power...5 Volume ...5 Switching Modes ...6 Attenuator ...6 Loudness ...6 System Q ...6 Audio Control Setting...7 Mobile Preset...8 Clock display ...8 Adjusting Time ...8 Disabled System Indicator (DSI) ...8 Theft Deterrent Faceplate...8 Tuner features Tuning ...10 Station Preset Memory...10 Auto Memory Entry ...10 Clean Reception System Circuit (CRSC)...11... -
Page 3: Safety Precautions
DNPS, DNPP, Magazine random play, and CD Text display. Note that none of the KDC-C100, KDC-C302, C205, C705, and non-Kenwood CD changers can be connected. 2CAUTION You can damage both your unit and the CD changer if you connect them incorrectly. - Page 4 Safety precautions NOTE • If you experience problems during installation, consult your Kenwood dealer. • If the unit does not seem to be working right, try pressing the reset button first. If that does not solve the problem, consult your Kenwood dealer.
-
Page 5: General Features
General features Release button ATT / LOUD Clock display Clock indicator SYSTEM Q ATT indicator LOUD indicator indicator Power ¢ Turning on the power: Q/AUD Press the SRC (source) button. NOTE Turn the power on before carrying out the following procedures. Turning off the power: Press the PWR OFF button for at least one second. -
Page 6: Switching Modes
General features Switching Modes Switching Modes: Each time you press the SRC (source) button, the mode switches as follows: Tuner mode Tape mode External disc control mode 1 External disc control mode 2 / AUX mode Standby mode Selecting standby mode: Press the SRC button repeatedly and switch to "OFF"... -
Page 7: Audio Control Setting
Scan of Flat – Easy ("SCAn") Flat ("SQ-1") Easy ("SQ-6") Rock ("SQ-2") Jazz ("SQ-5") Top 40 ("SQ-3") Pops ("SQ-4") As you proceed, each indicator would go on. NOTE The System Q function changes the values of the following sound quality parameters: Bass center frequency, bass level, bass quality factor, bass extend, middle center frequency, middle level, middle quality factor, treble center frequency, and treble level. -
Page 8: Mobile Preset
General features Mobile Preset This function allows you to adjust the setting that is recalled with the System Q, according to types of speakers. Press the SRC button repeatedly to select the standby mode. "OFF" is displayed when the standby mode is selected. Press the Q button to enter the mobile preset plan mode. - Page 9 NOTE • The faceplate is a precision piece of equipment and can be damaged by shocks or jolts. For that reason, keep the faceplate in its special storage case while detached. • Do not expose the faceplate or its storage case to direct sunlight or excessive heat or humidity.
-
Page 10: Tuner Features Tuning
Tuner features Tuning You can choose from three tuning modes: auto seek, preset station seek, and manual. The AUTO 1 indicator lights up when auto seek tuning is selected, and the AUTO 2 indicator lights when preset station seek tuning is selected. Selecting Tuning Mode: Press the AUTO button. -
Page 11: Clean Reception System Circuit (Crsc)
Press the preset station button (#1-6) for the desired station. The number of the recalled station is displayed. Clean Reception System Circuit (CRSC) Temporarily have reception switched from stereo to mono to reduce multi-path noise when listening to the FM station. The factory default for this function is ON. -
Page 12: Cassette Player Features Playing Cassette Tapes
Cassette player features Playing Cassette Tapes Loading and Playing Cassettes: Load a cassette with the tape exposed on the right. The tape starts playing automatically. Playing Cassettes Already Loaded: Press the SRC (source) button repeatedly to select the tape mode. "TAPE" is displayed when the tape mode has been selected. -
Page 13: Tape Advance
Tape Advance Rewinds to the beginning of the track currently being listened to (or fast forwards to the beginning of the next track), continuing tape playback. Rewinding tape to the beginning of current track: Press the 4 button, and the tape will rewind to the beginning of the current track and automatically start playing again. -
Page 14: External Disc Control Features Playing Disc Mode
External disc control features Playing Disc mode This function permits the connection of optional players and the playing of discs. Playing Discs: Press the SRC button repeatedly to select the external disc control mode. The disc will start playing. NOTE The external disc control mode will differ, depending on the unit that is connected. -
Page 15: Track / Disc Repeat
Play starts at the beginning of the displayed disc. Making a Forward Disc Search: Press the DISC button to display the desired disc number. Each time the button is pressed, the displayed disc number increases by one. Play starts at the beginning of the displayed disc. NOTE "LOAd"... -
Page 16: Magazine Random Play
External disc control features Magazine Random Play Function of disc changers) Play the tracks on all the discs in the disc changer in random order. Press the M.RDM button to switch magazine random play on and off. The RDM indicator lights up when magazine random play is turned on. -
Page 17: Accessories
Accessories External view ...1 ...1 ...2 ...1 ...4 ...4 ...1 2CAUTION The use of any accessories except for those provided might result in damage to the unit. Make sure only to use the accessories shipped with the unit, as shown above. Installation Procedure 1. -
Page 18: Connecting Wires To Terminals
Always connect those wires to the power source running through the fuse box. Rear left output (White) KENWOOD disc changer control input NOTE To connect the Disc changer, consult your Disc changer manual. -
Page 19: Installation
Installation Installation Firewall or metal support Accessory4 Self-tapping Accessory2 Metal mounting screw strap (commercially available) NOTE Make sure that the unit is installed securely in place. If the unit is unstable, it may malfunction (for example, the sound may skip). Installing in Japanese-Made Cars Refer to the section “Removing the hard rubber frame (P. - Page 20 Installation Removing the hard rubber frame Engage the catch pins on the removal tool and remove the two locks on the lower level. Lower the frame and pull it forward as shown in the figure. Lock Accessory3 Removal tool When the lower level is removed, remove the upper two locations.
- Page 21 Installation Screwing the Faceplate on the Unit If you want to fasten the faceplate to the main unit so that it does not fall off, screw in the provided screw (ø4 × 16 mm) in the hole shown below. Accessory7 2CAUTION Never insert the taptite screw (ø4 ×...
-
Page 22: Troubleshooting Guide
Troubleshooting Guide What might seem to be a malfunction in your unit may just be the result of slight misoperation or miswiring. Before calling service, first check the following table for possible problems. PROBLEM The power does not turn on. The fuse has blown. - Page 23 Troubleshooting Guide PROBLEM Can’t remove tape. The cause is that more than 10 minutes has elapsed since the vehicle ACC switch was turned OFF. Free switching of the sound The system Q function is set on Scan mode. quality. If the following situations, consult your nearest service center: •...
- Page 24 Troubleshooting Guide CD/MD/External disc control mode PROBLEM The disc control mode cannot No wire has been connected to the disc changer input be selected. terminal on the unit. The specified disc does not The specified CD is quite dirty. play, but another one plays The CD is upside-down.
- Page 25 ] Cool down the unit by opening the windows or turning on the air conditioner. As the temperature falls below 60°C (140°F), the disc will start playing again. If this indicator continues blinking, it is possible that the tape has become jammed or tangled. ] Contact the Kenwood dealer if the cassette tape cannot be ejected. — 25 —...
-
Page 26: Specifications
Tape Speed ...4.76 cm/sec. Wow & Flutter (WRMS) ...0.08 % Frequency response (±3 dB) KRC-409 (70 µs)...30 Hz – 18 kHz KRC-309S (120 µs) ...30 Hz – 14 kHz Separation (1 kHz) ...43 dB Signal to Noise ratio KRC-409 Dolby NR OFF...57 dB Dolby B NR ON...65 dB...
Need help?
Do you have a question about the KRC-309S and is the answer not in the manual?
Questions and answers