Advertisement
Available languages
Available languages
Quick Links
Advertisement

Related Manuals for Golf Buddy WT3


Summary of Contents for Golf Buddy WT3
- Page 1 사작하기 User Manual...
- Page 2 CONTENTS 1. GETTING STARTED 2. BASIC OPERATION 3. ADVANCE OPERATION...
- Page 3 Thank you for choosing Golf Buddy. The GolfBuddy WT3 will provide you with the most accurate course information to ensure you the very best golf experience.
- Page 4 Button Overview Power / ESC Menu / Select Up / Mark Down / Score card...
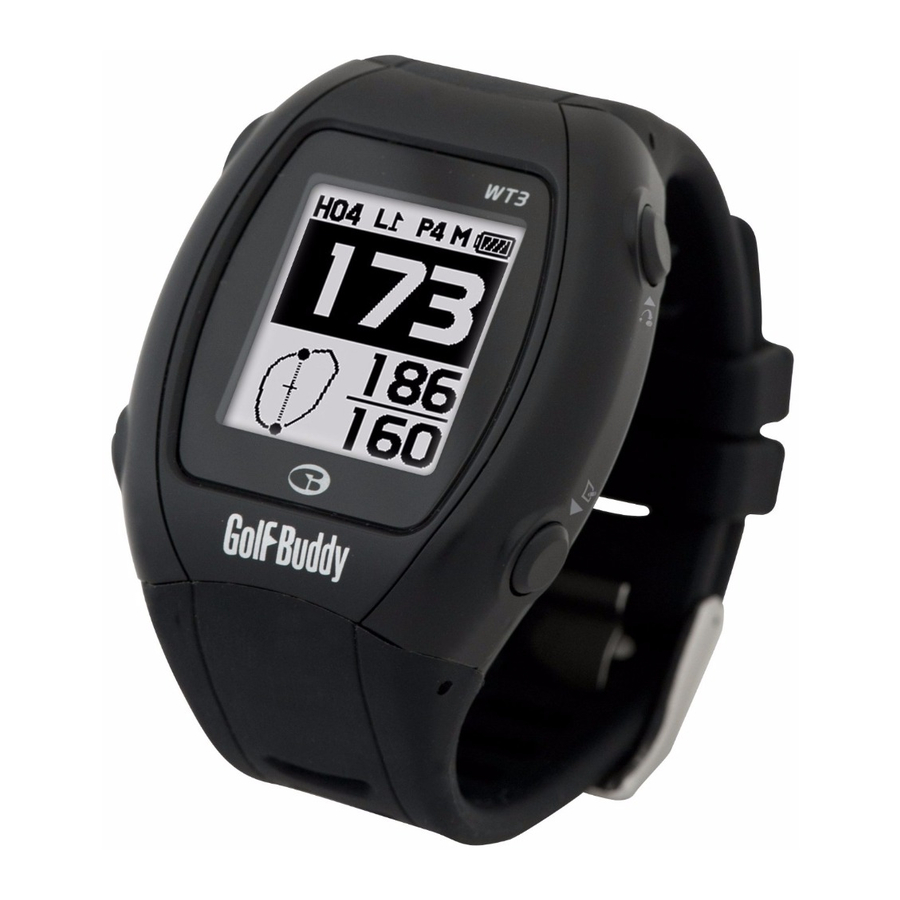
- Page 5 Screen Overview Watch Mode Screen ⦾ Time Date Battery Indicator Play Mode Screen ⦾ Hole Number Left/ Right Green Par info Meter (In Yards if not indicated) Battery Indicator Dynamic Green View Distance to the center of the Green. Distance to the back of the Green. Distance to the front of the Green.
- Page 6 Target Icon Information 50Meterpost 250Meterpost Trees 50Yardpost 250Yardpost Bush 100Meterpost Left Bunker Rough 100Yardpost Right Bunker Short Tree 150Meterpost Bunkers Hole 150Yardpost Fairway Out of Bound 200Meterpost Garden OB + Tree 200Yardpost Tree OB + Rock...
- Page 7 OB + Bunker Hill Bridge Sand Box Right Dogleg Beach Target Left Dogleg Cliff Rock Fence Pond Downhill Cave Cart Path Uphill Windmill Stump Water Tower Pole Wall Creek...
- Page 8 1. GETTING STARTED...
- Page 9 GETTING STARTED 1.1. Power On/Off Press and hold the button to turn on/off the device. 1.2 Charging You can charge the device by inserting the device into the charging dock as depicted in the picture below. The battery indicator will display while charging and will display when fully charged.
- Page 10 GETTING STARTED 1.3. Time Setting Time will set automatically after WT3 successfully connects to the satellite. To set the clock manually, press and hold the button then press the button to confirm. * DST : Daylight Savings Time can be applied by...
- Page 11 ■ Sun Rise/ Sun Set Time Press the button to view the Sun Rise/ Sun Set Time. (only applicable when WT3 is connected to the satellite) ■ Stop Watch Press the button twice to use the Stop Watch Function. Press the...
-
Page 12: Main Menu
■ Switching to Play Screen Press and hold the button from the default screen then select the icon to switch to the play screen. After WT3 connects to the satellite, it will recognize the nearest Golf Course and provide the Course/Hole information. - Page 13 2. BASIC OPERATION...
- Page 14 BASIC OPERATION 2.1. Play Screen Information ■ Distance to the Green Play Screen provides the distance to the center, back, and front of the green. ■ Time Press the button to view the current time while displaying the distance to the center of the green.
- Page 15 2.3. Setting Press and hold the button for the menu. Hole Selection/ Left & Right Green Selection Yard / Meter Previous Hole Selection Pin Placement Exit ■ Hole Selection/ Left & Right Green Selection Navigate by using the buttons and press button to select the Hole.
- Page 16 BASIC OPERATION ■ Previously Recognized Hole Selection Previously recognized hole can be selected by using the button then press the button to complete the selection. ■ Switching between Yard / Meter Yard/ Meter can be selected by using buttons then press the button to complete the select.
- Page 17 3. ADVANCE OPERATION...
- Page 18 ADVANCE OPERATION 3.1 Dynamic Green View / Pin Placement ■ Dynamic Green View Press the button or press and hold the button then select the icon to proceed to the Dynamic Green View. Dynamic Green View will allow you to always get the Front/ Center/ Back distance to the green from your angle of approach.
- Page 19 3.2. Measuring Distance Press and hold the button to start measuring then press the button again to finish and view the measured distance. 3.3. Recording Scores Press and hold the button while on the Play Screen to start access the Score Tracking Module. You can navigate and record your scores by using the buttons then press the button to complete the...
- Page 20 ADVANCE OPERATION 3.4. GPS Tracking While on Watch mode screen, press the button then select the icon. Press the button to start the recording and press the button to delete the record. Press the button to switch between Yard / Meter. ※...
- Page 21 사작하기 Guide d’utilisation...
- Page 22 CONTENTS 1. DEMARRAGE 2. FONCTIONS DE BASE 3. FONCTIONS AVANCEES...
- Page 23 Merci d’avoir choisi Golf Buddy Le Golf Buddy WT3 vous donnera les informations les plus précises afin d’ o ptimiser votre jeu de golf.
- Page 24 Vue des boutons Power / ESC Menu / Select Up / Mark Down / Score card...
- Page 25 Vue de l’écran Watch Mode Screen ⦾ Time Date Battery Indicator Ecran de jeu ⦾ N° du trou Green gauche/droit Par info Mètres( en yards si rien d’Indiqué) Niveau de batterie Dynamic green view Distance milieu de green Distance fond de green Distance entrée de green...
- Page 26 Target Icon Information Symbole des obstacles ⦾ 50Meterpost 250Meterpost Arbres 50Yardpost 250Yardpost Buissons 100Meterpost Bunker gauche Rough 100Yardpost Bunker droit petit arbre 150Meterpost Bunkers Trou 150Yardpost Fairway Hors limites 200Meterpost Jardin OL+ arbre 200Yardpost Arbre OL+ rocher...
- Page 27 OL+bunker Colline Pont Bac à sable Dogleg droit Beach Cible Dogleg gauche Falaise Rocher Barrière Mare Descente Grotte Cart Path Montée Moulin Souche Pièce d’ e au Tour Piquet Ruisseau...
- Page 28 1. DEMARRAGE...
- Page 29 GETTING STARTED 1.1. MISE EN ROUTE ON/OFF Pressez et maintenez enfoncé le bouton àn/off 1.2 Chargez Vous pouvez recharger l’appareil en le connectant commeindiqué sur la photo ci-dessous .
- Page 30 DEMARRAGE 1.3. Réglage de l’heure L’heure se règlera automatiquement lors de la connection aux satellites. Pour règler l’heure manuellement, maintenez appuyé et appuyez sur pour valider. * DST : Daylight Saving Times peut être appliqué en pressant dans le menu de réglage de l’heure * 12/24 Le format horaire: 12/24 .Sélectionner avec les boutons: e dans le menu de réglage de...
- Page 31 ■ Lever/coucher du soleil Appuyez pour voir Lever/ Coucher du soleil. Ne fonctionne que lorsque WT3 est connecté aux satellites. ■ Chronomètre Appuyez sur le bouton deux fois afin d’accéder à la fonction chronomètre. Appuyez sur le bouton pour démarrer/stopper le chronomètre, et appuyez sur le bouton pour remettre à...
- Page 32 ■ Passer à l’ é cran de jeu. Maintenez appuyé dans l’écran de départ , et sélectionnez Après que le WT3 se soit connecté aux satellites ,il localisera le parcours le plus proche et fournira les informations sur le parcours et le les trous .
- Page 33 2. FONCTIONS DE BASE...
- Page 34 FONCTIONS DE BASE 2.1. Ecran de jeu ■ Distances au green L’écran de jeu fournit les distances entrée/milieu/fond de green. ■ Heure Appuyez pour voir l’heure, la distance milieu de green reste affichée. ■ GPS Tracking Appuyez sur deux fois pour voir leGPS tracking ,la distance milieu de green reste affichée.
- Page 35 2.3. Règlages Maintenez enfoncé pour faire apparaître le menu: sélection du trou/choix green gauche/droit Yard / Mètre Sélection trou précédent Placement drapeau Exit ■ Sélection du trou/ choix du green droit ou gauche: Naviguez avec et appuyez pour sélectionner le trou. Sélectionnez green gauche ou droit, et appuyez pour valider la sélection.
- Page 36 OPERATIONS DE BASE ■ Sélection des trous précédents Les trous précédents peuvent être sélectionnés en utilisant . Pour valider appuyez ■ Switcher Yard / Meter Il est possible de passer des Yards aux Mètres Validez avec...
- Page 37 3. FONCTIONS AVANCEES...
- Page 38 FONCTIONS AVANCEES 3.1 Dynamic Green View / Placement du drapeau ■ Dynamic Green View Appuyez ou maintenez enfoncé sélectionnez pour accede au Dynamic Green View. Dynamic Green View vous permet de toujours avoir les distances entrée/milieu/fond de green en tenant compte de votre angle d’approche.
- Page 39 3.2. Mesurer la Distance Maintenez enfoncé pour commencer la mesure. Appuyez à nouveau pour terminer la mesure et voir la distance mesurée. 3.3. Enregistrer le score Maintenez appuyé dans l’ é cran de jeu pour acceder à la carte de score. Naviguez et marquez avec appuyez sur à...
- Page 40 FONCTIONS AVANCEES 3.4. GPS Tracking En mode montre,appuyez sur et selectionnez l’icone . Appuyez sur pour commencer à enregistrer pour effacer l’enregistrement.. et appuyez sur Appuyez sur pour passer de Yard àMetre. ※ REMISE à 0 Pour faire un reset, appuyez sur ensembles pour redémarrer le système.
- Page 41 사작하기 사용자 설명서...
- Page 42 CONTENTS 1. 시작하기 2. 기본사용 3. 고급사용...
- Page 43 골프버디를 이용하시는 고객님께 진심으로 감사드립 니다. ㈜데카시스템의 골프버디는 휴대용 GPS골프 거리측 정기로서 고객님의 플레이에 필요한 정확한 거리정 보를 제공하여 보다 즐거운 골프 게임을 만들어 드립 니다.
- Page 44 골프버디 버튼 설명 Power / ESC Menu / Select Up / Mark Down / Score card...
- Page 45 메인 화면 설명 시계화면 ⦾ 현재시간 요일 날짜 배터리 잔량 표시 플레이화면 ⦾ 홀번호 좌/우그린 파정보 Meter (표시가 없을경우 Yard) 배터리 잔량 표시 다이나믹 그린뷰 Center까지 남은 거리 Back까지 남은거리 Front까지 남은거리...
- Page 46 타겟 아이콘 설명 50Meterpost 250Meterpost Trees 50Yardpost 250Yardpost Bush 100Meterpost Left Bunker Rough 100Yardpost Right Bunker Short Tree 150Meterpost Bunkers Hole 150Yardpost Fairway Out of Bound 200Meterpost Garden OB + Tree 200Yardpost Tree OB + Rock...
- Page 47 OB + Bunker Hill Bridge Sand Box Right Dogleg Beach Target Left Dogleg Cliff Rock Fence Pond Downhill Cave Cart Path Uphill Windmill Stump Water Tower Pole Wall Creek...
- Page 48 1. 시작하기...
- Page 49 시작하기 1.1. 전원 켜기/끄기 골프버디 좌측 상단의 전원버튼을 길게 누르면 전원 이 켜지거나 꺼집니다. 1.2 충전하기 제공된 충전기에 아래 사진과 같이 제품을 장착하여 전원에 연결하여 충전을 시작합니다. 충전 중에는 배터리 잔량표시 가 움직이며, 충전 이 완료되면 배터리 잔량표시가 완충 상태 로...
- Page 50 시작하기 1.3. 시계 설정 전원을 켜면 시계화면이 나타납니다. 현재시간은 위 성과 연결되면 자동으로 설정됩니다. 버튼을 길게 눌러 변경화면이 나타나면 수동으로 빠르게 원하는 시간대로 설정이 가능하며 버튼을 누르면 완료되 어 현재시간 화면으로 돌아갑니다. * DST : 시계설정 화면에서 버튼을 눌러 DST를 선택하면 서머타임을 설정할 수 있습니다. * 12시간...
- Page 51 ■ 일출, 일몰시간 시계화면에서 버튼을 누르면 현재시간과 일출, 일몰시간을 확인하실 수 있습니다. (GPS 위성이 인식된 경우에만 해당) ■ 스톱워치 시계화면에서 버튼을 두번 누르면 스톱워치 화 면이 나타납니다. 버튼을 누르면 기록이 시작 되며 기록을 멈추려면 버튼을 다시 누르면 됩 니다. 저장된 기록을 삭제하려면 버튼을...
- Page 52 시작하기 1.4. 메뉴 화면 기본화면에서 버튼을 길게 누르면 메뉴화면으로 이동합니다. 메뉴화면에서 버튼을 이용하여 플레이 화면, GPS Tracking 화면, 시계 화면, 시스템 정보 화면으로 이동할 수 있습니다. 플레이 TRACKING 현재시간 시스템정보 ■ 플레이화면 전환 기본화면에서 버튼을 길게 눌러 아이콘을 선택하면 플레이 화면으로 변경되며 사용자가 골 프코스에...
- Page 53 2. 기본사용...
- Page 54 기본사용 2.1. 플레이화면 정보안내 ■ 그린까지의 거리정보 확인 플레이 화면에서 그린의 center, back, front까지의 거리정보를 확인 할 수 있습니다. ■ 시간확인 플레이 화면에서 버튼을 누르면 그린의 center까지의 거리정보와 함 께 현재시간을 확인할 수 있습니다. ■ GPS Tracking 확인 플레이 화면에서 버튼을...
- Page 55 2.3. 환경설정 플레이 화면에서 버튼을 길게 누르면 환경설정 화면이 나타나며, 홀변경, Yard/Meter 변경, 핀위치 를 설정할 수 있습니다. 홀변경 / 좌,우그린 변경 Yard / Meter 변경 이전 인식된 홀로 되돌리기 핀설정 나가기 ■ 홀 변경 / 좌,우그린 변경 환경설정 화면에서 홀변경 아이콘을 선택하여, 버튼을...
- Page 56 기본사용 ■ 이전 인식된 홀로 되돌리기 환경설정 화면에서 을 선택하면 이전에 인식된 홀로 쉽게 변경할 수 있습니다. ■ Yard / Meter 변경하기 플레이 화면에서 버튼을 길게 누르면 환경설정 화면이 나타나며, 버튼을 눌러서 Y / M 를 선택하여 변경합니다. 설정이 완료한 후 버...
- Page 57 3. 고급사용...
- Page 58 고급사용 3.1 다이나믹 그린 뷰 / 핀설정 ■ 다이나믹 그린뷰 플레이화면에서 버튼을 누르거나 버튼을 길게 눌러 아이콘을 선택하면 그린뷰 화면이 나타납니다. 다이나믹 그린뷰는 사용자의 위치에 따라 green shape이 실시간으로 변경됩니다. ■ 핀설정 그린뷰 화면에서 PIN의 위치를 변경하여 설정 할 수 있습니다. 원하는 PIN의 위치로 버튼...
- Page 59 3.2. 비거리 측정 메인 플레이 화면에서 버튼을 길게 누르면 비거 리 측정이 시작되며 원하는 지점으로 이동해서 버튼을 누르면 비거리를 확인할 수 있습니다. 3.3. 스코어 기록 메인플레이 화면에서 버튼을 길게 눌러 스코어입 력 화면을 실행합니다. 버튼을 눌러서 스코 어를 기록한 후 버튼을...
- Page 60 고급사용 3.4. GPS Tracking 시계 화면이나 메인플레이 화면에서 버튼을 눌러 아이콘을 선택하면 GPS Tracking 화면이 실행됩 니다. 버튼을 누르면 기록이 시작되며, 저장된 기 록을 삭제하려면 버튼을 눌러 기록을 새로 시작 할 수 있습니다. 버튼을 눌러 Yard / Meter 로 쉽 게...
Need help?
Do you have a question about the WT3 and is the answer not in the manual?
Questions and answers