Table of Contents
Advertisement
Advertisement
Table of Contents

Related Manuals for Phonic SUMMIT

Summary of Contents for Phonic SUMMIT
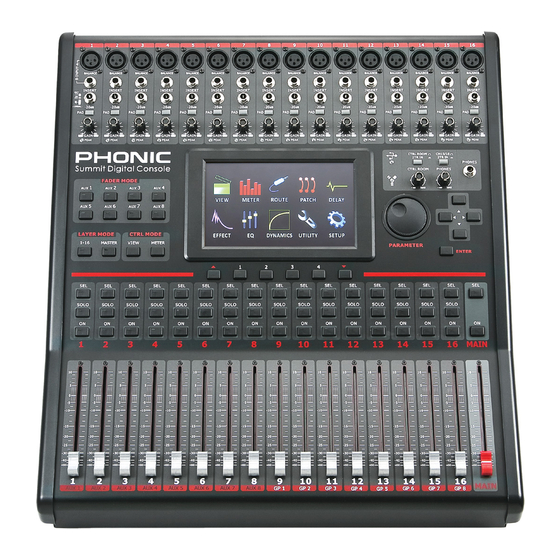
- Page 1 SUMMIT Intuitive 16-Channel 8-Bus Digital Mixing Console SUMMIT...
-
Page 2: Important Safety Instructions
IMPORTANT SAFETY INSTRUCTIONS The apparatus shall not be exposed to dripping or splashing and that no objects with liquids, such as vases, shall be placed on the apparatus. The MAINS plug is used as the disconnect device, the disconnect device shall remain readily operable. -
Page 3: Table Of Contents
Troubleshooting.............................31 Presets................................32 Digital Effect Table............................37 Specifications..............................39 Application..............................40 Dimensions ..............................42 Block Diagram ............................43 To view this manual in full colour, please visit www.phonic.com Phonic preserves the right to improve or alter any information within this document without prior notice. V1.0 03/22/2010... -
Page 4: Part One: Overview And Installation
Please do not block the ventilation holes parameters each. Gate, Expander, Compressor and Limiter on the rear panels of Summit console. Please do not operate in dynamic processes can be assigned to all input channels. Also direct sunlight or at any extreme temperature. -
Page 5: Part Two: Controls And Connections
AFL – After Fader Listen – exactly as the name suggests, this is a monitor signal that is taken after the signal has passed through 1. Make sure the SUMMIT’s power is off. To fully ensure this, the fader/level control. -
Page 6: Analog Controls And Settings
This button changes the input source of input channels 15 and 16. Pushing it in will allow channels 15 and 16 to use the signal taken from the RCA 2TR inputs found on the rear of the SUMMIT. When this button is disengaged, the XLR or 1/4” line input jacks will be used for these input channels. -
Page 7: Display
21. Up and Down Buttons Rear Panel These buttons will help users scroll or run through all of the available functions of the SUMMIT, the icons of which can be 26. Phantom Power Switches found on the top right-hand site of the GUI. -
Page 8: Rack-Mounting Kit
Connect the DC head of the included power supply to this port. The other end of the power supply should be connected to a suitable AC power source. When connecting the DC head of the power supply to the SUMMIT, ensure to lock it into place using the retaining clip to ensure the supply is not inadvertently removed. -
Page 9: Installing The Optional Firewire + Usb Expansion Card
Installing The Optional FireWire + USB Expansion Card 1. First ensure all power is off on your SUMMIT mixer and the power cable is disconnected. 2. Remove the back protective cover on the SUMMIT by unscrewing the two support screws. -
Page 10: Part Three: Navigating And Selecting
Start-up The SUMMIT takes around two minutes to start up. The first screen users will see on the display is a red Phonic logo with a blue status bar indicating the status of the start up process. After this is done, the display will show the status of the DSP check. -
Page 11: User Interface
SUMMIT. In this instance, settings that have recently been altered will not be saved in the event that you turn off the SUMMIT. Simply push this yellow dot to save the current settings. These will be retained in the event that you power down the SUMMIT. - Page 12 (onscreen) or by simply pushing the appropriate SEL button on the channel/AUX/Group itself (on the face of the SUMMIT itself). As with most functions, an activated button is indicated in blue. When an AUX send is set to pre-fader, however, it will be highlighted in brown when active.
- Page 13 A Note About Group Sources and Panning channel in your computer’s digital audio workstation software. It is important to note that the Summit has an Intelligent Group In this event, the input channel’s signal is cut off completely and Panning System (IGPS) programmed into its DSP. When channel replaced by the return signal.
- Page 14 Configuring AUX Sends • Configuring AUX/Group Masters AUX and Group Masters can be fed by any input channels, and can be assigned to MULTI outputs 1 to 8. The Group mixes can also be assigned to the Main stereo mix. SUMMIT...
- Page 15 Master selection is chosen on the Layer selection 1.2.4 Channel Send Meter Pre/Post Button section of the SUMMIT. Note that faders cannot be adjusted on This button adjusts the AUX and group send meters between screen, instead they must be selected and the rotary control used pre-fader and post-fader meters.
- Page 16 Solo Safe is This level meter displays the final output signal level for the Control activated on a channel. Room outputs on the rear of the SUMMIT. 1.3.3 Solo & Clear All Buttons 1.3.6...
- Page 17 A Note About Group Sources and Panning When the Main mix is selected, the AES/EBU button will allow It is important to note that the Summit has an Intelligent Group the Digital input signal (received through the AES/EBU input) to Panning System (IGPS) programmed into its DSP.
- Page 18 Users are able to adjust these meters between pre- and post-fader meters by pushing the Pre/Post Meter buttons. The post-fader signal displayed is post-fader, -equalizer, -dynamics and -delay. SUMMIT...
- Page 19 The Control Room trim can be adjusted. The trim can be adjusted on the AES/EBU input, which can also be turned on and off within this menu. If no digital device is connected to the input, users will not be able to activate the AES/EBU inputs. SUMMIT...
- Page 20 The icon on this button will automatically change depending on the type of connection detected by the SUMMIT (FireWire or USB). 3.1.10 Invert Phase Activating this button will invert the phase of the corresponding...
- Page 21 3.3.5 AES/EBU Level Fader This fader will adjust the incoming signal level from any external AES/EBU-enabled device currently connected to the appropriate XLR AES/EBU inputs on the rear of the SUMMIT. 3.3.6 AES/EBU Meter The incoming signal levels from the AES/EBU input can be viewed through this meter.
- Page 22 Effect The SUMMIT’s built in digital effect processor can be assigned to any of the AUX mixes. To apply an effect to any particular channel (or a mix of a few different channels) simply send the channel(s) to an AUX mix and apply the desired effect to that mix.
- Page 23 Equalizer The SUMMIT provides a 4-band parametric equalizer on each input channel, Multi 1 to 8 outputs and Main Mix. All parameters are adjusted using the data encoders or touch-screen. Users are able to select a boost or cut of up to 18 dB on frequencies between 20 Hz and 20kHz.
- Page 24 8. Dynamics The SUMMIT provides a built-in Gate, Expander, Compressor and Limiter on each input Channel, Multi 1 to 8 outputs and Main Mix. Dynamics are not limited by DSP resources, and can be configured as pre- or post-EQ/Delay for each channel. All built-in dynamics parameters are adjusted using the touch-screen and onboard controls.
- Page 25 AUX channels, Group channels or the Main mix, and select Save. Users are also able to select and unselect all channels with the included buttons. The saved settings for each are: select, fader levels, on/off, panning, equalizer, dynamics, effects, AUX sends, delay and routing. SUMMIT...
- Page 26 Internal (with sampling rates of 44.1 kHz, 48 kHz, 88.2 kHz and 96 kHz), the digital device, or the Word Clock input/ output. The selected Sampling Rate – or that set by the external device – is displayed at the bottom of this menu. The Enter button must be pushed to confirm new Clock Source settings. SUMMIT...
- Page 27 SUMMIT’s onboard controls to navigate the GUI and bring up the LCD Calibration function. If it becomes necessary to calibrate the screen, users can use the tab buttons, directional buttons and ENTER button on the SUMMIT to allow them to access the calibration function.
-
Page 28: System Restore
…Monitor a signal? There are a number of ways to monitor a signal using the SUMMIT. The easiest is of course to solo the signal by pushing the SOLO button in the channel’s View screen. This will immediately send the signal to your Control Room and Headphones mix. However a normal solo will cut the signal sent to your Main mix. - Page 29 …Connect an amplifier to the SUMMIT? The easiest way to use the SUMMIT in live situations is to connect the Main XLR outputs on the rear of the SUMMIT to an amplifier’s input, or else to the input of a couple of active speakers. For a surround system, you may also want to use the 1/4” Multi outputs. You can assign any of your AUX or Group mixes to the Multi outputs, so making a submix for your rear speakers should be a piece of cake.
-
Page 30: Optional Firewire + Usb Expansion Card
Mac OSX Mac users who are using Garageband or Logic Pro will simply need to connect the SUMMIT to their Mac via FireWire or USB and the unit will be automatically recognized. If using other programs, such as Cubase, users will need to create an aggregated device to make full use of the unit. -
Page 31: Troubleshooting
If the screen becomes uncalibrated for whatever reason, and the appropriate menu cannot be selected onscreen, users should use the SUMMIT's onboard controls to navigate the GUI and bring up the LCD Calibration function. Firmware updates and version check ❍... -
Page 32: Presets
H-MID HIGH Default PEAKING PEAKING PEAKING PEAKING 0 dB 0 dB 0 dB 0 dB 87.9 122.1 2066.9 9699.4 Bass Drum 1 PEAKING PEAKING PEAKING H.SHELF +2.5 dB –2.5 dB 0.0 dB +2.5 dB 100.2 260.2 1002.4 5365.4 — SUMMIT... - Page 33 PEAKING PEAKING PEAKING H.SHELF +3.0 dB 0.0 dB +2.5 dB +0.5 dB 110.6 118.2 2000 3990.5 0.35 — Syn. Bass 1 PEAKING PEAKING PEAKING H.SHELF +2.5 dB +4.5 dB 0.0 dB 0.0 dB 93.9 969.6 3990.5 12619.1 0.35 — SUMMIT...
- Page 34 PEAKING PEAKING PEAKING H.SHELF –2.0 dB 0.0 dB +1.0 dB +2.0 dB 103.6 1070.5 1872.7 5365.4 — A. G. Stroke 2 L.SHELF PEAKING PEAKING H.SHELF –3.5 dB –2.0 dB 0.0 dB +2.0 dB 306.7 745.5 2000 3498.5 — — SUMMIT...
- Page 35 Light Plate Preset Thin Plate 1.15 Preset Perc Plate 1.3s 35ms Industrial Preset 100% Plate Echo Delay Default Delay1 Delay2 Dealy Dealy Program Name FB_HPF FB_LPF time time Default 190ms 310ms 5.6K 5.6K Preset Echo 190ms 310ms 5.6K 5.6K SUMMIT...
- Page 36 Tremolo 6.1Hz Sine Auto Pan Auto Pan Default Program Name LFO_Freq LFO_Type Depth Default 2.35Hz Triangle L<->R Preset Auto Pan 2.35Hz Triangle L<->R Tap Delay Tap Delay Default Program Name Delay time Default Tap Delay 200ms 90 Hz 7.1K SUMMIT...
-
Page 37: Digital Effect Table
0 to 99% Feedback gain of input 1 Feedback 2 0 to 99% Feedback gain of input 2 FB HPF 20 Hz to 20 kHz Feedback High Pass Filter FB LPF 20 Hz to 20 kHz Feedback Low Pass Filter SUMMIT... - Page 38 Determines the modulation waveform Depth 0 to 100% Adjusts the depth of the Auto Pan effect Determines the direction of the panning effect LR / L R / R L Note: Reverb Effects are found on EFFECT 1 only. SUMMIT...
-
Page 39: Specifications
16 x 16 Universal Expansion Card (2 x FireWire, 1 x USB 2.0) Power Supply Unit 100V – 240V, 50/60 Hz, 90W Dimensions (H x W x D) 164 x 450 x 520 mm / 6.5” x 17.7” x 20.5” Weight 16.9 kg / 37.3 lbs SUMMIT... -
Page 40: Application
APPLICATION Live Setup GUITAR BASS KEYBOARD HEADPHONES DRUM SET FOH SPEAKERS PERFORMER STAGE MONITORS AMPLIFIER ACTIVE MONITOR CD or MP3 PLAYER EQUALIZER SUMMIT... - Page 41 Recording GUITARS BASS KEYBOARD HEADPHONES DRUM SET Return through input channels for monitoring DIGITAL RECORDER MULTITRACK RECORDER Producer’s Booth MASTER CLOCK CD or MP3 PLAYER 16 in 16 out COMPUTER SUMMIT...
-
Page 42: Dimensions
DIMENSIONS Measurements are shown in mm/inches SUMMIT... -
Page 43: Block Diagram
Digital in 1~16 LEVEL 2T IN Digital out 1~16 LEVEL GP1 L ~ GP8 L Control Master AUX1~AUX8 Room L Firewire (L+R)/2 Firewire GP1 R ~ GP8 R Control Master AUX1~AUX8 Room R EXPANSION Card LEVEL 2T IN PHONES SUMMIT... - Page 44 http://www.phonic.com...
Need help?
Do you have a question about the SUMMIT and is the answer not in the manual?
Questions and answers