Table of Contents
Advertisement
Table of Content
IMPORTANT SAFETY INSTRUCTIONS ......................................................................................... 1
Read before operating equipment ............................................................................................ 1
Compliance Information ........................................................................................................... 3
CE Conformity for European Countries..................................................................................... 3
Declaration of RoHS Compliance ............................................................................................. 4
PREPARATION ............................................................................................................................. 6
Before installation .................................................................................................................... 6
Package contents .................................................................................................................... 7
Installation of batteries ............................................................................................................. 7
TV INSTALLATION ........................................................................................................................ 8
Mount the TV stand ................................................................................................................. 8
TV connectors ......................................................................................................................... 8
Wall mounting ......................................................................................................................... 9
Remove the TV stand for wall mounting ................................................................................... 9
device.................................................................................................................10
Rear connections ...................................................................................................................10
Side connections ....................................................................................................................11
Power connection ...................................................................................................................12
Turning the LCD TV on ...........................................................................................................12
First time installation ...............................................................................................................13
Control panel buttons .............................................................................................................14
Remote control functions ........................................................................................................15
Picture format ........................................................................................................................17
TV menu.......................................................................................................................................18
OSD Settings .........................................................................................................................18
Picture ...................................................................................................................................19
Sound ....................................................................................................................................20
TV .........................................................................................................................................21
TV/Channels ..........................................................................................................................22
Installation .............................................................................................................................24
Parental .................................................................................................................................26
Other information ..........................................................................................................................27
Troubleshooting .....................................................................................................................27
Glossary ................................................................................................................................28
Specifications .........................................................................................................................29
Advertisement
Table of Contents

Related Manuals for AOC L32WB81


Summary of Contents for AOC L32WB81
-
Page 1: Table Of Contents
Table of Content IMPORTANT SAFETY INSTRUCTIONS ..................1 Read before operating equipment .................... 1 Compliance Information ......................3 CE Conformity for European Countries..................3 Declaration of RoHS Compliance ..................... 4 PREPARATION ..........................6 Before installation ........................6 Package contents ........................7 Installation of batteries ...................... -
Page 3: Important Safety Instructions
IMPORTANT SAFETY INSTRUCTIONS Read before operating equipment Read these instructions. Keep these instructions. Heed all warnings. Follow all instructions. Do not use this apparatus near water. Clean only with a dry cloth. Do not block any of the ventilation openings. Install in accordance with the manufacturers instructions. - Page 4 The readily operable appliance coupler will serve as the disconnecting device of this apparatus. The apparatus must be connected to a mains socket outlet with a protected earthed connection. Used or discharged batteries must be properly disposed of or recycled in compliance with all applicable laws.
-
Page 5: Compliance Information
Disposal of Waste Equipment by Users in Private Household in the European Union. This symbol on the product or on its packaging indicates that this product must not be disposed of with your other household waste. Instead, it is your responsibility to dispose of your waste equipment by handing it over to a designated collection point for the recycling of waste electrical and electronic equipment. -
Page 6: Declaration Of Rohs Compliance
Declaration of RoHS Compliance This product has been designed and manufactured in compliance with Directive 2002/95/EC of the European Parliament and the Council on restriction of the use of certain hazardous substances in electrical and electronic equipment (RoHS Directive) and is deemed to comply with the maximum concentration values issued by the European Technical Adaptation Committee (TAC) as shown below: Substance Proposed Maximum... - Page 7 LCD panel The LCD panel used in this product is mode of glass. Therefore, it can break when the product is dropped or impacted upon by other objects. The LCD panel is a very high technology product, giving you finely detailed pictures. Occasionally, a few non-active pixels may appear on the screen as a fixed point of blue, green or red.
-
Page 8: Preparation
PREPARATION Before installation Place the TV on a solid surface. Ensure that the TV is placed in a position to allow free flow of air. Do not cover the ventilation openings on the back cover. To prevent any unsafe situations, no naked flame sources, such as lighted candles, should be placed on or in the vicinity. -
Page 9: Package Contents
PREPARATION Package contents Please verify that you received the following items with your package contents: LCD TV Base Remote control with batteries User’s Manual Quick Setup Guide Power cord x (UK or Europe) Installation of batteries Insert two AAA batteries into Remote control. Make sure + and – are facing the proper direction. Replace the cover. -
Page 10: Tv Installation
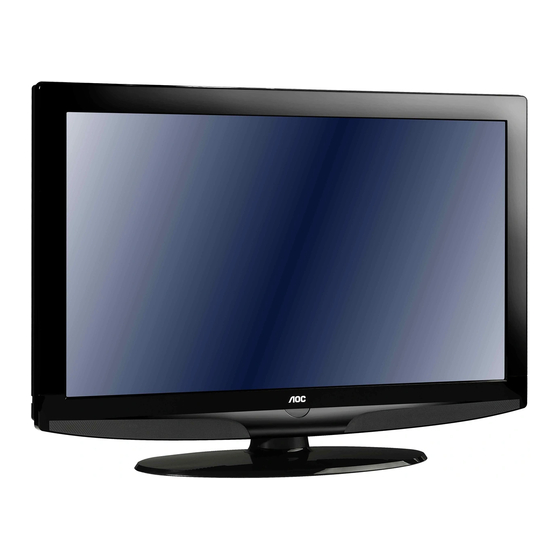
TV INSTALLATION TV Overview Mount the TV stand- Put the TV face down on a safe surface that is covered by a soft and smooth cloth. Click the TV stand to the base column. Fix the 3 bolts securely using the holes in the back of the TV (26”) . TV connectors Front views Side... -
Page 11: Wall Mounting
TV INSTALLATION TV Overview Wall mounting TV screen VESA-compatible Screw type size (inches) wall bracket (millimeters) (W X H) 19” 100 x 100 mm Metric 4 x 10 mm 22” 100 x 100 mm Metric 4 x 10 mm 26” 200 x 100 mm Metric 4 x 10 mm... -
Page 12: Connect The Device
TV INSTALLATION Connect the device Rear connections Port Functions Tuner Input Connects to TV RF signals (antenna/CATV). Full SCART, which transmits RGB, S-Video and CVBS in, and CVBS tuner SCART 1 out (Analog only). PC IN Connect to VGA analog signals sources. PC audio supports 3.5mm Jack. SPDIF Output SPDIF is highly recommended for high quality digital sound output. -
Page 13: Side Connections
TV INSTALLATION Connect the device Side connections DVD Player Port Functions COMMON Function when PC Card or ExpressCard is in COMMON INTERFACE slot INTERFACE of the set. Please refer to your plug-in card manual for detail information. Connect to headphones (16Ω or 32Ω). Earphone Output AV IN The composite audio and video provide a basic connection from the DVD... -
Page 14: Power Connection
TV INSTALLATION Connect the device Power connection Attach the AC power cord to the LCD TV and plug into an appropriate wall outlet. AC 100-240V 50/60Hz Power outlets differ from region to region. Do not insert the power plug in a wall socket before all connections are firm. Turning the LCD TV on Press the POWER button at the side of the TV or press the button on the remote control to turn on the... -
Page 15: First Time Installation
TV INSTALLATION Connect the device First time installation After unpacking and plugging in your new LCD TV, please proceed with the following steps to set-up your TV. If you do not run this set-up function, your LCD TV may not operate properly. Press the Green button to proceed with the installation. -
Page 16: Control Panel Buttons
TV INSTALLATION Control panel buttons Button Functions POWER Use this button to switches your LCD TV on/off. INPUT Use this button to toggle between video input source. Use this button to display and adjust the features in the On-Screen-Display MENU (OSD). -
Page 17: Remote Control Functions
TV INSTALLATION Remote control functions 0-9 DIGIT BUTTONS + VOL- To select a TV channel directly. Press to adjust the volume. + PR – GUIDE Press this key to display Press to select the channel. electronic program guide in TV MUTE mode. - Page 18 TV INSTALLATION Remote control functions TELETEXT ( Designed for Europe PAL/SECAM/DVB-T system only ) TELETEXT Press this button to activate Teletext. Press again to turn off Teletext. Press this button to activate Teletext with TV. SIZE Press this button to change the font size: Full screen, Top half and Bottom half.
-
Page 19: Picture Format
TV INSTALLATION Remote control functions Picture format Press the RATIO button on the remote control to enter the picture format menu. ∧/∨ Press the buttons to select a picture format and press the OK button to confirm your choice. Automatic: The Automatic format for DTV and HDMI transport streams with AFD information, while ... -
Page 20: Tv Menu
TV menu Using the advanced menu OSD Settings Press the MENU button on the side of the LCD TV or press the MENU button on the remote control. Menu Descriptions Show more picture modes and functions based on your favourite channels and Picture enables you to adjust the colour and brightness setup. -
Page 21: Picture
TV menu Using the advanced menu Press the MENU button on the side of the LCD TV or press the MENU button on the remote control. Press the ∧/∨button to highlight the menu entries. < Press the button to enter the submenu. Press the ∧/∨button to highlight the item to be adjusted. -
Page 22: Sound
TV menu Using the advanced menu Sound Menu Descriptions Balance To adjust the balance between left/right channels. Bass To adjust audio setting parameters of bass. Treble To adjust audio setting parameters of treble. ∧/∨ To add greater depth and dimension to the TV sound. Use the buttons to Virtual surround toggle between On or Off. - Page 23 TV menu Using the advanced menu Menu Descriptions To select the relevant country. This is the country you are in, or the country Country whose channels you want to receive if you live near its borders. To display a dialogue enabling the preferred language to be set. This is the Audio language language to be used for digital channels if it is available.
-
Page 24: Tv/Channels
TV menu Using the advanced menu TV/Channels Menu Descriptions Channel scan ∧/∨ Use the buttons to select Channel scan in the Channels menu. Press the π button to enter it and press the OK button to start searching the local program automatically. Update scan ... - Page 25 TV menu Using the advanced menu TV/Channels Menu Descriptions Channel sort ∧/∨ Use the buttons to select Channel sort in the Channels menu. > ∧/∨ Press the button to enter it and use the buttons to highlight a program you want to sort and press the OK button to select. ∧/∨...
-
Page 26: Installation
TV menu Using the advanced menu Installation Menu Descriptions Language To choose of languages in your interface. To identify the accessory devices you have connected to the external Source inputs/outputs. ∧/∨ Use the buttons to toggle between : Time zone: to select the time zone you are in. ... - Page 27 TV menu Using the advanced menu Installation Menu Descriptions ∧/∨ Teletext Use the buttons to toggle between : Digital teletext language: to select the transmitted language of teletext on the screen. Decoding page language: to decode the teletext language on regional ...
-
Page 28: Parental
TV menu Using the advanced menu Parental Menu Descriptions To lock a certain TV channel or external source completely. Channel lock To control access programs based on their age ratings. All settings apply to Program lock digital channels. To change your access code or overwriting it. If no PIN-code exists, the menu item is set to Set PIN. -
Page 29: Other Information
Other information Troubleshooting The following table contains the common problems and the solutions to these problems. Please check this list before you contact technicians. Problems Solutions 1. Connect power cord correctly. 2. Turn on power. No picture 3. Connect signal cable correctly. 4. -
Page 30: Glossary
Other information Glossary Audio / Video Inputs Located on the rear and the front of the receiver these connectors (RCA phono type plug) are used for the input of audio and video signals. Designed for use with VCRs (or other accessories) in order to receive higher picture resolution and offer sound connection options. -
Page 31: Specifications
Other information Specifications Model No. L19W981 L22W981 L26W981 DISPLAY Aspect Ratio 16:10 16:10 16:9 Resolution 1440 x 900 1680 x 1050 1366 x 768 English, German, French, Italian, Spanish, Portuguese, Dutch, OSD Language Danish, Finnish, Swedish, Norwegian, Polish, Russian, Greek ENHANCEMENT Sound Output (RMS Watts) Sound Mode...