
Related Manuals for Lincoln Electric INVERTEC 300TPX


Summary of Contents for Lincoln Electric INVERTEC 300TPX
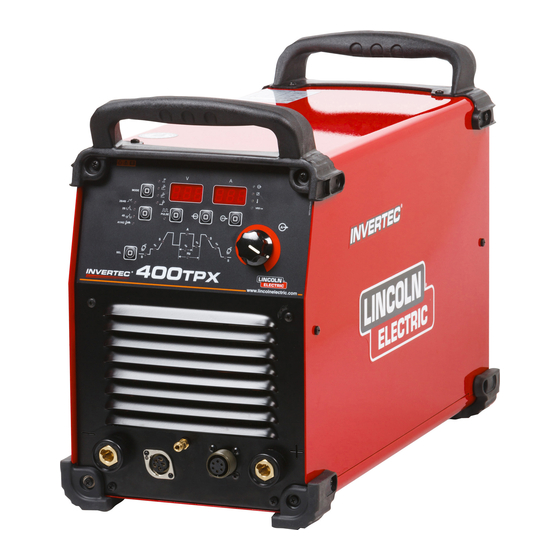
- Page 1 IM2041 03/2014 REV02 INVERTEC 300TPX & 400TPX OPERATOR’S MANUAL ENGLISH Lincoln Electric Bester Sp. z o.o. ul. Jana III Sobieskiego 19A, 58-263 Bielawa, Poland www.lincolnelectric.eu...
-
Page 2: Declaration Of Conformity
2006/95/CEE, 2004/108/CEE and has been designed in compliance with the following standards: EN 60974-1, EN 60974-10:2007 (15.02.2013) Paweł Lipiński Operations Director Lincoln Electric Bester Sp. z o.o., ul. Jana III Sobieskiego 19A, 58-263 Bielawa, Poland 07/11 English English... - Page 3 2006/95/CEE, 2004/108/CEE and has been designed in compliance with the following standards: EN 60974-1, EN 60974-10:2007 (15.02.2013) Paweł Lipiński Operations Director Lincoln Electric Bester Sp. z o.o., ul. Jana III Sobieskiego 19A, 58-263 Bielawa, Poland 07/11 English English...
-
Page 4: Table Of Contents
12/05 THANKS! For having chosen the QUALITY of the Lincoln Electric products. Please Examine Package and Equipment for Damage. Claims for material damaged in shipment must be notified immediately to the dealer. For future reference record in the table below your equipment identification information. Model Name, Code &... -
Page 5: Safety
Failure to follow the instructions in this manual could cause serious personal injury, loss of life, or damage to this equipment. Read and understand the following explanations of the warning symbols. Lincoln Electric is not responsible for damages caused by improper installation, improper care or abnormal operation. -
Page 6: Installation And Operator Instructions
SAFETY MARK: This equipment is suitable for supplying power for welding operations carried out in an environment with increased hazard of electric shock. EQUIPMENT WEIGHT OVER 30kg: Move this equipment with care and with the help of another person. Lifting may be dangerous for your physical health. CYLINDER MAY EXPLODE IF DAMAGED: Use only compressed gas cylinders containing the correct shielding gas for the process used and properly operating regulators designed for the gas and pressure used. -
Page 7: Remote Control Connection
First determine the proper electrode polarity for the If a Coolarc unit listed above is connected to the electrode to be used. Consult the electrode data for this Machine, it will be automatically turned ON and OFF in information. Then connect the output cables to the order to ensure the torch cooling. - Page 8 Remote Amptrol or Pedal are allowed (trigger is NOTE: If a COOLARC TIG torch cooling unit is ignored). connected to the machine, it will be turned ON/OFF by the Green Mode feature. D. Gas Inlet: Connector for the TIG shielding gas. Use the supplied connector to connect the machine to the gas source line.
- Page 9 To store [or recall] a record: Mode Pushbutton: Store (M) Recall (M) This pushbutton changes the welding modes of the 01 10 machine: Stick (SMAW) Lift TIG (GTAW) HF TIG (GTAW) Spot TIG (GTAW) Store (M) Recall (M) The Spot TIG feature is selectable only if the “option 10”...
- Page 10 actual welding current following the instruction explained electrode to the work piece. This decrease in in the “Remote LED” description above. current allows the operator to remove the electrode from the electrode holder without creating large The left (V) Display can also shown the following set of sparks which can damage the electrode holder.
- Page 11 HF TIG (GTAW welding) Before to start a TIG welding, a gas circuit purge is To select HF TIG welding: Action Visualization recommended. To purge the gas circuit and torch: Press MODE several times until the LED above lights up When the mode pushbutton is in HF TIG position, the stick welding functions are disabled and the machine is Action...
- Page 12 Tig Welding Sequences During welding the Sel pushbutton is enabled for the At each pressure of the SEL following functions: pusbutton the LEDs lights up in the Output current following order: Only if Pulse Function is active: is possible operates on the values of Duty (%), Frequency (Hz) and Background current (A).
- Page 13 4-Step Trigger Sequence After the arc is turned OFF, the gas valve will To select 4-Step sequence: remain open to continue the flow of the shielding Action Visualization gas to the hot electrode and work piece. Press several times until the LED above lights up With the 4-step trigger mode and a TIG welding mode selected, the following welding sequence will occur.
- Page 14 This sequence operation, 4-step with restart disabled, is the default setting from the factory. As shown here, again after the TIG torch 4-Step Trigger Sequence with Restart Option trigger is quickly pressed and released To select 4-Step with restart sequence: from step 3A, it is Action Visualization...
-
Page 15: Setup Menu
Then release the SEL” pushbutton seconds, then turn ON again. If the error remains, a maintenance is required. Please contact the nearest technical service center or Lincoln Electric and report the error code displayed on the meter of the Front Panel. Error code table... - Page 16 Maintenance WARNING For any maintenance or repair operations it is recommended to contact the nearest technical service center or Lincoln Electric. Maintenance or repairs performed by unauthorized service centers or personnel will null and void the manufacturers warranty. The frequency of the maintenance operations may vary in accordance with the working environment.
- Page 17 List of parameters and Factory stored programs List of parameters and Factory Configuration program: Displayed parameter Displayed name value Selectable Value Range Factory Configuration Parameter (P99) Current Preflow 0.1s 0 - 5s (step 0.1s) selected value Lift TIG 2-step: 22A Not adjustable Current Lift TIG 4-step: 100%...
-
Page 18: Electromagnetic Compatibility (Emc)
Lincoln Electric. The Class A equipment is not intended for use in residential locations where the electrical power is provided by the public low-voltage supply system. -
Page 19: Technical Specifications
12/05 Part List reading instructions Do not use this part list for a machine if its code number is not listed. Contact the Lincoln Electric Service Department for any code number not listed. Use the illustration of assembly page and the table below to determine where the part is located for your particular code machine. -
Page 20: Electrical Schematic
Electrical Schematic Refer to the "Spare Part" manual supplied with the machine. Suggested Accessories W6100316R 300TPX / 400TPX Trigger Connector (5 pins). W6100317R 300TPX / 400TPX Remote Connector (6 pins). W8800072R 300TPX / 400TPX Male Quick Connect Gas Fitting. K10095-1-15M 300TPX / 400TPX Hand Amptrol.
Need help?
Do you have a question about the INVERTEC 300TPX and is the answer not in the manual?
Questions and answers
How do I take scratch mode off to start welding