Table of Contents
Advertisement
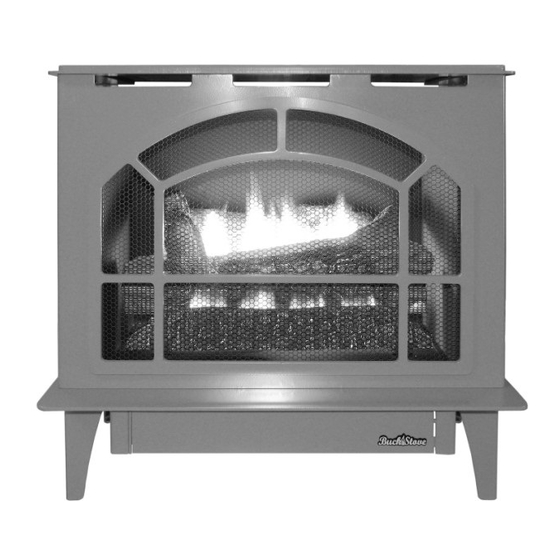
CVFB200
TOWNSEND II
WARNING:
If the information in this manual is not followed exactly, a fire or explosion may result causing
property damage, personal injury or loss of life.
Do not store or use gasoline or other flammable vapors and liquids in the vicinity of this or any other appliance.
WHAT TO DO IF YOU SMELL GAS
Do not try to light any appliance.
Do not touch any electrical switch; do not use any phone in your building.
Immediately call your gas supplier from a neighbor's phone. Follow gas supplier's instructions.
If you cannot reach your gas supplier, call fire department.
Installation and service must be performed by a qualified installer, service agency or the gas supplier.
"This appliance is intended for supplemental heating."
"This heater shall not be installed in a bedroom or bathroom."
WARNING:
Improper installation, adjustment, alteration, service or maintenance can cause injury or property
damage. Refer to this manual for correct installation and operational procedures. For assistance or additional
information consult a qualified installer, service agency or gas supplier.
WARNING:
This is an unvented gas-fired heater. It uses air (oxygen) from the room in which it is installed.
Provisions for adequate combustion and ventilation air must be provided. Refer to Air for Combustion and
Ventilation section on page 4 of this manual.
WARNING: If the information in this manual is not followed exactly, a fire or explosion may result causing
property damage, personal injury or loss of life.
This appliance may be installed in an aftermarket*, permanently located, manufactured (mobile) home,
where not prohibited by state or local codes.
This appliance is only for use with the type of gas indicated on the rating plate.
This appliance is not convertible for use with other gases.
* Aftermarket: Completion of sale, not for purpose of resale, from the manufacturer
INSTALLER:
Leave this manual with appliance.
CONSUMER:
Retain this manual for future reference.
MANUFACTURED BY NEW BUCK
CORPORATION
200 ETHAN ALLEN DRIVE, PO BOX 69
SPRUCE PINE, N.C. 28777
www.buckstove.com
VENT FREE STOVE SERIES
NATURAL OR LIQUID PROPANE GAS STOVE HEATER
OWNER'S OPERATION AND INSTALLATION MANUAL
ANS Z21.11.2b-2010
HEPPLEWHITE
WARNING:
Only New Buck Corporation
approved blower assembly, part number
MA CVF714, may be used with the
unit only.
C100BA
CVFB200
January 2013
Advertisement
Table of Contents
Troubleshooting

Related Manuals for BuckMaster CVFB200 TOWNSEND II

Summary of Contents for BuckMaster CVFB200 TOWNSEND II
- Page 1 Leave this manual with appliance. CONSUMER: Retain this manual for future reference. MANUFACTURED BY NEW BUCK WARNING: Only New Buck Corporation CORPORATION approved blower assembly, part number 200 ETHAN ALLEN DRIVE, PO BOX 69 MA CVF714, may be used with the CVFB200 unit only.
-
Page 3: Table Of Contents
TABLE OF CONTENTS SAFETY INFORMATION ........................1 IDENTIFICATION NUMBERS AND DESCRIPTIONS...............2 AIR FOR COMBUSTION AND VENTILATION ................. 4-6 UNPACKING STOVE ASSEMBLY ......................7 INSTALLATION OF OPTIONAL BLOWER (ONLY) FOR VENT FREE STOVE SERIES TOWNSEND II ............................8 INSTALLATION: CLEARANCES ............................9 CONNECTING GAS SUPPLY ......................10 PRESSURE TESTING...........................11 INSTALLATION / POSITIONING OF LOGS: VENT FREE STOVE SERIES TOWNSEND II ................ -
Page 4: Safety Information
VENT FREE STOVE SERIES SAFETY INFORMATION During initial operation, slight Due to high temperatures the smoking could occur due to WARNINGS: appliance should be located out of heater burning manufacturing traffic and away from furniture and IMPORTANT: Read this residues. draperies. -
Page 5: Identification Numbers And Descriptions
IDENTIFICATION NUMBERS AND DESCRIPTIONS FOR VENT FREE STOVE SERIES CVFB200 TOWNSEND II MODEL COLOR CVFB200-A ALMOND CVFB200-B BLACK CVFB200-G GREEN CVFB200-R TERRACOTTA CVFB200-PV VINTAGE COPPER TYPE OF GAS CVFB200(LP) LIQUID PROPANE CVFB200(NAT) NATURAL OPTIONAL BLOWER ASSEMBLY CVFB200 ONLY MA CVF714... -
Page 6: Product Features
VENT FREE UNITS. PRODUCT FEATURES AUTO OPERATION MANUAL NOTE: CVFB200 TOWNSEND II PICTURED ( TOWNSEND II ) This heater is clean burning. It requires no outside venting. There is no heat loss out a vent or up a chimney. Heat is generated by realistic, dancing yellow flames. - Page 7 AIR FOR PROVIDING ADEQUATE Unusually Tight Construction or COMBUSTION AND VENTILATION Unconfined Space VENTILATION FOR The following are excerpts from The National Fuel Gas Code, ANSI C100BA, CFVB200 VENT National Fuel Gas Code, NFPA 54/ Z223.1 defines a unusually tight ANSI Z223.1, Section 5.3, Air for construction as a space whose volume FREE STOVE SERIES...
-
Page 8: Air For Combustion And Ventilation
AIR FOR COMBUSTION AND VENTILATION Continued DETERMINING FRESH-AIR FLOW FOR HEATER LOCATION Determining if You Have A Unusually Tight Construction or Unconfined Space Use this work sheet to determine if you have a unusually tight construction or unconfined space. Space: Includes the room in which you will install heater plus any adjoining rooms with doorless passageways or ventilation grills between the rooms. - Page 9 AIR FOR COMBUSTION AND VENTILATION Continued 12" VENTILATION AIR VENTILATION FROM Option (2) INSIDE BUILDING Option (3) Ventilation Grills Into Adjoining Room Remove This fresh air would come from an Door into adjoining unconfined space. When Adjoining Option (1) Room ventilating to an adjoining unconfined Ventilation Grills Into...
-
Page 10: Unpacking Stove Assembly
UNPACKING STOVE ASSEMBLY FOR CVFB200, C100BA VENT FREE STOVE SERIES 1. Carefully remove corrugated box enclosing stove, leaving unit on pallet at this time. Remove box that contains logs, also remove Top Grate from stove and set aside. Top Grate will be placed on unit after being installed in desired location 2. -
Page 11: Townsend Ii
105€ temperature rating. WARNING: Only New Buck Corporation approved blower assembly, part number MA CVF714, may be used with Vent Free Stove Series CVFB200(LP) or CVFB200(NAT) Townsend II only. -
Page 12: Clearances
INSTALLATION OF VENT FREE STOVE SERIES CFVB200, C100BA NOTE: IMPORTANT: Maintain adequate clearances for You must maintain Place freestanding stove in desired accessibility for the purpose of minimum wall and ceiling clearances position in room. Be sure to maintain servicing and proper operation. during installation. -
Page 13: Connecting Gas Supply
CAUTION Use only new, black INSTALLATION iron or steel pipe. Internally- Continued tinned copper tubing may be used in certain areas. Check your local After positioning stove in desired position, connect gas supply and codes. Use pipe of 1/2 diameter "... -
Page 14: Pressure Testing
Check all joints of gas supply Pressure Testing Heater Gas INSTALLATION piping system. Apply mixture of Connections Continued liquid soap and water to gas joints. Bubbles forming show a Open equipment shutoff valve (See We recommend that you install a leak. -
Page 15: Installation / Positioning Of Logs: Vent Free Stove Series Townsend Ii
FOUR PHILLIPS SCREWS INSTALLATION OF LOGS FOR TOWNSEND II MODEL CVFB200(LP) ACCESS DOOR MODEL CVFB200(NAT) NOTE: FOR INSTALLATION OF C100BA HEPPLEWHITE LOGS SEE PAGE 14. Remove log access door on top of unit buy removing two (4) phillips FIGURE 11 - REMOVING ACCESS DOOR screws. - Page 16 POSITIONING OF LOGS FOR VENT FREE STOVE SERIES CVFB200(LP), CVFB200(NAT) TOWNSEND II “LOG #2 PLACEMENT” FIGURE 13 WARNING: POSITIONING LOGS IS VERY CRITICAL (SEE FIGURE 13). LOG PLACEMENT FOR LOG SET 1) Place rear log (flat faced) #1 on rear log support. The log has alignment notches on each corner. 2) Place ember strip (wrapped in cardboard box ) #2 on front log supports.
-
Page 17: Vent Free Stove Series Hepplewhite
I N S TA L L AT I O N OF LOGS FOR HEPPLEWHITE MODEL C100BA(LP) MODEL C100BA(NAT) Carefully insert logs though opening in top of unit, placing logs TOP GRATE on base as described on ( Page 15, figure 15). After placing logs on base, light heater making sure no logs are contacting flames, if so, then turn... - Page 18 POSITIONING OF LOGS FOR VENT FREE STOVE SERIES C100BA(LP), C100BA(NAT) HEPPLEWHITE “LOG #2 PLACEMENT” FIGURE 15 WARNING: POSITIONING LOGS IS VERY CRITICAL (SEE FIGURE 15). LOG PLACEMENT FOR LOG SET 1) Place rear log (flat faced) #1 on rear log support. The log has alignment notches on each corner. 2) Place ember strip (wrapped in cardboard box ) #2 on front log supports.
-
Page 19: Operating Heater
LIGHTING INSTRUCTIONS *If knob does not pop up when OPERATING HEATER released, stop and immediately call SIT-MILLIVOLT VALVE your service technician or gas supplier. STOP! Read Safety Information. FOR YOUR SAFETY * If the pilot will not stay lit after Make sure manual shutoff valve is several tries, turn the gas control knob READ BEFORE... -
Page 20: Lighting Instructions (Sit) Millivolt
OPERATING HEATER Continued WARNING: Improper installation, adjustment, alteration, service or PILOT FLAME PATTERN maintenance can cause property damage, personal injury or loss of (MILLIVOLT) life. Installation and service must be Figure 18 shows a correct pilot flame performed by a qualified installer, pattern. -
Page 21: Front Access To (Sit) Millivolt Valve
FRONT ACCESS TO (SIT) MILLIVOLT FACE PLATE CONTROL BRACKET VALVE When performing pressure checks or wiring accessories such as remote control or wall mounting thermostats it will be necessary to access the front of the valve body. (See Fig- ure 20). To access the front of the valve body, you must remove the face plate from the control bracket. -
Page 22: Inspecting / Cleaning
INSPECTING move it back to the correct position LOGS AND CLEANING after cleaning. If you remove logs for cleaning, 4. Opening the shutter as in step 3, MAINTENANCE refer to Installing Gas Logs. allows you to inspect the orifice. Townsend II (Figure 13, page WARNING: Turn off heater and... -
Page 23: Trouble Shooting
WARNING: Turn off heater and CAUTION: TROUBLESHOOTING Never use a wire, let cool before servicing. Only a needle, or similar object to clean qualified service person should ODS/pilot. This can damage ODS/ service and repair heater. pilot unit. NOTE: All troubleshooting items are listed in order of operation. -
Page 24: Installation Clearances
TROUBLESHOOTING Continued OBSERVED PROBLEM POSSIBLE CAUSE REMEDY Delayed ignition burner Manifold pressure is too low Contact local gas company Burner orifice clogged Clean burner (see Cleaning and Maintenance, page 19) or replace burner orifice Burner backfiring during combustion Burner orifice is clogged or Clean burner (see Cleaning and damaged Maintenance, page 19) or replace... -
Page 25: Troubleshooting
TROUBLESHOOTING Continued WARNING: If you smell gas Shut off gas supply. Do not try to light any appliance. Do not touch any electrical switch; do not use any phone in your building. Immediately call your gas supplier from a neighbor’s phone. Follow the gas supplier’s instructions. -
Page 26: Parts List
PARTS LIST FOR MODELS CVFB200(LP), CVFB200(NAT) AND C100BA(LP), C100BA(NAT) MILLIVOLT (SIT) KEY # PART # DESCRIPTION # PE 8204C PILOT ASSEMBLY NATURAL GAS PE 8404C PILOT ASSEMBLY L.P. PO 10-2121-12 FLEXIBLE SUPPLY LINE PE 820638 (SIT) MILLIVOLT VALVE NATURAL GAS PE 820636 (SIT) MILLIVOLT VALVE L.P. -
Page 27: Replacement Parts
REPLACEMENT PARTS OPTIONAL BLOWER ASSEMBLY (MA CVF714) FOR USE WITH CVFB200 PART NO. DESCRIPTION QTY. PH 101612TEK #10-16 x 1/2" Self tapping Screws ( For Mounting Blower Assembly To Fire Box ) PE A2-40-01WB Motor PE 400132 Therm o disc PE 400240 Power Cord PE 400320... -
Page 28: Accessories
ACCESSORIES SERVICE HINTS REPLACEMENT Purchase these heater accessories from PARTS your local dealer. If they can not sup- When Gas Pressure Is Too Low ply these accessories, call our Parts NOTE: Use only original replacement Department at 1-828-765-6144 for re- Pilot will not stay lit parts. -
Page 29: Wiring Diagram
VENT FREE STOVE SERIES CVFB200(LP), CVFB200(NAT) TOWNSEND II WIRING DIAGRAM AND REMOTE OR WALL THERMOSTAT INSTALLATION REV. DATE DISCRIPTION APRVD DATE M.B. NEW RELEASE FACTORY WIRING AUTO/OFF/MANUAL SWITCH ON BACK OF UNIT THERMOPILE-GENERATOR RED WIRE FOR OPTIONAL REMOTE CONTROL OR WALL THERMOSTAT CONNECT THE TWO (2) WIRES FROM PILOT ASSEMBLY REMOTE RECEIVER OR WALL... -
Page 30: Vent Free Stove Series C100Ba
VENT FREE STOVE SERIES C100BA(LP), C100BA(NAT) HEPPLEWHITE WIRING DIAGRAM AND REMOTE OR WALL THERMOSTAT INSTALLATION REV. DATE DISCRIPTION APRVD DATE M.B. NEW RELEASE FACTORY WIRING AUTO/OFF/MANUAL THERMOPILE-GENERATOR SWITCH UNDERNEATH FRONT OF UNIT RED WIRE FOR OPTIONAL REMOTE CONTROL OR WALL THERMOSTAT CONNECT THE TWO (2) WIRES FROM REMOTE RECEIVER OR WALL PILOT ASSEMBLY... -
Page 31: Warranty
WARRANTY INFORMATION New Buck Corporation warrants this product to be free from defects in materials and components for two (2) year from the date of first purchase provided that the product has been properly installed, operated and maintained in accordance with all applicable instructions. -
Page 33: Owner Registration
OWNER REGISTRATION The attached owner registration card must be completed in its entirety and mailed within 30 days from date of installation in order for warranty coverage to begin to: New Buck Corporation P.O. Box 69 Spruce Pine, NC 28777...