Honda HS724 Owner's Manual
Hide thumbs
Also See for HS724:
- Owner's manual (81 pages) ,
- Dealer instructions (18 pages) ,
- Owner's manual (80 pages)

Related Manuals for Honda HS724


Summary of Contents for Honda HS724
- Page 1 SNOWBLOWER HS724 Click to Save As o2014 Honda Motor Co., Ltd. -All Rights Reserved...
- Page 2 The information and specifications included in this publication were in effect at the time of approval for printing. Honda Motor Co., Ltd. reserves the right, however, to discontinue or change specifications or design at any time without notice and without incurring any obligation...
- Page 3 When your snowblower needs scheduled maintenance, keep in mind that your Honda servicing dealer is specially trained in servicing Honda snowblowers. Your Honda servicing dealer is dedicated to your satisfaction and will be pleased to answer your questions and concerns.
- Page 4 INTRODUCTION A FEW WORDS ABOUT SAFETY Your safety and the safety of others are very important. And using this snowblower safely is an important responsibility. To help you make informed decisions about safety, we have provided operating procedures and other information on labels and in this manual.
-
Page 5: Table Of Contents
CONTENTS SNOWBLOWER SAFETY .............. 5 IMPORTANT SAFETY INFORMATION ......... 5 SAFETY LABEL LOCATIONS............8 CONTROLS & FEATURES ............. 9 COMPONENT & CONTROL LOCATIONS........9 CONTROLS ................11 Fuel Valve Lever ..............11 Engine Switch..............11 Chute Crank ............... 12 Starter Grip ................ 12 Throttle Lever .............. - Page 6 Carburetor Modification for High Altitude Operation....65 Emission Control System Information........66 Air Index ................68 Specifications ..............69 CONSUMER INFORMATION............70 Dealer Locator Information ........... 70 Honda Publications .............. 70 Customer Service Information ..........71 QUICK REFERENCE INFORMATION......Inside back cover...
-
Page 7: Snowblower Safety
SNOWBLOWER SAFETY IMPORTANT SAFETY INFORMATION Honda snowblowers are designed to clear snow from driveways and walkways. Other uses can result in injury to the operator or damage to the snowblower and other property. Most injuries or property damage with snowblowers can be prevented if you follow all instructions in this manual and on the snowblower.... - Page 8 SNOWBLOWER SAFETY Keep Shields in Place Guards and shields are designed to protect you from being hit by thrown objects and to keep you from touching hot engine parts and moving components. For your safety and the safety of others, keep all shields in place when the engine is running.
- Page 9 SNOWBLOWER SAFETY Operating Conditions Do not use the snowblower when visibility is poor. Under conditions of poor visibility, there is a greater risk of striking an obstacle or causing injury. Adjust the snow discharge chute to avoid hitting bystanders or vehicles.
-
Page 10: Safety Label Locations
SNOWBLOWER SAFETY SAFETY LABEL LOCATIONS These labels warn you of potential hazards that can cause serious injury. Read them carefully. If a label comes off or becomes hard to read, contact your Honda snowblower dealer for a replacement. WA type... -
Page 11: Controls & Features
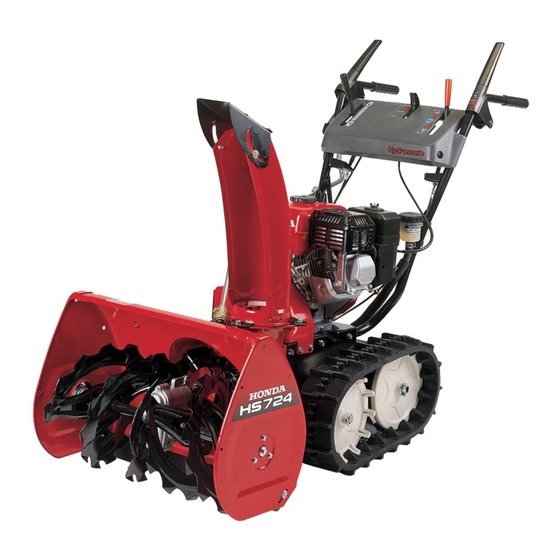
CONTROLS & FEATURES COMPONENT & CONTROL LOCATIONS Use the two illustrations on these pages to locate and identify the most frequently used controls. Track type DISCHARGE DEFLECTOR LEVER AUGER CLUTCH LEVER SHIFT LEVER FUEL TANK CAP DRIVE CLUTCH LEVER DISCHARGE DEFLECTOR SNOW DISCHARGE CHUTE THROTTLE LEVER STARTER GRIP... - Page 12 CONTROLS & FEATURES Wheel type DISCHARGE DEFLECTOR LEVER AUGER CLUTCH LEVER SHIFT LEVER FUEL TANK CAP DRIVE CLUTCH LEVER DISCHARGE DEFLECTOR SNOW DISCHARGE CHUTE THROTTLE LEVER STARTER GRIP MUFFLER AUGER WHEEL SKID SHOE (side-mount type) TRANSMISSION FLUID RESERVOIR ENGINE SWITCH SNOW CLEARING BAR ENGINE OIL FILLER CAP...
-
Page 13: Controls
CONTROLS & FEATURES CONTROLS Fuel Valve Lever FUEL VALVE LEVER The fuel valve opens and closes the fuel line leading from the fuel tank to the carburetor. Make sure that the fuel valve is positioned exactly at either the ON or OFF position. -
Page 14: Chute Crank
CONTROLS & FEATURES Chute Crank Use the chute crank to turn the snow discharge chute right or left. To throw snow to the left To throw snow to the right CHUTE CRANK Starter Grip Pull this grip to start the engine. See page 23 for starting procedures. -
Page 15: Throttle Lever
CONTROLS & FEATURES Throttle Lever The throttle lever controls engine speed from SLOW to FAST, it will stay in any designated position. Set the lever to CHOKE when the engine is cold. THROTTLE LEVER SLOW FAST CHOKE Shift Lever The shift lever selects F (FORWARD), N (NEUTRAL), or R (REVERSE). The shift lever also controls the transmission drive ratio;... -
Page 16: Discharge Deflector Lever
CONTROLS & FEATURES Discharge Deflector Lever The discharge deflector lever controls the snow discharge angle. HIGH AND FAR HIGH AND FAR LOW AND NEAR LOW AND NEAR DISCHARGE DEFLECTOR DISCHARGE DEFLECTOR LEVER Foot Pedal (track type only) Use the pedal for adjusting the height and angle of the machine in relation to the tracks. -
Page 17: Drive Clutch Lever And Auger Clutch Lever
CONTROLS & FEATURES Drive Clutch Lever and Auger Clutch Lever Use these controls to engage the snow blowing mechanism and/or the drive mechanism. AUGER CLUTCH LEVER DRIVE CLUTCH LEVER Squeeze to engage the Squeeze to engage the snow blowing mechanism. drive transmission. -
Page 18: Transmission Release Lever
CONTROLS & FEATURES Transmission Release Lever The transmission release lever has two positions, RELEASED and ENGAGED. Set the lever to the ENGAGED position for self-propelled operation. Set it to the RELEASED position when pushing the snowblower with the engine stopped. Operating the transmission release lever while the engine is running can damage the transmission. -
Page 19: Features
CONTROLS & FEATURES FEATURES Snow Clearing Bar If the snow discharge chute or snow blowing mechanism becomes restricted, stop the engine, and make sure all rotating parts have come to a complete stop. Remove the spark plug cap from the spark plug. Use the snow clearing bar to remove the obstruction. -
Page 20: Before Operation
BEFORE OPERATION ARE YOU READY TO GET STARTED? Your safety is your responsibility. A little time spent in preparation will significantly reduce the risk of injury. Knowledge Read and understand this manual. Know what the controls do and how to operate them. Familiarize yourself with the snowblower and its operation before you begin using it. -
Page 21: Check The General Condition Of The Snowblower
• Check the fuel level (see page 36). Starting with a full tank will help to eliminate or reduce operating interruptions for refueling. • Check the hydrostatic fluid level in the reservoir (see page 41). Use only Honda Hydrostatic Fluid. -
Page 22: Check Your Work Area
BEFORE OPERATION CHECK YOUR WORK AREA For your safety and the safety of others, always inspect the area before operating the snowblower. Objects Anything that can be picked up by the augers and thrown is a potential hazard to you and others. Thoroughly inspect the area where the equipment is to be used and remove all doormats, sleds, boards, wires, stones, and nails from the work area. -
Page 23: Operation
OPERATION SNOWBLOWING PRECAUTIONS Before operating the snowblower for the first time, please review both the SNOWBLOWER SAFETY chapter (see page 5) and the BEFORE OPERATION chapter (see page 18). Even if you have operated other snowblowers, take time to become familiar with how this snowblower works, and practice in a safe area until you build up your skills. - Page 24 OPERATION 2.Set the transmission release ENGAGED lever in the ENGAGED position (see page 16). TRANSMISSION RELEASE LEVER 3.Turn the fuel valve to the ON FUEL VALVE position. Be sure that the drain knob is tightened securely. DRAIN KNOB 4.In cold weather and when the THROTTLE LEVER engine is cold, follow the procedures below.
- Page 25 OPERATION 5.Start the engine. a. Turn the engine switch to the ON position. b. Pull the starter grip lightly until you feel resistance, then pull briskly in the direction of the arrow as shown. c. Return the starter grip gently to the engine. STARTER GRIP Direction to pull •...
-
Page 26: Stopping The Engine
OPERATION 7.While warming the engine up, also warm the transmission as follows: a. Check that the shift lever is in the ‘‘N’’ (Neutral) position. N (Neutral) SHIFT LEVER b. Squeeze the drive clutch lever DRIVE CLUTCH LEVER for about 30 seconds to warm up the transmission fluid. - Page 27 OPERATION 1.Release the auger and drive clutch levers. The drive and snow blowing mechanism will stop operation. AUGER CLUTCH LEVER DRIVE CLUTCH LEVER 2.Move the shift lever to ‘‘N’’ (Neutral) position. N (Neutral) SHIFT LEVER 3.Turn the throttle lever to the SLOW position. THROTTLE LEVER SLOW...
- Page 28 OPERATION 4.Turn the engine switch to the OFF position. ENGINE SWITCH 5.Turn the fuel valve to the OFF position. FUEL VALVE...
-
Page 29: Clearing Snow
OPERATION CLEARING SNOW 1.Move the throttle lever to the FAST position for normal operation. 2.Release the auger clutch lever, R (Reverse) N (Neutral) and move the shift lever to select the desired drive speed. FAST Low speed is recommended for F (Forward) removing deep or hard-packed SHIFT LEVER... - Page 30 OPERATION 6.Squeeze the drive clutch lever to self-propel the snowblower. If the transmission release lever (see page 22) is in the ENGAGED position, and the shift lever (see page 27) is in the FORWARD (F) position, the hydrostatic drive will propel the snowblower forward when you squeeze the drive clutch lever.
- Page 31 OPERATION 7.Release the clutch levers to stop clearing or moving. AUGER CLUTCH LEVER DRIVE CLUTCH LEVER...
-
Page 32: Snow-Clearing Tips
• Clear a narrower swath. Make several passes with the auger overlapping the cleared areas. • If the snow is deeper than the height of the auger, remove it in several steps, as shown below, or install the drift-breaker kit (optional part) that is available from authorized Honda snowblower dealers. -
Page 33: Removing Obstructions
OPERATION REMOVING OBSTRUCTIONS If the snow discharge chute or snow blowing mechanism becomes restricted, review snow clearing information (see page 30) to reduce the possibility of reoccurring obstructions. 1.Before removing the obstruction, SNOW CLEARING BAR be sure to stop the engine, and make sure that all rotating parts have come to a complete stop. -
Page 34: Servicing Your Snowblower
Always follow the inspection and maintenance recommendations and schedules in this owner’s manual. To ensure the best quality and reliability, use only new, Honda Genuine parts or their equivalents for repair or replacement. Maintenance, replacement, or repair of the emission control devices and systems may be performed by any engine repair establishment or individual, using parts that are ‘‘certified’’... -
Page 35: Maintenance Safety
SERVICING YOUR SNOWBLOWER MAINTENANCE SAFETY Some of the most important safety precautions follow. However, we cannot warn you of every conceivable hazard that can arise in performing maintenance. Only you can decide whether or not you should perform a given task. Failure to properly follow maintenance instructions and precautions can cause you to be... -
Page 36: Tool Kit
SERVICING YOUR SNOWBLOWER TOOL KIT The tools necessary for performing some of the periodic maintenance, simple adjustments and repairs are supplied in the tool kit. Spare lock bolts and nuts are also located in the tool kit. SPARK PLUG WRENCH BLOWER LOCK BOLT WRENCH HANDLE 6 mm SELF LOCK NUT (4) -
Page 37: Maintenance Schedule
(1) These parts may required more frequent inspection and replacement under heavy use. (2) These items should be serviced by your servicing dealer, unless you have the proper tools and are mechanically proficient. Refer to Honda shop manual for service procedures. See ‘‘Honda Publications’’ on page 70 for ordering information. -
Page 38: Refueling
SERVICING YOUR SNOWBLOWER REFUELING With the engine stopped, remove the fuel tank cap and check the fuel level. Refill the tank if the fuel level is low. Do not fill above the base of the filler neck. Gasoline is highly flammable and explosive. -
Page 39: Fuel Recommendations
SERVICING YOUR SNOWBLOWER Spilled fuel is not only a fire hazard, it causes environmental damage. Wipe up spills immediately. Fuel can damage paint and plastic. Be careful not to spill fuel when filling your fuel tank. Damage caused by spilled fuel is not covered under warranty. -
Page 40: Servicing Your Snowblower (Continued)
SERVICING YOUR SNOWBLOWER ENGINE OIL LEVEL CHECK Check the engine oil level with the engine stopped and in a level position. 1.Remove the oil filler cap/dipstick and wipe it clean. 2.Insert and remove the dipstick without screwing it into the filler neck. Check the oil level shown on the dipstick. -
Page 41: Engine Oil Change
SERVICING YOUR SNOWBLOWER ENGINE OIL CHANGE Drain the oil while the engine is still warm to assure rapid and complete draining. 1.Place the snowblower on a level surface. If your snowblower is the track type, use the foot pedal (see page 14) to raise the engine. 2.Place a suitable container below the engine to catch the used oil, then remove the oil filler cap/dipstick and the drain plug. -
Page 42: Engine Oil Recommendations
4-stroke automotive detergent oil. SAE 5W-30 is recommended for general use. The SAE oil viscosity and service classification are on the API label on the oil container. Honda recommends that you use API SERVICE category SJ or later (or equivalent) oil. AMBIENT TEMPERATURE... -
Page 43: Hydrostatic Transmission Fluid
SERVICING YOUR SNOWBLOWER HYDROSTATIC TRANSMISSION FLUID Check the hydrostatic fluid level in the reservoir. Hydrostatic fluid expands and contracts with changes in temperature. The UPPER and LOWER limit marks on the reservoir are calibrated for room temperature fluid. It is normal for the fluid level to rise above the UPPER level mark when snowblower operation warms the transmission. - Page 44 1.Unscrew the reservoir cap and remove the seal. Be careful to prevent dirt, water, or snow from entering the reservoir. 2.Add Honda Hydrostatic Fluid to bring the fluid level to the UPPER limit mark at room temperature, or to the appropriate level shown in the temperature chart below.
-
Page 45: Spark Plug Service
SERVICING YOUR SNOWBLOWER SPARK PLUG SERVICE Recommended spark plug: BPR5ES (NGK) W16EPR-U (DENSO) Use only the recommended spark plugs or equivalent. Spark plugs which have an improper heat range may cause engine damage. To ensure proper engine operation, the spark plug must be properly gapped and free of deposits. - Page 46 SERVICING YOUR SNOWBLOWER 5.Measure the plug gap with a SIDE ELECTRODE wire-type feeler gauge. Correct as necessary by carefully bending 0.028–0.031 in (0.7–0.8 mm) the side electrode. WASHER The gap should be: 0.028–0.031 in (0.7–0.8 mm) INSULATOR 6.Make sure that the spark plug sealing washer is in good condition, and thread the spark plug in by hand to prevent ...
-
Page 47: Track Adjustment
SERVICING YOUR SNOWBLOWER TRACK ADJUSTMENT Make sure the tracks are clean and dry before adjustment. The tracks cannot be correctly adjusted if clogged with snow or debris, or coated with ice. With the snowblower resting on its tracks, check track deflection by pressing down midway between the wheels with a force of 33 lbf ... -
Page 48: Tire Inspection
If any of the lock bolts are broken, replace them with the ones furnished with the snowblower. Additional lock bolts and nuts are available from authorized Honda snowblower dealers. Lock bolts are designed to break under force that would otherwise damage auger and blower parts. -
Page 49: Lock Bolt Replacement Procedure
SERVICING YOUR SNOWBLOWER LOCK BOLT REPLACEMENT PROCEDURE 1.Place the snowblower on a firm, level surface. 2.Turn the engine switch OFF, and remove the cap from the spark plug. 3.Clean the auger and blower of snow, ice, or any other foreign particles. -
Page 50: Skid Shoes And Scraper
SERVICING YOUR SNOWBLOWER SKID SHOES AND SCRAPER Turn the engine switch to the OFF position, and disconnect the spark plug cap, so the engine cannot be accidentally started while you are near the auger. Inspection <Rear-mount type> 1.Raise the auger housing off the ground. - Page 51 SERVICING YOUR SNOWBLOWER Adjustment 1.Place the snowblower on a level surface. (For track-type snowblowers, step on the foot TO LOWER pedal, and set the auger in the middle position.) 2.Loosen the skid shoe nuts and bolts, and adjust the skid shoes to RAISE obtain the auger ground clearance SCRAPER...
-
Page 52: Storage
STORAGE STORAGE PREPARATION Proper storage preparation is essential for keeping your snowblower trouble-free and looking good. The following steps will help to keep rust and corrosion from impairing your snowblower’s function and appearance, and will make the engine easier to start when you use the snowblower again. -
Page 53: Fuel
STORAGE Fuel Depending on the region where you operate your equipment, fuel formulations may deteriorate and oxidize rapidly. Fuel deterioration and oxidation can occur in as little as 30 days and may cause damage to the carburetor and/or fuel system. Please check with your servicing dealer for local storage recommendations. - Page 54 STORAGE Adding a Fuel Stabilizer to Extend Fuel Storage Life When adding a fuel stabilizer, fill the fuel tank with fresh gasoline. If only partially filled, air in the tank will promote fuel deterioration during storage. If you keep a container of gasoline for refueling, be sure that it contains only fresh gasoline.
- Page 55 STORAGE Draining the Fuel Tank and Carburetor 1.Place an approved gasoline container below the carburetor, and use a funnel to avoid spilling fuel. 2.Loosen the carburetor drain knob, DRAIN KNOB then move the fuel valve lever to the ON position. Drain the carburetor until the fuel tank is empty.
-
Page 56: Engine Oil
STORAGE Engine Oil 1.Change the engine oil (see page 39). 2.Remove the spark plug (see page 43). 3.Pour a teaspoon (5 cc) of clean engine oil into the cylinder. 4.Pull the starter rope slowly several times to distribute the oil. 5.Reinstall the spark plug. -
Page 57: Storage Precautions
STORAGE STORAGE PRECAUTIONS If your snowblower will be stored with gasoline in the fuel tank and carburetor, it is important to reduce the hazard of gasoline vapor ignition. Select a well-ventilated storage area away from any appliance that operates with a flame, such as a furnace, water heater, or clothes dryer. -
Page 58: Transporting
2.Use a loading ramp that is strong enough to support the combined weight of the snowblower and the operator: Weight of snowblower: (Operating weight) Models HS724 Types 198 lbs (90 kg) 209 lbs (95 kg) 3.The loading ramp must be long enough so ... -
Page 59: Loading
TRANSPORTING LOADING 1.Track type: Step on the foot pedal, and raise the auger to the HIGH position (see page 14). 2.Start the engine (see page 21) and maneuver the snowblower into line with the loading ramp. 3.Track type: Run the snowblower slowly up the loading ramp. Wheel type: Push down the handles to raise the auger and run the snowblower up the loading ramp. - Page 60 TRANSPORTING Tie the snowblower down with rope or straps, and block the treads. Keep the tie-down rope or straps away from controls and cables. Do not tie with rope or straps stronger than necessary to prevent snowblower parts from breaking. Tie-down Points Front Rear...
-
Page 61: Taking Care Of Unexpected Problems
TAKING CARE OF UNEXPECTED PROBLEMS ENGINE PROBLEMS Starter operates, but engine will not start Possible cause Correction Throttle not in proper Throttle must be in FAST position. position, choke OFF for a hot start, choke ON for a cold start (see page 22). - Page 62 TAKING CARE OF UNEXPECTED PROBLEMS Engine has low power Possible cause Correction Fast ground speed when Blow snow at slower ground blowing wet, deep snow puts speed. excessive load on engine. Wet, deep cuts place Reduce snowblowing swath. excessive load on engine. Discharge chute restricted.
-
Page 63: Drive Problems
42). Shift lever is in ‘‘N’’ (neutral). Move shift lever to forward or reverse (see page 27). Drive clutch lever mechanism See servicing Honda or cable not functioning snowblower dealer. properly. Drive belt worn, broken or not See servicing Honda... -
Page 64: Snowblower Problems
Clear discharge chute of obstructions (see page 17). Foreign object stopping Remove foreign object. auger from rotating. Belt worn, not on pulleys or See servicing Honda not properly installed. snowblower dealer. Snow not discharging properly Possible cause Correction Auger spinning too slowly. - Page 65 TAKING CARE OF UNEXPECTED PROBLEMS Snow not discharging properly (cont.) Possible cause Correction Snowblower moving too fast Use shift lever to reduce ground for snow conditions. speed (see page 27). Engine stalls when auger clutch lever is set to On Possible cause Correction Engine running too slow.
-
Page 66: Technical Information
TECHNICAL INFORMATION Serial Number Locations Record the engine and frame serial numbers in the spaces below. You will need these serial numbers when ordering parts, and when making technical or warranty inquiries (see page 71). FRAME SERIAL NUMBER ENGINE SERIAL NUMBER Engine serial number: Frame serial number: Date of purchase:... -
Page 67: Carburetor Modification For High Altitude Operation
TECHNICAL INFORMATION Carburetor Modification for High Altitude Operation At high altitude, the standard carburetor air-fuel mixture will be too rich. Performance will decrease, and fuel consumption will increase. A very rich mixture will also foul the spark plug and cause hard starting. Operation at an altitude that differs from that at which this engine was certified, for extended periods of time, may increase emissions. -
Page 68: Emission Control System Information
Carbon monoxide does not react in the same way, but it is toxic. Honda utilizes appropriate air/fuel ratios and other emissions control systems to reduce the emissions of carbon monoxide, oxides of nitrogen and hydrocarbons. - Page 69 • Black exhaust smoke or high fuel consumption. Replacement parts The emission control systems on your new Honda engine were designed, built, and certified to conform with EPA and California emission regulations. We recommend the use of Honda Genuine parts whenever you have maintenance done.
-
Page 70: Air Index
TECHNICAL INFORMATION Air Index An Air Index Information hang tag/label is applied to engines certified to an emission durability time period in accordance with the requirements of the California Air Resources Board. The bar graph is intended to provide you, our customer, the ability to compare the emissions performance of available engines. -
Page 71: Specifications
TECHNICAL INFORMATION Specifications Frame Model HS724 Type Items Discription code SZBE Overall length 53.5 in (1,360 mm) 55.9 in (1,420 mm) Overall width 24.4 in (620 mm) Overall height 38.2 in (970 mm) 40.9 in (1,040 mm) Dry mass [weight]... -
Page 72: Consumer Information
Honda Publications Shop Manual This manual covers complete maintenance and overhaul procedures. It is intended to be used by a skilled technician. Available through your Honda dealer or through Helm Inc. at 1 (888) 292-5395 or visit http://powerequipment.honda.com/support/shop-manuals Parts Catalog This manual provides complete, illustrated parts lists. -
Page 73: Customer Service Information
CONSUMER INFORMATION Customer Service Information Honda Power Equipment dealership personnel are highly trained professionals. They should be able to answer any question you may have. If you encounter a problem that your dealer does not solve to your satisfaction, please discuss it with the dealership’s management. - Page 74 MEMO...
-
Page 75: Quick Reference Information
QUICK REFERENCE INFORMATION Fuel Type Unleaded gasoline with an ethanol content of no more than 10% and a pump octane rating of 86 or higher Type SAE 5W-30 API SJ or later for Engine Oil general use Maximum oil capacity: 0.6 US qt/20 oz (0.6 L) Spark Plug Type... - Page 76 31V04602 700.2014.06 00X31-V04-6020 Printed in Japan...
Need help?
Do you have a question about the HS724 and is the answer not in the manual?
Questions and answers