
Related Manuals for Proview HV-147


Summary of Contents for Proview HV-147
- Page 1 USER GUIDE LCD TV Component Video Inputs Multiple I/O Support Digital Noise Reduction Progressive Scan Display Excellent Audio Performance with BBE HV-147...
- Page 3 FEDERAL COMMUNICATIONS COMMISSION(F.C.C) STATEMENT This equipment has been tested and found to comply with the limits of a class B digital device. Pursuant to Part 15 of the FCC Rules. These limits are designed to provide reasonable protection against harmful interference in a residential installation.
- Page 4 IMPORTANT SAFETY INSTRUCTIONS WARNING To reduce the risk of fire or electric shock, do not expose this equipment to rain or moisture. CAUTION RISK OF ELECTRIC SHOCK DO NOT OPEN CAUTION: TO REDUCE THE RISK OF ELECTRIC SHOCK, DO NOT REMOVE COVER (OR BACK). NO USER-SERVICEABLE PARTS INSIDE.
- Page 5 IMPORTANT SAFETY INSTRUCTIONS To prevent any injuries, the following safety precautions should be observed in the installation, use, servicing and maintenance of this equipment. Before operating this equipment, please read this manual completely, and keep it nearby for future reference. Do not place the equipment on any uneven or unstable carts, stands, tables, shelves etc..
- Page 6 IMPORTANT SAFETY INSTRUCTIONS Do not attempt to service the equipment yourself. Opening and removing the covers may expose you to dangerous voltage or any other hazards and may terminate your warranty. Refer service from qualified personnel. Do not place or drop any other objects on top. Do not insert anything into the ventilation holes of your equipment.
- Page 7 IMPORTANT SAFETY INSTRUCTIONS EXAMPLE OF OUTDOOR ANTENNA GROUNDING If an outdoor antenna is connected, follow the precautions below: An outdoor antenna should not be located anywhere that can be in contact of overhead power lines, or any other electric light or power circuits.
- Page 8 ANTENNA CONNECTION Cable TV (CATV) Connection NOTE TO CATV SYSTEM INSTALLER This reminder is provided to call the CATV system installer s attention to Article 820-40 of the National Electrical Code (NEC) that provides guidelines for proper grounding and, in particular, specifies that the cable ground shall be connected to the grounding system of the building accurately, or as close to the point of cable entry as possible.
- Page 9 ANTENNA CONNECTION ANTENNAS The antenna requirements for good color TV reception are more important than those of a black & white TV reception. For this reason, a good quality outdoor antenna is strongly recommended. The following is a brief explanation of the type of connection that is provided with the various antenna systems.
-
Page 10: Table Of Contents
CONTENT PREPARATION Features .......................9 Package Contents ....................10 Your LCD TV .....................11 Front View .....................11 Rea View 1 .....................12 Rear View 2 .....................13 Remote Control ....................14 Using your LCD TV....................16 INSTALLATION Connecting a TV Cable or an Antenna ...............17 Connecting a VCR....................18 Connecting a DVD Player ..................19 Connecting a TV Box and Satellite Receiver.............20 Connecting a Video Camera ................21... -
Page 11: Preparation
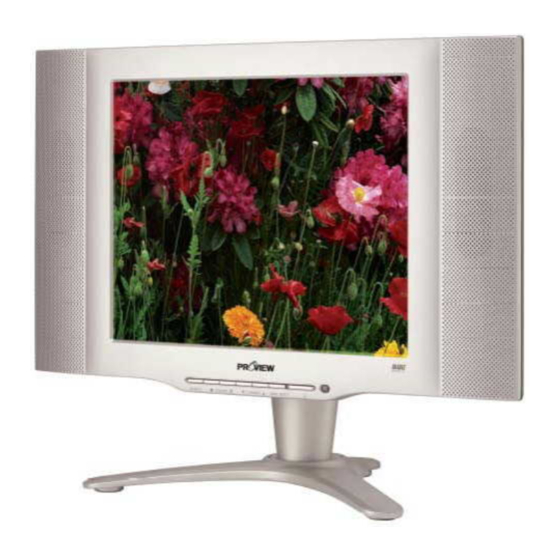
PREPARATION Congratulations on the purchase of your LCD TV. Features Various Audio/Video terminals for external equipment connection 1 Composite A/V terminal 1 S-VIDEO terminal 1 set of COMPONENT Video input terminals 1 VGA connector 2 sets of Audio input terminals 1 Line output (Ear phone) Component Video Inputs Offer the best video quality for DVD (480i)connection. -
Page 12: Package Contents
Package Contents Once you open the box, make sure all of the following contents are included. If you are missing any items, please return this product to the original place of purchase. LCD TV Remote control/ Audio Cable S-Video Cable AAA batteries A/V Cable D-SUB Cable... -
Page 13: Your Lcd Tv
Your LCD TV Front View SOURCE VOLUME CHANNEL MENU/SELECT ITEM DESCRIPTION Infrared Receiver (IR) POWER Turns the LCD TV on and off . The LED light indicates when the LCD TV is activated (green light indicates on and amber indicates off). Press to display the OSD (on screen display), press again MENU/SELECT to turn the OSD off. -
Page 14: Rea View 1
Your LCD TV Rear View_1 LINE OUT AUDIO IN DC IN ITEM DESCRIPTION Connects the ear phone output jack of the AV equipment. LINE IN Connects the audio input jack of the satellite receiver or AUDIO IN other AV equipment with D-Sub connector. Connects the satellite receiver or other AV equipment with D-Sub connector. -
Page 15: Rear View 2
Your LCD TV Rear View_2 LINE OUT AUDIO IN DC IN ITEM DESCRIPTION Connects to the S-VIDEO output jacks and Audio output S-VIDEO jacks on your video equipment. Connects to the composite A/V output jacks on VIDEO your video equipment. Connects to the audio or video equipment with left and right audio output jacks of the Video or S-Vide or AUDIO IN... -
Page 16: Remote Control
Remote Control POWER Turns your LCD TV on and off. TV/AV/S-VIDEO/VGA/YUV Selects the video equipment connected to the video input of your LCD TV: TV/AV/S-VIDEO/VGA/YCbCr MUTE Mutes and restores your LCD TV sound. AUTO SCAN Automatically detect and store all active channels in your area. RESET Restores the factory settings. - Page 17 Remote Control Installing the batteries in your remote control Slide the back cover to open the battery compartment of the remote control. Insert two AAA size batteries. Make sure to match the (+) and (-) ends of the batteries with the (+) and (-) ends indicated in the battery compartment.
-
Page 18: Using Your Lcd Tv
Using your LCD TV IMPORTANT SAFETY INSTRUCTIONS You may adjust the angle of the LCD TV about 25 degrees. Always turn the LCD TV off when the LCD TV is not in use for a long period of time. The Power button is only used for switching the LCD TV on and off, it does not disconnect the device from the main voltage. -
Page 19: Installation
INSTALLATION Refer to the owner s manual of the external equipments to be connected. When connecting an external equipment, do not connect any AC power cords to wall outlets until you have completed all connections. Connecting a TV Cable or an Antenna Basic Connection: Connecting cable or an antenna. -
Page 20: Connecting A Vcr
Connecting a VCR Video Audio Audio Video/Audio Cord Method 1 : Use an Audio cable to connect the VCR s audio output jacks to your LCD TV. Use an S-Video cable to connect your LCD TV and VCR player. Connect the AC power cable to the DC adapter and connect the adapter to the power jack on the back of your LCD TV. -
Page 21: Connecting A Dvd Player
Connecting a DVD Player For best picture quality, if your equipment has component video output, use component cable instead of a standard video or S-video cable. Video Audio Audio Video/Audio Cord DVD PLAYER Method 1 : Use a component cable to connect the Y, Cb, and Cr jacks on the DVD player to your LCD TV. -
Page 22: Connecting A Tv Box And Satellite Receiver
Connecting a TV Box and Satellite Receiver LINE OUT D-SUB Cable Use a component cable to connect the Y/Cb/Cr jacks on the satellite receiver to your LCD TV. Use an Audio cable to connect the Satellite Receiver audio jacks to LCD TV. Use a D-SUB cable to connect the TV Cable Box D-SUB(VGA) connector to your LCD TV. -
Page 23: Connecting A Video Camera
Connecting a Video Camera Video Audio Audio Video/Audio Cord Method 1 : Use an Audio cable to connect the Video Camera s audio output jacks to your LCD TV. Use an S-Video cable to connect your LCD TV and video camera. Connect the AC power cable to the DC adapter and connect the adapter to the power jack on the back of your LCD TV. -
Page 24: Connecting A Subwoofer
Connecting an Ear Phone LINE OUT Audio Cable Connect the LCD TV s LINE output jack to the Ear phone. Connect the AC power cable to the DC adapter and connect the adapter to the power jack on the back of your LCD TV. Press the POWER button on the remote to turn on your LCD TV. -
Page 25: Using The Features
USING THE FEATURES Setting up the Channel List After you have finished connecting a TV cable or MENU antenna to your LCD TV, press the TV button VIDEO ADJUSTMENT PC DISPLAY on the remote control. TV SETTING C.C/V-CHIP AUDIO SETUP Press the MENU button on the remote control SETUP MENU to display the TV Menu, and use... -
Page 26: Watching Your Lcd Tv
Watching your LCD TV Press the POWER button to turn your LCD TV on. Press the TV button to enter TV mode. Press the CH button to change channels, or use the 0-9 buttons to choose a channel, then press the ENTER button. Press the JUMP button to alternate back and forth between two channels. -
Page 27: Using The Osd
Using the OSD To select the signal source, press the MENU button on the remote control. The main menu will appear on the screen. MENU VIDEO ADJUSTMENT PC DISPLAY TV SETTING C.C/V-CHIP AUDIO SETUP SETUP MENU RESET EXIT to highlight your main menu option, then press the OK button to enter your selected option. -
Page 28: Viewing The Osd Chart
Viewing the OSD Chart Allows you to make adjustments to your picture VIDEO ADJUSTMENT settings PC DISPLAY Allows you to adjust the RGB color. This function will enable if the signal source is VGA. Allows you to edit and label channels, auto scan. TV SETTING This function will enable if the signal source is TV. -
Page 29: Video Adjustment
VIDEO ADJUSTMENT If the signal source is TV/C-VIDEO/S-VIDEO/YCbCr, the OSD displays: VIDEO ADJUSTMENT CONTRAST BRIGHTNESS COLOR SHARPNESS NOISE REDUCE COLOR SYSTEM (AUTO) RETURN The VIDEO ADJUSTMENT includes the following options: Option Description Allows you to adjust the contrast of the picture. CONTRAST Allows you to adjust the brightness of the picture. -
Page 30: Pc Display
PC DISPLAY If the signal source is VGA, the OSD displays: PC DISPLAY CONTRAST BRIGHTNESS CLOCK PHASE H-POSITION V-POSITION COLOR AUTO CONFIGURE RETURN The PC DISPLAY includes the following options: Option Description Allows you to adjust the contrast of the picture. CONTRAST Allows you to adjust the brightness of the picture. -
Page 31: Tv Setting
TV SETTING If the signal source is TV, the OSD displays: TV SETTING SOURCE CABLE STD CH SEARCH CH MEMORY RETURN The TV SETTING includes the following options: Option Description SOURCE Allows you to choose the antenna or cable signal. AIR : If you are receiving TV channels with an antenna. -
Page 32: C.c/V-Chip
C.C/V-CHIP If the signal source is TV, the OSD displays: C.C /V-CHIP MODE CC/T OFF INPUT SECRET NO. - - - - RETURN The C.C/V-CHIP includes the following options: MODE (Close Caption Mode): Allows you to select from 4 closed caption modes: CC1~CC4 : Displays a printed version of the dialog or sound effects of program. - Page 33 TV Rating Age-Based Ratings Rating Description All children Directed to children age 7 and older General Audience Parents Guidance suggested Parents strongly cautioned Mature Audience only Press to select the rating you want and press the OK Button, press the OK button again to unlock.(B: blcked, U:Unblocked) Press the EXIT button to return...
-
Page 34: Audio Setup
AUDIO SETUP If the signal source is TV/C-VIDEO/YCbCr/S-VIDEO/VGA, the OSD displays: AUDIO SETUP BASS TREBLE BALANCE MUTE RETURN The AUDIO SETUP includes the following options: Option Description BASS Allows you to adjust the lower-pitched sounds. Allows you to adjust the higher-pitched sounds. TREBLE Allows you to adjust the balance of the speakers. -
Page 35: Setup Menu
SETUP MENU If the signal source is TV/C-VIDEO/YCbCr/S-VIDEO/VGA, the OSD displays: SETUP MENU ENGLISH LANGUAGE SLEEP TIMER H POSITION V POSITION OSD TIMEOUT RETURN The OSD SETUP includes the following options: Option Description LANGUAGE Allows you to select a language for all the on-screen menu. Allows you to set up a remaining time before the TV shuts SLEEP TIMER off automatically : Off/0~120 mins. - Page 36 Using the Features...
-
Page 37: Troubleshooting
TROUBLESHOOTING Before consulting service personnel, check the following chart for a possible cause of the trouble you are experiencing and for a solution. PROBLEM SOLUTION TV will not turn on Make sure the power cord is securely connected to the TV, DC adapter, and wall outlet. -
Page 38: Specifications
SPECIFICATION HV-147 Model Panel System 14 Inch LCD TV Display Resolution 640 pixels(horizontal) x 480 pixels (vertical) Television System NTSC/PAL-D/K Antenna Input 75 £[ unbalanced Inputs /Outputs Composite Video In S-Video In Component In D-SUB Audio In Ear Phone Speaker Out... - Page 39 Your Proview Plasma/LCD Display will be repaired or replaced in accordance with the terms of this warranty, at Proview's option, if it proves to be defective in material or workmanship under normal use, during the warranty period ( Warranty Period) listed below, effective from the date ( Date of Purchase) of original consumer purchase of the product.
Need help?
Do you have a question about the HV-147 and is the answer not in the manual?
Questions and answers