Table of Contents
Advertisement
Available languages
Available languages
Quick Links
Advertisement
Chapters
Table of Contents

Related Manuals for Nokia 6276


Summary of Contents for Nokia 6276
- Page 1 User Guide Manual del Usuario...
- Page 2 Nokia 6276 User Guide Nota: La traducción en español de este manual inicia en la Página 137.
- Page 3 Includes RSA BSAFE cryptographic or security protocol software from RSA Security. Java is a trademark of Sun Microsystems, Inc. The information contained in this user guide was written for the Nokia 6276 product. Nokia operates a policy of ongoing development. Nokia reserves the right to make changes to any of...
- Page 4 UNDER NO CIRCUMSTANCES SHALL NOKIA BE RESPONSIBLE FOR ANY LOSS OF DATA OR INCOME OR ANY SPECIAL, INCIDENTAL, AND CONSEQUENTIAL OR INDIRECT DAMAGES HOWSOEVER CAUSED. THE CONTENTS OF THIS DOCUMENT ARE PROVIDED "AS IS." EXCEPT AS REQUIRED BY APPLICABLE LAW, NO WARRANTIES OF ANY KIND, EITHER EXPRESS OR IMPLIED,...
-
Page 5: Table Of Contents
C o n t e n t s Contents For your safety ......................6 Welcome........................10 1. Phone at a glance ..................12 2. Set up your phone..................18 3. Text entry......................27 4. Messages ......................30 5. Log ........................50 6. - Page 6 C o n t e n t s 15. Enhancements ....................118 16. Battery information ..................120 Care and maintenance..................123 Additional safety information ................. 125 Index ........................132...
-
Page 7: For Your Safety
F o r y o u r s a f e t y For your safety Read these simple guidelines. Not following them may be dangerous or illegal. Read the complete user guide for further information. SWITCH ON SAFELY Do not switch the phone on when wireless phone use is prohibited or when it may cause interference or danger. - Page 8 F o r y o u r s a f e t y USE SENSIBLY Use only in the normal position as explained in the product documentation. Do not touch the antenna unnecessarily. QUALIFIED SERVICE Only qualified personnel may install or repair this product. ENHANCEMENTS AND BATTERIES Use only approved enhancements and batteries.
-
Page 9: Network Services
F o r y o u r s a f e t y ■ Network services To use the phone you must have service from a wireless service provider. Many of the features in this device depend on features in the wireless network to function. These network services may not be available on all networks or you may have to make specific arrangements with your service provider before you can utilize network services. -
Page 10: Shared Memory
F o r y o u r s a f e t y ■ Shared memory The following device features may share memory: contacts; text messages; photos, images, and tones in the gallery; calendar notes; games; and applications. Use of one or more of these features may reduce the memory available for the remaining features sharing memory. -
Page 11: Welcome
W e l c o m e Welcome Congratulations on your purchase of the Nokia mobile phone. Your phone provides many functions which are practical for daily use, such as a hands-free loudspeaker, camera, MP3 player, video recorder, and more. Your phone can also connect to a PC, laptop, or other device using a USB data cable, Bluetooth wireless technology, or infrared. -
Page 12: Accessibility Solutions
W e l c o m e Updates From time to time, Nokia updates this guide to reflect changes. The latest version may be available at www.nokia.com. An interactive tutorial for this product may be available at www.nokiahowto.com. Accessibility solutions Nokia is committed to making mobile phones easy to use for all individuals, including those with disabilities. -
Page 13: Phone At A Glance
P h o n e a t a g l a n c e 1. Phone at a glance ■ Keys and parts Front view Earpiece (1) Display (2) Scroll key (3) Right selection key (4) End and power key (5) Keypad (6) Pop-Port™... -
Page 14: Side Views
P h o n e a t a g l a n c e Side views Volume key (1) Camera flash and self- portrait mirror (2) Camera lens (3) Camera key (4) Loudspeaker (5) Headset connector (6) Infrared (7) -
Page 15: Standby Mode
P h o n e a t a g l a n c e ■ Standby mode Depending on your wireless service provider and the model number of your phone, some or all of the following selection keys may appear in the standby mode. -
Page 16: Indicators And Icons
P h o n e a t a g l a n c e Scroll down key—Go to the contacts list. Scroll left key—Create a text message. Center selection key—Display available applications or selects highlighted menus and submenus. ■ Indicators and icons To view the icons on your phone, select Menu >... -
Page 17: Main Menu Display
P h o n e a t a g l a n c e 2. When you arrive at a menu, to enter submenus, press Select (the center selection key). To return to the previous menu, select Back from the submenu level. To return to the standby mode from any menu or submenu, press the end key. -
Page 18: Go To Functions
P h o n e a t a g l a n c e ■ Go to functions The Go to menu allows you to change the function of the left selection key on your phone so that your most frequently used functions can be quickly accessed from the Go to menu in the standby mode. -
Page 19: Set Up Your Phone
S e t u p y o u r p h o n e 2. Set up your phone ■ Antenna Your device has an internal antenna. Hold the device as you would any other telephone with the antenna area pointed up and over your shoulder. -
Page 20: Remove The Back Cover
S e t u p y o u r p h o n e Remove the back cover Note: Always switch off the power, and disconnect the charger and any other device before removing the cover. Avoid touching electronic components while changing the cover. -
Page 21: Microsd Card
(5), and replace the battery and back cover. Note: Use only microSD cards approved by Nokia for use with this device. Nokia utilizes the approved industry standards for memory cards but not all other brands may function correctly or be fully compatible with this device. -
Page 22: Replace The Battery
S e t u p y o u r p h o n e Important: Do not remove the memory card while reading or writing to the card. Doing so may cause data corruption on the card or the phone. UIM (CDMA SIM) card slot Your phone has a built-in UIM card slot. -
Page 23: Charge The Battery
S e t u p y o u r p h o n e 2. Press the back cover latch down, and slide the back cover toward the top of phone. 3. Make sure back cover latch is secure. Charge the battery 1. -
Page 24: Connect The Headset
S e t u p y o u r p h o n e ■ Turn your phone on or off 1. To turn your phone on or off, press and hold the end key for at least 3 seconds. 2. -
Page 25: Make Calls
S e t u p y o u r p h o n e ■ Make calls 1. Enter the phone number, including the area code. For international calls, press * twice for the international prefix (the + character replaces the international access code) and then enter the country code, the area code without the leading 0, if necessary, and the phone number. -
Page 26: Call Waiting
S e t u p y o u r p h o n e Call waiting If your network operator supports this feature, call waiting notifies you of an incoming call even while you are in a call. You can then accept, reject, or ignore the incoming call. -
Page 27: Make A Conference Call
S e t u p y o u r p h o n e Warning: Do not hold the device near your ear when the loudspeaker is in use because the volume may be extremely loud. Make a conference call Conference calling is a network service that allows you to take part in a conference call with two other participants. -
Page 28: Text Entry
T e x t e n t r y 3. Text entry You can use two methods for entering text and numbers: standard mode and predictive text mode. Select Clear to backspace the cursor and delete a character. Select and hold Clear to backspace continuously and delete characters. ■... -
Page 29: Punctuation And Special Characters
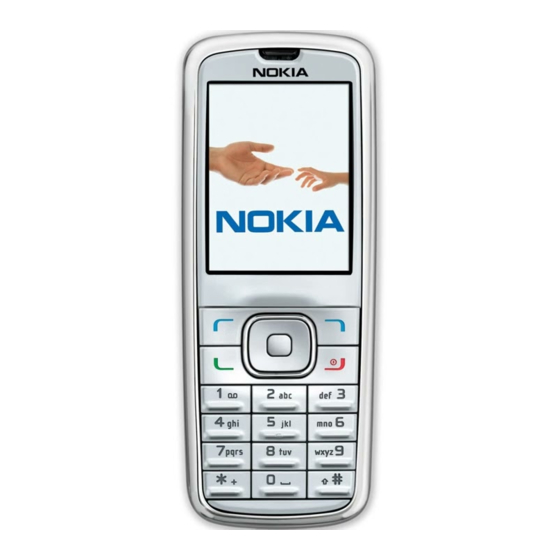
The following illustration shows how to enter the word Nokia with predictive text. With the English dictionary selected, press the following number keys one time only (6, 6, 5, 4, 2). The screen displays Nokia by predicting the letter and word, based on your keypad entry:... -
Page 30: Change Case And Mode
T e x t e n t r y • If a displayed word is not correct, press * to see other matches. To return to the previous word in the list of matches, select Previous • If ? appears after a word, select Spell to add the word to the dictionary. •... -
Page 31: Messages
M e s s a g e s 4. Messages If you have subscribed to a message network service, you can send and receive messages to compatible phones that are also subscribed to a message service. You can also send and receive multimedia and e-mail messages if supported by your network operator. -
Page 32: Create Distribution Lists
M e s s a g e s ■ Create distribution lists Distribution lists allow you to send text messages to a designated group of people. 1. Select Menu > Messaging > Distribution lists > New list. If you create a second distribution list, select Menu > Messaging > Distribution lists >... -
Page 33: Text Messages
M e s s a g e s ■ Text messages Write and send 1. Select Menu > Messaging > Text messages > Create message. 2. Write a message using the keypad. Depending on the messaging service enabled, some or all of the following options are available while writing your message: Sending options >... -
Page 34: Read Message
M e s s a g e s Prediction on or Prediction off—Turn the predictive text on or off. Matches—View matches in the dictionary for the word you want to use (only available with predictive text on and when the same set of key presses can produce multiple words). -
Page 35: Reply To Message
M e s s a g e s Reply to message 1. Select Menu > Messaging > Text messages > Inbox and your desired message, or when you receive a message, select Show. 2. Select Reply > Empty screen, Original text, Template, or one of the predefined answers;... -
Page 36: Delete Messages
M e s s a g e s View saved messages 1. Select Menu > Messaging > Text messages. 2. Select the folder containing the message you want to view: Inbox—Automatically stores any incoming messages Outbox—Stores messages that have not been sent Sent items—Stores messages that have been sent Drafts—Stores messages created as drafts Archive—Stores messages that you choose to archive, including unread ones... -
Page 37: Sending Options
M e s s a g e s Delete a single message 1. Select Menu > Messaging > Text messages. 2. Select the folder containing the message you want to delete. 3. Highlight the message you want to delete. 4. Select Options > Delete. 5. -
Page 38: Other Settings
M e s s a g e s Delivery reports > On or Off—Send a note to yourself confirming delivery of the message. Send callback no.—Send a callback number to the recipient. Select Off or enter your desired phone number to send to the recipient as a callback number, and select OK. Signature—Select On to create a signature to send with text messages or Off to turn this feature off. -
Page 39: Multimedia Messages
M e s s a g e s Save sent messages > Always save, Always prompt, or Off Queue if no digital > On, On prompt, or Off—Messages are stored in the outbox until they can be sent with digital service. ■... -
Page 40: Multimedia Message Folders And Options
M e s s a g e s • Sound: MP3, eAAC+, SP-MIDI, AMR audio, QCELP, and monophonic ringing tones • Video: clips in 3g2 or 3gp format in QCIF image size You cannot receive multimedia messages if you have a call in progress, games or other applications running, or an active browsing session. - Page 41 M e s s a g e s 2. Compose a message using the keypad. See "Choose a multimedia message option," p. 41, for composing options. 3. Select Send to > Recently used, To phone number, To e-mail address, To many, Album, or Distribution lists.
-
Page 42: Read And Reply To Multimedia Messages
M e s s a g e s Read and reply to multimedia messages When a multimedia message is received, is displayed along with the percentage display indicating the download progress. Once the message is fully downloaded, and a notification are displayed. 1. - Page 43 M e s s a g e s Insert > Image, Sound clip, or Video clip—Insert an image, sound clip, or video file. Open the desired folder, and select the file. Copyright protections may prevent some images, ringing tones, and other content from being copied, modified, transferred, or forwarded.
- Page 44 M e s s a g e s More options > Insert contact, or Insert number—Insert one of these items into your message. More options > Message details—Shows the details of your multimedia message. Exit editor—Exits the message editor. Insert smiley—Insert a smiley. Insert word or Edit word—Enter or edit the text of a new word that might not appear in the predictive text dictionary.
-
Page 45: Delete Multimedia Messages
M e s s a g e s Delete—Delete the message you are viewing. Reply or Reply to all—Enter a reply and send it to the original sender and any other recipients of the message. Use detail—Use a corresponding number or e-mail address. Scroll to the number or e-mail address. -
Page 46: Multimedia Message Settings
M e s s a g e s Multimedia message settings You can change how your messages are displayed or saved. Select Menu > Messaging > Multimedia msgs. > Message settings and one of the following items: Save sent messages > No or Yes—Save the multimedia messages that you send to the Sent items folder. -
Page 47: Incoming Multimedia Messages
M e s s a g e s Incoming multimedia messages You can set how your phone retrieves incoming multimedia messages. Select Menu > Messaging > Multimedia msgs. > Message settings > Incoming multim. msgs. and one of the following: Retrieve—Sets the phone to automatically retrieve all multimedia messages. -
Page 48: Save Voice Mailbox Number
M e s s a g e s Save voice mailbox number Your network operator may have already saved your voice mailbox number to your device. Select OK to leave the number unchanged. 1. Select Menu > Messaging > Voice messages > Voice mailbox no.. The voice mailbox number is displayed. - Page 49 M e s s a g e s 2. Call and check your voice mail as you normally would. 3. Write down your interaction with the recorded prompts step-by-step. Keep in mind that each voice mail service may vary. However, it should look similar to the following: Dial 8585551212, pause 5 seconds, press 1, pause 2 seconds, press 1234, and press #.
-
Page 50: Clear Voice Mail Icon
M e s s a g e s Insert dialing codes Press * repeatedly to cycle through dialing codes. When the desired code appears in the display, pause briefly, and the code is inserted into the dialing string. The following dialing codes are available: *—Bypasses a set of instructions p—Pauses for 2.5 seconds before sending any numbers that follow +—Replaced by the international access code... -
Page 51: Log
L o g 5. Log Log stores information about the last 30 missed, received, or dialed calls. It also displays the total duration of all calls. When the number of calls exceed the maximum, the most recent call replaces the oldest. When viewing missed, received, or dialed calls, the menu options are the same: Time of call—Display the date and time of the call. -
Page 52: View Dialed Numbers
L o g 1. Select Menu > Log > Received calls. 2. Scroll to a name or number, select Options, and an option. ■ View dialed numbers Dialed calls are numbers you have previously dialed from your phone: 1. Press the call key; or select Menu > Log > Dialed numbers. 2. -
Page 53: Data Or Fax Calls
L o g Dialed calls—Check the combined time of calls you dialed for either Home or Roaming. Received calls—Check the combined time of calls you received for either Home or Roaming. All calls—Check the combined time of all calls. Life timer—Check the total airtime minutes logged on your phone. Clear timers—Enter your lock code, and select OK to clear all timers on your phone. -
Page 54: Duration Of Minibrowser Calls
L o g ■ Duration of minibrowser calls Minibrowser is a network service. See "Network services," p. 8, for more information. If your wireless service provider supports this feature, you can view the size or duration of sent or received data from the minibrowser. Note: The actual invoice for calls and services from your service provider may vary, depending on network features, rounding off for billing, taxes and so forth. -
Page 55: Contacts
C o n t a c t s 6. Contacts The contacts list can hold up to 500 contacts with multiple numbers and text notes for each contact. The amount of numbers and text entries you can save may vary, depending on the length and total number of entries in the contacts list. -
Page 56: Save Numbers And Text Items
C o n t a c t s Save numbers and text items You can save different types of phone numbers and short text items per name to the contacts list. The first number you save for any entry is automatically set as the default, or primary number, which you can always change. -
Page 57: Change Speed Dialing Numbers
C o n t a c t s 2. To manage your caller groups, in the standby mode, select Menu > Contacts > Caller groups > Group details to display the following caller group options: Group name—Rename the group to your preference. Group ringing tone—Set the ringing tone for the group. -
Page 58: Voice Tags
C o n t a c t s Delete 1-touch dialing numbers 1. In the standby mode, select Menu > Contacts > 1-touch dialing. 2. Scroll to the entry you want to delete, and select Options > Delete > Yes. ■... -
Page 59: Dial A Number
C o n t a c t s Dial a number 1. In the standby mode, press and hold the right selection key with the fold open, or press and hold the voice key regardless of the fold being open or closed. 2. -
Page 60: Delete Contacts Entries
C o n t a c t s Delete—Delete more details (Delete number, Delete detail, or Delete detail) or the entire contact entry (Delete contact) of the contact. Send message—Create and send the contact a text message or multimedia message. Use number—Use or save the number (available when you select a contact listed with a contact name). -
Page 61: Search For A Name
C o n t a c t s Settings—Change the contacts list view or check the memory status of your device. To set the default memory, select Phone and UIM, Phone, or UIM card. Caller groups—View and edit the properties of any of the caller groups on the device. -
Page 62: Send A Business Card
C o n t a c t s Send a business card You can send a business card as a text message to a compatible phone or other handheld device. 1. Highlight your desired entry from your contacts list, and select Details > Options > Send business card >... -
Page 63: Gallery
You can save pictures, video clips, recordings, and ringing tones to folders in the Gallery and add new folders. You can download images and tones using SMS, mobile Internet sites, or Nokia PC Suite. Your device supports a digital rights management system to protect content you have acquired. -
Page 64: Fun Frames And Clip Art
G a l l e r y Delete folder —Delete a folder you have created. You cannot delete a preset folder. Move—Move the selected folder into another folder. After selecting Move, scroll to another folder, and select Move to. You cannot move a preset folder. Rename folder—Rename a folder you have created. -
Page 65: Media
M e d i a 8. Media ■ Camera You can take photos and record video clips with the built-in 2.0 megapixel camera. The camera lens is on the back of the phone. The camera produces pictures in JPEG format and video clips in 3GP format. When taking and using images or video clips, obey all laws and respect local customs as well as privacy and legitimate rights of others. -
Page 66: Camera Options
M e d i a Camera options Select Menu > Media > Camera > Options and from the following: Still image or Video—Choose Still image to take a picture or Video to record a video. Mute audio or Unmute audio—Turn the sound on or off for the video clip. Night mode on or Night mode off—Switch the camera night mode on and off. -
Page 67: Music Player
To transfer music tracks from a compatible PC to your phone and to and manage music tracks and track lists, see the instructions for the Nokia Audio Manager application in the Nokia PC Suite online help. See "Infrared connectivity," p. 87, or "Bluetooth connectivity," p. 84. -
Page 68: Music Player Options
M e d i a Select track—To select a track, press the upper side of the scroll key and select a track from the list. Play track—To play a track, select Adjust volume—To adjust the volume level, use the volume key. Pause—To pause the playing, select Skip tracks—To skip to the beginning of the next track, select . -
Page 69: Save Radio Channels
M e d i a ■ Save radio channels 1. To start the channel search, select and hold . To change the radio frequency in 0.1 MHz steps, briefly press 2. To save the channel to a memory location 1 to 9, press and hold the corresponding number key. -
Page 70: Voice Recorder
M e d i a Set frequency—Manually enter the frequency of a known radio station, and select OK. You can also press * to set a frequency. You can normally make a call or answer an incoming call while listening to the radio. During the call, the volume of the radio is muted. - Page 71 M e d i a Activate an equalizer set Select Menu > Media > Equalizer, scroll to the desired equalizer setting, and select Activate. Select Options > View to display the equalizer settings. Create a custom equalizer set 1. Select Menu > Media > Equalizer. 2.
-
Page 72: Settings
S e t t i n g s 9. Settings Use this menu to change profiles, display settings, themes, tone settings, time and date settings, call settings, phone settings, voice commands, connectivity settings, enhancement settings, security settings, application settings, network settings, network services, restore factory settings, and phone details. -
Page 73: Set A Timed Profile
S e t t i n g s Set a timed profile You can use timed profiles to prevent missed calls. For example, suppose you attend an event requiring your device set to Silent before the event starts, but you forget to return it to General until long after the event. -
Page 74: Font Color
S e t t i n g s Font color To set the font color of your phone when in the standby mode, select Menu > Settings > Display > Standby mode settings > Standby font color. Scroll to select a color from the color grid. Screen saver To choose a screen saver for the main display, select Menu >... -
Page 75: Tone Settings
S e t t i n g s ■ Themes A theme contains many elements for personalizing your phone, such as wallpaper, screen saver, color scheme, and a ringing tone. Themes automatically loads wallpapers, screen savers, ringing tones and background colors. -
Page 76: Time And Date Settings
S e t t i n g s Alert for—Define which caller groups the selected profile will accept or decline. See "Caller groups," p. 55. ■ Time and date settings Clock Select Menu > Settings > Time and date > Clock > Show clock, or Hide clock, Set the time, Time zone or Time format. -
Page 77: Call Settings
S e t t i n g s ■ Call settings Anykey answer Anykey answer enables you to answer an incoming call. Briefly press any key except the right selection or end key. In the standby mode, select Menu > Settings > Call > Anykey answer >... -
Page 78: Save Information
S e t t i n g s Save information 1. In the standby mode, select Menu > Settings > Call > Calling card. 2. Enter your security code, and select OK. See "Security settings," p. 91. 3. Scroll to the calling card of your choice, and select Options > Edit > Select > Dialing Sequence. -
Page 79: International Prefix
Do not move the device or hold it in your hand during a data call. For more information on connectivity, refer to the PC/PDA Connectivity Guide which can be downloaded from the Nokia website at http://www.nokia.com/us. 1. In the standby mode, select Menu > Settings > Call > Data/fax calls > Rcvd. -
Page 80: Data Transfer
S e t t i n g s 2. When finished with receiving the fax or data call, repeat steps 1 and 2, and select Normal. Data transfer To view the transmission speed when sending or receiving data and fax calls. In the standby mode, select Menu >... -
Page 81: Automatic Keyguard
S e t t i n g s The writing language selects the language used for messaging, calendar, notes, and To-do lists. In the standby mode, select Menu > Settings > Phone > Writing language and the language of your choice. Automatic keyguard You can set the keypad of your device to lock automatically after a preset time delay. -
Page 82: Touch Tones
S e t t i n g s Touch tones Touch tones, or DTMF tones, are the tones that sound when you press the keys on your device keypad. You can use touch tones for many automated dial-up services such as banking and airlines or for entering your voice mailbox number and password. Touch tones are sent during an active call. -
Page 83: Voice Commands And Voice Tags
S e t t i n g s The default setting for help text is On. However, you can turn help text on or off. In the standby mode, select Menu > Settings > Phone > Help text activation. ■ Voice commands and voice tags Before using voice tags, note the following: •... - Page 84 PC using IR or a USB data cable; and use the phone as a modem to enable connectivity from the PC. For more information, see the Nokia PC Suite online help. Nokia PC Suite and all related software can be downloaded from the U.S. Mobile Phone products section...
-
Page 85: Bluetooth Connectivity
S e t t i n g s Important: Only install and use applications and other software from sources that offer adequate security and protection against harmful software. Bluetooth connectivity Bluetooth technology connectivity enables cost-free wireless connections between electronic devices and can be used to send and receive images, texts, gallery files, voice recordings, videos, notes, business cards, and calendar notes. - Page 86 • Serial port profile (SPP) To ensure interoperability between other devices supporting Bluetooth technology, use only enhancements approved by Nokia for this model. Check with the manufacturers of other devices to determine their compatibility with this device. There may be restrictions on using Bluetooth technology in some locations. Check with your local authorities or service provider.
-
Page 87: Bluetooth Connectivity Settings
S e t t i n g s Delete pairing—Delete the pairing to the selected device. Pair new device—Search for active devices with Bluetooth technology within range, scroll to the desired device, and select Pair to establish pairing with that device. Do not accept Bluetooth connectivity from sources you do not trust. -
Page 88: Send Data
S e t t i n g s To deactivate Bluetooth connectivity, select Menu > Settings > Connectivity > Bluetooth > Off. Deactivation of the Bluetooth technology connection will not affect other functions of the phone. Send data Instead of using the Connectivity menu, you can use other phone menus to send various types of data to other devices with Bluetooth connectivity. -
Page 89: Ir Connection Indicator
Important: Disconnect the USB data cable from the phone to make a call. Enable default mode connection Connect to your PC in Nokia mode to transfer phone data and files between your phone and PC using Nokia PC Suite. 1. Connect your PC and your phone with a CA-53 USB data cable. A notification... - Page 90 S e t t i n g s 2. Select Accept > Nokia mode. A notification appears on the display stating a connection is active. You can now use PC Suite to connect to your phone. Enable data storage connection...
- Page 91 S e t t i n g s Disable data storage connection 1. To disable the USB data cable, double-click the green arrow on the task bar at the bottom of your PC screen. A window pops up that displays Unplug or Eject Hardware. 2.
-
Page 92: Security Settings
S e t t i n g s Lights (for Handsfree or Charger only)—Choose to keep the phone lights always on, or to shut off automatically after several seconds. Select On or Automatic. If the Loopset is connected and recognized through the Pop-Port™ connector, the phone automatically uses the Loopset. -
Page 93: Allow Numbers
S e t t i n g s With Lock now selected, you must enter your lock code before the device can function normally. Call not allowed is displayed if you attempt to place a call with your device locked. To answer a call with the phone lock on, select Answer, or press the call key. -
Page 94: Call Restrictions
S e t t i n g s 3. Select Change lock code. 4. Enter the new lock code (must be 4 characters in length). 5. Reenter the new lock code for verification, and select OK. When changing your lock code, make sure you store it in a safe place, away from your device. -
Page 95: Voice Privacy
S e t t i n g s Voice privacy Voice privacy is a network service. See "Network services," p. 8. If your wireless service provider supports this feature, the voice privacy feature protects the privacy of your current phone conversation from other callers placing phone calls on your same network. -
Page 96: Restore Factory Settings
S e t t i n g s If your device cannot find a preferred network, it selects a network automatically based on the option you choose in the Network menu. Select Menu > Settings > Network > Set mode > Home only, Automatic A, or Automatic B. -
Page 97: Organizer
O r g a n i z e r 10. Organizer Your phone contains features to help organize your everyday life, including an alarm clock, calendar, calculator, countdown timer, and stopwatch. ■ Alarm clock Set an alarm The alarm clock is based on the phone clock. An alarm sounds at the time you specify, even if the phone is turned off. -
Page 98: Set The Alarm Tone
O r g a n i z e r If you need to revise the days for a repeated alarm, select Menu > Organizer > Alarm clock > Repeat alarm > Repetition days. If you need to stop a repeated alarm, select Menu > Organizer > Alarm clock > Repeat alarm >... -
Page 99: Open Calendar
O r g a n i z e r The default monthly view provides an overview of the selected month and weeks. You can also jump to a specific date. Any days or dates that appear in bold font contain calendar notes such as a meeting or reminder. A short summary of notes for the day appear at the bottom of the screen. -
Page 100: Options While Viewing A Day
O r g a n i z e r 2. Scroll to the date for which you want to make a note. Scroll or select Options > Go to date, and select a date. 3. Select Options > Make a note and one of the following Meeting—Enter the subject, and select Save. -
Page 101: Receive A Calendar Note
O r g a n i z e r Delete—Delete the note. Edit—Edit the note. Use detail—Use a detail contained in the note. Move—Move the note to another date on your calendar. Repeat—Enable the note to recur on a regular basis (daily, weekly, biweekly, monthly, and yearly). - Page 102 O r g a n i z e r Set the time—Enter the current time, and select OK. Appears only when the time has not yet been set. Time zone—Select your current time zone. Date format—Select your preferred date format. Date separator—Select your preferred date separator.
-
Page 103: Notes Options
O r g a n i z e r Insert word or Edit word—Enter or edit the text of a new word that might not appear in the predictive text dictionary. This option is displayed only when predictive text is on. Insert symbol—Inserts a special character into your message. -
Page 104: To-Do List
O r g a n i z e r ■ To-do list Use the To-do list feature to keep track of your tasks. You can save a task or errand as a to-do list note, select a priority level for the to-do list note, and mark it as done when you have completed it. - Page 105 O r g a n i z e r To view to-do list notes, select Menu > Organizer > To-do list > View > Options, and one of the following choices: Deadline—Change the deadline of the to-do list note. Mark note as done or Mark as not done—Indicate whether the to-do list note is completed or not.
- Page 106 O r g a n i z e r Use detail—Use a detail contained in the note. Sort by deadline or Sort by priority—Sort the to-do list by either date or priority. Send > Send as message, Via calendar, Via infrared, or Via Bluetooth—Send the to-do list note in calendar format (vCal) in a text message, in a multimedia message, or directly to another device.
-
Page 107: Currency Converter
O r g a n i z e r 3. Enter the second number in your calculation. 4. Select Equals. To perform a square or square root calculation, select Options > Square or Square root. ■ Currency converter You can convert foreign currency to domestic, or vice versa, directly from the standby mode or from the Calculator menu. -
Page 108: Normal Timer
O r g a n i z e r ■ Timers Your device contains two event timers: a normal timer that counts down a set interval, and an interval timer that counts up set intervals. The timers only work when the phone is on. Once you turn off your phone, the timers are no longer active. -
Page 109: Interval Timer
O r g a n i z e r Interval timer The interval timer in your device allows you to store multiple interval timers. You can define and store up to 10 timing periods for each interval timer. Once at least one interval timer is set and stored, you can select the interval timer and one of the stored intervals for that timer. -
Page 110: Measure Split Or Lap Time
O r g a n i z e r ■ Stopwatch Your phone has a stopwatch that can be used to track time. The stopwatch displays time in hours, minutes, seconds, and fractions of a second in hh:mm:ss.ss format. Using the stopwatch or allowing it to run in the background when using other features increases the demand on battery power and reduces the battery life. -
Page 111: Stopwatch Options
O r g a n i z e r Stopwatch options Select Menu > Organizer > Stopwatch and one of the following: Continue—Continue to measure time and return to the stopwatch screen. This option appears only if the clock is running. Show last time—View the last measured time. -
Page 112: Catalogs
C a t a l o g s 11. Catalogs Catalogs is a network service. Contact your wireless network operator for more information. See "Network services," p. 8. -
Page 113: Mobile Web
Your device may have some bookmarks loaded for sites not affiliated with Nokia. Nokia does not warrant or endorse these sites. If you choose to access them, you should take the same precautions, for security or content, as you would with any internet site. -
Page 114: Sign On To The Mobile Internet
M o b i l e w e b It should not be necessary to manually configure the browser on your phone. Normally this is done by your wireless provider when you subscribe to the feature. Contact your wireless provider if you have problems using the browser. ■... -
Page 115: Make An Emergency Call While Online
M o b i l e w e b • To reject the incoming call, press the end key. After you end your voice call, the mobile internet connection automatically resumes. If your wireless service provider does not support incoming calls while browsing, incoming calls are automatically forwarded to voice mail. -
Page 116: Extras
■ Collection Your phone software includes some Java applications specially designed for this Nokia phone. Launch an application Select Menu > Extras > Collection. Scroll to an application, and select Open, or press the call key. - Page 117 E x t r a s Leaving applications running in the background increases the demand on battery power and reduces the battery life. To view the memory available for application installations, select Menu > Extras > Collection > Options > Memory status. Note: Only install applications from sources that offer adequate protection against harmful software.
-
Page 118: Pc Connectivity
Remember to make back-up copies of all important data. ■ Nokia PC Suite Nokia PC Suite software is available for this phone. Nokia PC Suite is a collection of powerful tools that you can use to manage your phone features and data. -
Page 119: Enhancements
AC-3 or AC-4 charger. Warning: Use only batteries, chargers and enhancements approved by Nokia for use with this particular model. The use of any other types may invalidate any approval or warranty, and may be dangerous. - Page 120 E n h a n c e m e n t s • Mobile Charger (DC-4) • Charger Adapter (CA-44) Use the CA-44 charger adapter to connect the phone with Nokia chargers with a larger barrel size, including ACP-7, ACP-8, ACP-9, ACP-12, AC-1 (retractable charger), and LCH-12 (mobile charger).
-
Page 121: Battery Information
The battery can be charged and discharged hundreds of times, but it will eventually wear out. When the talk and standby times are noticeably shorter than normal, replace the battery. Use only Nokia approved batteries, and recharge your battery only with Nokia approved chargers designated for this device. -
Page 122: Nokia Battery Authentication Guidelines
Do not dispose as household waste. ■ Nokia battery authentication guidelines Always use original Nokia batteries for your safety. To check that you are getting an original Nokia battery, purchase it from an authorized Nokia dealer, look for the... - Page 123 What if your battery is not authentic? If you cannot confirm that your Nokia battery with the hologram on the label is an authentic Nokia battery, please do not use the battery. Take it to the nearest authorized Nokia service point or dealer for assistance.
-
Page 124: Care And Maintenance
• Do not attempt to remove the battery from the device. Nokia recommends that you take the device to the nearest authorized service facility for replacement of the battery. - Page 125 C a r e a n d m a i n t e n a n c e • Use a soft, clean, dry cloth to clean any lenses, such as camera, proximity sensor, and light sensor lenses. • Use only the supplied or an approved replacement antenna. Unauthorized antennas, modifications, or attachments could damage the device and may violate regulations governing radio devices.
-
Page 126: Additional Safety Information
A d d i t i o n a l s a f e t y i n f o r m a t i o n Additional safety information ■ Operating environment Your device and its enhancements may contain small parts. Keep them out of the reach of small children. - Page 127 A d d i t i o n a l s a f e t y i n f o r m a t i o n Pacemakers Pacemaker manufacturers recommend that a minimum separation of 15.3 centimeters (6 inches) be maintained between a wireless device or phone and a pacemaker to avoid potential interference with the pacemaker.
-
Page 128: Potentially Explosive Environments
A d d i t i o n a l s a f e t y i n f o r m a t i o n your vehicle is mounted and operating properly. Do not store or carry flammable liquids, gases, or explosive materials in the same compartment as the device, its parts, or enhancements. -
Page 129: Emergency Calls
A d d i t i o n a l s a f e t y i n f o r m a t i o n ■ Emergency calls Important: Wireless phones, including this device, operate using radio signals, wireless networks, landline networks, and user-programmed functions. - Page 130 SAR values may vary depending on national reporting and testing requirements and the network band. Additional SAR information may be provided under product information at www.nokia.com. Your mobile device is also designed to meet the requirements for exposure to radio waves established by the Federal Communications Commission (USA) and Industry Canada.
-
Page 131: Technical Information
A d d i t i o n a l s a f e t y i n f o r m a t i o n ■ Technical information Dimensions—Width 42.8 mm (1.685 inches); length 109 mm (4.29 inches); depth 17.2 mm (0.677 inch) Weight—105 g (3.7 oz) with BL-6C Li-ion Battery Wireless networks—CDMA 800 and 1900 MHz, AMPS, and Bluetooth... -
Page 132: Talk And Standby Times
A d d i t i o n a l s a f e t y i n f o r m a t i o n Talk and standby times Operation times are estimates only and depend on signal strength, phone use, network conditions, features used, battery age and condition (including charging habits), temperatures to which the battery is exposed, and many other factors. -
Page 133: Index
I n d e x Index NUMERICS Bluetooth connectivity 84 receive data 87 1-touch dialing 56 set up 86 settings 86 business cards 60 about your device 8 alarm clock 96 repeating 96 calendar antenna 18 make notes 98 application settings 94 open 98 applications options 98... - Page 134 I n d e x camera 64 display changing options 65 main menu 16 take photos 64 settings 72 care and maintenance 123 display language 79 certification information (SAR) 129 charger connect 22 emergency calls 114 information 120 with keypad locked 80 times 130 enhancements 90 collection applications 115...
- Page 135 I n d e x help get 10 main menu display 16 in-phone 16 maintenance services 11 text activation 16 make calls 24 help text 81 media 64 media player 65 MEID 10 memory 80 indicators and icons 15 memory card 115 infrared 87 message folders 34 infrared connectivity 87...
- Page 136 8 services 8 radio 67 settings 94 received calls 50 network services 8 recording sound 69 Nokia PC Suite 117 repeating alarm 96 notes 101 restore factory settings 95 options 102 send 102 safety important safety information 125...
- Page 137 I n d e x talk time 131 video technical information 130 record 64 text entry 27 view predictive text 28 saved messages 35 standard 27 voice dialing 57 text messages 32 voice messages 46 themes 74 voice privacy 94 time and date settings 75 voice recorder 69 timed profiles 72...
- Page 138 Nokia 6276 Manual del Usuario...
- Page 139 Java es marca registrada de Sun Microsystems, Inc. La información en este manual del usuario fue escrita para el producto Nokia 6276. Nokia opera bajo un sistema de desarrollo continuo. Nokia se reserva el derecho de hacer cambios y mejoras...
- Page 140 SEA EXPRESA O IMPLÍCITA, INCLUYENDO, PERO SIN LIMITARSE A, GARANTÍAS IMPLÍCITAS DE MERCADEO Y DE CAPACIDAD PARA UN PROPÓSITO PARTICULAR, EN CUANTO A LA PRECISIÓN Y FIABILIDAD O CONTENIDO DE ESTE DOCUMENTO. NOKIA SE RESERVA EL DERECHO DE REVISAR ESTE DOCUMENTO O DESCONTINUAR SU USO EN CUALQUIER MOMENTO SIN PREVIO AVISO.
- Page 141 C o n t e n i d o Contenido Para su seguridad....................142 Bienvenido ......................146 1. Su teléfono....................148 2. Programar su teléfono ................154 3. Ingreso de texto................... 163 4. Mensajes......................166 5. Registro ......................188 6. Contactos....................... 192 7.
- Page 142 C o n t e n i d o 15. Accesorios...................... 260 16. Información sobre las baterías ..............262 Cuidado y mantenimiento ................266 Información adicional de seguridad............... 268 Índice ........................275...
-
Page 143: Para Su Seguridad
P a r a s u s e g u r i d a d Para su seguridad Lea estas sencillas normas. El incumplimiento de ellas puede ser peligroso o ilegal. Lea el manual del usuario completo para obtener más información. ENCIENDA EL TELÉFONO EN FORMA SEGURA No encienda el teléfono donde el uso de teléfonos móviles esté... - Page 144 P a r a s u s e g u r i d a d ÚSELO CORRECTAMENTE Use el dispositivo sólo en la posición normal como se explica en la documentación del producto. Evite el contacto innecesario con la antena. SERVICIO TÉCNICO CALIFICADO Sólo personal de servicio técnico calificado puede instalar o reparar este producto.
-
Page 145: Servicios De Red
P a r a s u s e g u r i d a d ■ Servicios de red Para utilizar el teléfono, debe contratar los servicios de un proveedor de servicios móviles. Muchas de las funciones de este dispositivo dependen de las funciones de la red inalámbrica para su funcionamiento. -
Page 146: Memoria Compartida
P a r a s u s e g u r i d a d Advertencia: Para poder usar cualquiera de las funciones de este dispositivo, con la excepción de la alarma, es preciso encender el dispositivo. No lo encienda donde el uso de dispositivos móviles pueda causar interferencia o peligro. -
Page 147: Bienvenido
B i e n v e n i d o Bienvenido Felicitaciones por la compra de su teléfono móvil Nokia. Su teléfono le brinda muchas funciones prácticas para el uso diario, como un altavoz, cámara, reproductor MP3, grabador de video y más. Su teléfono también puede conectarse con una PC, computadora portátil u otro dispositivo usando un cable de datos USB, la tecnología... -
Page 148: Soluciones De Acceso
B i e n v e n i d o Actualizaciones De vez en cuando Nokia actualiza este manual para reflejar cambios. La versión más reciente de este manual se puede encontrar en www.nokia.com (para el Caribe) y www.latinoamerica.nokia.com/mitelefono (para Latinoamérica). También puede encontrar una versión interactiva en www.nokiahowto.com (para el Caribe) y... -
Page 149: Su Teléfono
S u t e l é f o n o 1. Su teléfono ■ Teclas y partes Vista frontal Audífono (1) Pantalla (2) Tecla de desplazamiento (3) Tecla de selección derecha (4) Tecla Encender/Apagar y Finalizar (5) Teclado (6) Conector Pop-Port™ (7) Micrófono (8) Puerto del cargador (9) Tecla Llamar (10) -
Page 150: Vistas Laterales
S u t e l é f o n o Vistas laterales Tecla de volumen (1) Flash de la cámara y espejo para autorretrato (2) Lente de la cámara (3) Tecla Cámara (4) Altavoz (5) Conector del auricular (6) Infrarrojos (7) -
Page 151: Modo Standby
S u t e l é f o n o ■ Modo standby Dependiendo de su proveedor de servicios móviles y del número de modelo de su teléfono, algunas o todas las siguientes teclas de selección pueden aparecer en el modo standby. El modo standby indica que su teléfono está... -
Page 152: Indicadores E Iconos
S u t e l é f o n o Tecla de desplazamiento izquierda: para crear un mensaje de texto. Tecla de selección central: para mostrar las aplicaciones disponibles o seleccionar los menús y submenús resaltados. ■ Indicadores e iconos Para ver todos los iconos en su teléfono, seleccione Menú... -
Page 153: Pantalla Del Menú Principal
S u t e l é f o n o 2. Cuando llegue a un menú, para ingresar a los submenús, pulse Selec. (la tecla de selección central). Para volver al menú anterior, seleccione Atrás desde el nivel de submenú. Para volver al modo standby desde cualquier menú... - Page 154 S u t e l é f o n o ■ Ir a funciones El menú Ir a le permite cambiar la función de la tecla de selección izquierda en su teléfono de manera que pueda acceder rápidamente a las funciones que usa con más frecuencia desde el menú...
-
Page 155: Programar Su Teléfono
P r o g r a m a r s u t e l é f o n o 2. Programar su teléfono ■ Antena Su dispositivo tiene una antena interior. Sujete el dispositivo como lo haría con cualquier otro teléfono, sobre el hombro y con la antena hacia arriba. - Page 156 P r o g r a m a r s u t e l é f o n o Retirar la cubierta posterior Nota: Siempre apague el dispositivo y desconecte el cargador y cualquier otro dispositivo antes de retirar la cubierta. Evite tocar los componentes electrónicos mientras cambia la cubierta.
-
Page 157: Tarjeta Microsd
Nota: Use sólo tarjetas microSD aprobadas por Nokia para su uso con este dispositivo. Nokia utiliza los estándares aprobados por la industria para tarjetas de memoria, pero no todas las marcas funcionan correctamente o... -
Page 158: Volver A Colocar
P r o g r a m a r s u t e l é f o n o Importante: No retire la tarjeta de memoria mientras lee o escribe en la tarjeta. Retirar la tarjeta puede ocasionar que los datos en la tarjeta o en el teléfono se dañen. - Page 159 P r o g r a m a r s u t e l é f o n o 2. Presione el botón de seguridad de la cubierta posterior hacia abajo y deslice la cubierta hacia la parte superior del teléfono. 3.
-
Page 160: Conectar El Auricular
P r o g r a m a r s u t e l é f o n o ■ Apagar o encender su teléfono 1. Para encender o apagar su teléfono, mantenga pulsada la tecla Finalizar por lo menos por tres segundos. 2. -
Page 161: Realizar Llamadas
P r o g r a m a r s u t e l é f o n o ■ Realizar llamadas 1. Ingrese el número telefónico, incluyendo el código de área. Para las llamadas internacionales, pulse la tecla * dos veces para el prefijo internacional (el carácter + reemplaza el código de acceso internacional) y luego ingrese el código del país, el código de área sin anteponer el 0, si es necesario, y el número telefónico. -
Page 162: Llamada En Espera
P r o g r a m a r s u t e l é f o n o Llamada en espera Si su operador de red móvil admite esta función, llamada en espera le avisa de una llamada entrante, incluso durante una llamada activa. Puede aceptar, rechazar o ignorar la llamada entrante. -
Page 163: Realizar Una Llamada De Multiconferencia
P r o g r a m a r s u t e l é f o n o Contactos: para ver la lista de contactos. Menú: para ver el menú del teléfono. Advertencia: No sostenga el dispositivo cerca del oído cuando esté utilizando el altavoz, ya que el volumen puede resultar muy alto. -
Page 164: Ingreso De Texto
I n g r e s o d e t e x t o 3. Ingreso de texto Puede usar dos métodos para ingresar texto y números: el modo estándar y modo de texto predictivo. Seleccione Borrar para retroceder el cursor y borrar un carácter. Mantenga pulsada Borrar para retroceder continuamente y borrar los caracteres. -
Page 165: Ingreso De Texto Predictivo
El siguiente gráfico muestra la manera de ingresar la palabra Nokia con el texto predictivo. Con el diccionario español seleccionado, pulse las siguientes teclas numéricas una sola vez (6, 6, 5, 4, 2). La pantalla muestra Nokia mediante la predicción de la letra y la palabra, tomando como base los ingresos del teclado:... - Page 166 I n g r e s o d e t e x t o • Si la palabra es incorrecta, pulse la tecla * para ver otras coincidencias. Para regresar a la palabra previa en la lista de coincidencias, seleccione Anterior. •...
-
Page 167: Mensajes
M e n s a j e s 4. Mensajes Si se ha suscrito a un servicio de red de mensajes, puede enviar y recibir mensajes a teléfonos compatibles que también estén suscritos a un servicio de mensajes. También puede enviar y recibir mensajes multimedia y de e-mail si su operador de red lo admite. - Page 168 M e n s a j e s ■ Crear listas de distribución Listas distribución le permite enviar mensajes de texto a un grupo de personas designado. 1. Seleccione Menú > Mensajería > Listas distribuc. > Nva. lista. Si crea una segunda lista de distribución, seleccione Menú > Mensajería > Listas distribuc.
-
Page 169: Mensajes De Texto
M e n s a j e s ■ Mensajes de texto Escribir y enviar 1. Seleccione Menú > Mensajería > Mensajes texto > Crear mensaje. 2. Escriba un mensaje usando el teclado. Dependiendo del servicio de mensajería activado, algunas o todas las opciones siguientes están disponibles al escribir su mensaje: Opciones de envío >... - Page 170 M e n s a j e s Insertar palabra o Editar palabra: para ingresar o editar el texto de una nueva palabra que posiblemente no aparezca en el diccionario de texto predictivo (solamente está disponible cuando el texto predictivo está activado). Insertar símbolo: para insertar un carácter especial en su mensaje (solamente está...
- Page 171 M e n s a j e s Usar información: para usar o guardar el número, dirección de e-mail o dirección Web. Mover: para guardar el mensaje en Archivos, Plantillas o en una carpeta que haya creado. Desviar: para volver a enviar el mensaje a otro número telefónico o dirección de e-mail. Bloquear o Desbloquear: para bloquear o desbloquear el mensaje.
-
Page 172: Carpetas Para Los Mensajes De Texto
M e n s a j e s Carpetas para los mensajes de texto Guardar mensajes Puede guardar los borradores de mensajes o mensajes recibidos en una carpeta existente o en una carpeta que haya creado. 1. Abra el mensaje recibido o escriba un nuevo mensaje y seleccione Opciones. 2. -
Page 173: Eliminar Mensajes
M e n s a j e s Solamente puede eliminar las carpetas creadas en mis carpetas; las carpetas de buzón de entrada, elementos enviados, archivo y plantillas están protegidas. Al eliminar una carpeta, también borrará los mensajes en la carpeta. Listas de distribución: guardar listas de distribución que creó. - Page 174 M e n s a j e s 3. Seleccione y marque las carpetas que contienen los mensajes que desea eliminar: Buzón entrada: para eliminar todos los mensajes en la carpeta buzón de entrada. Elementos enviados: para eliminar todos los mensajes en la carpeta elementos enviados.
-
Page 175: Otras Configuraciones
M e n s a j e s Para cambiar las opciones de envío para un mensaje, seleccione Menú > Mensajería > Mensajes texto > Crear mensaje > Opciones > Opciones de envío, marque o desmarque la configuración que desea cambiar: Urgente: para configurar la prioridad del mensaje como urgente. -
Page 176: Mensajes Multimedia
M e n s a j e s ■ Mensajes multimedia Mensajería multimedia es un servicio de red. Consulte "Servicios de red", pág. 144, para obtener más información. Si su proveedor de servicios móviles admite esta función, podrá enviar y recibir mensajes multimedia a teléfonos compatibles que también estén suscritos al servicio. - Page 177 M e n s a j e s No puede recibir mensajes multimedia si tiene una llamada en curso, juegos u otras aplicaciones funcionando o una sesión de explorador activa. Dado a que la entrega de mensajes multimedia puede no lograrse por diferentes razones, no dependa solamente en éstos para las comunicaciones importantes.
- Page 178 M e n s a j e s 2. Escriba el mensaje usando el teclado. Consulte "Seleccionar una opción de mensajes multimedia", pág. 178 para obtener más información sobre las opciones de escritura. 3. Seleccione Enviar a > Últimos usados, A número teléfono, A dirección e-mail, A varios, Álbum o Listas de distribución.
- Page 179 M e n s a j e s Leer y responder mensajes multimedia Cuando recibe un mensaje multimedia, aparece en la pantalla junto con la pantalla de porcentaje la cual indica el progreso de descarga. Una vez que descargue completamente el mensaje, y una notificación aparecen en la pantalla.
- Page 180 M e n s a j e s Send to album (Enviar a álbum): para enviar un mensaje a un álbum en línea. Este es un servicio de red en línea. Consulte a su proveedor de servicios para obtener más información. Insertar >...
- Page 181 M e n s a j e s Duración diapositiva: para configurar el intervalo para cada diapositiva. En forma predeterminada, cada diapositiva aparece por doce segundos. Texto superior o Texto inferior: para mover el texto al principio o final de la diapositiva. En forma predeterminada, el texto aparece al final o último.
- Page 182 M e n s a j e s Detalles: para mostrar los detalles de un archivo adjunto al cual se ha desplazado. Guardar imagen, Guardar clip sonido o Guardar videoclip: para guardar el archivo correspondiente en Galería. Debe abrir las imágenes, clips de sonido y videoclips antes de guardarlos.
-
Page 183: Configuraciones De Mensajes Multimedia
M e n s a j e s Eliminar un sólo mensaje multimedia 1. Seleccione Menú > Mensajería > Mensajes MMS 2. Seleccione la carpeta que contenga el mensaje multimedia que desea eliminar. 3. Seleccione el mensaje que desea eliminar y Opciones > Eliminar > Sí o No. Eliminar todos los mensajes multimedia en una carpeta Seleccione Menú... - Page 184 M e n s a j e s La configuración predeterminada para el servicio de mensajes multimedia por lo general está activada. La apariencia de un mensaje multimedia puede variar dependiendo del dispositivo receptor. Puede optar por recibir todos los mensajes, bloquear todos los mensajes o recibir solamente los mensajes cuando está...
-
Page 185: Mensajes De Voz
M e n s a j e s notificación del mensaje y luego seleccione Recuper. Seleccione Salir para guardar la notificación en su buzón de entrada y recuperar el mensaje en otro momento. Rechazar: para que el teléfono rechace los mensajes multimedia. Permitir o bloquear publicidad Le permite bloquear los anuncios publicitarios. -
Page 186: Configurar Su Correo De Voz
M e n s a j e s Configurar su correo de voz 1. Tras guardar el número del buzón de voz, en el modo standby, mantenga pulsada 1. 2. Cuando se conecte al correo de voz y el saludo pregrabado comience, siga las instrucciones del servicio automatizado para configurar su correo de voz. - Page 187 M e n s a j e s Números telefónicos con códigos de marcación Puede insertar caracteres especiales conocidos como códigos de marcación en números telefónicos como el correo de voz y guardar el número en una ubicación de marcación rápida. Los códigos de marcación instruyen al sistema receptor a hacer una pausa, esperar, ignorar o aceptar los números que los siguen en la secuencia de marcación.
- Page 188 M e n s a j e s Los siguientes códigos de marcación están disponibles: *: para ignorar un conjunto de instrucciones. p: para hacer una pausa por 2,5 segundos antes de enviar cualquiera de los números que siguen. +: para reemplazarlo con el código de acceso internacional. w: para esperar que pulse la tecla Llamar antes de enviar los números o códigos que siguen.
-
Page 189: Registro
R e g i s t r o 5. Registro Registro guarda información sobre las últimas treinta llamadas perdidas, recibidas y marcadas. También muestra la duración total de todas las llamadas. Cuando la cantidad de llamadas excede el máximo, la llamada más reciente reemplaza la más antigua. -
Page 190: Ver Las Llamadas Recibidas
R e g i s t r o ■ Ver las llamadas recibidas Las llamadas recibidas son aquellas que han sido contestadas. 1. Seleccione Menú > Registro > Llam. recibidas. 2. Desplácese a un nombre o número, seleccione Opciones y una opción. ■... - Page 191 R e g i s t r o Duración última llam.: para ver la duración de su última llamada. Llamadas marcadas: para ver la duración combinada de llamadas marcadas para Local o Roaming. Llamadas recibidas: para ver la duración combinada de llamadas recibidas para Local o Roaming.
- Page 192 R e g i s t r o Todos datos/fax rec.: para ver el tamaño (KB) de todas las llamadas datos/fax recibidas. Duración última llam.: para ver la duración de la última llamada de datos o fax. Durac. llam. datos/fax: para ver la duración de todas las llamadas. Borrar reg.
-
Page 193: Contactos
C o n t a c t o s 6. Contactos La lista de contactos puede almacenar hasta 500 contactos con varios números y notas de texto para cada contacto. La cantidad de números y entradas de texto que puede guardar varía dependiendo de la longitud y número total de entradas en la lista de contactos. -
Page 194: Grupos De Llamantes
C o n t a c t o s Guardar números y elementos de texto Puede guardar distintos tipos de números telefónicos y elementos cortos de texto para cada contacto en su lista de contactos. El primer número que guarda para cualquier entrada es programado automáticamente como predeterminado o número primario, el cual puede cambiar si así... - Page 195 C o n t a c t o s 2. Para administrar sus grupos de llamantes, en el modo standby, seleccione Menú > Contactos > Grupos llaman. para mostrar las siguientes opciones de grupos de llamantes: Renombrar grupo: para renombrar el grupo a su preferencia. Tono de grupo: para configurar el tono de timbre para el grupo.
- Page 196 C o n t a c t o s 2. Desplácese a la entrada de marcación rápida que desea cambiar y seleccione Opciones > Cambiar. 3. Ingrese el nuevo número y un nombre para la entrada o seleccione OK, o seleccione Buscar para recuperar un número de la lista de contactos.
- Page 197 C o n t a c t o s 2. Seleccione Detalles > Opciones > Agregar etiqueta voz > Iniciar. 3. Hable claramente en el micrófono. No seleccione Salir a no ser que desee borrar la grabación. El dispositivo finaliza automáticamente la grabación de la etiqueta de voz, la guarda y la reproduce.
- Page 198 C o n t a c t o s Agregar detalles: para agregar más información al contacto: Nombre (sólo está disponible si no se ha agregado un nombre), Número (General, Móvil, Casa, Trabajo o Fax), Dirección e-mail, Dirección Web, Dirección, Nota, Imagen (sólo está...
- Page 199 C o n t a c t o s ■ Eliminar entradas de contactos Para eliminar todas los entradas en su lista de contactos, en el modo standby, seleccione Menú > Contactos > Elim. todos cont. ■ Acceder al menú de contactos 1.
- Page 200 C o n t a c t o s Programar las configuraciones Puede seleccionar cómo desea que los contactos aparezcan en su lista de contactos y ver la memoria usada o disponible en su dispositivo. En el modo standby, seleccione Menú...
-
Page 201: Galería
Puede guardar fotos, videoclips, grabaciones y tonos de timbre en carpetas en Galería y agregar nuevas carpetas. Puede descargar imágenes y tonos usando SMS, sitios de Internet móvil o Nokia PC Suite. Su teléfono admite un sistema de administración de derechos digitales para proteger el contenido que haya adquirido. - Page 202 G a l e r í a 2. Seleccione Abrir para ver una lista de los archivos en la carpeta u Opciones para acceder a las siguientes opciones: Tarj. mem.: cuando hay una tarjeta microSD en el teléfono, el nombre de la tarjeta aparece como la primera opción.
- Page 203 G a l e r í a ■ Marcos e imágenes predeterminadas En galería, puede seleccionar fotos e imágenes predeterminadas y guardarlas como protectores de pantalla e imágenes de fondo. Para personalizar las fotos, imágenes predeterminadas e imágenes de fondo, agregue texto, agregue un marco, cambie el tamaño de la imagen y ajuste el contraste.
-
Page 204: Multimedia
M u l t i m e d i a 8. Multimedia ■ Cámara Puede tomar fotos y grabar videoclips con la cámara incorporada de 2,0 megapíxeles. El lente de la cámara está en la parte posterior del teléfono. La cámara produce imágenes en formato JPEG y videoclips en formato 3GP. -
Page 205: Grabar Un Videoclip
M u l t i m e d i a Grabar un videoclip Seleccione Menú > Multimedia > Cámara > Opciones > Video. Seleccione Grabar para comenzar a grabar el videoclip. Seleccione Pausa para hacer una pausa, Continuar para continuar o Parar para detener la grabación. Los videoclips se guardan en la carpeta Videoclips del menú... -
Page 206: Reproductor Multimedia
M u l t i m e d i a ■ Reproductor multimedia Con el reproductor multimedia puede descargar, ver y reproducir imágenes compatibles, archivos de audio y video, e imágenes animadas de diferentes fuentes. El reproductor multimedia le permite reproducir videos y streaming de audio de un servidor de red. - Page 207 Para transferir pistas de música de una PC compatible a su teléfono y para administrar las pistas de música y listas de pistas, consulte las instrucciones para la aplicación Nokia Audio Manager en la ayuda en línea de Nokia PC Suite. Consulte "Conectividad de infrarrojos", pág. 228 o "Conectividad Bluetooth", pág. 224.
- Page 208 M u l t i m e d i a Opciones para el reproductor de música Para acceder a las opciones para el reproductor de música, seleccione Menú > Play > Reprod. música > Opciones y una opción. ■ Radio Advertencia: Escuche la música a un nivel de volumen moderado.
-
Page 209: Escuchar La Radio
M u l t i m e d i a Cuando una aplicación que está usando una conexión de explorador está enviando o recibiendo datos, es posible que interfiera con la radio. Cuando realiza o recibe una llamada, la radio se silencia automáticamente. Cuando termina la llamada, la radio se activa nuevamente. -
Page 210: Grabadora De Voz
M u l t i m e d i a ■ Grabadora de voz Puede grabar voz, sonidos o una llamada activa hasta por tres minutos. No es posible utilizar la grabadora cuando hay una llamada de datos activa. Grabar voz o sonido 1. - Page 211 M u l t i m e d i a Activar un conjunto de ecualizador Seleccione Menú > Multimedia > Ecualizador, desplácese a la configuración de ecualizador deseada y seleccione Activar. Seleccione Opciones > Ver para mostrar las configuraciones de ecualizador. Crear un conjunto de ecualizador personalizado 1.
-
Page 212: Configuraciones
C o n f i g u r a c i o n e s 9. Configuraciones Use este menú para cambiar perfiles, configuraciones de pantalla, temas, configuraciones de tonos, configuraciones de hora y fecha, configuraciones de llamada, configuraciones de teléfono, comandos de voz, configuraciones de conectividad, configuraciones de accesorio, configuraciones de seguridad, configuraciones de aplicación, configuraciones de red, servicios de red, restaurar las configuraciones de fábrica y detalles del teléfono. -
Page 213: Configurar Un Perfil Programado
C o n f i g u r a c i o n e s Configurar un perfil programado Puede usar los perfiles programados para no perder llamadas. Por ejemplo, suponga que está en un evento que le requiere configurar su dispositivo en Silencio antes de que comience el evento, pero se le olvidó... -
Page 214: Protector De Pantalla
C o n f i g u r a c i o n e s Color de letras Para configurar el color de letra en su teléfono en el modo standby, seleccione Menú > Configuraciones > Pantalla > Config. modo espera > Color fuente en esp. Desplácese para seleccionar un color de la cuadrícula. -
Page 215: Configuraciones De Tonos
C o n f i g u r a c i o n e s ■ Temas Un tema tiene muchos elementos para personalizar su teléfono, como imagen de fondo, protector de pantalla, esquema de colores y un tono de timbre. La función temas carga automáticamente imágenes de fondo, protectores de pantalla, tonos de timbre y colores de fondo. -
Page 216: Configuraciones De Hora Y Fecha
C o n f i g u r a c i o n e s Tonos del teclado: para configurar el volumen de los tonos del teclado (o apagarlos). Tonos de aviso > Activar o Desactivar: para configurar los tonos de aviso y confirmación. Aviso para: para definir los grupos de llamantes que el perfil seleccionado aceptará... -
Page 217: Configuraciones De Llamadas
C o n f i g u r a c i o n e s ■ Configuraciones de llamadas Cualquier tecla contesta La función cualquier tecla contesta le permite contestar una llamada entrante. Pulse brevemente cualquier tecla con la excepción de la tecla de selección derecha o tecla Finalizar. - Page 218 C o n f i g u r a c i o n e s Guardar información 1. En el modo standby, seleccione Menú > Configuraciones > Llamada > Tarjeta de llamada. 2. Ingrese su código de seguridad y seleccione OK. Consulte "Configuraciones de seguridad", pág.
-
Page 219: Prefijo Internacional
No mueva ni sujete el dispositivo durante una llamada de datos. Para obtener más información sobre conectividad, consulte la Guía de conectividad PC/PDA, la cual puede descargar del sitio Web de Nokia en www.nokia.com (para el Caribe) o www.latinoamerica.nokia.com (para Latinoamérica). -
Page 220: Transferencia De Datos
C o n f i g u r a c i o n e s 1. En el modo standby, seleccione Menú > Configuraciones > Llamada > Llamadas datos/fax > Llam. recib. datos/fax y alguna de las siguientes opciones: Normal: el dispositivo recibe llamadas como de costumbre. Sólo llamadas datos: el dispositivo solamente recibe llamadas de datos. -
Page 221: Configuraciones De Teléfono
C o n f i g u r a c i o n e s ■ Configuraciones de teléfono Configuraciones de idioma El idioma del teléfono afecta los formatos de hora y fecha del reloj y alarma. En el modo standby, seleccione Menú > Configuraciones > Teléfono > Idioma del teléfono y el idioma que prefiera. -
Page 222: Estado De La Memoria
C o n f i g u r a c i o n e s Estado de la memoria Puede ver el tamaño de la memoria disponible en su dispositivo. En el modo standby, seleccione Menú > Configuraciones > Teléfono > Estado de memoria. Puede ver el tamaño de memoria disponible para la instalación de aplicaciones. -
Page 223: Tono De Inicio
C o n f i g u r a c i o n e s Tono de inicio Puede seleccionar un tono de inicio para cuando encienda su dispositivo. En el modo standby, seleccione Menú > Configuraciones > Teléfono > Tono de inicio > Activar o Desactivar. - Page 224 C o n f i g u r a c i o n e s Operación manos libres Puede configurar hasta dieciséis comandos de voz para el uso manos libres de ciertas funciones en su dispositivo. Asignar una etiqueta de voz a un comando Antes de usar los comandos de voz, primero debe agregar una etiqueta de voz a la función del dispositivo.
-
Page 225: Conectividad Bluetooth
PC compatible usando IR o un cable de datos USB y usar el teléfono como un módem para activar la conectividad de su PC. Para obtener más información, consulte la ayuda en línea de Nokia PC Suite. Nokia PC Suite y todo software asociado pueden ser descargados desde la sección de productos de telefonía móvil de www.nokia.com/pc suite (para el Caribe) o... - Page 226 • Perfil de puerto serial (SPP) Para asegurar la funcionalidad entre otros dispositivos que admiten la tecnología Bluetooth, solamente use accesorios aprobados por Nokia para este modelo. Verifique con los fabricantes de otros dispositivos la compatibilidad con este dispositivo. Puede que existan ciertas restricciones al utilizar la tecnología Bluetooth en algunas localidades.
- Page 227 C o n f i g u r a c i o n e s Vincular Puede configurar una asociación permanente (vincular) entre su teléfono y otro dispositivo con tecnología Bluetooth. Ciertos dispositivos pueden requerir la vinculación antes de que la transferencia de datos se pueda realizar. Para vincular con un dispositivo, usted y el dueño del otro dispositivo deben ponerse de acuerdo y usar un código de acceso de 1 a 16 caracteres numéricos.
- Page 228 C o n f i g u r a c i o n e s Configuraciones de conectividad Bluetooth Para definir cómo su teléfono aparece en los otros dispositivos con conectividad Bluetooth. Seleccione Menú > Configuraciones > Conectividad > Bluetooth > Configurac.
-
Page 229: Enviar Datos
C o n f i g u r a c i o n e s Enviar datos En lugar de usar el menú Conectividad, puede usar otros menús del teléfono para enviar distintos tipos de datos a otros dispositivos con conectividad Bluetooth. o ejemplo, puede enviar un video de la carpeta Videoclips en el menú... - Page 230 Activar la conexión del modo predeterminado Conéctese a su PC en Modo Nokia para transferir datos y archivos del teléfono entre su teléfono y PC usando Nokia PC Suite. 1. Conecte su PC y su teléfono usando el cable de datos USB CA-53. Aparece una notificación en la pantalla que le pregunta qué...
- Page 231 C o n f i g u r a c i o n e s Activar la conexión para el almacenamiento de datos Conéctese a su PC en el modo Almacenam. datos para transferir música, fotos y archivos de video a la tarjeta microSD del teléfono y de la tarjeta microSD del teléfono a su PC con Windows Explorer.
- Page 232 C o n f i g u r a c i o n e s Desactivar la conexión de almacenamiento de datos 1. Para desactivar el cable de datos USB, haga clic dos veces en la flecha verde en la barra de tareas en la parte inferior de la pantalla de su PC. Aparece una ventana emergente que muestra Unplug (Desconectar) o Eject Hardware (Expulsar Hardware).
-
Page 233: Configuraciones De Seguridad
C o n f i g u r a c i o n e s Perfil predetermin.: para seleccionar el perfil que desea que se active automáticamente al conectar un auricular, equipo para automóvil o audífono. Respuesta auto.: para contestar las llamadas automáticamente después de un timbre cuando tiene conectado un auricular, equipo para automóvil o audífono. - Page 234 C o n f i g u r a c i o n e s Con el dispositivo bloqueado, aun es posible realizar llamadas al número oficial de emergencia programado en su dispositivo. 1. Seleccione Menú > Configuraciones > Seguridad. 2.
-
Page 235: Restricciones De Llamadas
C o n f i g u r a c i o n e s Para llamar al número telefónico permitido, desplácese hacia abajo para resaltar el número al que desea llamar, o ingréselo en el teclado, pulse la tecla Llamar para realizar la llamada. -
Page 236: Voz Confidencial
C o n f i g u r a c i o n e s 1. Seleccione Menú > Configuraciones > Seguridad. 2. Ingrese el código de bloqueo y seleccione OK. Consulte "Cambiar el código de bloqueo", pág. 234. 3. Seleccione Restricciones llam. 4. -
Page 237: Configuraciones De Aplicación
C o n f i g u r a c i o n e s ■ Configuraciones de aplicación Para cambiar las configuraciones para juegos y aplicaciones, seleccione Menú > Configuraciones > Config. aplicac. y alguna de las siguientes opciones: Sonidos aplicación >... - Page 238 C o n f i g u r a c i o n e s ■ Restaurar configuraciones de fábrica Para restaurar algunas de las configuraciones del menú a sus valores originales, seleccione Menú > Configuraciones > Rest. conf. orig. Ingrese el código de seguridad o bloqueo y seleccione OK.
-
Page 239: Organizador
O r g a n i z a d o r 10. Organizador Su teléfono tiene funciones para ayudarle a organizar su vida cotidiana, incluyendo una alarma, agenda, calculadora, temporizador y cronómetro. ■ Alarma Programar una alarma La alarma se basa en el reloj del teléfono. Una alarma suena a la hora que especifique, aun cuando el teléfono está... - Page 240 O r g a n i z a d o r Si necesita revisar los días para una alarma repetida, seleccione Menú > Organizador > Alarma > Repetir alarma > Días de repetición. Si necesita detener una alarma repetida, seleccione Menú > Organizador > Alarma >...
-
Page 241: Opciones De La Agenda
O r g a n i z a d o r La vista mensual predeterminada muestra el mes seleccionado completo y las semanas. También puede ir a una fecha específica. Cualquier día o fechas que aparecen en negrita contienen notas de agenda como una reunión o un recordatorio. Un resumen corto de las notas para el día aparece en la parte inferior de la pantalla. - Page 242 O r g a n i z a d o r 1. Seleccione Menú > Organizador > Agenda. 2. Desplácese a la fecha para la cual desea crear una nota. Desplácese o seleccione Opciones > Ir a fecha y seleccione una fecha. 3.
- Page 243 O r g a n i z a d o r Opciones mientras ve un día Al ver la lista de notas para un día, puede desplazarse a una nota, seleccione Opciones y alguna de las siguientes opciones: Crear nota: para crear una nota para la fecha seleccionada. Eliminar: para eliminar la nota.
- Page 244 O r g a n i z a d o r Modificar las configuraciones de la agenda Seleccione Menú > Organizador > Agenda > Opciones > Configuraciones y alguna de las siguientes opciones: Fijar fecha: ingrese la fecha actual y seleccione OK. Aparece sólo cuando no se ha fijado la fecha.
-
Page 245: Enviar Una Nota
O r g a n i z a d o r Al crear una nota, las siguientes opciones están disponibles: Insertar fecha/hora: para agregar la hora y fecha a su nota. Cerrar: le lleva a la lista de notas. Insertar emoticón: para insertar un emoticón en su mensaje. Insertar palabra o Editar palabra: para ingresar o editar el texto de una nueva palabra que posiblemente no aparezca en el diccionario de texto predictivo. -
Page 246: Lista De Tareas
O r g a n i z a d o r Editar: para editar la nota que seleccionó. Usar detalles: para utilizar un detalle en la nota. Enviar nota > Enviar como mensaje, Vía infrarrojo o Vía Bluetooth: para enviar una nota en un mensaje de texto, en un mensaje multimedia o directamente a otro dispositivo. -
Page 247: Texto Predictivo
O r g a n i z a d o r Insertar símbolo: para insertar un carácter especial en su mensaje. Insertar símbolo aparece sólo cuando el texto predictivo está activado. Idioma escritura: para seleccionar el idioma que desea utilizar. Predicción activada o Predicción desactiv.: para activar o desactivar el ingreso de texto predictivo. - Page 248 O r g a n i z a d o r Opciones para la lista de tareas Seleccione Menú > Organizador > Lista de tareas > Opciones y alguna de las siguientes opciones: Agregar: para crear una nueva nota en la lista de tareas. Eliminar: para eliminar la nota de lista de tareas seleccionada.
-
Page 249: Convertidor De Divisas
O r g a n i z a d o r 2. Ingrese el número base de la operación. Pulse # para ingresar un punto decimal, de ser necesario. Pulse la tecla de desplazamiento superior o inferior para cambiar el signo de su número o valor. -
Page 250: Temporizador Normal
O r g a n i z a d o r 4. Seleccione Opciones > A nacional o A extranjera. A nacional: convierte moneda extranjera en moneda nacional. A extranjera: convierte moneda nacional en extranjera. 5. Si todavía no ha ingresado una tasa de cambio, el dispositivo le solicita que la ingrese. -
Page 251: Temporizador De Intervalos
O r g a n i z a d o r Después de sesenta segundos la alarma para el temporizador vence automáticamente. Seleccione Salir o pulse la tecla Finalizar para borrar la nota del temporizador. Para cambiar la hora: 1. Seleccione Menú > Organizador > Temporizador > Cambiar tiempo. 2. - Page 252 O r g a n i z a d o r Para usar un temporizador de intervalos: 1. Seleccione Menú > Organizador > Temporizador > Temporiz. intervalos y alguno de los temporizadores para intervalos programados. Agregar nvo. tempor. es la única opción si no ha programado ningún temporizador de intervalos.
- Page 253 O r g a n i z a d o r de vuelta aparece debajo del tiempo en progreso. Cada vez que seleccione Vuelta, el nuevo tiempo medido aparece al principio de la lista. La cantidad máxima de vueltas es veinte. 1.
-
Page 254: Catálogos
C a t á l o g o s 11. Catálogos Catálogos es un servicio de red. Comuníquese con su operador de red móvil para obtener más información. Consulte "Servicios de red", pág. 144. -
Page 255: Web Móvil
Su dispositivo puede tener cargados algunos favoritos de sitios que no estén asociados con Nokia. Nokia no garantiza ni respalda estos sitios. Si accede a ellos, deberá tomar las mismas precauciones en cuanto a seguridad y contenido, como haría con cualquier sitio de Internet. - Page 256 W e b m ó v i l No debería ser necesario configurar manualmente el explorador en su teléfono. Por lo general, esto lo realiza su proveedor de servicios móviles cuando usted se suscribe a la función. Consulte a su proveedor de servicios móviles cuando tenga problemas al usar el explorador.
- Page 257 W e b m ó v i l • Para contestar la llamada entrante, pulse la tecla Llamar. • Para rechazar la llamada entrante, pulse la tecla Finalizar. Tras finalizar la llamada de voz, la conexión al Internet móvil se vuelve a activar automáticamente.
-
Page 258: Extras
■ Colección El software de su teléfono incluye algunas aplicaciones Java diseñadas especialmente para este teléfono Nokia. Iniciar una aplicación Seleccione Menú > Extras > Colección. Desplácese a una aplicación y seleccione Abrir o pulse la tecla Llamar. - Page 259 E x t r a s Dejar las aplicaciones funcionar en segundo plano aumenta la demanda de la energía de la batería y reduce la vida útil de la batería. Para ver la memoria disponible para la instalación de aplicaciones, seleccione Menú...
-
Page 260: Conectividad Pc
Recuerde hacer copias de seguridad de toda la información importante. ■ Nokia PC Suite El software Nokia PC Suite está disponible para este teléfono. Nokia PC Suite es un conjunto de herramientas poderosas que puede usar para administrar los datos y funciones de su teléfono. -
Page 261: Accesorios
Este dispositivo está diseñado para su uso con cargadores AC-3 o AC-4. Advertencia: Utilice sólo baterías, cargadores y accesorios aprobados por Nokia para este modelo particular de teléfono. El uso de cualquier otro tipo de batería, cargador o accesorio puede anular cualquier aprobación... - Page 262 • Adaptador para cargador (CA-44) Utilice el adaptador para cargador CA-44 para conectar el teléfono con los cargadores Nokia con tamaño cilíndrico más grande, incluyendo los cargadores ACP-7, ACP-8, ACP-9, ACP-12, AC-1 (cargador retráctil) y LCH-12 (cargador móvil). Cable de datos USB •...
-
Page 263: Información Sobre Las Baterías
Cuando los tiempos de conversación y de reserva sean notablemente más cortos de lo normal, cambie la batería. Utilice únicamente las baterías aprobadas por Nokia y recárguelas sólo con los cargadores aprobados por Nokia para este dispositivo. - Page 264 Si tiene alguna razón para creer que su batería no es batería auténtica y original de Nokia, evite usarla y llévela al centro de servicio autorizado Nokia más cercano o a un distribuidor Nokia para pedir asistencia. Su distribuidor Nokia o centro de servicio Nokia inspeccionará...
- Page 265 I n f o r m a c i ó n s o b r e l a s b a t e r í a s Autenticación del holograma 1. Al mirar el holograma en la etiqueta, debe ver el símbolo de Nokia: las manos conectadas desde un ángulo y el logo Nokia Original Enhancements desde otro ángulo.
- Page 266 I n f o r m a c i ó n s o b r e l a s b a t e r í a s ¿Qué ocurre si la batería no es auténtica? Si no puede confirmar que su batería Nokia con el holograma en la etiqueta es una batería auténtica de Nokia, no la use. Llévela al centro de servicio autorizado Nokia más cercano o distribuidor para pedir asistencia.
-
Page 267: Cuidado Y Mantenimiento
• No trate de retirar la batería del dispositivo. Nokia recomienda que lo lleve al centro de servicio autorizado más cercano para reponer la batería. - Page 268 C u i d a d o y m a n t e n i m i e n t o • No pinte el dispositivo. La pintura puede obstruir las piezas movibles e impedir un funcionamiento apropiado. • Use sólo un paño suave, limpio y seco para limpiar cualquier lente, como el lente de la cámara y de los detectores de proximidad y de luz.
-
Page 269: Información Adicional De Seguridad
I n f o r m a c i ó n a d i c i o n a l d e s e g u r i d a d Información adicional de seguridad ■ Entorno operativo Su dispositivo y accesorios pueden contener partes pequeñas. Manténgalos fuera del alcance de los niños. - Page 270 I n f o r m a c i ó n a d i c i o n a l d e s e g u r i d a d Marcapasos Los fabricantes de marcapasos recomiendan mantener una distancia mínima de 15,3 centímetros (6 pulgadas) entre un dispositivo o teléfono móvil y un marcapasos, a fin de evitar posibles interferencias.
-
Page 271: Entornos Potencialmente Explosivos
I n f o r m a c i ó n a d i c i o n a l d e s e g u r i d a d Sólo personal calificado debe reparar el dispositivo o instalarlo en un vehículo. Si la instalación o reparación no son correctas, pueden resultar peligrosas y anular cualquier garantía que se aplique al dispositivo. -
Page 272: Llamadas De Emergencia
I n f o r m a c i ó n a d i c i o n a l d e s e g u r i d a d El incumplimiento de estas instrucciones puede resultar en la suspensión o denegación de los servicios de teléfonos celulares al infractor y/o iniciar acción legal en su contra o ambas medidas. -
Page 273: Información De Certificación (Sar)
SAR pueden variar según los requisitos de información y evaluación nacionales y de la banda de la red. Puede obtener información adicional sobre el SAR en la sección de información de productos en www.nokia.com (en inglés). Su dispositivo móvil está diseñado para reunir los requerimientos que rigen la exposición a las ondas de radio los cuales fueron establecidos por la... -
Page 274: Información Técnica
I n f o r m a c i ó n a d i c i o n a l d e s e g u r i d a d máximo según la información suministrada bajo este estándar, durante la certificación del producto, cuando fue probado para uso junto al oído es de 1,13 V/kg y cuando está... -
Page 275: Tiempos De Carga
I n f o r m a c i ó n a d i c i o n a l d e s e g u r i d a d ■ Información sobre las baterías Esta sección provee información sobre los tiempos de carga para la batería con el cargador compacto (AC-3), el cargador para viaje (AC-4), tiempos de conversación y tiempos de reserva. -
Page 276: Índice
Í n d i c e Índice información 262 retirar, reemplazar 155 accesorios 231 tiempos de carga 274 aprobados 260 tiempos de conversación acerca de su dispositivo 144 y reserva 274 agenda baterías y cargadores 262 abrir 240 bloqueo de teclas configuraciones 243 automático 220 crear notas 240... - Page 277 Í n d i c e conectividad Bluetooth 224 configuraciones 227 fecha configurar conexión 227 configurar 215 recibir datos 228 fotografías 203 conectividad de infrarrojos 228 conectividad de teléfono 224 conectividad PC 259 configuraciones 211 galería 200 configuraciones de aplicación 236 grabadora de voz 209 configuraciones de hora y fecha 215 grabar sonido 209...
- Page 278 Í n d i c e internet móvil llamadas de datos o fax 218 realizar llamada de emergencia llamadas de emergencia 256 mientras está en línea 256 con el teclado bloqueado 220 internet, consulte internet móvil llamadas de fax 190 intervalos llamadas de multiconferencia 162 temporizador 250...
- Page 279 162 registro 188 multimedia 203 borrar 189 mensajes 175 llamadas perdidas 188 llamadas recibidas 189 números marcados 189 Nokia PC Suite 259 registro de llamadas 188 normal remarcado automático 216 temporizador 249 repetir alarma 238 notas 243 reproducir enviar 244 pistas de música 206...
- Page 280 Í n d i c e tiempo de conversación 274 tiempo de reserva 274 tarjeta de memoria 257 tiempo de vueltas 251 tarjeta microSD 156 tiempo parcial 251 tarjetas de llamadas 216 tono de inicio 222 tarjetas de negocios 199 tonos al tacto 221 tecla de navegación 220 transferencia de archivo 230...
- Page 281 Notas...
Need help?
Do you have a question about the 6276 and is the answer not in the manual?
Questions and answers