Table of Contents
Advertisement
Advertisement
Table of Contents

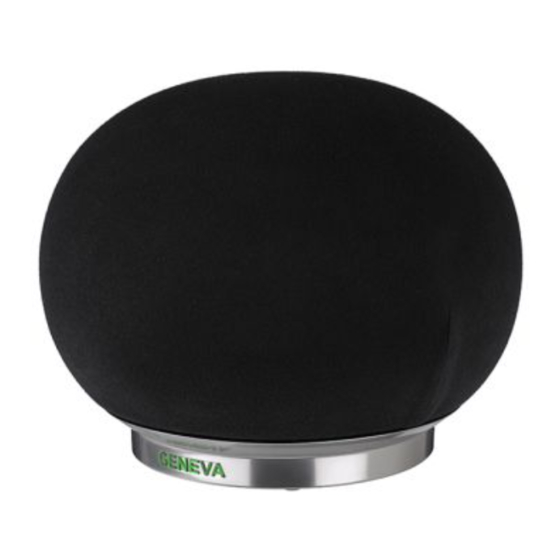
Summary of Contents for G-Lab AeroSphère Small
- Page 1 FEATURE GUIDE AeroSphère / Small / Large / Base...
-
Page 2: Table Of Contents
TABLE OF CONTENTS About the Geneva AeroSphère System ........................ 4 1.1. AeroSphère Small, Large & Base ......................... 4 User Interface: AeroSphère Small & Large ......................5 2.1. Remote control .............................. 5 2.2. AeroSphère App ............................5 2.3. Sound controls .............................. 5 2.4. - Page 3 9.2. Left and Right setup (AeroSPHère SmalL) ....................31 10. Wi-Fi Setup ................................32 10.1. OVERVIEW ..............................32 10.2. Wi-Fi Setup with WAC (Wireless Accessory Configuration) ............... 33 10.3. Wi-Fi Setup with WPS ..........................34 10.4. ADVANCED: more on WPS ........................35 10.5.
-
Page 4: About The Geneva Aerosphère System
1. About the Geneva AeroSphère System 1.1. AEROSPHÈRE SMALL, LARGE & BASE AeroSphère Small and Large AeroSphère Small and AeroSphère Large are wireless active speakers that play music from the following sources: AirPlay® (using Wi-Fi®) • DLNA® for Android (using Wi-Fi) •... -
Page 5: User Interface: Aerosphère Small & Large
2. User Interface: AeroSphère Small & Large 2.1. REMOTE CONTROL Figure 1: AeroSphère Small & Large remote control. 2.2. AEROSPHÈRE APP Go to section User Interface: AeroSphère App this guide. 2.3. SOUND CONTROLS Volume Remote control: use the volume buttons “VOL-“ and “VOL+”. •... -
Page 6: Display
2.4. DISPLAY Figure 2: The color of the Geneva logo shows the operation status of the device. Color Status black Device is powered off yellow Device is starting up green AirPlay, DLNA, connected to the Wi-Fi network green (blinking) AirPlay, DLNA, waiting to connect to the Wi-Fi network blue Bluetooth, connected blue (blinking) -
Page 7: User Interface: Aerosphère Base
3. User Interface: AeroSphère Base 3.1. INSERT AND EJECT A CD You can eject the CD with the following methods: Hold your hand about 10 mm above the CD slot. The CD eject sensor is located above the CD slot. It detects •... -
Page 8: User Interface: Aerosphère App
4. User Interface: AeroSphère App In this chapter you’ll learn how to use FM, DAB+ and the Audio CD with the remote control and the AeroSphère app. There is no additional setup needed because the AeroSphère Base will find all AeroSphère speakers automatically. -
Page 9: Main Screen
4.2. MAIN SCREEN Figure 6: The main screen with an AeroSphère Base (left), and without an AeroSphère Base (right). Starting the app When the app starts, it will automatically find all AeroSphère products in the Wi-Fi network. If no products are discovered, learn more in the troubleshooting section. - Page 10 Figure 7: Launching other music apps (left), bass and treble settings (right). Audio controls 1. Select a speaker 2. Adjust the control for volume, mute, bass or treble Volume: slider at the bottom Mute: touch the speaker icon on the bottom left Unmute: touch the same icon again Bass, treble: touch the music note icon on the bottom right How to launch your favorite music app quickly...
- Page 11 4.3. FM Figure 8: FM screen. Find a station automatically with auto-search Press the red << or >> auto-search keys on the display. Select a station manually Slide the frequency scale to the desired frequency. FM presets Select a station in the FM station list. To store and edit the presets, select the menu entry "Presets". Changing between Mono and Stereo reception In the settings menu, you can select either Mono or Stereo (if stereo is available, it will be the default option).
-
Page 12: Dab
4.4. DAB+ Figure 9: DAB screen. How to select DAB+ After you have selected an AeroSphère speaker icon, select the DAB menu in the main screen. Select a station Select a station in the DAB station list. The currently selected station is marked red. Using DAB for the first time (“Scan”... - Page 13 4.5. CD Figure 10: DAB screen. How to select CD After you have selected an AeroSphère speaker icon, select the CD menu in the main screen. Basic control Use the Play/Pause and skip icons. How to eject a CD Use the eject icon in the AeroSphère app. On the AeroSphère Base: hold your hand above the CD slot.
-
Page 14: Advanced: App Settings
4.6. ADVANCED: APP SETTINGS Figure 11: Settings, main menu (left), speaker menu (right). Speakers With this menu you have access to more details of each speaker and the Base. You can see the IP address, software version and change the name of each speaker. The speaker name will appear below the speaker icon (for example “Living room”, “Studio”... -
Page 15: Playing Music With Bluetooth
5. Playing Music with Bluetooth 5.1. SETUP ("PAIRING") FOR IPHONE, IPOD TOUCH AND IPAD Mobile phones, tablets, and computers with Bluetooth can connect to the AeroSphère speaker and play music wirelessly. The mobile phone, tablet, or computer must support Bluetooth A2DP. The AeroSphère speaker supports also the high quality codec aptX. -
Page 16: Using An Iphone, An Ipod Touch Or An Ipad
5.2. USING AN IPHONE, AN IPOD TOUCH OR AN IPAD Overview The easiest way to use the AeroSphère speakers wirelessly is by using Bluetooth. Mobile phones, tablets, and computers with Bluetooth can connect to the AeroSphère speaker and play music wirelessly. The AeroSphère speakers also support the high quality codec aptX. -
Page 17: Setup ("Pairing") For Android
5.3. SETUP ("PAIRING") FOR ANDROID Android phones and tablets with Bluetooth can connect to the AeroSphère speaker and play music wirelessly. The Android phones and tablets must support Bluetooth A2DP. The AeroSphère speaker supports also the high quality codec aptX. Instructions 1. -
Page 18: Playing Music With Airplay
6. Playing Music with AirPlay What is AirPlay? AirPlay lets you wirelessly stream music from your iPhone, iPad, iPod touch, Mac or Windows computer to the Geneva AeroSphère speaker and other AirPlay speakers. Once you select the AeroSphère speaker with the AirPlay icon in iTunes or the iOS device, the AeroSphère speakers switch automatically from the current audio source to AirPlay. - Page 19 Figure 17: Selecting an AirPlay speaker with the control center of the iPhone Are you connected to Wi-Fi? Before using AirPlay, DLNA, FM, DAB+ or CD, you need to connect the AeroSphère speaker to your Wi-Fi network. See the chapter “Wi-Fi Network Setup” in the Setup Guide. Turn on the power of the AeroSphère speaker and check the display.
-
Page 20: Playing Music With Spotify, Wimp, Deezer Etc. From An Iphone
6.2. PLAYING MUSIC WITH SPOTIFY, WIMP, DEEZER ETC. FROM AN IPHONE Any music iPhone app works with AirPlay Any audio streaming app such as Spotify, Wimp or Deezer can stream audio to the AeroSphère speaker via AirPlay. The same applies for any Internet Radio app. Instructions 1. -
Page 21: Using Itunes On Mac Or Windows
6.4. USING ITUNES ON MAC OR WINDOWS Figure 18: selecting an AeroSphère speaker from iTunes. Instructions 1. Turn the AeroSphère speaker on. 2. Wait until the AeroSphère speaker has successfully connected to the Wi-Fi network (the display is constant green). 3. -
Page 22: Playing Music From Itunes To Multiple Aerosphère Speakers
6.5. PLAYING MUSIC FROM ITUNES TO MULTIPLE AEROSPHÈRE SPEAKERS Figure 19: Playing from iTunes to multiple speakers. Instructions 1. Repeat the steps above 2. Select the AirPlay icon, then check “Multiple”. 3. Uncheck “My Computer” and select all AeroSphère speakers. 4. -
Page 23: Advanced: More On Airplay
6.6. ADVANCED: MORE ON AIRPLAY Automatic selection of AirPlay and volume synchronization When you select the Geneva AeroSphère speaker in the AirPlay menu, the speaker automatically changes to AirPlay. There is no need to use the remote control to switch. Furthermore, the volume level that you see on the control panel is the current volume level from the speaker. -
Page 24: Advanced: Using The Iphone App "Airplay Multi Room Player" With Multiple Aerosphère Speakers
6.7. ADVANCED: USING THE IPHONE APP “AIRPLAY MULTI ROOM PLAYER” WITH MULTIPLE AEROSPHÈRE SPEAKERS If you don’t have an AeroSphère Base you still can play music from an iPhone music app multiple AeroSphère speakers. The iPhone app “AirPlay Multiroom Player” by Whaale allows music to be played from the following sources: Local music files from your iPhone •... -
Page 25: Speakers
7. Playing Music on Android (DLNA) 7.1. USING DLNA ON ANDROID What is DLNA? The AeroSphère speakers work with apps that have DLNA support. DLNA is a standard for streaming audio via a home network to a speaker. Once a user selects the AeroSphère speaker in a DLNA app on a smartphone, the AeroSphère speakers will switch automatically from the current audio source to DLNA. -
Page 26: Playing Music From The Samsung App "Music
7.2. PLAYING MUSIC FROM THE SAMSUNG APP “MUSIC” Figure 25: Playing music on an AeroSphère Small speaker with the Samsung “Music” app. Setup: The app "Music" is already preinstalled on most Samsung phones. Step 1: Play a track or an album. Step 2: Select the music note icon/album art on the lower right to go to the next screen. -
Page 27: Playing Music With The Aerosphère Base
8. Playing Music with the AeroSphère Base 8.1. USING THE AEROSPHÈRE BASE What can I do with the AeroSphère Base? You can stream FM, DAB+ and Audio CDs to a maximum of four AeroSphère speakers simultaneously. You control the AeroSphère Base with the AeroSphère app and a remote control. The Base has no remote control sensor, so you need to point the remote control at an AeroSphère speaker. -
Page 28: Using Any Iphone Music App With Multiple Aerosphère Speakers
8.2. USING ANY IPHONE MUSIC APP WITH MULTIPLE AEROSPHÈRE SPEAKERS You can play music from your favorite iPhone app and stream it to all connected AeroSphère speakers. This multi room setup supports up to four AeroSphère speakers playing music at the same time. Figure 28: Playing any music from any iPhone app to multiple AeroSphère speakers. -
Page 29: Using Other Audio Devices With The Aerosphère Base
8.3. USING OTHER AUDIO DEVICES WITH THE AEROSPHÈRE BASE You can connect your turntable to the AeroSphère system with the “LINE IN” input of the AeroSphère Base. Connect the audio output (Line out, head phone out) with the "LINE IN" 3.5 mm connector at the back of the Base. Figure 29: Playing music from a turntable to multiple speakers with the AeroSphère system. -
Page 30: Sound Setup
9. Sound Setup 9.1. RECOMMENDED AUDIO SETTINGS FOR AEROSPHÈRE LARGE Bass setup The AeroSphère Large has a very powerful subwoofer. If the speaker is placed close to a wall or a corner, the bass will be amplified and too dominant. The bass is adjusted in the AeroSphère app, and can be accessed by selecting the music note icon on the lower right. -
Page 31: Left And Right Setup (Aerosphère Small)
9.2. LEFT AND RIGHT SETUP (AEROSPHÈRE SMALL) Two AeroSphère Small speakers can be configured and used as a pair of stereo speakers. With the AeroSphère App, each speaker has a balance option in Settings: N = neutral (default setting) - the mono speaker is using a mix between the left and right channel LEFT = play only the left audio channel RIGHT = play only the right audio channel Use the balance settings and select LEFT for the left speaker and RIGHT for the right speaker. -
Page 32: Wi-Fi Setup
10. Wi-Fi Setup 10.1. OVERVIEW Playing music wirelessly with AirPlay or DLNA requires the AeroSphère speakers to be connected to your home network via Wi-Fi (WLAN / wireless network). There are three different methods you can use for the Wi-Fi setup. Wi-Fi Setup method When to use this method Supported by... -
Page 33: Wi-Fi Setup With Wireless Accessory Configuration
10.2. WI-FI SETUP WITH WAC (WIRELESS ACCESSORY CONFIGURATION) What is needed for this setup? 1. An iPhone, iPad or iPod Touch with iOS version 7 or higher. 2. The iOS device must already be connected to your Wi-Fi network Instructions 1. -
Page 34: Wi-Fi Setup With Wps
10.3. WI-FI SETUP WITH WPS What is needed for this setup? Your Wi-Fi router needs to support WPS. No computer or smartphone is needed for this setup. Figure 34: Wi-Fi setup with WPS. Press the WPS button on both the Wi-Fi router and the AeroSphère speaker. Instructions 1. -
Page 35: Advanced: More On Wps
10.4. ADVANCED: MORE ON WPS WPS Icon Sometimes only an icon is shown on a Wi-Fi router, without the name “WPS”. Official WPS icon: Different names for WPS WPS is not always labeled “WPS”. Netgear WPS = Push’n connect Netgear WPS Icon: Fritzbox WPS button = WLAN WPS does not always work... -
Page 36: Advanced: Using The Network Setup Webpage (Aerosphère Small & Large)
10.5. ADVANCED: USING THE NETWORK SETUP WEBPAGE (AEROSPHÈRE SMALL & LARGE) What is needed for this setup? You need a computer (Mac, Windows or Linux), a tablet or a smartphone that is connected to your home network. You also need to know the password of your Wi-Fi network. This method works with any Wi-Fi router or Wi-Fi access point. - Page 37 6. Connect to the temporary Wi-Fi network, depending on your device and operating system. iPhone, iPad or iPod Touch 6.1. Open “Settings”, then open “Wi-Fi”. 6.2. Make sure Wi-Fi is on. 6.3. Select the network “AeroSphere_Small_SETUP…” or “AeroSphere_Large_SETUP…”. 6.4. Click “Join”. Android 6.1.
- Page 38 Figure 36: Network setup webpage of an AeroSphère device. Troubleshooting - Repeat the procedure. - Check if Wi-Fi is enabled on your computer or smartphone. - Ensure you have entered the correct IP address in the Internet browser: http://192.168.1.1 - You may have selected the wrong Wi-Fi network or the wrong password was entered. - Check the networking troubleshooting guide on the Genevalab.com support page.
-
Page 39: Advanced: Using The Network Setup Webpage (Aerosphère Base)
10.6. ADVANCED: USING THE NETWORK SETUP WEBPAGE (AEROSPHÈRE BASE) Figure 37: How to do the Wi-Fi setup with the network setup webpage. Instructions This setup method works with iPhone, iPad, Android, Mac and PC. 1. Turn the AeroSphère Base on by sliding the power switch to the ON position. Wait until you see the display flash two times repeatedly in green. -
Page 40: Recommendations For The Best Audio Streaming Quality
11. Recommendations for the best audio streaming quality In some places, there can be high Wi-Fi traffic. The following configurations are recommended for the best possible audio streaming. 11.1. WI-FI ROUTER Wi-Fi router choice: Use a Wi-Fi router that supports WMM - this is the case for most newer 802.11N Wi-Fi •... -
Page 41: Troubleshooting & Faq
12. Troubleshooting & FAQ Go to the "Troubleshooting & FAQ" on AeroSphère support on www.genevalab.com. -
Page 42: Copyrights
13. Copyrights © 2014 G-Lab GmbH. All rights reserved. Under the copyright laws, this manual may not be copied, in whole or in part, without the written consent of G-Lab GmbH. Geneva® is a registered trademark of G-Lab GmbH. AirPlay, iPad, iPhone, iPod, iPod classic, iPod nano, iPod touch, iTunes, iOS, and Retina are trademarks of Apple Inc., registered in the U.S.
Need help?
Do you have a question about the AeroSphère Small and is the answer not in the manual?
Questions and answers