Table of Contents
Advertisement
Quick Links
Download this manual
See also:
Installation Manual
Advertisement
Table of Contents

Related Manuals for Quadro Quadro6L

Summary of Contents for Quadro Quadro6L
- Page 2 • The Epygi Quadro6L/4L has been tested and found to comply with the limits for a class A digital device, pursuant to Part 15 of the FCC Rules. These limits are designed to provide reasonable protection against harmful interference in a commercial installation.
- Page 3 Internet and therefore is dependent upon a constant source of electricity and network availability. If a power outage occurs, the Quadro SIP Service automatically will be disabled. User understands in the event of a power or network out- age, the Quadro SIP Service will not support 911 emergency services, and further, such services only will be available via the user's regular telephone line that is not connected to the Quadro.
-
Page 4: Table Of Contents
Manual I: Installation Guide About This Installation Guide ............6 Requirements................7 Hardware Overview..............8 The Connectors Panel of Quadro6L/4L ............8 Quadro6L/4L’s Front Panel LEDs ..............9 Step 1: Installing the Quadro ............. 11 Networking Overview ................11 LAN/WAN Connection Options ............... 12 Connecting the Hardware .............. - Page 5 Quadro6L/4L Manual I: Installation Guide Manual II: see Administrator's Guide This guide describes in detail the menus available for administrators only. Fur- thermore, it includes all the system’s default values at a glance. Manual III: see Extension User's Guide This guide describes in detail the menus available for extension users. Further- more, it includes all the call codes at a glance.
-
Page 6: About This Installation Guide
Epygi SIP Server. After successfully configuring the Quadro, a user will be able to make SIP phone calls to remote Quadro devices, make local calls to the PSTN and access the Internet from devices connected to the LAN. -
Page 7: Requirements
Please Note: The Quadro6L/4L is shipped with one RJ11 cable and one straight RJ45 CAT 5 cable. If the LAN connector of the Quadro connects to a hub or switch, a crossover cable may be required. Quadro6L/4L; (SW Version 5.2.x) -
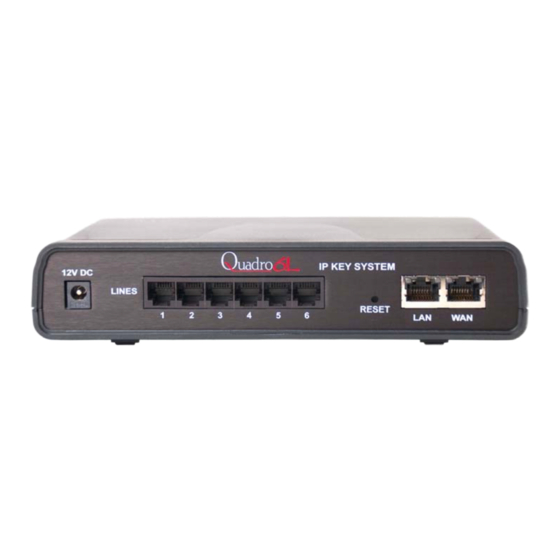
Page 8: Hardware Overview
Ethernet hub, router or switch is used; a crossover cable may be required. This port may also be used to connect IP phones to the Quadro (optional). In this case, it is recommended to use a hub or a switch to connect the PC along with IP phones to the Quadro’s LAN port. -
Page 9: Quadro6L/4L's Front Panel Leds
RJ45 socket to attach the Internet Uplink (WAN) via an Ethernet CAT 5 cable. This port may also be used to connect IP phones to the Quadro. The default con- figuration settings assume that IP phones are attached to this, rather than the LAN port. - Page 10 The yellow/red/green Info/Fault LED will stop blinking alternately red/yellow and start blink- ing red/green/red/yellow. This shows that Quadro has accepted the emergency firmware and is loading it. After a few seconds, Quadro will boot, showing the boot LED sequence. Quadro6L/4L; (SW Version 5.2.x)
-
Page 11: Step 1: Installing The Quadro
Ethernet hubs and switches on the LAN, allowing additional devices to be con- nected to the network. The Quadro is a device with two sides: one side connects to your LAN, and the other side connects to the Internet, or the WAN. Quadro’s firewall and Network Address Translation (NAT) functionality protects your LAN from being seen from the Internet side making the LAN private and secure. -
Page 12: Lan/Wan Connection Options
DHCP client on the WAN port. The IP phones are placed on the WAN side of the Quadro6L, connected to the company LAN. The Admin PC can be connected to the Quadro WAN or LAN port to access the Web Man- Quadro6L/4L; (SW Version 5.2.x) - Page 13 Since Quadro uses STUN by default, it will work with most basic rou- ters without any further configuration. • A Quadro6L with an Ethernet WAN port behind a router, which is connected to a cable or xDSL modem. IP phones are placed on the LAN side of the Quadro6L.
- Page 14 Step 1: Installing the Quadro Fig. l- 7: Configuration: Quadro4L behind a router with IP phones on LAN • A Quadro6L used as an Internet Access Router, connected directly to the Internet. Fig. l- 8: Configuration: Quadro6L used as Internet Access Router •...
- Page 15 The Admin PC is connected to the Quadro’s LAN port through a switch/hub to access the Web Management of the Quadro (Fig. I -6, Fig. I -7, Fig. I -8 and Fig. I -9). It is recommended to have Admin PC acting as a DHCP client and obtaining IP address from the Quadro.
-
Page 16: Connecting The Hardware
Connecting the Hardware • Quadro6L behind a router with IP phones connected to WAN Fig. l- 10: Installation: Quadro6L behind a router with IP phones on WAN • Quadro4L behind a router with IP phones connected to WAN Fig. l- 11: Installation: Quadro4L behind a router with IP phones on WAN •... - Page 17 Quadro4L behind a router with IP phones connected to LAN Fig. l- 13: Installation: Quadro4L behind a router with IP phones on LAN • Quadro6L used as Internet access router Fig. l- 14: Installation: Quadro6L used as an Internet Access Router Quadro6L/4L; (SW Version 5.2.x)
- Page 18 Connect the Ethernet port on your PC via a straight CAT 5 cable with an RJ45 con- nector to the LAN socket of the Quadro. If a hub or switch is connected between the Quadro and your PC, use a crossover cable from the LAN interface of the Quadro to the hub/switch.
- Page 19 WAN LEDs verify that the Ethernet connection is established between the end points. If these LEDs are not illuminated, there is a connection problem between the Quadro and the other device. Some modems, hubs, switches and routers will require the use of crossover cables.
-
Page 20: Step 2: Configuring The Quadro
• In the address field, enter http://Quadro_WAN_IP (the IP address assigned by the company’s DHCP sever) if the PC is connected to the Quadro WAN port; or http://172.30.0.1 (Quadro’s default LAN IP address) if the PC is con- nected to the Quadro’s LAN port. -
Page 21: Step 2.2: System Configuration Wizard
Next button to start. Enter into the Host Name field the unique name (top right corner, un- der Epygi logo) for the Quadro device. The Domain Name text field requires the LAN side domain name which the Quadro belongs to. -
Page 22: Dhcp Settings For The Lan Interface
LAN port. If you didn’t change the default LAN IP address of the Quadro, you also may leave the de- fault values for the IP Address Range. Make sure your connected LAN devices belong to the same network as the LAN port of your Quadro. -
Page 23: Emergency And Pstn Access Code Settings
For more information on the Blind Transfer to Extension Service, please see Manual II: Administrator’s Guide. The PSTN Access Code is the prefix number you choose to dial to tell the Quadro to “make this call over PSTN” (see Step 4: Making/Receiving Calls). -
Page 24: Finishing The System Configuration Wizard
Finishing the System Configuration Wizard Fig. l- 22: System Configuration Wizard finishing page Click on Finish to complete the System Configuration Wizard. The Quadro will then stop in- ternal functions and apply the changes made in the Wizard. Fig. l- 23: Wizard Execution Progress page After this is complete, the Quadro will reply with the Confirm Settings page requesting confirmation of the changes. - Page 25 If you do not use DHCP for your LAN and you have changed your LAN set- tings, make sure that the IP address of the PC connected to Quadro is still within the speci- fied IP address range, otherwise your PC may not establish a connection to Quadro.
-
Page 26: Step 2.3: Internet Configuration Wizard
System menu. The Internet Configuration Wizard is a tool for the administrator to config- ure the WAN settings and to adjust Quadro's connectivity in the global network. It must be run if Quadro is desired to be connected to the Internet. -
Page 27: Uplink Configuration
Quadro6L/4L Manual I: Installation Guide Step 2: Configuring the Quadro Uplink Configuration Select the desired WAN Interface Protocol and enter the WAN Interface Bandwidth to as- sure the quality of IP calls. Fig. l- 26: Uplink Configuration If the available bandwidth is used to the point where the quality of an additional IP call would suffer, then new IP calls are rejected. -
Page 28: Wan Ip Configuration
Quadro6L/4L Manual I: Installation Guide Step 2: Configuring the Quadro WAN IP Configuration Your Internet Service Provider (ISP) should provide this information. • Assign automatically via DHCP - The parameters are set automatically by the ISP. This is common with cable modem and DSL service. -
Page 29: Ppp/Pptp Configuration
Quadro always remain online in the network. The IP Address Assignment field is used to specify the external IP address given to the Quadro. Usually it is a dynamic address but in some cases you may be given a static IP address. -
Page 30: Wan Interface Configuration
Fig. l- 30: DNS Settings page The Quadro will suggest the correct settings. If Dynamically by Provider is selected, the DNS server settings will be set automatically whenever a connection to the Internet is es- tablished. -
Page 31: Finishing The Internet Configuration Wizard
Finishing the Internet Configuration Wizard Fig. l- 31: Internet Configuration Wizard Summary page Click the Finish button to complete the Internet Configuration Wizard. The Quadro will then stop internal functions and apply the changes made in the Wizard. After this is complete, the Quadro will display the Confirm Settings page requesting confirmation of the changes. -
Page 32: Step 2-A: Using Ip Lines
Before starting the IP Lines configuration, the appropriate IP phone should be connected to the Quadro either through its WAN or LAN port. If the phones are placed on the Quadro WAN, which the default configuration assumes, please ensure that the Connect IP phones from WAN side checkbox is enabled on the Line Settings page (see Fig. - Page 33 Username and Password are required to be inserted for this selection. They should match on both Quadro and SIP phone for a successful connection. The Password field is checked against its strength and you may see how strong is your inserted password right below that field.
- Page 34 To make sure the IP line is configured properly, do the following: • Go to Quadro Status – SIP Registration status – Registered IP Lines to see if IP Line registration is successful. •...
-
Page 35: Supported Sip Phones
Tested SIP Phones Below is the list of SIP phones that are tested and can be configured to work with Quadro6L/4L using the automatically configuration option. Some Quadro’s supported fea- tures like Paging, Intercom, etc. may be missing in these SIP phones. - Page 36 To use Plug and Play (PnP) option for supported IP phones, connect them to LAN/WAN for the Quadro and power up. If the phone is in default settings then it will automatically select a free IP line and attach to an extension. If not, reset the phone to factory defaults manu- ally.
-
Page 37: Step 2-B: Using Key System Emulation
Go to the Telephony menu of the Quadro’s Web Management for Key System Emulation service configuration. By default, the 6 FXO lines of the Quadro6L device are correspondingly attached to the first 6 SLA lines (SLA 7 and SLA 8 are inactive) and the 4 FXO lines of the Quadro4L are corre- spondingly attached o the first 4 SLA lines (SLA5, SLA6, SLA7 and SLA8 are inactive). -
Page 38: Using Sla Lines For Sip Calls
Step 2-B: Using Key System Emulation This means that each FXO line on the Quadro6L/4L is assigned to the SLA line and all in- coming calls on that FXO line will be ringing on the corresponding SLA line. Along with this, the programmable key on the IP phone responsible for that SLA line will be blinking during the incoming call. - Page 39 Quadro6L/4L Manual I: Installation Guide Step 2-B: Using Key System Emulation Fig. l- 35: Key System Emulation – SLA page The SLA Name text field is used to insert the preferred name for the corresponding SLA line. On the IP phones with the display available, this name is visible on the display next to the programmable key.
-
Page 40: How To Disable The Key System Emulation
As indicated above, this causes some limitations in using the FXO lines on the Quadro. If you wish to move back to the regular FXO lines usage on the Quadro6L/4L, you can achieve it by disconnecting the FXO line from the SLA by inactivating the SLA or by chang- ing the SLA assignment to a SIP server. -
Page 41: Step 2-C: Using Receptionist
Step 2-C: Using Receptionist If you wish to use the Receptionist’s features, the Receptionist should be set up on the Qu- adro. The Quadro’s basic configuration should be done in the same way as described in the Step 2. The Receptionist related setup, with detailed instructions on how to configure the Quadro and the attached IP Phones, is described in the “Receptionist Setup on Quadro”... -
Page 42: Step 3: Registering On Epygi's Technical Support
Epygi SIP Server. To register, you need to know the serial number of your Quadro, which is located on a label on the bottom of Quadro. You will also need the date of purchase. Next, open the Epygi home page (www.epygi.com), select Support and click on Registration Form. -
Page 43: Step 4: Making/Receiving Calls
PSTN. • To make a VoIP call to a user on the remote Quadro, lift the handset and dial 8 + SIP Address (of the user on the remote Quadro) + #. You are calling over the Internet to a remote user. - Page 44 Quadro6L/4L Manual I: Installation Guide Step 4: Making/Receiving Calls If you want to establish a dial plan between several Quadro units in a private group, refer to Appendix: Registering on Epygi’s SIP Server, which describes how to change the default, SIP addresses on the Epygi SIP server and in the Quadro devices.
-
Page 45: Appendix: Changing The Admin Password
Quadro6L/4L Manual I: Installation Guide Appendix: Changing the Admin Password Appendix: Changing the Admin Password For security reasons, it is recommended that you change the default admin password. The username of the administrator (admin) cannot be changed. To change the administrator password, go to the System menu, User Rights Manage- ment. - Page 46 Attention: It is highly recommended to define a proper and non-empty password on this page if the extension is being used for the Call Relay service from the Quadro's Auto At- tendant. Write down the password somewhere and keep it in a secure place. If the password is lost, a factory reset will be required on the unit (see Administrator's Guide, Hardware Overview).
-
Page 47: Appendix: Configuring Nat Traversal
To resolve this issue, either STUN must be enabled on the Quadro or SIP NAT traversal must be set up in the router and in the Quadro to route the in- coming calls properly. - Page 48 Quadro6L/4L Manual I: Installation Guide Appendix: Configuring NAT Traversal Fig. l- 40: NAT Traversal Settings – General Setting Go to SIP Parameters page. Fig. l- 41: NAT Traversal Settings - SIP Parameters Select Use Manual NAT Traversal and enter the WAN IP address of the router into the Mapped Host text field.
- Page 49 6000 (Min) and 6099 (Max), respectively. Click the Save button to save the contents. The Quadro will activate the settings and register the extensions on the Epygi SIP Server after a few minutes. You can verify the settings from the main Quadro Management menu under Status in the SIP Registration Status section.
-
Page 50: Appendix: Registering On Epygi's Sip Server
Appendix: Registering on Epygi’s SIP Server Appendix: Registering on Epygi’s SIP Server You may login directly to Epygi’s SIP Server if you have registered your Quadro at Epygi’s Technical Support Center. If you have not registered with Epygi Technical Support, you cannot login to the Epygi SIP Server. - Page 51 Fig. l- 45: SIP Services Add New Extension page The Authentication password validates the entry and must match the password entered on the Quadro later. Make sure to record the name, Authentication Password and SIP ex- tension number for entry into the Quadro later.
- Page 52 Configuring Quadro Extensions Once the SIP server has the created extensions with the user information, create these ex- tensions in the Quadro devices. Once they are entered in the Quadro, they will be regis- tered and can then be used.
- Page 53 Quadro6L/4L Manual I: Installation Guide Configuring Quadro Extensions Fig. l- 49: Extensions Management - Edit Entry – SIP Settings page • Enter the SIP registration number displayed in the column Ext# into the text field Registration User Name. • In the Password field, enter the password you specified when registering at the SIP server and confirm it in the field below.
- Page 54 If you go back to Epygi’s SIP Server, you will find the value reg. for this number in the col- umn Stat. Reg. This will indicate that the Quadro has successfully registered the new num- ber. If this does not happen after a few minutes, again verify the SIP Number and pass- words.
-
Page 55: Appendix: Checking The Connections
Quadro6L/4L Manual I: Installation Guide Appendix: Checking the Connections Appendix: Checking the Connections If the system doesn’t seem to be working properly, even when all the cables are connected properly, it may be helpful to Start Network Diagnostics: The WAN link, IP configuration, gateway, DNS server, and STUN-NAT will all be checked. - Page 56 STUN is enabled, the detected connection type and the IP address of this router's WAN port are displayed. Fig. l- 52: SIP Registration Status page Quadro cannot work behind your router if Detected Connection Type is one of the follow- ing: •...
- Page 57 Quadro6L/4L; (SW Version 5.2.x)
Need help?
Do you have a question about the Quadro6L and is the answer not in the manual?
Questions and answers