Table of Contents
Advertisement
Quick Links
Advertisement
Table of Contents

Related Manuals for PowerMaster GT

Summary of Contents for PowerMaster GT
-
Page 2: Table Of Contents
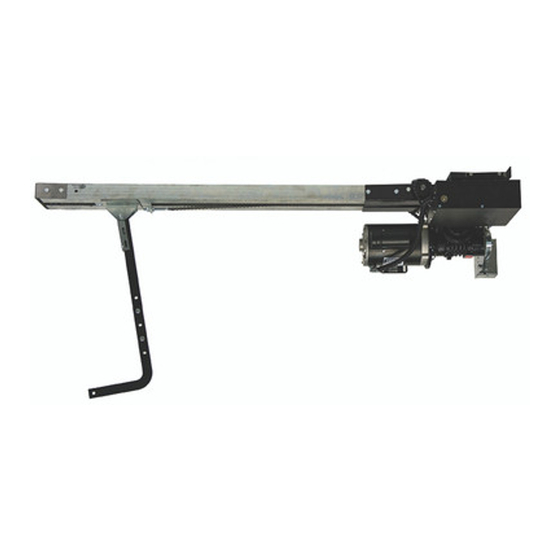
TABLE OF CONTENTS Model GT Drawbar Operator Applications– Product Features ............….3 Preparation ............................4-7 Component Identification Pictorial - Figure 1 ............... 4 Important Installation Notes (Things To Do Before/During Installation)......5 Component Identification Listing - Table 1 ................5 Rail/Chain Assembly Instructions - Figure 2 …...………………………………………………..6 Trolley Assembly Instructions - Figure 3 ………………………………..…………………..6-7... -
Page 3: Model Gt Drawbar Operator Applications- Product Features
A drawbar operator when properly installed ELECTRICIANS. will effectively lock the door in the closed position. NOTE:THE IMPORTANT SAFEGUARDS AND Model GT Drawbar operators are used in INSTRUCTIONS IN THIS MANUAL CANNOT the following applications: COVER ALL POSSIBLE CONDITIONS AND - Heavy... -
Page 4: Preparation
PREPARATION and phase are in accordance with electrical WARNING power provided at the job site. The rails are shipped separately from the power head. ELECTRIC DOOR OPENERS ARE DESIGNED FOR Warning: Rope off the area to keep DOORS GOOD WORKING CONDITION, personnel and vehicles clear of the door PROPERLY COUNTERBALANCED AND PROPERLY... -
Page 5: Important Installation Notes (Things To Do Before/During Installation)
Reinforcement Kit. door. • PowerMaster Model T Drawbar operators are Commercial Vehicular Door Operators and as such are NOT recommended for pedestrian • Do not overtighten the clutch adjustment to traffic. -
Page 6: Rail/Chain Assembly Instructions - Figure 2
RAIL/CHAIN ASSEMBLY SPRINGS, PULLEYS, CABLES AND MOUNTING HARDWARE USED TO BALANCE YOUR GARAGE DOOR ARE UNDER EXTREME TENSION AT ALL TIMES AND CAN CAUSE SEVERE INJURY OR DEATH IF DISTURBED. WARNING DO NOT ATTEMPT ADJUSTMENT. Track Assembly 1. Lay Track Angles (1) on work surface as shown in Figure #2. 2. -
Page 7: Operator Assembly Instructions Figure 4,5, & 6
INSTALLATION INSTRUCTIONS 5/16 X 1-1/4" LG. 9. Adjust chain tension using chain adjusting nut, CARRAGE BOLTS to remove excess slack. See Figure # 5 3/8" LOCK 10.Lock in adjustment using lock washer and WASHER UPPER HALF lock nut on chain take up bolt (7). See Figure OF TROLLEY # 5. -
Page 8: Operator Installation Figure 7 & 8
INSTALLATION INSTRUCTIONS WARNING CENTER OF DOOR TO AVOID DAMAGE TO DOOR AND OPERATOR ENSURE ALL DOOR LOCKS ARE DISABLED. PROJECTED LINE USE AN INTERLOCK SWITCH IF A LOCK IS REQUIRED TO RETAIN FUNCTIONALITY. LEVEL 1. Locate the center of the door and mark a line on the wall directly above the door. -
Page 9: Preparing Mounting Pad - Figure 9
INSTALLATION INSTRUCTIONS operator from the ceiling. Each installation will WARNING vary due to the difference in building structures. THE FRONT MOUNTING SURFACE MUST BE SOUND Side braces should always be used to further SECURE. NECESSARY PROVIDE support the power head. REINFORCEMENT IN THIS AREA BEFORE MOUNTING THE OPERATOR RAIL FRONT MOUNTING BRACKET. -
Page 10: Hanging Power Head - Figure 10
INSTALLATION INSTRUCTIONS 3/8" HEX HEAD BOLTS CENTER LINE CENTER LINE (BY OTHERS) OF DOOR OF DOOR 3/8" LAG BOLTS (BY OTHERS) ANGLE IRON MOUNTING PAD WOOD BLOCK MOUNTING PAD OVERALL LENGTH = DOOR HEIGHT PLUS 4'-9" LEVEL 3-1/2" MIN. ANGLE IRON SUPPORTS (BY OTHERS) SIDE BRACE (2) PLCS. -
Page 11: Assembling Door Arm - Figure 11
INSTALLATION INSTRUCTIONS 3/8 X 1-1/4" LG. HEX HEAD BOLTS 3/8" LOCKWASHERS AND NUTS Figure 11 DOOR CENTER LINE DOOR ARM ASSY. 3/8" NUTS 3/8 X 1-1/4" LG. HEX HEAD BOLT (BY OTHERS) Figure 12... -
Page 12: Setting The Limits - Figure 13
INSTALLATION INSTRUCTIONS 3. Refer to Figure 8. Depress the limit nut retaining bracket WARNING away from the slots in the limit nuts. Turn the CLOSE limit nut on the shaft until it engages the CLOSE Limit TO AVOID RISK OF ENTRAPMENT AND POSSIBLE Switch. -
Page 13: Electrical Wiring Instructions
IS CLEAR BEFORE STARTING TESTING OF UNIT. WIRING THE OPERATOR. Warning: Control voltage of the operator is NOTE: PowerMaster T Drawbar operators have 24 volts AC, Class 2. Do not run the power been designed and constructed for use with... -
Page 14: Pneumatic Door Edge Installation - Figure 14
PNEUMATIC DOOR EDGE INSTALLATION - FIELD WIRING Figure 16 Figure 14 PHOTOCELL OR 3-WIRE AIRSWITCH SINGLE TIMER DEFEAT EXT'L INTL'K CONTACT SWITCH (N.C.) (WHEN REQ'D) CONTROL (WHEN REQ'D) 2-WIRE EDGE OR AIRSWITCH OBSTRUCTION (SEE NOTE #3) SENSING DEVICE NOTES: - INSTALL BROWN JU MPER W IRE IF TH ERE IS NO STOP BUTTON OR EXTERNAL INTERLOCK SW ITCH CONNECTED TO TER MINAL STRIP. -
Page 15: Operation And Adjustment Instructions
OPERATION AND ADJUSTMENT INSTRUCTIONS IMPORTANT SAFETY INSTRUCTIONS FOR OWNER TO REDUCE THE RISK OF SEVERE INJURY OR WARNING DEATH: READ AND FOLLOW ALL INSTRUCTIONS! • NEVER let children operate or play with door controls. Keep the Remote Control away from children. -
Page 16: Clutch Adjustment - Figure 16
OPERATION AND ADJUSTMENT INSTRUCTIONS CLUTCH ADJUSTMENT CAUTION NEVER COMPRESS CLUTCH WARNING SPRING BEYOND POINT LIMITED BY THE DESIGN OF THE OPERATOR OR REPLACE IT WITH A HEAVIER SPRING. RISK OF ENTRAPMENT THAT MAY RESULT IN SERIOUS PERSONAL INJURY OR DEATH. Due to changing conditions of the door and DISCONNECT POWER TO THE OPENER normal wear, it may be necessary to occasionally... -
Page 17: Testing
OPERATION AND ADJUSTMENT INSTRUCTIONS TESTING To test the manual disconnect first move the WARNING door to the fully closed position. Then disconnect the power to the operator. Manual door operation is possible when the release cord is ALWAYS DISCONNECT POWER TO THE pulled and the door arm assembly releases from O P E R A T O R B E F O R E... -
Page 18: Maintenance
MAINTENANCE Normally, very little maintenance is required. A monthly visual inspection must be made for loose or missing hardware and for excessive slack in the v-belt and jackshaft chain. The clutch must be checked periodically and adjustments made if necessary. (See page 16) WARNING DO NOT STAND UNDER DOOR TO TEST REVERSING EDGE. -
Page 19: Trouble Shooting
OPERATION AND ADJUSTMENT INSTRUCTIONS SYMPTOM POSSIBLE CAUSE SOLUTION Motor runs but Door jammed or obstructed. Check manual operation of door. door does not Trolley disconnected from drive with Reconnect door arm to trolley traveler. move door arm release. Clutch slipping/v-Belt slipping Check clutch adjustment. -
Page 20: Wiring Diagram - Single Phase 331-3
WIRING DIAGRAM NO. 331-3 ETC. MAY BE CONNECTED TO TERMINALS INDICATED. SENSING DEVICE Copyright PowerMaster 1997 B-REMOTE CONTROL UNITS (EXCLUDING TREADLES AND PHOTO-ELECTRIC UNITS). PULL SWITCHES No portion of this diagram may be reproduced without the AND SINGLE CONTACT CONTROL STATIONS, MAY BE CONNECTED TO TERMINALS INDICATED. -
Page 21: Wiring Diagram - Three Phase 333-3
WIRING DIAGRAM NO. 333-3 B-REMOTE CONTROL UNITS (EXCLUDING TREADLES AND PHOTO-ELECTRIC UNITS). PULL SWITCHES AND SINGLE CONTACT CONTROL STATIONS, Copyright PowerMaster 1997 No portion of this diagram may be reproduced without the MAY BE CONNECTED TO TERMINALS INDICATED. expressed written permission of the manufacturer. -
Page 22: Wiring Diagram - Single Phase 1331-3
WIRING DIAGRAM NO. 1331-3 SENSING DEVICE ETC. MAY BE CONNECTED TO TERMINALS INDICATED. Copyright PowerMaster 1997 B-REMOTE CONTROL UNITS (EXCLUDING TREADLES AND PHOTO-ELECTRIC UNITS). PULL No portion of this diagram may be reproduced without the SWITCHES AND SINGLE CONTACT CONTROL STATIONS, MAY BE CONNECTED TO TERMINALS INDICATED. -
Page 23: Wiring Diagram - Three Phase 1333-3
ETC.. MAY BE CONNECTED TO TERMINALS INDICATED. WIRING DIAGRAM 1333-3 B-REMOTE CONTROL UNITS (EXCLUDING TREADLES AND PHOTO-ELECTRIC Copyright PowerMaster 1997 UNITS). PULL SWITCHES AND SINGLE CONTACT CONTROL STATIONS, No portion of this diagram may be reproduced without the MAY BE CONNECTED TO TERMINALS INDICATED. -
Page 24: Warranty
PowerMaster Limited 2 Year Warranty PowerMaster warrants all door operators to be free of defects in materials and workmanship for a period of two (2) years from date of purchase. If any part is found to be defective during this period, new parts will be fur- nished free of charge. - Page 25 Call 1- 800 - 323 - 3674 to order or to find a distributor near you Standard Two Year Warranty Warehouses across the country w/ factory trained managers Prompt delivery from stock 06-0922 GT Special operators normally ship within 7 days...
Need help?
Do you have a question about the GT and is the answer not in the manual?
Questions and answers