Table of Contents

Related Manuals for HealthTrainer HT660u

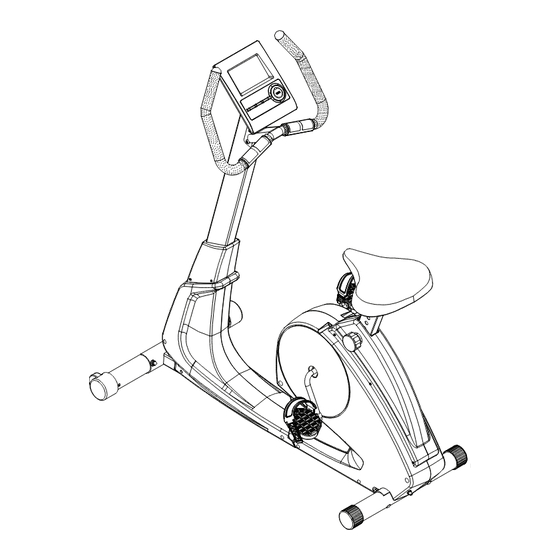
Summary of Contents for HealthTrainer HT660u
- Page 1 Owner’s Manual HealthTrainer 660 Upright Customer Service (888) 340-0482 4009 Distribution Drive Suite 250 Garland, TX 75041 www.keysfitness.com SERIAL TAG IS LOCATED ON THE FRAME Model Name: HT660U Date of Purchase: 315-00110 07/07 Rev A Serial Number:...
-
Page 2: Table Of Contents
Table of Contents Important Safety Information Assembly 5-10 Console Instructions 11-15 Monitoring Your Heart Rate 16-17 Warm-Up Exercises Moving Instructions Parts List Exploded Views Warranty Information... -
Page 3: Important Safety Information
Important Safety Information WARNING! Before using this unit or starting any exercise program, consult your physician. This is especially important for persons over the age of 35 and/or persons with pre-existing health problems. The manufacturer or distributor assumes no responsibility for personal injury or property damage sustained by or through the use of this product. -
Page 4: Important Safety Information
Important Safety Information Thank you for purchasing the Keys Fitness HealthTrainer 660 Upright Bike! The quality product you have chosen was designed to meet your needs for cardiovascular exercise. Before you start, please read the Owner’s Manual and become familiar with the operation of your new unit. -
Page 5: Assembly
Assembly Getting Started - The Healthtrainer HT660U will require some assembly. Unpack the box in a clear area. Remove packing material. Do not dispose of packing material until assembly is complete and unit is working properly. Place the unit on a clean level surface for assembly. - Page 6 Assembly Figure 2 Step 1: Turn locking knob (26) counter-clockwise and pull out. Step 2: While pulling the locking knob (26) out, slide seat post (8) into main frame (3) until desired height is selected. Step 3: Release locking knob and turn clockwise to secure seat post (8).
- Page 7 Assembly Figure 3 Step 1: Attach seat (11) to seat post (8) using washers (22) and locknuts (21).
- Page 8 Assembly Figure 4 Step 1: Slide console tube collar (9) up the console tube. Connect wire harness (65) coming from the main frame to wire harness (37) from the console tube. Step 2: Slide the console tube (39) onto main frame (3) and secure using hex head screws (19), wash- ers (4), and locknuts (31).
- Page 9 Assembly Figure 5 Step 1: Attach the left pedal (35) to the left crank. The left pedal is marked with an "L". Turn the threads on the pedal counter-clockwise to secure it to the crank. Step 2: Attach the right pedal (34) to the right crank. The right pedal is marked with an "R". Turn the threads on the pedal clockwise to secure it to the crank.
-
Page 10: Assembly
(40) to pulse wires (29) and wire harness (37). Step 2: Secure the console to the console tube (39) using screws (43). Note: The screws are already pre- installed into the back of the console. Congratulations! You have completed assembly of your new HT660U bike... -
Page 11: Console Instructions
Console Instructions The HT660U's console is a single LCD that displays RPM, SPEED, TIME, DISTANCE, CALORIES, PULSE, and HEART RATE. Power Modes Power On: Make sure the AC adapter is plugged into an outlet. Press any button to turn on the console. - Page 12 Console Instructions Start/Stop During Setup Mode: This button is used to begin workout. Press this button once all settings are confirmed During Workout: It is used to pause workout mode. All workout data is stored during pause mode. Enter (Press the dial) During Setup Mode: This button is used to select the desired setting you wish to change and to confirm the values entered (Time, Calories, Distance, Pulse, and Program).
-
Page 13: Program Instructions
Console Instructions RPM: Displays current training revolutions per minute. DISTANCE: If a target distance was not selected, distance will count up from 0.00 to maximum 99.90. When working out with a target distance, distance will count down from target to 0.0. When selecting target time, turn the dial clockwise to increase value, turn the dial counter-clockwise to decrease value, the distance will change in 0.1 mile increments and can range from 0.00 miles to 99.90 miles. - Page 14 Console Instructions PROGRAMS: The console comes with 12 preset programs (see program profiles on page 12 for programs available). Turn the selection dial until desired program is displayed. Press the dial to con- firm selection. Time will flash in the display. Turn the selection dial to set desired time. Press the dial to confirm selection.
- Page 15 Console Instructions PROGRAM 1 PROGRAM 2 PROGRAM 3 MANUAL STEPS HILL PROGRAM 4 PROGRAM 5 PROGRAM 6 ROLLING VALLEY FAT BURN PROGRAM 7 PROGRAM 8 PROGRAM 9 RAMP MOUNTAIN INTERVALS PROGRAM 10 PROGRAM 11 PROGRAM 12 RANDOM PLATEAU FARTLEK PROGRAM 13 PROGRAM 15 PROGRAM 14 PRECIPICE...
-
Page 16: Monitoring Your Heart Rate
Monitoring Your Heart Rate Monitoring Your Heart Rate To obtain the greatest cardiovascular benefits from your exercise workout, it is important to work within your target heart rate zone. The American Heart Association (AHA) defines this target as 60%-75% percent of your maximum heart rate. Your maximum heart rate may be roughly calculated by subtracting your age from 220. -
Page 17: Monitoring Your Heart Rate
Monitoring Your Heart Rate TARGET HEART RATE ZONE 100% Serious athletic training range Cardiovascular conditioning range Fat burning range... -
Page 18: Warm-Up Exercises
Warm Up Exercises EXERCISE GUIDELINES WARNING! Before beginning this or any exercise program, you should consult your physician. This is especially important for individuals over the age of 35 or individuals with pre-existing health problems. Warming up prepares the body for the exercise by increasing circulation, supplying more oxy- gen to the muscles and raising body temperature. -
Page 19: Moving Instructions
Moving Instructions CAUTION! TO REDUCE THE POSSIBILITY OF INJURY WHILE LIFTING, BEND YOUR LEGS AND KEEP YOUR BACK STRAIGHT. AS YOU LEAN THE UNIT, LIFT USING YOUR LEGS, NOT YOUR BACK. First, kneel down and grasp the rear support tube with both hands as shown in Figure 1. Next, with a firm grasp on rear support tube stand up bringing the rear of the bike up in the air and tilt the unit until it rolls freely on the transport wheels. -
Page 20: Parts List
Parts List HT660U PARTS LIST REV. A REF # PARTS # DESCRIPTION REF # PARTS # DESCRIPTION 302-01636 Carriage Bolt M8x1.25x70mm 306-01011 Right Pedal Strap 323-00615 Front Stabilizer 306-01010 Left Pedal 323-00624 Rear Stabilizer 306-01012 Left Pedal Strap 302-00449 M8x19mm Flat Washer(Black) -
Page 21: Exploded Views
Exploded View... -
Page 22: Warranty Information
Warranty Information Residential and Personal Use Limited Warranty PLEASE READ THESE WARRANTY TERMS AND CONDITIONS FULLY AND CAREFULLY BEFORE USING YOUR KEYS FITNESS EQUIPMENT. BY USING THE EQUIPMENT, YOU ARE CONSENTING TO BE BOUND BY THE FOLLOWING TERMS AND CONDITIONS. Frame: Lifetime Electronics and *Parts: 1 yr Missing/Cosmetic Parts: 30 Days... - Page 23 Notes...
- Page 24 Customer Service (888) 340-0482 Keys Fitness Products 4009 Distribution Drive Suite 250 Garland, TX 75041 www.keysfitness.com...
Need help?
Do you have a question about the HT660u and is the answer not in the manual?
Questions and answers