Advertisement
Advertisement
Table of Contents

Related Manuals for HealthTrainer HT840R

Summary of Contents for HealthTrainer HT840R
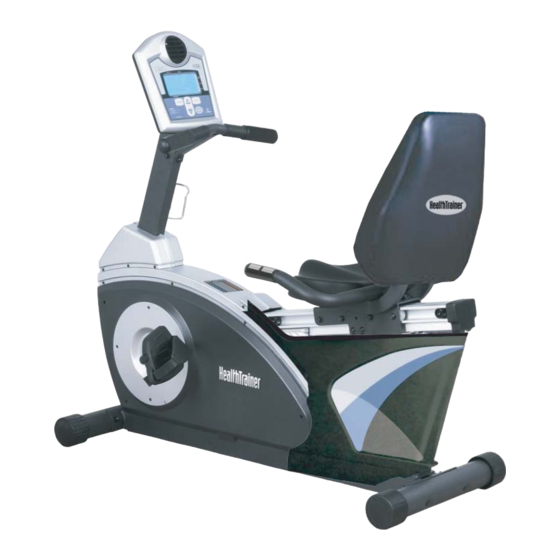
- Page 1 HT840R Owner’s Manual HT840R RECUMBENT Customer Service 1.888.340.0482 Keys Fitness 4009 Distribution Drive Suite 250 Garland, TX 75041 www.keysfitness.com Model Name : HT840R.1 Serial Number : Write down for future reference Serial Number Decal Location 315-00052 08/05 Rev A...
-
Page 2: Table Of Contents
Table of Contents Important Safety Information Before You Start Assembly Console Overview 10-12 Monitoring Your Heart Rate 13-14 Moving Instructions Warm Up Exercises Exploded View Parts List Warranty... -
Page 3: Important Safety Information
Important Safety Information WARNING! Before using this unit or starting any exercise program, consult your physician. This is especially important for persons over the age of 35 and/or persons with pre-existing health problems. The manufacturer or distributor assumes no responsibility for personal injury or property damage sustained by or through the use of this product. -
Page 4: Before You Start
Before You Start Thank you for purchasing the Health Trainer 840R Recumbent! This quality product you have chosen was designed to meet your needs for cardiovascular exercise. Before you start, please read the Owner's Manual and become familiar with the operation of your new unit. Remember to take the time to perform the stretching exercises provided to avoid injury. -
Page 5: Assembly
Assembly INSTRUCTIONS FOR ASSEMBLY: Unpack the box in a clear area. Check to make sure all components are present and in good condition. Do not dispose of the packing material until the assembly is completed. Tools have been provided for you to use when assembling this product. - Page 6 Assembly Figure 1 FIGURE 1 Step 1: Attach Rear Foot Tube (4) to Main Frame (1) with two Bolts (19), two Washers (49) and two Cap Nuts (61). Step 2: Attach Front Foot Tube (4) with two Bolts (19), two Washers (49) and two Cap Nuts (61).
- Page 7 Assembly Figure 3 FIGURE 3 Step 1: Connect Cables (64a) to (66a) and slide Endcap (80) into place. Attach Endcap with two Screws (70). Note: Be careful not to pinch the cables. Step 2: Slide Assembled Seat Carriage (30) onto Seat Bracket (21). Attach to brackets using one Screw (84), Spacers (83), Washer (63), and Screw (62).
- Page 8 Assembly FIGURE 5 Figure 5 Step 1: Connect Cables 8, 38, 37 and 66 as shown. Step 2: Attach Console Tube (2) to Main Frame (1) using three Screws (55), three Washers (49), three Nuts (50), two Screws (90) and two Washers (49).
- Page 9 Assembly FIGURE 7 Figure 7 Step 1: Connect the Pulse Wires (66) and Extension Wires (58) to Console (15). Secure Console (15) to Console Tube (2) using four Screws (39). Note: The four Screws(39) will already be installed into the back of Console(15) when you remove it from the box.
-
Page 10: Console Overview
Console Overview CONSOLE BUTTONS PROGRAM: Use this button to select an exercise program (P1 to P11). +: Use this button to increase values (TIME, SPEED, DISTANCE, etc.). -: Use this button to decrease values. This button also functions as a RESET. To reset console hold this but- ton for two seconds. - Page 11 Console Overview CONSOLE FUNCTIONS TIME: You can set the exercise time from 0-99 minutes by pressing the SELECT button until TIME flashes on display. Use the +/- buttons to increase or decrease the exercise TIME. Each press of the +/- buttons will increase/decrease exercise TIME by 1 minute.
- Page 12 Console Overview HEART RATE PROGRAMS P7 to P11: There are 5 programs to choose from. You can select a program by using the PROGRAM button to scroll thru programs 7-11. See profile charts below for each program. The percentage of maximum HEART RATE will appear in the display. You must keep contact with the pulse rate grips when using these programs.
-
Page 13: Monitoring Your Heart Rate
Monitoring Your Heart Rate Monitoring Your Heart Rate To obtain the greatest cardiovascular benefits from your exercise workout, it is important to work within your target heart rate zone. The American Heart Association (AHA) defines this target as 60%-75% percent of your maximum heart rate. -
Page 14: Target Heart Rate Zone
Monitoring Your Heart Rate TARGET HEART RATE ZONE 100% Serious athletic training range Cardiovascular conditioning range Fat burning range... -
Page 15: Moving Instructions
Moving Instructions CAUTION! TO REDUCE THE POSSIBILITY OF INJURY WHILE LIFTING, BEND YOUR LEGS AND KEEP YOUR BACK STRAIGHT. AS YOU LEAN THE UNIT, LIFT USING YOUR LEGS, NOT YOUR BACK. First, kneel down and grasp the rear support tube with both hands as shown in Figure 1. Next, with a firm grasp on rear support tube stand up bringing the rear of the bike up in the air and tilt the unit until it rolls freely on the transport wheels. -
Page 16: Warm Up Exercises
Warm Up Exercises EXERCISE GUIDELINES WARNING! Before beginning this or any exercise program, you should consult your physician. This is espe- cially important for individuals over the age of 35 or individuals with pre-existing health problems. Warming up prepares the body for the exercise by increasing circulation, supplying more oxygen to the mus- cles and raising body temperature. -
Page 17: Exploded View
Exploded View... -
Page 18: Parts List
Parts List HT840R.1 Parts List Rev A Ref # Part # Description Ref # Part # Description 323-00372 FRAME, HT840R.1 302-00375 M8X38MM SCREW 323-00373 CONSOLE TUBE, HT840R.1 302-00449 M8 X19MM WASHER BLACK 220E/240E/240R/240 310-00012 BOTTLE RACK CM835/850 HT840 ALL900/920 302-01231... -
Page 19: Warranty
Product. To obtain warranty service, you must contact a Keys authorized retailer, service technician or Keys Fitness at our phone numbers located in this manual. Any parts determined to be defective must be returned to Keys to obtain warranty service. You must prepay any shipping charges, export taxes, custom duties and taxes, or any other charges associated with transportation of the parts or Product. - Page 20 Customer Service 1.888.340.0482 Keys Fitness 4009 Distribution Drive Suite 250 Garland, TX 75041 www.keysfitness.com...
Need help?
Do you have a question about the HT840R and is the answer not in the manual?
Questions and answers