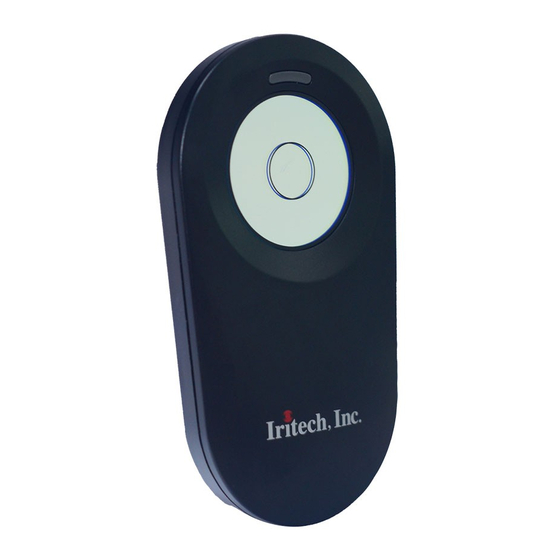
Summary of Contents for Iritech IriShield?USB MK 2120U
- Page 1 IriShield ‐USB MK 2120U Auto‐Capture Camera with Onboard Iris Recognition Quick Start Guide 1. Connect 2. Install 3. Operate...
- Page 2 Thank you for choosing IriShield‐USB camera. This guide will help with your setup and use of IriShield ‐USB MK 2120U with IriShield package and your computer. IriShield ‐USB family has several models supporting different specifications and operating systems (OS). This guide, however, will focus on Encased Device model supporting Windows OS. For more information, please visit IriTech’s website at http://www.iritech.com or contact us by email at collaboration@iritech.com.
- Page 3 What’s in the box: 1. IriShield ‐USB is an onboard‐processing device with no special requirement for host device except USB 2.0 port. USB 2.0 port 2. What else you’ll need for IriSmartEye 2000 Mono software: Windows XP (SP2 or above) or Win7 1GHz Processor or higher 128 MBytes RAM or higher 500MB Hard Disk space Sound card and Speaker Computer...
- Page 4 1. Connect 1. Connect one end of USB cable into IriShield ‐USB MK 2120U device. 2. Connect the other end of USB cable into the PC’s USB port. USB 2.0...
- Page 5 2.1 Install Driver Install Driver Install SDK Install IriSmartEye 2000 Mono 1. Download/Copy IriShield’s Software Package to PC. The package is provided by IriTech via a download center. 2. Choose “Update Driver” on IriShield in Device Manager. 3. Select “IriShield‐USB_Mono_Driver” folder that contains drivers for IriShield‐ USB in the Software Package. What’s in the Software Package: 4. Follow instructions from IriShield‐USB IriShield‐USB_Mono_Driver the installer to complete the driver installation. SDK&Demo IriSmartEye_2000_Mono Manual ReadMe.txt...
- Page 6 2.2 Install SDK Install SDK Install Driver Install IriSmartEye 2000 Mono 1. Go to “SDK&Demo” folder in the Software Package. 2. Double‐click on “setup.exe” file in “IDDK 2000 Mono C_C++” or “IDDK 2000 Mono Java”. 3. The installer will guide you through the entire installation process. Select the appropriate options and click “Next” to move to next steps. 4. Follow instructions from What’s in the Software Package: the installer to complete IriShield‐USB IriShield‐USB_Mono_Driver the setup process. SDK&Demo IriSmartEye_2000_Mono Manual ReadMe.txt...
- Page 7 2.3 Install IriSmartEye 2000 Mono Install IriSmartEye 2000 Mono Install Driver Install SDK 1. Run “setup.exe” file from “IriSmartEye_2000_Mono” folder in the Software Package. 2. Click “Next” for all steps with default values accepted, and “Close” to finish. 3. The default installed folder will be located at “C:\Program files\IriTech\ IriSmartEye 2000 Mono”. What’s in the Software Package: IriShield‐USB IriShield‐USB_Mono_Driver SDK&Demo IriSmartEye_2000_Mono Manual ReadMe.txt...
- Page 8 3.1 Capturing An Iris Image Execute IriSmartEye 2000 Mono software at “C:\Program files\IriTech\IriSmartEye 2000 Mono” and enjoy the superior iris recognition system. 1. Select “Capture” tab on the IriSmartEye 2000 Mono application. 2. Click “Start” button to activate the camera to capture iris image. 3. Keep your eye wide open, look straight ahead, and align the eye so that it is seen in the center of camera mirror. (Closing the other eye may help with the alignment.) 4. Approach the camera slowly from a distance of about 5 cm (2 inches) away from the front of camera. The IriSmartEye 2000 Mono software will say “Keep moving please” when it detects the first in‐focus iris image. (The computer must have a soundcard and a speaker turned on to hear the message.) 5. Once the message, “Keep moving please”, is heard, it is best to keep moving steadily towards the camera to satisfy the focus distance until the system sounds with “shutter click”, signaling that it has selected a qualified iris image and completed capturing process. 6. If non‐qualified iris image is captured, an error message of “No frame was qualified. Please try again.” will appear on the computer.
- Page 9 3.2 Enroll 1. Capture an iris image (see 3.1). 2. Enter enrollment ID. 3. Click “Enroll” button to enroll current captured image to device. 4. The outcome message will show in the box.
- Page 10 3.3 Unenroll 1. Select an ID from existing enrollee ID list. 2. Click “Unenroll” button to remove the selected enrollee from the device. 3. The outcome message will show in the box.
- Page 11 3.4 Verify 1. Capture an iris image (see 3.1). 2. Select an ID from existing enrollee ID list. 3. Click “Verify” button to verify whether the captured image is from the enrollee with the selected enrollment ID. 4. The outcome message will show in the box. 5. Distance is a measure of dissimilarity between captured iris image and iris data of the specified enrollee. A smaller distance implies higher similarity.
- Page 12 3.5 Identify 1. Capture an iris image (see 3.1). 2. Click “Identify” button to identify the person whose iris has been captured. 3. The outcome message will show in the box. 4. Distance is the lowest distance value between captured iris image and all iris data stored in the device.
- Page 13 3.6 System Management 1. Click on “System Management” tab from menu toolbar. 2. This tab includes following functionalities: Enroll/Unenroll Admin, Set Role for SuperUser/User, Lock/Unlock/Configure Device, and Certify. Please refer to following documents for more details: IriShield‐USB MK 2120U Basic User's Guide IriShield‐USB and UART Mono SW Developer's Manual...
- Page 14 Specifications are subject to change without prior notice. © 2012 IriTech, Inc. All rights reserved. http://www.iritech.com...


Need help?
Do you have a question about the IriShield?USB MK 2120U and is the answer not in the manual?
Questions and answers