Panasonic Lumix DMC-GF3C Owner's Manual
Digital camera/lens kit/body
Hide thumbs
Also See for Lumix DMC-GF3C:
- Basic owner's manual (52 pages) ,
- Basic operating instructions manual (52 pages) ,
- Basic owner's manual (273 pages)
Table of Contents
Advertisement
Quick Links
Download this manual
See also:
Basic Owner's Manual
DMC-GF3C/DMC-GF3K
Model No.
Before connecting, operating or adjusting this product, please read
For USA and Puerto Rico assistance, please call: 1-800-211-PANA(7262) or,
contact us via the web at: http://www.panasonic.com/contactinfo
PP
Basic Owner's Manual
the instructions completely.
More detailed instructions
on the operation of this
camera are contained in
"Owner's Manual for advanced features
(PDF format)" in the supplied CD-ROM.
Install it on your PC to read it.
Digital Camera/
Lens Kit/Body
DMC-GF3
VQT3Q61
Advertisement
Table of Contents

Subscribe to Our Youtube Channel
Related Manuals for Panasonic Lumix DMC-GF3C


Summary of Contents for Panasonic Lumix DMC-GF3C
- Page 1 “Owner’s Manual for advanced features (PDF format)” in the supplied CD-ROM. Install it on your PC to read it. For USA and Puerto Rico assistance, please call: 1-800-211-PANA(7262) or, contact us via the web at: http://www.panasonic.com/contactinfo VQT3Q61...
-
Page 2: Information For Your Safety
Dear Customer, Thank you for choosing Panasonic! You have purchased one of the most sophisticated and reliable products on the market today. Used properly, we’re sure it will bring you and your family years of enjoyment. Please take time to fill in the information on the below. The serial number is on the tag located on the underside of your camera. - Page 3 Responsible party: Panasonic Corporation of North America One Panasonic Way, Secaucus, NJ 07094 Support Contact: Panasonic Consumer Electronics Company 1-800-211-PANA (7262) This device complies with Part 15 of the FCC Rules. Operation is subject to the following two conditions: (1) This device may not cause harmful interference, and (2) this device must accept any interference received, including interference that may cause undesired operation.
- Page 4 ∫ About the battery pack CAUTION Battery pack (Lithium ion battery pack) • Use the specified unit to recharge the battery pack. • Do not use the battery pack with equipment other than the specified unit. • Do not get dirt, sand, liquids, or other foreign matter on the terminals. Do not touch the plug terminals (i and j) with metal objects.
- Page 5 Do not use any other USB connection cables except the supplied one. • Always use a genuine Panasonic HDMI mini cable (RP-CDHM15, RP-CDHM30; optional). Part numbers: RP-CDHM15 (1.5 m) (5 feet), RP-CDHM30 (3.0 m) (10 feet) Keep this unit as far away as possible from electromagnetic equipment (such as microwave ovens, TVs, video games etc.).
-
Page 6: Table Of Contents
Contents Information for Your Safety....................2 Standard Accessories.......................7 Names and Functions of Components ................9 About the Lens........................13 Changing the Lens......................14 Attaching the Shoulder Strap..................16 Charging the Battery.......................17 • Charging ........................17 • Approximate operating time and number of recordable pictures ......18 Inserting and Removing the Card (optional)/the Battery..........20 About the Card........................21 •... -
Page 7: Standard Accessories
About unavailable functions such as [STABILIZER], Direction Detection Function, description in this owner’s manual is based on the interchangeable lens (H-FS014042). • If any accessories are lost, customers in the USA and Puerto Rico should contact Panasonic’s parts department at 1-800-833-9626 for further information about obtaining replacement parts. (ENG) VQT3Q61... - Page 8 DMC-GF3C H-H014 VYF3371 DMC-GF3K H-FS014042 VYC1009 VYF3201 VFC4315 DMC-GF3K / DMC-GF3 VKF4385 DMW-BLE9PP DE-A99B K1HY08YY0020 K1HY08YY0019 VFF0831 VFC4710 VGQ0C14 ¢1 Supplied in DMC-GF3C only ¢2 Supplied in DMC-GF3K only ¢3 Supplied in DMC-GF3 only VQT3Q61 (ENG)
-
Page 9: Names And Functions Of Components
Names and Functions of Components ∫ Camera body Sensor Flash Self-timer indicator/ AF Assist Lamp Lens fitting mark Mount Lens lock pin Lens release button Flash open button Touch panel/LCD monitor 10 Playback button 11 [Q.MENU/Fn] button/ Delete/Return button 12 [MENU/SET] button 13 Control dial 14 Cursor buttons 3/Exposure Compensation button... - Page 10 Panasonic DC coupler (DMW-DCC11; optional) and AC adaptor (DMW-AC8PP; optional) are used. 27 28 29 • Always use a genuine Panasonic AC adaptor (DMW-AC8PP; optional). • It is recommended to use a fully charged battery or AC adaptor when recording motion pictures.
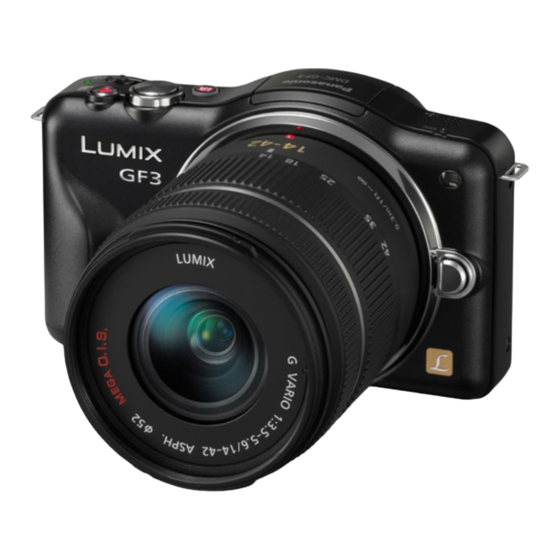
- Page 11 ∫ Lens H-H014 H-FS014042 (LUMIX G 14 mm/F2.5 ASPH.) (LUMIX G VARIO 14 –42 mm/F3.5 – 5.6 ASPH./MEGA O.I.S.) 31 34 35 36 30 Lens surface 31 Focus ring 32 Contact point 33 Lens fitting mark 34 Tele 35 Wide 36 Zoom ring (ENG) VQT3Q61...
- Page 12 Touch Panel This touch panel is a type that detects pressure. Drag Touch the screen A movement without releasing the touch To touch and release the touch panel. panel. Use this to perform tasks such as selecting This is used to move the AF area, operate icons or images displayed on the touch the slide bar, etc.
-
Page 13: About The Lens
About the Lens ∫ Micro Four Thirds™ mount specification lens This unit can use the dedicated lenses compatible with the Micro Four Thirds System lens mount specification (Micro Four Thirds mount). ∫ Four Thirds™ mount specification lens Lens with the Four Thirds mount specification can be used by using the mount adaptor (DMW-MA1;... -
Page 14: Changing The Lens
Changing the Lens By changing the lens, you will increase your picture taking-options and further your enjoyment of the camera. Change the lens using the following procedure. • Check that the camera is turned off. • Change lenses where there is not a lot of dirt or dust. Detaching the lens Preparations: Attach the lens cap. - Page 15 Note • Do not insert your fingers into the mount when the lens and body cap are removed from the camera body. • To prevent dust or debris from adhering to internal parts of the camera body, fit the body cap or a lens to the mount on the camera body.
-
Page 16: Attaching The Shoulder Strap
Attaching the Shoulder Strap • We recommend attaching the shoulder strap when using the camera to prevent it from dropping. Pass the shoulder strap through the shoulder strap eyelet on the camera body. A: Shoulder strap eyelet Pass the end of the shoulder strap through the ring in the direction of the arrow and then pass it through the stopper. -
Page 17: Charging The Battery
To ensure that safe products are used we would recommend that a genuine Panasonic battery pack is used. • Use the dedicated charger and battery. -
Page 18: Approximate Operating Time And Number Of Recordable Pictures
CIPA is an abbreviation of [Camera & Imaging Products Association]. Temperature: 23 oC (73.4 • F)/Humidity: 50%RH when LCD monitor is on. • Using a Panasonic SD Memory Card (2 GB). • Using the supplied battery. • Starting recording 30 seconds after the camera is turned on. -
Page 19: Recording Motion Pictures
∫ Recording motion pictures – [AVCHD] (Recording with picture quality set to [FSH]) When the interchangeable lens (H-H014) is used Recordable time Approx. 150 min Actual recordable time Approx. 75 min When the interchangeable lens (H-FS014042) is used Recordable time Approx. -
Page 20: Inserting And Removing The Card (Optional)/The Battery
Inserting and Removing the Card (optional)/the Battery • Check that this unit is turned off. • We recommend using a Panasonic card. Slide the release lever in the direction of OPEN LOCK the arrow and open the card/battery door. •... -
Page 21: About The Card
SDXC Memory Card using the SDXC Memory Cards. (48 GB, 64 GB) http://panasonic.net/avc/sdcard/information/SDXC.html • Only the cards with capacity listed left can be used. ¢ SD Speed Class is the speed standard regarding continuous writing. Check via the label on the card, etc. -
Page 22: Setting Date/Time (Clock Set)
Setting Date/Time (Clock Set) The clock can be setup with the following procedure at the time of purchase. Change the clock setting in [CLOCK SET] of the [SETUP] menu. For details, read the PDF. • The clock is not set when the camera is shipped. Turn the camera on. -
Page 23: Selecting The Recording Mode
Selecting the Recording Mode Press [MENU/SET]. Touch [REC MODE]. • A screen listing the Recording Mode is displayed. • It is also possible to display the screen listing the Recording Mode by touching the Recording Mode icon in Recording Mode. Touch the Recording Mode to select. - Page 24 ∫ Basic Intelligent Auto Mode The subjects are recorded using settings automatically selected by the camera. Intelligent Auto Plus Mode Easily match settings selected by the camera to your preferences and record. Program AE Mode The subjects are recorded using your own settings. ∫...
-
Page 25: Taking A Still Picture
Recording Mode: Taking a Still picture ] by pressing 4( • Set the drive mode to [ Selecting the Recording Mode. Press the shutter button halfway to focus. A Aperture value B Shutter speed • Aperture value and shutter speed are displayed. (It will flash in red if the correct exposure is not achieved, except when set to flash.) •... -
Page 26: Taking Pictures Using The Automatic Function (Intelligent Auto Mode)
ñ Recording Mode: Taking Pictures using the Automatic Function (Intelligent Auto Mode) The camera will set the most appropriate settings to match the subject and the recording conditions so we recommend this mode for beginners or those who want to leave the settings to the camera and take pictures easily. - Page 27 ∫ Scene Detection When the camera identifies the optimum scene, the icon of the scene concerned is displayed in blue for 2 seconds, after which its color changes to the usual red. When taking pictures > ¦ [i-PORTRAIT] [i-SCENERY] [i-MACRO] •...
-
Page 28: Easily Adjust And Record (Intelligent Auto Plus Mode)
Recording Mode: Easily adjust and record (Intelligent Auto Plus Mode) The brightness and color optimally set by the camera can be easily matched to your preferences. This mode is useful if you do not like dealing with detailed settings but like the settings made automatically by the camera to match your preferences. -
Page 29: Taking Pictures With Defocus Control Function
Recording Mode: Taking Pictures with Defocus Control Function You can easily set the blurriness of the background while checking the screen. Touch [ ] to display the setting screen. Touch the slide bar to set. • Setting can also be performed by rotating the control dial. Recording of pictures or motion pictures. -
Page 30: Taking Pictures With Your Favorite Settings (Program Ae Mode)
Recording Mode: Taking Pictures with Your Favorite Settings (Program AE Mode) The camera automatically sets the shutter speed and the aperture value according to the brightness of the subject. You can take pictures with greater freedom by changing various settings in [REC] Mode menu. -
Page 31: Recording Motion Picture
Recording Mode: Recording Motion Picture This can record full high definition motion pictures compatible with the AVCHD format or motion pictures recorded in Motion JPEG. Audio will be recorded in monaural. The functions available when recording motion pictures differ according to the lens you are using, and the operational sound of the lens may be recorded. -
Page 32: Playing Back Pictures/Motion Pictures
Playing Back Pictures/Motion Pictures Playing Back Pictures Press [(]. Forward or rewind the image by dragging the screen horizontally. Forward: drag from right to left Rewind: drag from left to right • It is also possible to forward or rewind the image by pressing 2/1 of the cursor button. -
Page 33: Playing Back Motion Pictures
Motion pictures in AVCHD format that can be played back on this unit are [AVCHD] motion pictures that were recorded with this unit, AVCHD format (including [AVCHD Lite]) motion pictures recorded with Panasonic digital cameras (LUMIX) only. Press [(]. Select a picture with a Motion Picture icon ([ ]) and then touch [ ] to play back. - Page 34 ∫ Operations performed during Motion Picture Playback Display control panel by touching screen. • If no operation is performed for 2 seconds, it will return to original status. Operate control panel by touching. Play/Pause Stop Fast rewind Fast forward Frame-by-frame rewind Frame-by-frame forward (while pausing) (while pausing)
-
Page 35: Deleting Pictures
Deleting Pictures Once deleted, pictures cannot be recovered. Press [(]. To delete a single picture Select the picture to be deleted, and then touch Touch [DELETE SINGLE]. • Confirmation screen is displayed. Picture is deleted by selecting [YES]. (ENG) VQT3Q61... -
Page 36: Setting The Menu
Setting the Menu When [MENU/SET] is pressed, [REC MODE] A and 5 menus B ([REC], [MOTION PICTURE], [CUSTOM], [SETUP], and [PLAYBACK]) are displayed. In the 5 different menus, there are menus that allow you to setup the recording or playback to your preference, or make it more fun and easier to use the camera. -
Page 37: Setting Menu Items
Setting menu items • If you set [MENU RESUME] in the [CUSTOM] menu to [ON], the screen shows the last selected menu item when the camera was turned off. It is set to [ON] at the time of purchase. Press [MENU/SET]. Select the menu by pressing 3/4/2/1 or by rotating the control dial. - Page 38 Select the settings by pressing 3/4 or by rotating the control dial. • The figure on the right is an example of setting [I.DYNAMIC] from [OFF] to [HIGH]. Press [MENU/SET] to set. ∫ Close the menu Press [ ] several times or press the shutter button halfway. ∫...
-
Page 39: Compensating The Exposure
Recording Mode: Compensating the Exposure Use this function when you cannot achieve appropriate exposure due to the difference in brightness between the subject and the background. Look at the following examples. Properly Underexposed Overexposed exposed Compensate the exposure Compensate the exposure towards positive. -
Page 40: Taking Pictures By Specifying The Aperture/Shutter Speed
±´² Recording Mode: Taking Pictures by Specifying the Aperture/ Shutter Speed Aperture-priority AE Set the aperture value to a higher number when you want a sharp focus background. Set the aperture value to a lower number when you want a soft focus background. Set Recording Mode to [ Rotate the control dial to set the aperture value. -
Page 41: Manual Exposure Mode
Manual Exposure Mode Determine the exposure by manually setting the aperture value and the shutter speed. The Manual Exposure Assistance appears on the lower portion of the screen to indicate the exposure. Set Recording Mode to [ Rotate the control dial to set the aperture and shutter speed. -
Page 42: Reading The Owner's Manual (Pdf Format)
You can download and install a version of Adobe Reader that you can use with your OS from the following Web Site. http://get.adobe.com/reader/otherversions ∫ To uninstall the Owner’s Manual (PDF format) Delete the PDF file from the “Program Files\Panasonic\Lumix\” folder. ∫ For Mac Turn the PC on and insert the CD-ROM containing the Owner’s Manual (supplied). -
Page 43: Specifications
Specifications Digital Camera Body (DMC-GF3): Information for your safety Power Source: DC 8.4 V Power Consumption: 2.3 W (When recording) [When the Interchangeable lens (H-H014) is used] 2.4 W (When recording) [When the Interchangeable lens (H-FS014042) is used] 1.5 W (When playing back) [When the Interchangeable lens (H-H014) is used] 1.6 W (When playing back) [When the Interchangeable lens (H-FS014042) is used]... - Page 44 Minimum Illumination Approx. 6 lx (when i-Low light is used, the shutter speed is 1/30th of a second) [When the Interchangeable lens (H-H014) is used] Approx. 11 lx (when i-Low light is used, the shutter speed is 1/30th of a second) [When the Interchangeable lens (H-FS014042) is used] Shutter speed 60 seconds to 1/4000th of a second...
- Page 45 Flash synchronization Equal to or smaller than 1/160th of a second speed Microphone Monaural Speaker Monaural Recording media SD Memory Card/SDHC Memory Card/SDXC Memory Card Picture size Still picture When the aspect ratio setting is [X] 4000k3000 pixels, 2816k2112 pixels, 2048k1536 pixels When the aspect ratio setting is [Y] 4000k2672 pixels, 2816k1880 pixels, 2048k1360 pixels When the aspect ratio setting is [W]...
- Page 46 Battery Charger (Panasonic DE-A99B): Information for your safety Input: 110 V to 240 V, 50/60 Hz, 0.15 A Output: 8.4 V, 0.43 A Equipment mobility: Movable Battery Pack (lithium-ion) (Panasonic DMW-BLE9PP): Information for your safety Voltage/capacity: 7.2 V/940 mAh VQT3Q61 (ENG)
- Page 47 Interchangeable Lens (H-H014) “LUMIX G 14 mm/F2.5 ASPH.” Focal length f=14 mm (35 mm film camera equivalent: 28 mm) Aperture type 7 diaphragm blades/circular aperture diaphragm Aperture range F2.5 Minimum aperture value Lens construction 6 elements in 5 groups (3 aspherical lenses) 0.18 m (0.59 feet) to ¶...
- Page 48 Interchangeable Lens (H-FS014042) “LUMIX G VARIO 14 –42 mm/F3.5 –5.6 ASPH./MEGA O.I.S.” Focal length f=14 mm to 42 mm (35 mm film camera equivalent: 28 mm to 84 mm) Aperture type 7 diaphragm blades/circular aperture diaphragm Aperture range F3.5 (Wide) to F5.6 (Tele) Minimum aperture value Lens construction...
-
Page 49: Digital Camera Accessory System
Digital Camera Accessory System Description Accessory# Lithum Ion Battery DMW-BLE9 ¢1 AC Adaptor DMW-AC8 ¢1 DC Coupler DMW-DCC11 ¢2 Zoom Lever DMW-ZL1 ¢3 ¢4 MC Protector DMW-LMC46 , DMW-LMC52 ¢3 ¢4 ND Filter DMW-LND46 , DMW-LND52 ¢3 ¢4 PL Filter (Circular Type) DMW-LPL46 , DMW-LPL52 ¢3... - Page 50 ¢1 The AC Adaptor (optional) can only be used with the designated Panasonic DC Coupler (optional). The AC adaptor (optional) cannot be used by itself. ¢2 The interchangeble lens (H-H014) is not used. ¢3 When the interchangeble lens (H-H014) is used ¢4 When the interchangeble lens (H-FS014042) is used...
-
Page 51: Digital Camera Accessory Order Form (For Usa And Puerto Rico Customers)
VISIT YOUR LOCAL PANASONIC DEALER CALL PANASONIC’S ACCESSORY ORDER LINE AT 1-800-332-5368 [6 AM-6 PM M-F, PACIFIC TIME] MAIL THIS ORDER TO: PANASONIC SERVICE AND TECHNOLOGY COMPANY ACCESSORY ORDER OFFICE 20421 84th Avenue South Kent, WA. 98032 In CANADA, please contact your local Dealer for more information about accessories. -
Page 52: Limited Warranty (Only For U.s.a. And Puerto Rico)
If your product does not work properly because of a defect in materials or workmanship, Panasonic Consumer Electronics Company (referred to as “the warrantor”) will, for the length of the period indicated on the chart below, which starts with the date of original purchase (“warranty period”), at its option either (a) repair your product with new or refurbished parts, (b) replace it... - Page 53 When shipping Lithium Ion batteries please visit our Web Site at www.panasonic.com/BatteryHandling as Panasonic is committed to providing the most up to date information. Include a letter detailing the complaint, a return address and provide a daytime phone number where you can be reached.
- Page 54 Monday-Friday 9am-9pm, Saturday-Sunday 10am-7pm EST For hearing or speech impaired TTY users, TTY: 1-877-833-8855 Accessory Purchases (United States and Puerto Rico) Purchase Parts, Accessories and Instruction Books online for all Panasonic Products by visiting our Web Site at: http://www.pstc.panasonic.com Or, send your request by E-mail to: npcparts@us.panasonic.com...
-
Page 55: Useful Information (For Latin American Countries Only)
(ENG) VQT3Q61... - Page 56 HDMI, the HDMI Logo, and High-Definition Multimedia Interface are trademarks or registered trademarks of HDMI Licensing LLC in the United States and other countries. • VIERA Link™ is a trademark of Panasonic Corporation. • EZ Sync™ is a trademark of Panasonic Corporation. •...
Need help?
Do you have a question about the Lumix DMC-GF3C and is the answer not in the manual?
Questions and answers