Advertisement
Quick Links
Download this manual
See also:
User Manual
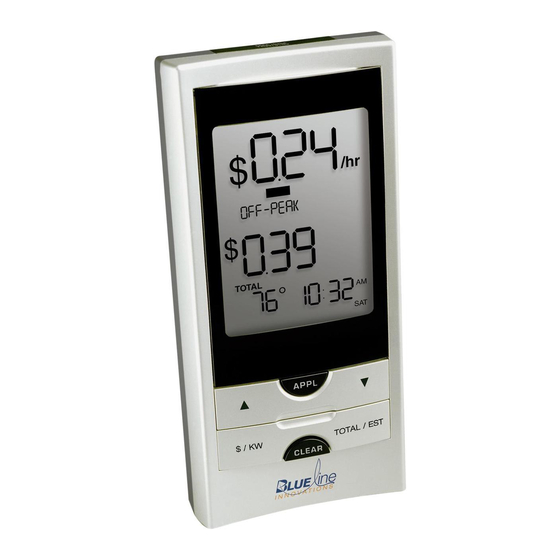
PowerCost Monitor
Installation Guide
Welcome
Congratulations on your purchase of the PowerCost Monitor™, a new electricity-monitoring
device that informs you in real time of the amount of electricity your household is consuming.
This Guide explains how to get your system ready for use. Please follow the instructions in the
order shown without skipping any steps.
Important Safety Precautions
Install your PowerCost Monitor Sensor Unit on a dry day and take all necessary safety
precautions, particularly if you need to use a ladder for installing the Sensor Unit. In addition,
please read and apply the safety instructions below at all times.
Do not immerse either PowerCost Monitor unit in any liquid.
Do not drop or cause any sudden impact to either PowerCost Monitor unit.
If disposing of the PowerCost Monitor, do so in accordance with your local waste
disposal regulations.
Take precautions when handling batteries. They can cause injuries, burns, and/or property
damage as a result of contact with metal objects, heat, and corrosive materials.
A damaged LCD display may leak fluids that can be harmful to your health. If any fluid
leaks from the Display Unit after you drop it accidentally, immediately wash it off with
soap and water.
Read all the instructions carefully before using your PowerCost Monitor.
1
Verify the Contents of the Box
Verify that your box contains all these components. If any item
is missing, please contact your PowerCost Monitor reseller.
Rubber Shims
Clear Alignment Template
Alkaline "AA" Batteries
™
Display
Unit
Sensor Unit
Guides
(with clamping strap)
2
Install the Batteries in the Display Unit
Remove the battery compartment
cover on the back of the Display
Unit, insert two AA batteries in the
proper orientation, and replace the
battery compartment cover.
3
Install the Batteries in the Sensor Unit
Unlock and open the Sensor Unit battery compartment cover, insert two AA batteries
in the orientation indicated, then close and lock the cover. The red STATUS indicator
should light up without flashing within 10 seconds. It stays lit until you install it on
the meter, at which time it starts flashing.
NOTE: Ensure that
the battery closest to
the Sensor Arm goes
in with its positive
end (+) facing
inward.
1
Advertisement

Summary of Contents for Blue Line Innovations PowerCost Monitor
-
Page 1: Installation Guide
Important Safety Precautions Install your PowerCost Monitor Sensor Unit on a dry day and take all necessary safety precautions, particularly if you need to use a ladder for installing the Sensor Unit. In addition, please read and apply the safety instructions below at all times. - Page 2 Determine Your Meter Type and Power Factor Your Sensor Unit has an extensible arm that you may have to adjust to fit to your particular meter in Step 8. Therefore, it is extremely important to determine exactly what kind of meter is installed on your premises. Type 3 Meter: IMPORTANT: To determine your meter type, study the illustrations and descriptions Electronic with optical port on the face,...
- Page 3 TIME SLOT START TIME END TIME RATE TYPE NOTE: The PowerCost Monitor system allows for up to nine different rates. If you pay ON PEAK OFF PEAK a single rate, simply write it down in the RATE 1 box for reference purposes and ignore MID PEAK the rest of the table.
- Page 4 Configure Your Display Unit Set your billing mode, the internal clock and the meter’s Power Factor You will now configure your Display Unit so it will be ready to provide you with real time information as soon as you install your Sensor Unit. 1.
- Page 5 Set Your Billing Rates For Billing Mode 3: Time-based (ON PEAK / MID PEAK / OFF PEAK) 1. Enter your OFF PEAK RATE. For Billing Mode 1: Single (Flat) Rate and Tiered Rates 2. Enter your MID PEAK RATE. 1. Number “1” is displayed under RATE. Enter your (first) electricity rate. 3.
- Page 6 Prepare Your Sensor Unit Type 3 Meter: Electronic with front optical port closer than 1.5 inches to the meter’s outer rim Clamp 1. Verify that the Sensor Arm is fully pushed in as described for Type 2 meters. Sensor Arm (Extended) 2.
- Page 7 Install Your Sensor Unit START – Read SAFETY PRECAUTIONS first Type 4 Meters: 1. Turn on a high energy-consuming appliance in your house, such as your electric stove or dryer. This will temporarily increase your electricity consumption and enable the Sensor 1.
-
Page 8: Technical Specifications
• Consult the dealer or an experienced radio/TV technician for help. © 2008. Blue Line Innovations Incorporated. All Your Sensor Unit should now be correctly installed and communicating rights reserved. Information in this document with your Display Unit.


Need help?
Do you have a question about the PowerCost Monitor and is the answer not in the manual?
Questions and answers