Table of Contents
Advertisement
Advertisement
Chapters
Table of Contents

Related Manuals for Pidion BI-300 Series

Summary of Contents for Pidion BI-300 Series
- Page 2 • This wireless device may cause propagation interference, and so, it cannot be involved with life-saving services. Trade mark PIDION aims for leading brand in the future mobile industry. As a global brand representing the image of reliability, representativeness, and cutting-edge technologies, this mark has been registered by Bluebird Soft Inc.
-
Page 3: Table Of Contents
Content BI-300 Warnings and Cautions 11 Power On/Off 37 Using PidionScan Program 1. Power On 1. Connect Checking components 2. Power Off 2. Download 1. Basic components 12 Scanning barcode 3. Setting 2. Options 13 Sending data to PC 4. Configure Name and function of each 1. -
Page 4: Warnings And Cautions
(Note that using the product for a long time may cause a physical pain or convulsions due to excessive motion.) • Do not put the product in a heater, microwave oven, heating cooker and high-pressure vessels. (It may cause explosion or fire.) BI-300 Series Manual BI-300 Series Manual... - Page 5 BI-300 BI-300 Caution • Do not explode • repair • remodel the product. If you suspect a fault, contact the Customer Service Center. (It may cause electric shock or malfunction.) • Power on the product at a place where products are forbidden to use or at an explosion hazard area in terms of radio. (It may cause malfunction of other equipment or explosion.) •...
-
Page 6: Checking Components
[Portable necklace] [Car charger] [Barcode scanner(terminal)] [USB cable] [Charger] [Case] The above figure may be a little different from a real object. Accessory components may differ from the above figure depending on purchase specifications. BI-300 Series Manual BI-300 Series Manual... -
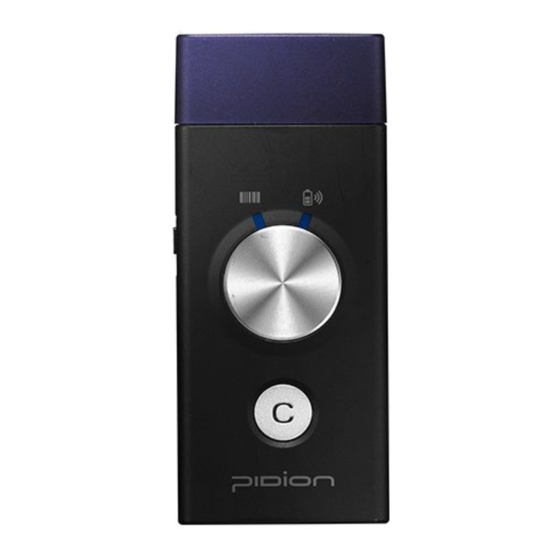
Page 7: Name And Function Of Each Component
Name and function of each component BI-300 BI-300 Be familiar with the name and function of each component before using the product. Signal tone Scan button Notify the scanner status by Barcode scan and save (See P-12) signal tone (See P-8) External connector Used when connecting to the Battery •... -
Page 8: About Scan, Memory Lamp/Battery, Communication Lamp
Changing the color of the scan • memory lamp and battery • communication lamp let the user know the operating information on the scanner. Checking lamp Scan • Memory lamp Battery • Communication lamp BI-300 Series Manual BI-300 Series Manual... -
Page 9: Indication Of Lamp Status
BI-300 BI-300 Indication of lamp status Division Status Scan • Memory lamp Battery • Communication lamp Booting Violet Violet Power supply, scanner initialization Orange/blue/violet conversion Orange/blue/violet conversion complete, barcode scan enabled Basic operation Lack of memory storage Turn orange Violet lamp 1 time/flickering Default mode (Sleep mode×) 5 seconds Barcode scan successful... -
Page 10: About Signal Tone
Connect with USB or Serial High once Wire Wire communication is disconnected High/low once communication Rx error and reject to attempt connecting Low twice Barcode scan is successful during wire•radio communication, but Rx Others High once error occurs BI-300 Series Manual BI-300 Series Manual... -
Page 11: Changing A Battery
Changing a battery BI-300 BI-300 Removing a battery Inserting a battery 1 Power the terminal 1 Connect the battery off. connection cable to the connection 2 Unscrew the screw terminal. of a battery cover counterclockwise. 2 Insert the battery. 3 Lift up the battery cover in the arrow direction and remove. -
Page 12: Charging A Battery
• If two lamps are violet-flickering it means a lack of battery. Please charge the battery. • You should purchase charge- USB cable separately. BI-300 Series Manual BI-300 Series Manual... -
Page 13: Power On/Off
Power On/Off BI-300 BI-300 Power On Power Off Push down the Power button on the left side of the Push down the Power button on the left side of the terminal as shown in the figure, and then power is terminal as shown in the figure, and then power on. -
Page 14: Scanning Barcode
Clear all saved Press the Cancel button for characteristics of the laser barcode engine. Thus, barcodes (Clear All) 6 seconds while scanning one scan at a little inclined angle, not a right angle. unspecific barcode BI-300 Series Manual BI-300 Series Manual... -
Page 15: Sending Data To Pc
Sending data to PC BI-300 BI-300 You can exchange data by connecting the terminal to a PC with the USB cable. Procedures for data transmission 1 Copy the driver [gserial.inf] file of a PC in the • If the PC and Bluetooth are properly connected, the battery •... -
Page 16: Installing Driver- Windows Xp
Driver is not installed if USB connection is permitted. 1 Select the PC driver folder [BI300_PidionScan_ Windows XP, Vista], and copy the driver file [gserial_XP.inf] in the PC. You can download the driver at our homepage. (http://www.mypidion.com) BI-300 Series Manual BI-300 Series Manual... - Page 17 BI-300 BI-300 3 The [Found New Hardware Wizard] program is 4 Select the <Install from a list or specific location automatically run, and select <No, not this time>, [Advanced]> menu and select the <Next> button. and select the <Next> button.
- Page 18 6 After the <Install Hardware> window appears, menu and select the <Search> button, and select press the <Continue> button. a folder in which the driver file [gserial_XP.inf] is saved, and then select the <Next> button. BI-300 Series Manual BI-300 Series Manual...
- Page 19 BI-300 BI-300 • If the window to search for [usbser.sys] 7 If you check <Finish> in the [Found New Hardware file does not appear, or the device is not Wizard], the program is successfully installed. properly recognized even after the driver file [gserial_XP.inf] is normally installed, separate the terminal from the PC, copy...
-
Page 20: Installing Driver- Windows Vista
Driver is not installed if USB connection is permitted. 1 Select the PC driver folder [BI300_PidionScan_ Windows XP, Vista], and copy the driver file [gserial_XP.inf] in the PC. You can download the driver at our homepage. (http://www.mypidion.com) BI-300 Series Manual BI-300 Series Manual... - Page 21 BI-300 BI-300 3 The [Found New Hardware] program is 5 In the <Insert the disc that came with your Gadget automatically run, and then selects the <Locate Serial>, select the <I don’t have the disc Show me and install driver software>. other options.>...
- Page 22 6 In the <Windows couldn’t find driver software for 7 Select the <Browse...> button, and select a folder your device>, select the <Browse my computer for in which the driver file [gserial_Vista.inf] is saved, dirver software> button. and select the <Next> button. BI-300 Series Manual BI-300 Series Manual...
- Page 23 BI-300 BI-300 8 Select the <This driver software will be installed.> • If the window to search for [usbser.sys] file does not appear, or the device is not properly button. recognized even after the driver file [gserial_ Vista.inf] is normally installed, separate the terminal from the PC, copy the [usbser.sys] 9 Driver software installation is completed.
-
Page 24: Installing Pidionscan Program
[PidionScan_WinXp,Vista.exe] program. You can download the driver at our homepage. (http://www.mypidion.com) <COM Port> of <Gadget Serial> is changed at each PC, so that check the number to which the Gadget Serial COM port is set. BI-300 Series Manual BI-300 Series Manual... - Page 25 BI-300 BI-300 To check <COM Port> to be set, b. Select [System Restore] [Hardware] a. Right-click the mouse in [My Computer] of the <Device Manager>. PC, and select <Properties>.
- Page 26 3 For how to use the [PidionScan] program, refer to Manager>, you can check <Gadget Serial>. <Use PidionScan Program> on page 37. Image seen in the PC screen is different, but the function is quite similar to PDA. BI-300 Series Manual BI-300 Series Manual...
-
Page 27: Sending Data By Pda
Sending data by PDA BI-300 BI-300 You can exchange data by connecting the terminal to the PDA supporting Bluetooth, without the USB cable. Procedures for data transmission 1 Install [Microsoft ActiveSync] in a PC. (See P-26) • If the PDA and Bluetooth are properly connected, the battery •... -
Page 28: Installing Activesync
If the [ActiveSync] program is already installed in the PC, you need not install the program separately. The seen screen corresponds to the [Microsoft ActiveSync 4.5] version and it depends on the software version used. BI-300 Series Manual BI-300 Series Manual... - Page 29 BI-300 BI-300 2 Select the <Accept> button in the [License 3 If ready to install, [Microsoft ActiveSync] is Contract] window, and fill in the <User ID> installed. <Organization> in the [Customer information] window, and set <Installation Location> in the [Target Folder] window. 4 [Microsoft ActiveSync] installation is completed.
-
Page 30: Installing Pidionscan Program
• Image seen in the [Windows CE] screen is different, but the function is the same as [Windows Mobile]. 1 Connect the PDA and the PC using the USB cable. BI-300 Series Manual BI-300 Series Manual... - Page 31 BI-300 BI-300 • Depending on software version used in 3 Copy the [BI300_Pidion-Scan_Windows Mobile] PDA, install the [BI300_PidionScan_Windows folder in the provided CD in the [Mobile Device] CE] folder for Windows CE, and install the folder. [BI300_PidionScan_Windows Mobile] folder for Windows Mobile. •...
-
Page 32: Bluetooth Power On/Power Off
[Connect], and [Wireless of the screen and select Administrator]. [Wireless Administrator]. 2 Select <Bluetooth>. 2 Select <Bluetooth>. : Bluetooth on (set) : Bluetooth off(release) Terminal equipped with Bluetooth can be connected without setting Bluetooth. BI-300 Series Manual BI-300 Series Manual... -
Page 33: Bluetooth Setting-Windows Mobile
BI-300 BI-300 Bluetooth setting-Windows Mobile 1 Select the [Start] [Set] The seen screen corresponds to the [Connections] and [Windows Mobile 5.0] version and it depends [Bluetooth]. on the software version used. 2 Select <Turn on Bluetooth> in [Mode] tab. - Page 34 4 Select <BI-300> among the 6 Select <Serial Port> and searched Bluetooth devices, select the <Finish> button. and select the <Next> button. It is possible to search for <BI-300> only if the terminal power is on. BI-300 Series Manual BI-300 Series Manual...
- Page 35 BI-300 BI-300 7 Select <New Outgoing Port> 9 Select an unused port address in the [COM Port] tab. and select the <Finish> button. 8 Select <BI-300> and select the <Next> button. Unavailable if a port in use is selected and available only if a port not in use is selected.
-
Page 36: Bluetooth Setting-Windows Ce
1 Select [Start] [Set] The seen screen corresponds to the [Bluetooth Device [Windows CE 5.0] version and it depends on Attributes]. the software version used. 2 <Bluetooth Administrator> and select the <Search Device> button. BI-300 Series Manual BI-300 Series Manual... - Page 37 BI-300 BI-300 3 Select the searched <BI-300>, 5 If the PIN entry window and select <Trusted>. appears, enter PIN, and select the <OK> button. If the PDA and the terminal are connected for the first time, enter PIN to register. Default PIN is 1234, and the user can change the PIN.
- Page 38 Sending data by PDA Bluetooth Setting-Windows CE 7 Select <BI-300>, and select <Activate>. 8 Red < > mark is displayed in the device list. BI-300 Series Manual BI-300 Series Manual...
-
Page 39: Using Pidionscan Program
Using PidionScan Program BI-300 BI-300 Using the program named PidionScan, you can perform Connect data communication with the PDA/PC, and set the function of a terminal. You can connect/disconnect Image seen in the PC screen is different from that of communication between the PDA, but the function is quite similar each other. -
Page 40: Download
Popup window disappears) If too many barcode values are displayed in a data sheet in Real-time data sync state, sometimes, there may be a problem with program performance. BI-300 Series Manual BI-300 Series Manual... - Page 41 BI-300 BI-300 2 Device IDs of all connected 4 File name of download devices are displayed in the location is saved as <Device Popup window, and the name_scandata.extension>. download status per device is progressed by %. For PDA, downloaded files are saved in the <Device(my IF download is completed, the device)>...
-
Page 42: Setting
PC or PDA in real time. • If you do not select the checkbox, barcode values are not displayed in real time. BI-300 Series Manual BI-300 Series Manual... -
Page 43: Configure
BI-300 BI-300 Configure You can configure the General environment such as terminal Beep Volume : You can adjust volume, memory. the beep volume to level 4 For multiple accesses, you can (Off/Low/Medium/High). select many terminals and apply (Default : High) set value at a time. -
Page 44: Interleaved 2 Of 5 Length Min
Then, • Only the numbers 0~2 to be entered otherwise input the default value as below and push Set button. setting will be cancelled. BI-300 Series Manual BI-300 Series Manual... -
Page 45: Otherwise Setting Will Be
BI-300 BI-300 2 Interleaved 2 of 5 Length Min 4 MSI check digit : Set up minimum cognition : Set up Check Digit. It is the length. method to inspect whether the barcode is correct. • Basic Set Point : 3 •... -
Page 46: Basic Set Point
Prefix, Suffix : You can use carriage return and linefeed by Check digit entering a value. Number algorithm • Default modulo_10_10 Prefix : Blank Suffix : r modulo_10_11 modulo_10_12 • Enter numbers 0~2 otherwise setting will be cancelled. BI-300 Series Manual BI-300 Series Manual... - Page 47 BI-300 BI-300 Trigger System You can the Scan mode of the You can change the Power Save Scan button. mode and password of the terminal. Single : Scans one barcode each time you press the Scan button Power Save Mode : Set to the once.
- Page 48 Using PidionScan Program Configure About Information on software PIN Code should be the same as a 4 digit version and copyright is password entered in Confirm. displayed. BI-300 Series Manual BI-300 Series Manual...
-
Page 49: Product Specifications
Product Specifications BI-300 BI-300 Frequency : 2402MHz ~ 2480MHz Classification Specification Output : 20uW Size 36 x 85 x 19 mm Emission type : F1D Battery (included) : 54g Modulation mode : GFSK method : Physical Electrical Bluetooth Weight Number of channels repeated : 79 Main body (battery excluded) Type of public line : Chip ANT : 38g... - Page 50 If a problem still remains even if you check the above items, please contact a nearby Customer Service Center. The warranty period (one year after the purchase date) for the product is one year. BI-300 Series Manual BI-300 Series Manual...
-
Page 51: Customer Service
Customer Service BI-300 BI-300 +82-2-1588-1380 For any enquires of problems or inconveniences while using the product please call [Before asking for after-sales service] [How to ask for after-sales service] • Before requesting after-sales service, the user needs • For after-sales service, please contact your local dealer to back up data in the device in person. -
Page 52: Service Center Information
• If the price on the receipt is higher than the price, than the usual price will be used as a standard, considering that other incidental expenses had been added to the higher price. BI-300 Series Manual BI-300 Series Manual... - Page 53 BI-300 BI-300 [Charged Service] 4. Regulations of treatment after charged service - If the same default occurs on the part that had been 1. If it is not a default, it will be charged when repaired within a 2 months(60 days) period, it will be requesting for after-sales service.
-
Page 54: Certificate Of Guarantee
1. Due to the regulations of the customer damage product will never stop or there will never be an error compensation, Bluebird Soft Inc. (hereafter Bluebird) will when using the product. guarantee the products as follows. BI-300 Series Manual BI-300 Series Manual... -
Page 55: Ce Mark And Eea
MIC Certification CE Mark and EEA BI-300 BI-300 The following information on this class B equipment is provided for the users: This equipment is home appliances registered as EMI/EMS/EMC, and is available in all areas including residential district. BBS-BI-300 BBS-BI-300A(B) You can use a life safety-related service because radio equipment corresponding to the following has a possibility of radio... -
Page 56: Laser Device
Class 2 laser scan uses low-power visible light diode. Users should not directly look at light of quite bright light source such as sunlight. Instantaneous exposure to class 2 laser is considered to be not harmful. BI-300 Series Manual BI-300 Series Manual... - Page 57 Customers Service Center Hours Mon.- Fri. : 9 A.M. ~ 6 P.M. (GMT Time: +9 Hours) We are not open on Saturday, Sundays and National Holidays. Address : 1242, Gaepo-dong, Gangnam-gu, Seoul, Korea Bluebird constantly strives to bring utmost satisfaction to all our customers.
Need help?
Do you have a question about the BI-300 Series and is the answer not in the manual?
Questions and answers