Table of Contents
Advertisement
Advertisement
Table of Contents

Related Manuals for Mani Palmyra MIR 1017

Summary of Contents for Mani Palmyra MIR 1017
- Page 1 Palmyra WiFi Internet & FM Radio Manual MIR 1017 www.maninational.com...
- Page 2 9). Protect the power cord from being walked on or pinched particularly at plugs, convenience receptacles, and the point where they exit the device. 10). Only use attachments or accessories specified by Mani National Corporation 11). Unplug this product during lightning storms or when unused for long periods of time.
-
Page 3: Table Of Contents
Welcome Thank you for purchasing Palmyra Radio. Your Palmyra Radios designed as a digital music radio to add to your existing Audio system and to provide you with hours of music enjoyment with simple, convenient access to thousands of Internet radio stations worldwide and furthermore music streaming options. No matter whether you are in Zürich and want to listen to Brazilian music, or select a genre such as classical music, hard rock or jazz, the Radiobrings you home the radio station of your choice. - Page 4 Clock..............Alarm..............Language.............. light ..............Sleep Timer ............Buffering ............. . Version Update ............ . Reset ..............User Helper ..............Warranty ..............How you can get service ..........Registering your device with Mani .......
-
Page 5: Package Contents
Package contents Please make sure that the following content s are in cluded in the package: 1. Palmyra Internet Radio - Main unit 2. Power supply 3. Remote control 4. Radio User Manual Before you start Before you can use your internet radio and/or the music streaming function , you need the following: 1. -
Page 6: Features
Features Stand-alone device Wireless/cable connection Up-to-date list of more than 10,000 online stations 250 favorites Radio alarm Specifications Connectivity Wireless access point Data rates 54 Mbits (WLAN) 10/100 Mbits (Ethernet) Wireless LAN security WPA and WPA2-AES 64/128-bit WEP Audio format decoder Real/MP3/WMA/Flac/Ogg. -
Page 7: Getting Started
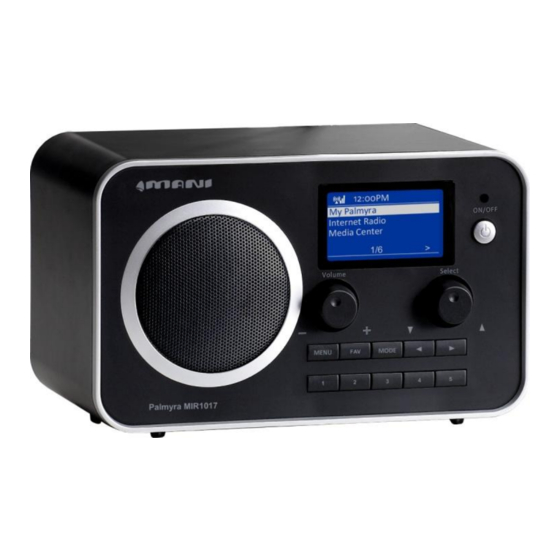
Ge tting sta r te d Front panel Power button Press to switch the device between standby and on mode. Enter button Press to confirm your selection of a menu option. Up navigation button Press to scroll up through menu items. Press to enter text. -
Page 8: Back Panel
Back panel FM Antenna Audio Line Out USB Port 9v-2A DC Power Plug Remote control... -
Page 9: Remote Functions
Remote Functions Power button Press to switch the device between standby and on mode. Menu button Press to return to the main menu. Volume- button Press to decrease the output volume. Mute button Press to mute the audio output. Volume+ button Press to increase the output volume. -
Page 10: Menu Structure
Menu Structure (not all features shown are available for this model) Modes and menus overview map... -
Page 11: Turning On The Radio
Turning on the Radio To turn on the Radio for the first time: 1. Plug the supplied power adapter in a power outlet. 2. Connect the power adapter to the DC power jack on the rear panel. Network status Time Menu options Press the right navigation... -
Page 12: Text Entry
1. From the main menu, select Configure > Language. 2. Press the up/down navigation button to scroll through the language options and press the enter button to apply the selected language. NOTE: The language selected applies to the Radio menus and system messages only. -
Page 13: Establishing A Wireless Connection
Establishing a wireless connection 1. Set up your access point (AP) to receive/broadcast a wireless signal. 2. From the main menu, select Configure > Network > WiFi Configure. The names of the receivable access points are listed. If you highlight a network protected by WEP encryption, a key icon will show at the bottom of the display. - Page 14 3. Select a network you have access to. If the network is not secured by a WEP key, press the enter button to make a connection. If it is locked, select Enter WEP. Your WEP key is the same Wi-Fi password you use on a laptop or PC to connect the Internet.
-
Page 15: Listening To The Radio
Lis t e ning to the r a dio Searching for a radio station The Adaptor has an up-to-date, well-classified list of online radio stations worldwide. You can search for a station by music genre or the location of the station. You can also go through the stations categorized in alphabetical order or manually enter the address of a station. -
Page 16: Searching By Country/Location
Searching by country/location From the main menu, select Radio Station/Music > Country/Location, and a list of geographical regions displays in alphabetical order: The list includes: Africa, Asia, Europe, Latin America, Middle East, North America, Oceania/Pacific, and Internet only (for stations broadcasting via the Internet only). -
Page 17: Searching By Station Name
Searching by station name From the main menu, select Service > Search Radio Station. The stations are divided into 10 categories by their name initial: 0-9, A-C, D-F, G-I, J-L, M-O, P-R, S-U, V-Z, and Other. Select a category and a list of stations displays. -
Page 18: Searching By Entering The Address
Searching by entering the address From the main menu, select Service > Add New Radio Station. Enter the address of a station. Refer to the “Text entry” section for details about inputting text. When finished, press Enter to connect to the station. Connecting to a station If the Radio is successfully connected to a station, the display is as follows: Network status... -
Page 19: Adding A Station To My Favorite
Adding a station to My Favorite You can add a currently played radio station to My Favorite or set a station as your favorite immediately after you found it on the list. The Radio has a memory of 250 stations. Adding a currently played radio station Press the +Favorite button on the remote control. -
Page 20: Managing My Favorite
Add to My Favorite: Select to add the station to your favorites list. Auto Scan (Down)/(Up): Select to connect to the stations on the list consecutively up/down from the highlighted station. Each station will be played for 30 seconds during which you can add it to My Favorite by pressing the +Favorite button. -
Page 21: Other Settings
Ot he r s e t t ings Configuration Selecting Configuration from the main menu allows you to configure the Radio setups including network, clock, alarm, language, light, sleep timer, buffer, version update, and reset. Network Refer to page 11 and 12 for details about network setup. Upnp: From the main menu, select mode into “Media Center”. -
Page 22: Alarm
Alarm This option allows you to turn on/off the alarm and program an alarm. Pressing the Alarm button on the remote control also activates/deactivates a programmed alarm. To program an alarm: Go to Configuration > Alarm > Turn On. Select Set Alarm Time and enter values. Refer to the “Text entry” section for details about inputting numbers. -
Page 23: Language
Language Refer to page 10 and 11 for details about language selection. Light The Configuration > light option allows you to adjust the brightness of the light. You can also shift the light mode by pressing the light button on the remote control. -
Page 24: Version Update
Version Update This option allows you to download the latest firmware version for the device. To update the firmware version: Go to Configuration > Version Update and select the item you are allowed to download. Select Yes to begin downloading it. Wait for a few seconds until the device reboots. -
Page 25: User Helper
_____________________________________ 4). Your WiFi network password: _____________________________________ 5). When you purchase a MANI brand devices you required to register them online. Please go to www.maninanational.com to create your user account and write down your account information for future use. User Name:... -
Page 26: Warranty
This limited warranty does not cover defects in appearance, cosmetic or decorative items, including any non-operative parts. Under no circumstances will Mani be liable for any loss of revenue, loss of profits or failure to realize expected savings (collectively “Economic Loss”) under this warranty or any implied conditions or warranty. -
Page 27: How You Can Get Service
MODIFY OR ADD TO THIS LIMITED WARRANTY. Registering Your Product with Mani Start your journey of using Mani brand products happily. Please take a moment to register your Device at w w w. ma n i n a ti o n a l .co... - Page 28 Mani National Corporation, 12 Smoothwater Terrace, Markham, ON, L6B-0E5, CANADA. t: 416-570-1990 f: 905-472-0051 email enquires: info@maninational.com...
Need help?
Do you have a question about the Palmyra MIR 1017 and is the answer not in the manual?
Questions and answers
Internet radio is not able to use as it is not able on accessing my network work for wireless.
To troubleshoot the Mani Palmyra MIR-1017 internet radio for wireless network connection issues, follow these steps:
1. Check ESSID or Key:
- If the display shows "Bad ESSID or key," ensure the MAC address of the radio is added to the allowed devices list in your wireless router's settings.
- Obtain the MAC address by navigating to Configure > Network Config > View Config > MAC address on the radio.
2. Verify Network Encryption:
- Confirm that the correct key or passphrase (e.g., WEP or WPA) is entered into the radio. Ensure the key is typed correctly, as it is case-sensitive.
3. Hidden ESSID:
- If your network name (ESSID) is hidden, either:
- Enable the network name on your access point, or
- Manually enter the ESSID into the radio by selecting Configure > Network > Enter ESSID.
4. Connection Issues:
- Double-check that the network settings, including encryption and ESSID, are correctly configured on the radio.
- If necessary, consult the access point's guide for detailed steps to allow the radio on the network.
By following these steps, you should be able to resolve common wireless network connection issues.
This answer is automatically generated