Table of Contents
Advertisement
Advertisement
Table of Contents

Related Manuals for Blendtec HP3A


Summary of Contents for Blendtec HP3A
- Page 1 Model HP3A Instruction Manual...
-
Page 3: Table Of Contents
Table of Contents SECTION SECTION 1: IMPORTANT SAFEGUARDS SECTION 2: UNPACKING SECTION 3: BLENDER OVERVIEW SECTION 4: INSTALLATION SECTION 5: CARE AND CLEANING SECTION 6: OPERATIONAL OVERVIEW SECTION 7: TROUBLESHOOTING SECTION 8: WARRANTY PAGE #... -
Page 4: Safety Certification
These precautions will prevent personal injury and/or damage to the blender. 1.4 NEVER OPERATE THE BLENDER IF IT APPEARS DAMAGED If the blender malfunctions call your service agent first. If it is dropped or dam- aged in any way, return the blender to a Blendtec service agent immediately for examination, repair, electrical or mechanical adjustment, or possible replace- ment. - Page 5 Removing the cover or attempting to service the blender will void the warranty. 1.14 TURN THE POWER SWITCH OFF WHEN NOT IN USE The Power Switch (ON/OFF switch) is located on the back of the blender motor cover. 1.15 AVOID TOUCHING THE BLENDER DRIVE SOCKET AFTER EXTENSIVE USE.
-
Page 6: Section 2: Unpacking
If any damage has occurred contact your Blendtec service agent immediately. 2.2 RECORDING YOUR SERIAL NUMBER AND DATE OF PURCHASE Record your blender motor serial number and date of purchase in the space below. You will need these when contacting Blendtec for service or questions. Motor Serial #:... -
Page 7: Section 3: Blender Overview
1. Place blender on a flat, clean and dry surface. 2. Make sure a plug outlet is available within four feet of the blender motor. 3. Ensure that the unit is turned off before plugging it into a separate 120-volt receptacle. - Page 8 HP-5...
-
Page 9: Section 5: Care And Cleaning
CARE AND CLEANING 5.1 AFTER USE CLEANING 1. Add 1 cup of hot water and a drop of liquid dishwashing soap to the blender jar. 2. Place the lid tightly onto the jar. Place the blender jar on the blender base, and with your hand placed on top of the lid;... -
Page 10: Section 6: Operational Overview
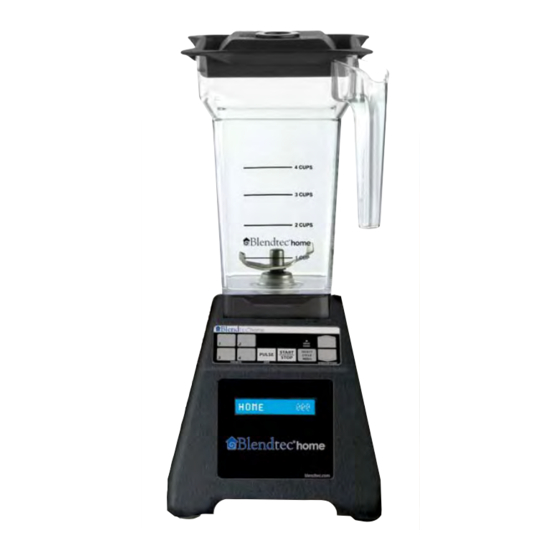
PRESETS 6.1 BEFORE YOU BEGIN OPERATION 1. Turn on the main power switch located on the back of the blender motor in the lower right corner. The display on the front will read “Blendtec home” 2. Place the blender jar on the base, making sure the jar is secure. Attach the blender lid. - Page 11 “Program Complete”. The blender will exit menu mode automatically and the preset is available for use. If the blender fails to program the button, the display will read, “Program Failed”. If you continue to receive this message after multiple attempts to program your blender, contact Blendtec customer service at 800-253-6383 for assistance.
-
Page 12: Restoring Factory Defaults
Drinks/Ice Cream Whole Foods To restore your blender to these settings, press and hold preset button 4 and the START/STOP button. The display will read, “RestoringDefaults”. When the pro- gramming is complete, the display will read, “Restore complete” and the blender will be ready for use in standard mode. -
Page 13: Section 7: Troubleshooting
• Determine if the Liquid Crystal Display (LCD) is lit. An absence of a lit LCD indicates a lack of power to the unit. • Remove the blender jar from the blender motor and check to make sure the blade turns freely while unattached to the motor. If the blade does not move freely the problem may be the jar, not the motor. - Page 14 • Ensure the mixture is not cavitating during the cycle. Cavitation is a condi- tion in which the blender blade spins freely in an air pocket within the drink mix because the mix is too cold or too solid. This problem can be corrected...
-
Page 15: Section 8: Warranty
The jar assembly, including all moving jar parts, is covered against leaking or breakage for 1 year. The blender jar blade and the motor base drive socket are covered by a lifetime warranty. Warranties begin from date of purchase. -
Page 16: Under Warranty
Many issues can be resolved simply and quickly over the phone. 2. If the blender is not under warranty and you wish to have it repaired, box up the blender motor and ship it to Blendtec and you will be billed for services ren- dered. - Page 17 1206 South 1680 West Orem, UT 84058 801-222-0888 blendtechome.com OWN-RE-023 Model HP3A Manual Rev. 02 12/06 ©2006 K-TEC, Inc., All Rights Reserved Blendtec is a registered trademark of K-TEC, Inc. HP-14...
Need help?
Do you have a question about the HP3A and is the answer not in the manual?
Questions and answers