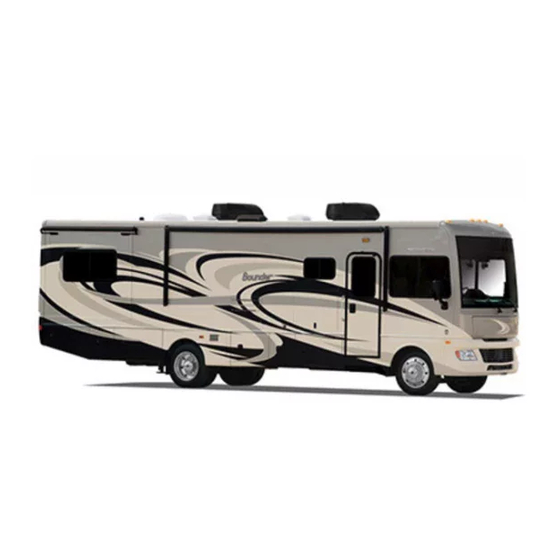
Fleetwood Southwind Owner's Manual

Fleetwood Southwind Owner's Manual

2014 rv
Hide thumbs Also See for Southwind:
Table of Contents

Advertisement

2014 Owner's Manual
©2013 by Fleetwood RV, Inc. All rights reserved. No part of this publication may be reproduced or transmitted
in any form or by any means, electronic or mechanical, including photocopying, recording, or by any information storage or retrieval system without written
permission from Fleetwood RV, Inc.
IMPORTANT - PLEASE READ: Product information, photography and illustrations included in this manual were as accurate as possible at the time of publication.
Materials, design, and specifications are subject to change without notice. Fleetwood has designed its recreational vehicles for a variety of customer uses. Each
vehicle features optimal seating, sleeping, storage, and fluid capacities. The user is responsible for selecting the proper combination of loads (i.e. occupants,
equipment, fluids, cargo, etc.) to ensure that the vehicle's weight capacities are not exceeded.
Manufacturing subsidiaries of Fleetwood RV, Inc. build the following motor homes:
American Heritage • American Eagle • American Tradition • American Revolution • Providence • Discovery • Expedition • Excursion • Terra • Southwind • Bounder •
Bounder Classic • Storm • Jamboree Sport • Jamboree Searcher • Tioga Ranger • Tioga Montara

Advertisement

Table of Contents
loading

Summary of Contents for Fleetwood Southwind

  • Page 1 Manufacturing subsidiaries of Fleetwood RV, Inc. build the following motor homes: American Heritage • American Eagle • American Tradition • American Revolution • Providence • Discovery • Expedition • Excursion • Terra • Southwind • Bounder • Bounder Classic • Storm • Jamboree Sport • Jamboree Searcher • Tioga Ranger • Tioga Montara...
  • Page 2 This page intentionally blank.
  • Page 3: Table Of Contents

    Motor Home Fuses and Circuit Breakers ..04-5 Engine Fan ........... 05-17 Driver’s Controls ........... 04-6 Exhaust System Heat ........05-17 SOUTHWIND INFORMATION ....04-7 Engine Temperature Gauges ......05-17 Motor Home Fuses and Circuit Breakers ..04-7 Carbon Monoxide Safety Precautions ..05-17 Driver’s Controls ...........
  • Page 4 (If Equipped) .......... 06-5 Chassis Bulbs and Fuses ......08-1 Sofa Conversion (If Equipped) ....06-5 Sleeper Sofa Conversion (If Equipped) ..06-5 Fleetwood 12-Volt House and Automotive Folding Doors/Privacy Curtain System ............08-1 Dividers ..........06-5 Battery Disconnect (If Equipped) ....08-2 Folding Chairs (If Equipped) ....
  • Page 5 Table of Contents PROPANE SYSTEM ........09-1 Exterior Sealants ........11-3 Door, Window, Roof Component Propane Safety Precautions ......09-1 and Molding Resealing ......11-3 System Components ........09-2 Acrylic Assist Handles (If Equipped) .... 11-3 Hoses ............09-2 Interior ............11-3 Propane Regulator ........
  • Page 6 This page intentionally blank.
  • Page 7: Introduction

    NFPA or CSA standards. because of the continuous program of product change conducted by Fleetwood, it is possible that recent Like all equipment, your motor home will require product changes may not be included.
  • Page 8: Inspect And Maintain

    If your Owner’s Information Package does not con- INSPECT AND MAINTAIN tain these items, even if you purchased your motor home “used,” please call or write Fleetwood and Follow a consistent schedule of inspection and request the desired or missing information.
  • Page 9: Chassis And Vehicle Identification

    V.I.N. TYPE VEHICLE: MULTI-PURPOSE PASSENGER VEHICLE The tires and wheels with sizes and ratings designated above have been equipped with this vehicle by Fleetwood. Any replacement tires installed must meet the same specifications and minimum load requirements.  FLEETWOOD RV, INC.
  • Page 10: After-Market Steering Aid Devices

    DEVICES design of the motor home, possibly leading to Fleetwood does not sanction or condone the handling problems and a vehicle crash. installation of any steering aid device that is not approved by our chassis manufacturer’s. Any...
  • Page 11 Propane systems can cause a fire and can endanger your motor home • You may be able to increase the weight of and its occupants . Fleetwood, your chassis any towed load by properly installing on and other manufacturers stand behind the the towed load a supplemental brake con- motor home as delivered –...
  • Page 12: Event Data Recording Device (If Equipped)

    Introduction • Brake Warning may be retrieved by authorized parties using specialized equipment, for vehicle diagnostic or • Engine Warning accident investigation purposes. Please refer to the chassis manufacturer owner’s EVENT DATA RECORDING DEVICE guide and/or (if equipped) electronic device (If Equipped) manufacturers owner’s guide(s), for further SPECIAL NOTICE: Vehicle Event Data...
  • Page 13: Warranty

    LIMITED ONE-YEAR WARRANTY For Motor Homes Manufactured by Fleetwood RV, Inc., Sold in the United States and Canada b. Failure to comply with instructions COVERAGE PROVIDED contained in the Owner’s Information Package; Your new motor home is warranted under normal use to be free from manufacturing defects in c.
  • Page 14: Limitations

    There is no defect, or any other dissatisfaction experienced warranty of any kind made by Fleetwood RV with the motor home so the manufacturer beyond the limited warranty contained in this has the opportunity to cure the problem or document.
  • Page 15: Manufacturer's Obligations

    PERIOD DESIGNATED ABOVE. AS TO dealer was unable or unwilling to resolve the STRUCTURAL DEFECTS, ANY ACTION problem, a Fleetwood RV Service Center will TO ENFORCE THESE EXPRESS OR repair or replace any parts necessary to correct IMPLIED WARRANTIES SHALL NOT BE defects in material or workmanship.
  • Page 16: Warranty Service

    (non-Fleetwood RV dealer), be sure to save receipts and especially Fleetwood RV will not be responsible for front any parts that are replaced. These parts will have end alignment after this pre-delivery inspection to be returned to your dealer before you can be has been performed.
  • Page 17: Reporting Safety Defects

    If you are unsure if Traffic Safety Administration (NHTSA) in the issue is chassis related, please contact your addition to notifying Fleetwood RV Owner Fleetwood RV dealer. Relations at 1-800-322-8216. The motor home has been thoroughly inspected If NHTSA receives similar complaints, it may before shipment.
  • Page 18 This page intentionally blank.
  • Page 19: Important Notices

    IMPORTANT NOTICES Please pay close attention to these statements while you read this Owner’s Manual. In this manual, statements preceded by the fol- lowing words are of special significance: DANGER Indicates an imminently hazardous situation that, if not avoided, will result in death or seri- ous injury.
  • Page 20 This page intentionally blank.
  • Page 21: Bounder Information

    This panel is very similar to a device or label. Doing so constitutes a fire hazard. residential panel with resettable breakers. 2. Fleetwood Automotive 12-volt System — This panel is located in a side compartment or in the engine access compartment. This...
  • Page 22: Driver's Controls

    Bounder Information DRIVER’S CONTROLS 1. Grade Brake Switch Recirc Button – When button is pressed in and (Option by Chassis) 2. Overdrive Switch light is on, interior air is recirculated through the (Option by Chassis) 3. Auxiliary Start Switch system. When button is out, air from outside the 4.
  • Page 23: Bounder Classic Information

    Doing so constitutes a fire hazard. 2. Fleetwood Automotive 12-volt System — This panel is located in a side compartment or in the engine access compartment. This...
  • Page 24: Driver's Controls

    Bounder Classic Information DRIVER’S CONTROLS 1. Radio Mode Switch 2. Radio/CD Player 3. 12 V Power Port 4. Generator Hour Meter 5. Generator Switch 6. Climate Controls 7. Instrument Cluster – Consult Chassis Operator’s Manual for details on instruments. 8. Headlights 9.
  • Page 25: Southwind Information

    Doing so constitutes a fire hazard. 2. Fleetwood Automotive 12-volt System — This panel is located in a side compartment or in the engine access compartment. This...
  • Page 26 Southwind Information 1. Headlight Switch Air is delivered from the adjustable dash 2. Driving Light Switch (Workhorse only) mounted outlets. Air will be either cooled 3. Leveler Switch or heated depending on position of A/C Button and Temperature Control Knob.
  • Page 27: On The Road

    . Towing and braking capacities may be different. Refer licensing requirements and vehicle dimen- to Fleetwood and the chassis manufacturer’s sional restrictions. Check the laws in the area manuals for complete information. where you anticipate traveling.
  • Page 28: Towing A Vehicle Or Trailer ("Towed Load Or Towed Unit")

    If the Chassis Operator’s/Owner’s Guide/Manual home structure or drive train, and restrict equipped with your motor home does not provide your coverage under the Fleetwood or chas- specific information on towing weight limits, it is sis manufacturer’s warranty. Changing the...
  • Page 29 On The Road • Towing equipment to consider includes a Your motor home is equipped with some of the weight distribution system, a sway control equipment required to tow a trailer, automobile system, a brake controller, and a supple- dolly, or other towed load. mental brake control system.
  • Page 30: Dinghy Towing

    On The Road ing the load you intend to pull. its own independent auxiliary brake system that is activated any time the motor home brakes are If you intend to tow, take advantage of reading applied. and studying literature that is available from vehicle manufacturers, the National Highway Because of State/Province regulations, care must traffic Safety Administration, equipment manu-...
  • Page 31: Occupant And Cargo Carrying Capacity And Load Distribution

    On The Road Occupant and Cargo Carrying If your motor home is improperly loaded, it may be unsafe to drive, uncomfortable to drive, Capacity and Load Distribution or both. Axle load is important and it is recom- NOTE mended that you should load your motor home so that the front axle is loaded to at least 80% of The Occupant and Cargo Carrying Capacity the front GAWR.
  • Page 32 On The Road To calculate the opposite side of the vehicle Your RV must remain as level as possible on the wheel position weight, subtract this side’s scale (even though an axle or side is not physically weights from the weights recorded in steps 1, 2 on the scale).
  • Page 33: Dangers Of Overloading

    On The Road WEIGHING YOUR MOTOR HOME To Obtain Individual Wheel Positions Weights: STEP 1S STEP 3S One Side One Side Scale Weight _____________ lbs. Scale Weight _____________ lbs. (Step 1S) (Step 3S) Calculate Other _____________ lbs. Calculate Other _____________ lbs. Side Weight (Step 1 - 1S) Side Weight...
  • Page 34: Tires

    12 inches square. tire manufacturer’s tire pressure chart. NOTE Tire Inflation Fleetwood recommends using a high quality tire pres- For safety and maximum tire life, vehicle speeds sure gauge for accurate, repeatable pressure readings. must be proper, proper inflation pressure must...
  • Page 35: Air Pressure

    On The Road Air Pressure heat. This heat damages the inner liner, casing and outer sidewall of the tire. If not remedied The most important factor in maximizing the quickly, the tire will be irreparably damaged. life of your tires is maintaining proper inflation. In extreme cases, the sidewall of the tire is Driving on a tire that does not have the correct destroyed, both from the excessive heat it endured...
  • Page 36: Tire Replacement

    On The Road dual, you might also spot it with a visual inspec- In case of sudden tire failure: tion. However, if it is an inside rear dual, the • Apply the accelerator to maintain direc- chances of spotting it without an air pressure tional stability, then gradually release the check are very slim.
  • Page 37: Seats And Seat Belts

    Fleetwood motor home dealer. one buckle and one tongue that are designed to be used as a pair.
  • Page 38: Safety Belt Maintenance

    On The Road Children should always ride with the seatback in Safety Belt Maintenance the fully upright position. When the seatback is Check your safety belt system periodically to not fully upright, there is a greater risk that the make sure that it works properly and isn’t dam- child will slide under the safety belt and be seri- aged.
  • Page 39: Driving And Vehicle Control

    On The Road seat, we recommend using a tether whenever one is required or available. WARNING You can visually identify the anchorage hard- ware by inspecting the lower rear of the passen- An incorrectly anchored tether strap could lead to ger or secondary seat.
  • Page 40: Maneuvering In Traffic

    On The Road lower gear to match the driving conditions you descending hills and always operate in the encounter or expect to encounter. Preselection proper transmission range. Downshift on hills will give you better control on slick or icy roads to avoid overheating or undue engine loads.
  • Page 41: Rear View Video Monitor (If Equipped)

    On The Road • Parking or idling should be done only in CAUTION an area where there are no combustible materials under the vehicle. The rear view video monitor system provides a general view of the road and objects to the rear of WARNING the motor home.
  • Page 42: Safe Refueling Guidelines

    . from your Fleetwood motor home dealer. • Always re-install the fuel cap correctly Clean up fuel spills immediately. Fuel spilled before departing.
  • Page 43: Engine Fan

    On The Road you return from your vehicle interior to remove “normal” operating temperature . As a motor the filling nozzle without discharging the static home owner, be aware that the gauge is intended build-up, in rare circumstances, a brief flash to provide a warning of any rapid change in fire could occur at the filling point if the static engine coolant temperature from the “normal”...
  • Page 44: Carbon Monoxide Detector/Alarm

    On The Road protect yourself and others from the effects of car- If you or others experience any of these symp- bon monoxide poisoning. toms, get out into fresh air immediately. If symptoms persist, seek medical attention. Shut Beware of the symptoms of exhaust gas (carbon down the unit and do not operate it until it has monoxide) poisoning: been inspected and repaired.
  • Page 45: Testing Procedure

    On The Road Procedures to take during an alarm TESTING PROCEDURE 1. Turn off all gas appliances. This includes 1. To test the propane alarm press the but is not limited to the stove, heater, TEST/MUTE button any time the alarm furnace, etc.
  • Page 46: Emergency Towing

    On The Road To prepare your motor home for towing: EMERGENCY TOWING 1. Secure any loose or protruding parts of the The preferred emergency towing methods are disabled vehicle, if any . either an under reach wheel lift device or a flat bed 2.
  • Page 47: Manual Headlamp Aiming Procedure

    On The Road Manual Headlamp Aiming Procedure 5. Inspect your headlamp system and deter- mine if it is a “Type 1” or “Type 2” system. A Type 1 system has a separate HI and CAUTION LOW beam and uses four lamps. A Type 2 system can be identified by locating the The following procedure is not a substitute for having number “2”...
  • Page 48 On The Road a. Type 1 Headlamps: The projected beam ment criteria adjust the “Vertical “and/or should be centered vertically and horizon- “Horizontal” positioning as shown on the tally on the vertical surface as marked in attached figure, rotate the knobs and/or step 6 and 7.
  • Page 49: Living With Your Motor Home

    LIVING WITH YOUR MOTOR HOME battery system must be connected (battery dis- (If Equipped) LEVELING SYSTEM connect in the “ON” position) for the entry step Controls for the leveling system are located in the to operate. driver’s compartment. A detailed operating and The entry step will typically extend and retract maintenance guide is included in your Owner’s with the opening and closing of the entry door...
  • Page 50: Entry And Screen Doors

    Living With Your Motor Home Emergency Exit Window(s) ENTRY AND SCREEN DOORS The main entry door uses a latching system sim- Emergency exit windows are identified by the red ilar to that used in automobiles. It has a second- handles and EXIT label. Storm windows should ary latch as well as a primary latch.
  • Page 51: Pull Shades (If Equipped)

    Living With Your Motor Home (If Equipped) PULL SHADES To Lower shades: Gently pull the shade down to the desired height. To Raise shades: unlock, move Gently pull the bottom of shade until the cord to center spring tension from the roller is felt, allow- Shade release ten-...
  • Page 52: Interior Storage

    Living With Your Motor Home slide-out room. WARNING • Always be certain that there is plenty of clearance for your room to safely extend to the full outward position. Do not store flammable, volatile liquids or haz- ardous chemicals inside the motor home or in •...
  • Page 53: Dinette Conversion (With Built-In Table) (If Equipped)

    (If Equipped) 2. Push the sofa fully into position. Your motor home may be equipped with free- Sleeper Sofa Conversion standing furniture. Fleetwood has designed retention hardware which will secure any loose (If Equipped) furniture during travel. Always secure any fur-...
  • Page 54: Interior Lighting

    Living With Your Motor Home Lubricate the gears and mechanism yearly with WARNING a light, water resistant grease. Loose furniture must be secured before travel. WARNING Failure to do so may result in injury or death in the event of an accident or emergency maneuver. When operating the on-board generator for electrical Interior Lighting power and using the overhead kitchen vent fan,...
  • Page 55: Effects Of Permanent Occupancy

    Living With Your Motor Home water may not conduct the signal properly. condense on the inside surfaces of your RV This condition may be infrequent, but can during cold weather when the humidity of the exist. Check the panel reading when the interior air is high.
  • Page 56 Living With Your Motor Home Floor mopping – When an 8’ x 10’ almost any material – except glass and kitchen floor is mopped and rinsed, almost metals. Water vapor in the air always ⁄ pounds of water can be released into wants to move toward dry air.
  • Page 57: Dripping Ceiling Vents

    Living With Your Motor Home formation. Avoid crowding closets or wardrobe space. Overstuffed closets CAUTION restrict air flow. 5. Stock kitchen and bath cabinets to allow Do not heat the RV interior with the range or oven. Open flames add moisture to the inte- free air circulation .
  • Page 58: What The Rv Owner Can Do

    Living With Your Motor Home Also, most mold growth requires a temperate water pool or stand in or under your RV. climate. The best growth occurs at temperatures • Inspect for leaks on a regular basis. Look between 40ºF and 100ºF. Most importantly, for discolorations or wet spots.
  • Page 59: Fire Safety

    Living With Your Motor Home the section about ventilation and prolonged WARNING occupancy in the Living With Your Motor Home chapter in this Owner’s Manual. Urethane foam is flammable! We provide you consumer information as Do not expose urethane foams to open flames or detailed by the National Fire Protection any other direct or indirect high temperature sources of ignition such as burning operations, welding,...
  • Page 60: Smoke Detector/Alarm

    BEEP signal sounds. If the smoke detector/alarm fails to operate WARNING with new batteries , replace it with a new unit, available through an authorized Fleetwood Portable fuel-burning equipment, including wood Dealer. and charcoal grills and stoves, shall not be used inside this recreational vehicle.
  • Page 61: Plumbing Systems And Holding Tanks

    PLUMBING SYSTEMS AND HOLDING TANKS The plumbing systems in your motor home are constructed of durable thermoplastic materi- als. Holding tanks and piping components are strong, lightweight, and corrosion resistant. Holding tanks are of three types: • Fresh – Fresh potable water •...
  • Page 62: Draining The Fresh Water Tank

    Plumbing Systems and Holding Tanks on-board tank is full. Immediately shut the water off or turn the bypass valve to normal. After filling, turn the bypass valve to “Normal.” DRAIN CLOSED CAUTION MAIN WATER TANK DRAIN VALVE Overfilling the fresh water tank from a pressurized source may cause damage to the water system.
  • Page 63: Low Point Drains

    If you experience this type of damage, repairs can best To drain hot and cold lines: be made by an authorized Fleetwood dealer. 1. Open hot and cold low point drains. For your safety, the shower faucet is equipped 2.
  • Page 64: Exterior Shower (If Equipped)

    Plumbing Systems and Holding Tanks 4. Top off water tank with fresh water and system completely self-contained and allow you allow the system to stand for at least 4 hours. to dispose of waste water at your convenience. A flexible sewer hose is required to connect the 5.
  • Page 65: Draining The Holding Tanks

    Plumbing Systems and Holding Tanks Draining the Holding Tanks Whenever possible, drain the holding tanks before traveling. Waste water and sewage in the holding The holding tanks terminate in a valve arrange- tanks reduce the carrying capacity of the motor ment that permits draining each tank separately.
  • Page 66: Black Tank Flush System (If Equipped)

    Plumbing Systems and Holding Tanks 3. Allow enough time for the tank to drain 4. Remove hose from black tank flush inlet completely. Rinse and flush the tank connection and store hose. through the toilet. When the tank is empty, 5.
  • Page 67: Cold Weather Usage

    Plumbing Systems and Holding Tanks If the drain system does get clogged: draining. Be sure to cover the tank bottom with water after draining. • Use a hand-operated probe to loosen stub- • Use only toilet tissue formulated for use in born accumulations.
  • Page 68 Plumbing Systems and Holding Tanks WATER PUMP SWITCH SPRAY NOZZLE TV/CABLE TELEPHONE CONNECTIONS ELECTRIC BLACK BYPASS VALVE CORD WATER STORAGE KNIFE VALVE HOT & COLD CITY VALVES FOR WATER GRAY WATER OUTDOOR DRAIN FILL KNIFE VALVE SHOWER COLD WATER WATER DRAIN Utility Compartment (detail varies depending on product) 07-8...
  • Page 69: Electrical Systems

    Exterior bulb types are listed in section 04-01 of the chassis 12-volt system this Owner’s Manual. Always replace bulbs and the Fleetwood 12-volt house system fuses with equivalent types and ratings. the 120-volt AC system. Fuses will interrupt the flow of electricity if a They operate together to give you electrical circuit is overloaded .
  • Page 70: Battery Disconnect (If Equipped)

    Electrical Systems To clean the battery: Battery Disconnect (If Equipped) 1. Be sure the vent caps are installed and tight. Some accessories or equipment such as clocks, 2. Wash the battery with a diluted solution radios or the refrigerator may draw small of baking soda and water to neutralize any amounts of current even when turned OFF.
  • Page 71: Solar Panel (If Equipped)

    Your dealer or an authorized Fleetwood Dealer • Do not charge the battery at a rate that can advise you on proper battery selection.
  • Page 72: Power Converter

    120-volt from the generator or a public utility. motor home electrical system checked at an autho- rized Fleetwood Dealer or by a qualified electrician. The DC power converter will charge the chassis and house batteries when plugged into 120-volt Test the GFCI at least once a month.
  • Page 73: Generator

    • Check engine fuel lines. Fuel leakage in or around the compartment is an extreme fire Fleetwood Dealer or by a qualified electri- hazard. Do not use the generator until fuel cian. Do not use the system until the prob- leaks are repaired.
  • Page 74: Generator Fuel Supply

    Electrical Systems Propane Generator (If Equipped) WARNING Fuel is provided from a dedicated Propane tank. Do not modify the generator installation or exhaust system in any way. Generator Operations Do not use the generator as an emergency power source to a general residential or industri- To start the generator: al utility line.
  • Page 75: Electrical Wiring Diagrams

    Electrical Systems There is no programming necessary and the ELECTRICAL WIRING DIAGRAMS unit will work with any load within the circuit Because of the many model, floor plans and breaker limits. The Smart EMS automatically option variations available, it is beyond the “learns”...
  • Page 76 This page intentionally blank.
  • Page 77: Propane System

    PROPANE SYSTEM Propane is available from an approved storage check that the container is not overfilled) and container to operate your range, oven, furnace note the odor described as garlic/rotten egg like and water heater, and as an alternate energy for future reference.
  • Page 78: System Components

    Propane System SYSTEM COMPONENTS WARNING Hoses 6. Turn off Propane main valve before filling The hoses used in your Propane system meet Propane container or entering an Propane bulk stringent requirements, and are rated to with- plant or motor fuel service station. Turn off all stand many times the pressures encountered in pilot lights and appliances individually before refueling of motor fuel tanks and/or Propane...
  • Page 79: Accessory Propane Supply (If Equipped)

    Propane System full as possible during cold weather. Check the BTU/hr rating plates on your Propane appliances. Accessory Propane Supply This info rmation will help you manage your Equipped) Propane usage . The accessory Propane supply device and hose FILLING PROPANE TANKS is intended for outdoor use only.
  • Page 80: Propane Leak Detector/Alarm

    7. If the alarm does not sound during a test or if the green indicator light is not visible, see your dealer or an authorized Fleetwood Dealer. There are no batteries or user WARNING service able parts inside the unit.
  • Page 81: Appliances

    Consult with your established by these organizations. All appli- dealer for the location for your particular unit. ances are covered by Fleetwood’s Owner Care To bypass the water heater, turn the lever valve Warranty program. Each appliance is also war- vertical .
  • Page 82: Range

    Appliances stored personal items block the free flow of air Propane System chapter of this manual. at the registers or the return air to the furnace. When you use the range oven for cooking or Storage under cabinets should be done carefully baking, always open a vent or window to pro- so as to not crush or damage any furnace ducting.
  • Page 83: Televisions And Dvd Players (If Equipped)

    Obtain the park connection point is located near the rear on 12-volt source from a properly fused battery the roadside sidewall. circuit. Consult an authorized Fleetwood dealer before adding any additional equipment to your motor home. 10-3...
  • Page 84: Microwave Oven (If Equipped)

    Appliances with the appliance manufacturer’s printed instructions . (If Equipped) MICROWAVE OVEN MISCELLANEOUS APPLIANCES The microwave oven is powered by 120-volt AC power and will only operate when con- You may have additional appliances in your unit nected. A wall receptacle for the microwave is which operate only when connected to 120-volt located in the overhead cabinet adjacent to the power from either a public utility or the generator.
  • Page 85: Maintenance

    Refer this type of service to your dealer or an The best insurance against these effects is rou- authorized Fleetwood Dealer. Never use strong tine maintenance . If the finish is not washed and solvents or abrasives to clean plastic surfaces.
  • Page 86: Exterior Graphics Care

    Maintenance Exterior Graphics Care Windows, Doors, Vents and Locks The pressure sensitive graphics installed on the Keep moving parts, hinges and latches adjusted exterior surfaces of your motor home require little and maintained . Lubricate with a light oil at maintenance and should be treated similarly to a least once a year.
  • Page 87: Sealant Renewal

    Minor spills should be cleaned up quickly to EXTERIOR SEALANTS avoid staining. The affected area should be blot- Consult your Fleetwood Motor Home dealer for ted, not rubbed, to prevent the stain from work- the most current sealant use. ing deeper into the fabric.
  • Page 88: Laminate Top Care (If Equipped)

    “matte/satin” finish with an the hole location and drill a 3/16” hole where abrasive cleanser. the rivet is to be located. If you need rivets, contact your Fleetwood dealer. Laminate Top Care (If Equipped) For cleaning laminate surfaces, uses mild dish- washing liquid with warm water.
  • Page 89: Engine Access

    Fleetwood Owner’s Manual will ensure WARNING your RV will provide you many years of enjoy- able use. Severe climates, either hot or cold, can The interior engine cover is heavy.
  • Page 90 Maintenance Wash exterior Wax exterior Lubricate and adjust exterior locks, hinges, roof vents, window mechanisms, etc. Lubricate power step mechanism Check all exterior sealants, around windows, doors, sidewall seams, windshield, lamps, all exterior openings including roof A/C gasket and roof components. Re-seal if necessary.
  • Page 91: Storage

    STORAGE 10. Turn off water pump and water heater STORAGE CHECKLISTS switches. The following checklists will help you perform 11. Turn off Propane at tank valve. the steps necessary to prepare your motor home 12. Turn off refrigerator and furnace. for storage.
  • Page 92: Long-Term Storage (Over 60 Days)

    Storage Long-Term Storage 9. During extended periods of storage, gaso- line may deteriorate due to oxidation. This (Over 60 Days) can damage rubber and other materials in 1. Perform all steps as required for short-term the fuel system. It may also clog small ori- storage.
  • Page 93: Water System Winterizing

    Storage 3. Winterize the Propane system. Your 7. Flush the toilet. Operate toilet sprayer, if Propane dealer or service station will per- equipped. form this for you. 8. Drain the shower head by opening the 4. Winterize all appliances as outlined in the valve.
  • Page 94: Reactivating The Motor Home After Storage

    If you didn’t, and extensive system as outlined in the Plumbing chapter. freeze damage or other serious deterioration has occurred, please consult your dealer or an autho- 12. Install a new water filter cartridge (if rized Fleetwood Dealer for advice. equipped). 12-4...
  • Page 95 If defects are found, refer Operate vehicle slowly during these checks service to your dealer or an authorized to allow sufficient circulation of fluids and Fleetwood Dealer. reseating of components. 21. Prepare the generator for operation follow- ing instructions in the generator operat- Your motor home should now be ready for a ing manual in your Owner’s Information...
  • Page 96 This page intentionally blank.
  • Page 97: Glossary

    120-volt 60-cycle power. number that identifies your motor home as Belted Seating Positions - These are seats with a Fleetwood product. Use this number when seat belts. Anyone riding in the motor home ordering parts or requesting warranty service must use one of these seats any time the for your motor home.
  • Page 98 VIN (Vehicle Identification Number) - The tion cards, and other material put together for legal, 17-digit vehicle identification number you by Fleetwood. These materials contain as shown on the vehicle registration certifi- operating and maintenance instructions for cate.
  • Page 99 MANUFACTURING PLANTS: FLEETWOOD RV, INC. 1031 U.S. 224 E., P.O. Box 31 Decatur, Indiana 46733 (260) 728-2121 CUSTOMER SERVICE: FLEETWOOD OWNER RELATIONS P.O. Box 1007 Decatur, IN 46733 (800) 322-8216...
  • Page 100 Notes...

Table of Contents