Table of Contents
Advertisement
Quick Links
Advertisement
Table of Contents

Subscribe to Our Youtube Channel
Related Manuals for Athena 6000


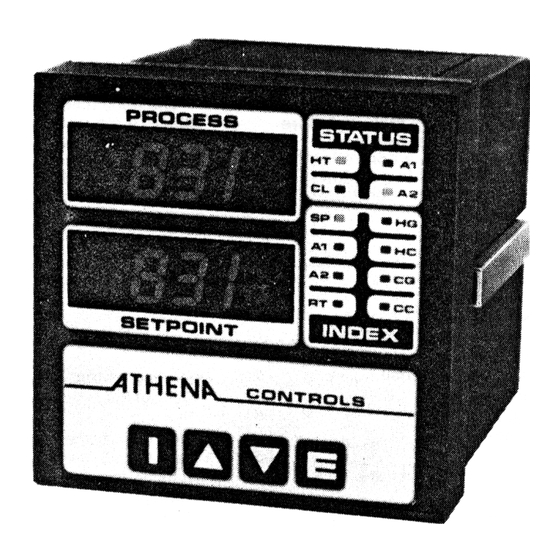
Summary of Contents for Athena 6000
-
Page 2: Table Of Contents
By using microprocessor Thermocouple linearization hardware and a highly sophisticated The 6000 has a program to software package, Athena designers linearize signal input from the and engineers have included more thermocouple. Without it, tempera- features than have ever been... -
Page 3: Mounting
Specifications Inputs: Line Voltage 120/240 Vac 50,60 Hz -15% T, J or K thermocouple or Platinum 100Ω at 0°C Sensor Power consumption: Less than 6 VA (Instrument) Ranges available: J couple 0-1400°F (0-760%) K couple 0-2000°F (0-1093ºC) ±1 digit of full scale Accuracy: 5 µV/ºC Max 3 µV/ºC typ. - Page 4 Front Panel Adjustments Touch Key Index: Allows the following adjustments to be selected. 1) set point temperature 0 to span 2) alarm one temperature setting 0 to span 3) alarm two temperature setting 0 to span 4) rate with tracking reset (1:6ratio) ** 0 to 120 sec 5) heat gain *** 1 to 400...
-
Page 7: Output Modules
Output Modules times less than ten seconds will drastically shorten relay life and in no case should the cycle time be set to zero (60 millisecond time base). Normally open contacts are provided for both heating or cooling use. NOTE: Do not use this output module with mechanical contactors because they generate an excessive EMI field which can lnterfere with other controllers. -
Page 12: Operating Instructions
Installation Instructions variable, the probe should be close to the work area. Some experimenting with probe location is often needed to find its optimum position. In a bath process, the addition of a stirrer will help to eliminate thermal lags. Since the thermocouple is basically a point measuring device, putting more than one thermocouple in parallel will provide an average temperature reading and produce better results In air... -
Page 13: Start-Up
Operating Instructions Start-Up Before line voltage is applied, double check all items connected to controller: The correct type thermocouple (see section on thermocouples, p. 11) must be on terminals 1 and 2 (red on 2) with no AC or DC voltage leading or arcing to it. -
Page 14: Heat Galn Setting
A controller must be tuneable to process characteristics in order to compensate for the deficiencies of the rest of the system. The Model 6000 has been designed so that it does this and still remains easy to operate. Heat Gain... -
Page 15: Examples
Operating Instructions (with some overshoot) reduce rate time 10-20%. For more anticipation (giving undershoot) increase rate slightly. Experiment with (HG) settings. EXAMPLES OF PARAMETER SETTING ON TWO PROCESSES Process A : Slow, 2 lag process, matched power, 200º set point. TEMPERATURE REMARKS 197º-199º... -
Page 16: Trouble Shootlng
Trouble Front dark - no instrument power, blown fuse or burned Shooting out transformer. Process display shows CCCC - Open thermocouple. Short terminals 1 and 2, should indicate temperature at back of case. Repair or replace thermocouple. About Half Or Twice Expected Reading- Check position of ºC or ºF switch.
Need help?
Do you have a question about the 6000 and is the answer not in the manual?
Questions and answers