Table of Contents
Advertisement
Quick Links
VIDEO CASSETTE RECORDER
HR-VP70U
POWER
A
B
ENTER
OSD
1
2
3
4
5
6
DAILY (M–F)
WEEKLY
7
8
9
C.RESET
AUX
0
CANCEL
TIMER
CH SKIP
TV
CH
VOL.
CABLE
DBS
SP/EP
DISPLAY TV/VCR
TV
VCR
(VIDEO)
PLAY
STOP
POWER
SHUTTLE
PLUS
VIDEO (MONO)L – AUDIO – R
MULTI BRAND
REMOTE CONTROL UNIT
MENU
SP
AM
V C R
PM
TIMER
H
M
S
INSTRUCTIONS
PLAY
REW
FF
2
2
REC
STOP/EJECT
PAUSE
OK
q
5/8
6
CH
ST
R E C
SAP
PLAY
M
PAUSE
For Customer Use:
Enter below the Serial No. which is
located on the rear of cabinet. Retain
this information for future reference.
Model No.
HR-VP70U
Serial No.
LPT0002-0E5A
Advertisement
Table of Contents

Subscribe to Our Youtube Channel
Related Manuals for JVC HR-VP70U


Summary of Contents for JVC HR-VP70U
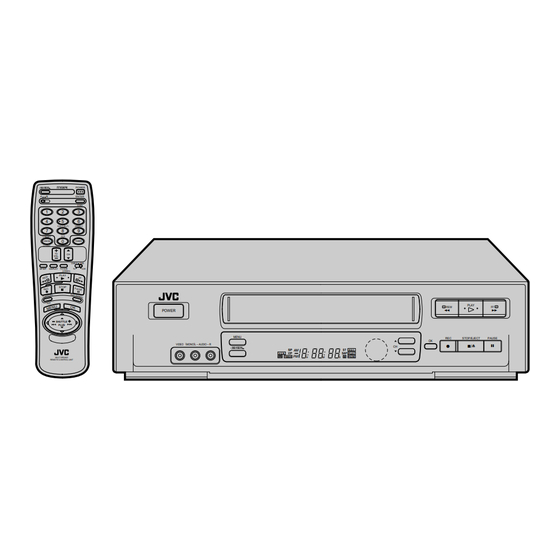
- Page 1 VIDEO CASSETTE RECORDER HR-VP70U POWER ENTER DAILY (M–F) WEEKLY C.RESET CANCEL TIMER CH SKIP VOL. CABLE SP/EP DISPLAY TV/VCR (VIDEO) PLAY STOP POWER SHUTTLE PLUS MENU VIDEO (MONO)L – AUDIO – R MULTI BRAND REMOTE CONTROL UNIT INSTRUCTIONS PLAY STOP/EJECT...
- Page 2 Dear Customer, Thank you for purchasing the JVC VHS video cassette recorder. Before use, please read the safety information and precautions contained in the following pages to ensure safe use of your new VCR. CAUTIONS CAUTION RISK OF ELECTRIC SHOCK...
-
Page 3: Important Product Safety Instructions
IMPORTANT PRODUCT SAFETY INSTRUCTIONS Electrical energy can perform many useful functions. But improper use can result in potential electrical shock or fire hazards. This product has been engineered and manufactured to assure your personal safety. In order not to defeat the built-in safeguards, observe the following basic rules for its installation, use and servicing. - Page 4 BEFORE YOU INSTALL YOUR NEW VCR ..please read the sections/literature listed below. ”Cautions” on page 2 ”Important Products Safety Instructions” on the previous pages...
-
Page 5: Table Of Contents
Edit From A Camcorder ... 46 PECIAL FEATURES TV Multi-Brand Remote Control ... 48 Cable Box Multi-Brand Remote Control ... 49 DBS Receiver Multi-Brand Remote Control ... 50 Control Two JVC VCRs ... 51 ROUBLESHOOTING Power ... 52 Tape Transport ... 52 Playback ... 52 Recording ... -
Page 6: Basic Connections
If RF connection to TV is used, when switching from VCR to TV mode and from TV to VCR it may be necessary to issue a CH UP and then CH DOWN on TV to obtain a good quality picture. -
Page 7: Nitial Settings
If you perform Plug & Play successfully, D.S.T. will be set to “AUTO”. At the D.S.T. adjustment time ( VCR's power must be off and your cable box must be set to the host PBS channel in your area for the D.S.T. adjustment to take place. -
Page 8: Language
Language Turn on the TV and select the VCR channel 3 or 4 (or AV mode). MENU This VCR offers you the choice to view on-screen messages in English, Spanish or French (not including messages superimposed on the TV picture). Select the desired language using this procedure. -
Page 9: Clock
Clock Turn on the TV and select the VCR channel 3 or 4 (or AV mode). MENU Perform clock setting only if the clock has not been set correctly by the Plug & Play function. Access the Override Auto Clock Set screen to choose the Auto, Semi-Auto or Manual clock setting procedure. -
Page 10: Semi-Auto
Set screen reappears. NOTES: For cable box users: Select "AUTO" or the channel on your VCR that receives the cable box channels, and set the cable box to the PBS channel. There are some PBS channels that do not transmit clock setting data. -
Page 11: Manual
(arrow) to "AUTO CLOCK SET" by pressing CH the VCR. Do not power it on again until the clock has been adjusted. The clock is automatically adjusted on the hour except at 11:00 PM, midnight, 1:00 AM and 2:00 AM. -
Page 12: Tuner
Tuner Turn on the TV and select the VCR channel 3 or 4 (or AV mode). MENU Set Receivable Channels POWER SHUTTLE PLUS INITIAL SETTINGS (cont.) TURN ON THE VCR Press POWER. ACCESS MAIN MENU SCREEN Press MENU as many times as necessary. - Page 13 MENU SHUTTLE PLUS INFORMATION The VCR detects the band (TV or CATV) and selects the correct band automatically during Auto Channel Set. If necessary, you can check the setting at the Band screen after Auto Channel Set has set the channels.
-
Page 14: Add Or Delete A Channel
CH.SKIP MENU Add Or Delete A Channel NUMBER SHUTTLE PLUS INITIAL SETTINGS (cont.) ACCESS TUNER SET SCREEN Access by performing steps 2 and 3 of the Tuner procedure on page 12. To add a channel, go to step 2. To delete a channel, skip to step 4. ACCESS AFC SCREEN Move the highlight bar (arrow) to "AFC"... -
Page 15: Cable Box Control
Cable Box Control Suggested Location Place the cable box on top of the VCR. Attach the VCR's Controller to the top of the VCR with the Controller’s transmitter pointed towards the cable box’s remote sensor. Attention: The Controller can also control a DBS receiver. If both a cable... -
Page 16: Set Cable Box Output Channel
Turn on the TV and select the VCR channel 3 or 4 (or AV mode). MENU Set Cable Box Output Channel TURN ON THE VCR Press POWER. ACCESS MAIN MENU SCREEN Press MENU as many times as necessary. POWER SHUTTLE PLUS INITIAL SETTINGS (cont.) -
Page 17: Set Cable Box Brand
For customers in U.S.A.: If you are unable to set the Control- ler, please contact JVC toll free at 1-800-252-5722. CABLE BOX BRAND LIST BRAND ARCHER... -
Page 18: Vcr Plus+ Setup
If the numbers are different, and you want to be able to timer record programs from those stations, you have to inform the VCR of the mismatch. Go to step 1. If you will not want to timer record from those stations, you can go directly to “VCR Plus+ Timer Programming”... - Page 19 GUIDE CH : 6 VCR CH PRESS NUMBER KEY (0-9) OR (5∞), THEN (OK) PRESS (MENU) TO END You can now use VCR Plus+ for quick and simple timer programming ( INPUT RECEIVING CHANNEL NUMBER Press CH5 ∞ , SHUTTLE (Ex.) If WNJU(Ind.) is...
-
Page 20: Dbs Receiver Control
DBS Receiver Control Suggested Location Place the DBS (Direct Broadcast Satellite) receiver on top of the VCR. Attach the VCR's Controller to the top of the VCR with the Controller’s transmitter pointed towards the DBS receiver's remote sensor. Attention: The Controller can also control a cable box. If both a DBS... -
Page 21: Set Dbs Receiver Output Channel
Turn on the TV and select the VCR channel 3 or 4 (or AV mode). MENU Set DBS Receiver Output Channel TURN ON THE VCR Press POWER. Set the VCR to the channel (3 or 4 or AU) on which the signals from the DBS receiver are received. -
Page 22: Set Dbs Receiver Brand
For customers in U.S.A.: If you are unable to set the Control- ler, please contact JVC toll free at 1-800-252-5722. Set DBS Receiver Brand NUMBER SHUTTLE PLUS INITIAL SETTINGS (cont.) -
Page 23: Imple Playback And Recording
SIMPLE PLAYBACK AND RECORDING Simple Playback Turn on the TV and select the VCR channel 3 or 4 (or AV mode). REW (Rewind) Usable cassettes Full-Size VHS T-30 (ST-30**) T-60 (ST-60**) T-90 T-120 (ST-120**) T-160 (ST-160**) ST-210** Compact VHS* TC-20 (ST-C20**) -
Page 24: Simple Recording
Simple Recording Turn on the TV and select the VCR channel 3 or 4 (or AV mode). SP/EP SIMPLE PLAYBACK AND RECORDING (cont.) ENTER NUMBER Accidental erasure prevention PLAY To prevent accidental recording on a recorded cassette, remove its record safety tab. -
Page 25: Features
PLAYBACK AND RECORDING FEATURES Playback Features High-Speed Search ACTIVATE HIGH-SPEED SEARCH During playback or still press FF for forward high-speed search, or REW for reverse high-speed search. To resume normal playback, press PLAY. NOTE: For short searches, during playback or still press and hold FF or REW for over 2 seconds. -
Page 26: Manual Tracking
Pause. Manual tracking is possible during hands-free slow-motion. During hands-free slow-motion playback, simply press CH5 or ∞ on the VCR's front panel or remote to adjust tracking. Tape Position Indicator The Tape position indicator... -
Page 27: Video Stabilizer
SHUTTLE PLUS Video Stabilizer You can correct vertical vibration when playing back unstable EP recordings that were made on another VCR. When this function is set to "ON", vertical vibration will be automatically corrected. *The default setting is "OFF". ACCESS MAIN MENU SCREEN Press MENU as many times as necessary. -
Page 28: Superimpose
(No indication during still and search.) Press OSD again to clear the display. The superimposed indication on the TV screen tells you what the VCR is doing. Tuned-in channel or AUX(iliary) mode When the channel is changed, the new... -
Page 29: Select The Soundtrack
MENU SHUTTLE PLUS Select The Soundtrack Your VCR can record two soundtracks simultaneously (Normal and Hi-Fi) and play back the selected one, or both together. ACCESS MAIN MENU SCREEN Press MENU as many times as necessary during playback or when VCR is in stop mode. -
Page 30: Index Search
An index code is not placed on the tape when recording is paused and then resumed. Instant ReView At the press of a button, you can power up your VCR, rewind the tape and begin viewing the most recent timer-recorded program. SKIP SEARCH... -
Page 31: Repeat Playback
C.RESET DISPLAY C.MEMORY Next-Function Memory The Next Function Memory “tells” the VCR what to do after rewinding. * Before continuing, ensure that the VCR is in stop mode. a– For Automatic Start Of Playback After Tape Rewind . . . -
Page 32: Av Compu Link Playback
MENU PLAYBACK AND RECORDING FEATURES (cont.) AV COMPU LINK Playback Your VCR is compatible with JVC’s AV COMPU LINK components, including amplifiers (or receivers) and televisions. AV COMPU LINK provides one touch control of the audio and video compo- nents that are linked via their AV COMPU LINK connectors. - Page 33 LINK II (VCR ONLY) AUDIO IN VIDEO IN AV COMPU LINK Television NOTE: Connection varies depending on the type of JVC TV you have. Please refer to the TV’s instruction manual when making this connection. SHUTTLE PLUS Your VCR VIDEO AUDIO...
-
Page 34: Auto Picture
Auto Picture Turn on the TV and select the VCR channel 3 or 4 (or AV mode). MENU PLAYBACK AND RECORDING FEATURES (cont.) Auto Picture compensates for variations in tape characteristics to ensure the best possible playback picture. It checks and compensates for the condition of the tape at the beginning of automatic tracking when playback is selected. -
Page 35: Start Playback
Playback The VCR assesses the quality of the tape once you start playback. Perform steps 1 and 2 on page 23 ("Simple Playback") before continuing. START PLAYBACK Press PLAY. The VCR adjusts the playback picture quality based on the quality of the tape in use. -
Page 36: Recording Features
During recording, press OSD at any time to see the elapsed time. All indications corresponding to the current status of the VCR are displayed for 5 seconds. The counter display remains on the screen indicating the elapsed time. Press OSD again to remove the display. -
Page 37: Stereo And Sap (Second Audio Program)
MENU SHUTTLE PLUS Stereo And SAP (Second Audio Program) Your VCR’s built-in MTS decoder enables reception of Multi- channel TV Sound broadcasts. The ST indicator on the front display panel lights during stereo broadcast reception, and SAP lights during SAP program reception. -
Page 38: Timer Recording
VCR Plus+ Timer Programming Before VCR Plus+ Timer programming, see "VCR Plus+ Setup" on page 18. Turn on the TV and select the VCR channel 3 or 4 (or AV mode). CANCEL SP/EP MENU Timer recording allows you to program the VCR to automatically record a program which will be broadcast at some future time. - Page 39 NOTES: To disengage the timer before recording starts, press TIMER again. Pressing once more re-engages it. In case of a power failure after programming, the VCR’s memory backup keeps your selections for approximately 10 minutes. When timer-recording cable channels received through a Cable Box, be sure to keep the Cable Box set to ON.
-
Page 40: On-Screen Timer Programming
On-Screen Timer Programming Turn on the TV and select the VCR channel 3 or 4 (or AV mode). MENU EXAMPLE If you program the VCR to timer record a show on December 24 on channel 40 from 12:00 noon to 1:00 PM in SP mode, the screen will look like this: You can directly program the VCR’s timer to record up to 8... - Page 41 TV : To timer-record a regular TV program received on the VCR. b- CATV : To timer-record a cable TV program received on the VCR, or through a cable box (unless "CABLE BOX OUTPUT" is set to "OFF" c- DBS : To timer-record a satellite program received through a DBS receiver.
-
Page 42: Check And Cancel Programs
CANCEL MENU Check And Cancel Programs POWER TIMER To Cancel A Program . . . SHUTTLE PLUS TIMER RECORDING (cont.) DISENGAGE TIMER Press TIMER, then press POWER. ACCESS MAIN MENU SCREEN Press MENU as many times as necessary. ACCESS PROGRAM SET SCREEN Press CH 5 ∞... -
Page 43: Auto Timer
RETURN TO NORMAL SCREEN Press MENU as many times as necessary. NOTE: For safety, when AUTO TIMER is set to “OFF”, all other VCR functions are disabled while the Timer mode is engaged. To disengage the timer, press TIMER. pg. 38) pg. -
Page 44: Instant Timer Recording (Itr)
REC to extend the time. Each press extends recording time by 30 minutes. NOTES: You can only perform ITR using the REC button on the VCR's front panel. After you set the ITR time, the previous display reappears. To check the remaining time, press REC once during record- ing and the remaining time will be displayed for about 5 seconds. -
Page 45: Diting
If you use a cable box or a DBS receiver connected to one of the VCR's auxiliary input connectors and if you have used this VCR as the recording deck for editing, be sure to select again the required input at the AUX Input screen when you finish editing. -
Page 46: Edit From A Camcorder
VIDEO Camcorder AUDIO OUT EDIT Player NUMBER "0" MENU You can use a camcorder as the player and your VCR as the recorder. Your VCR SHUTTLE PLUS EDITING (cont.) MAKE CONNECTIONS Connect an AV cable between the camcorder’s VIDEO OUT and AUDIO OUT connectors and your VCR’s VIDEO IN and AUDIO IN connectors. -
Page 47: Select Input
OFF before pressing play. START RECORDER Set your VCR to its record mode. If you are using a Master Edit Control-equipped JVC camcorder, it can put the recorder automatically into Record mode. (Refer to camcorder's instruction manual.) -
Page 48: Special Features
POWER remote control TVs and on the brands of remote control TVs listed below. The TV brand code is factory preset to control JVC TVs. NOTE: Depending on the kind of TV, there may be cases where some or all functions cannot be operated using the remote control. -
Page 49: Cable Box Multi-Brand Remote Control
11, 12 Cable Box Multi-Brand Remote Control The VCR's remote control can control functions on the brands POWER of cable boxes listed below. Some cable box brands have more than one code. If your cable box does not function with a specified code, try other codes. -
Page 50: Dbs Receiver Multi-Brand Remote Control
Press in succession down DBS Receiver Multi-Brand Remote Control The VCR's remote control can control functions on the brands POWER of DBS (Direct Broadcast Satellite) receivers listed below. NOTES: You must set the DBS receiver brand for your remote control and the DBS receiver brand for your Controller ( separately. -
Page 51: Control Two Jvc Vcrs
A/B CODE Control Two JVC VCRs The supplied remote control is capable of controlling two JVC VCRs independently using the A/B CODE switch. You can set this VCR so it responds to remote commands only when the switch is POWER set to B, and another VCR so it responds to commands when the switch is set to A. -
Page 52: Troubleshooting
Before requesting service for a problem, use this chart and see if you can repair the trouble yourself. Small problems are often easily corrected, and this can save you the trouble of sending your VCR off for repair. POWER SYMPTOM 1. -
Page 53: Timer Recording
POSSIBLE CAUSE The clock and/or the timer have been set incorrectly. The timer is not engaged. The VCR has not been set up properly. Timer recording is in progress. The timer is engaged but there’s no cassette loaded. The loaded cassette has had its record safety tab removed. -
Page 54: Other Problems
This VCR contains microcomputers. External electronic noise or interference can cause microcomputer to malfunction. If the VCR does not operate correctly switch its power off and unplug the power cord from the AC supply. Wait for a while and then plug the power back in. -
Page 55: Uestions And Answers
Q. What happens if the end of the tape is reached during playback or search? A. The tape is automatically rewound to the beginning. Q. Can the VCR indefinitely remain in the still mode? A. No. It stops automatically after 5 minutes to protect the heads. -
Page 56: Ndex
Superimpose ...28 Tape Position Indicator ...26 Tape Speed Setting ...24 Time Zone Selection ... 11 Tuner Setting ...12 Variable-Speed Search ...25 VCR Plus+ ...18 VCR Pius+ Timer Programming ... 38 VCR Pius+ Timer Recording ... 38 Video Stabilizer ...27 INDEX... -
Page 57: Front View
FRONT VIEW POWER VIDEO (MONO)L – AUDIO – R 1 Power On/Off Button ( pg. 8) 2 Cassette Loading Slot 3 Rewind [REW] Button ( pg. 23) 4 PLAY Button ( pg. 23) 5 Fast-Forward [FF] Button ( 6 VIDEO/AUDIO Input Connectors ( 7 MENU Button ( pg. -
Page 58: Rear View
Remote PAUSE Connector ( AV COMPU-LINK Connector ( 3 VIDEO/AUDIO Input Connectors ( FRONT DISPLAY PANEL V C R TIMER 1 VCR Mode Indicator ( pg. 36) 2 Tape Speed Indicators ( 3 AM/PM Indicators ( pg. 7) 4 Clock Display ( pg. -
Page 59: Remote Control
SKIP SEARCH Button ( y OK Button ( u SHUTTLE PLUS Button ( How To Use The remote control can operate most of your VCR's functions. NOTES: This remote control can also operate various brands of TVs, Cable Boxes and DBS Receivers. For instructions, pg. -
Page 60: Specifications
GENERAL Power requirement : AC 120 V` , 60 Hz Power consumption : 21 W Temperature Operating : 5°C to 40°C (41°F to 104°F) Storage : –20°C to 60°C (–4°F to140°F) Operating position : Horizontal only Dimensions (W x H x D) : 400 x 94 x 273 mm (15-3/4"... -
Page 61: For Servicing (Only In U.s.a.)
Sophisticated electronic products may require occasional service. Just as quality is a keyword in the engineering and production of the wide array of JVC products, service is the key to maintaining the high level performance for which JVC is world famous. The JVC service and engineering organization stands behind our products. -
Page 62: Arranty (Only In U.s.a.)
WHAT WE WILL DO: If this product is found to be defective, JVC will repair or replace defective parts at no charge to the original owner. Such repair and replacement services shall be rendered by JVC during normal business hours at JVC authorized service centers. Parts used for replacement are warranted only for the remainder of the Warranty Period. - Page 63 MEMO...
- Page 64 JVC COMPANY OF AMERICA DIVISION OF US JVC CORP. 41 Slater Drive, Elmwood Park, N.J. 07407 JVC CANADA INC. 21 Finchdene Square, Scarborough Ontario M1X 1A7 Printed in Malaysia U/U(C) COPYRIGHT © 1997 VICTOR COMPANY OF JAPAN, LTD. 0497HOV...
Need help?
Do you have a question about the HR-VP70U and is the answer not in the manual?
Questions and answers