Table of Contents
Advertisement
Quick Links
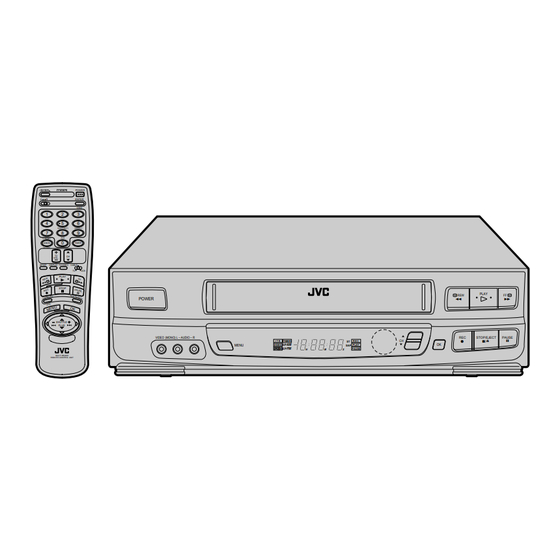
VIDEO CASSETTE RECORDER
HR-VP636U
POWER
A
B
ENTER
OSD
1
2
3
4
5
6
DAILY (M-F)
WEEKLY
7
8
9
C.RESET
AUX
0
CANCEL
TIMER
CH SKIP
TV
CH
VOL.
SP/EP
DISPLAY TV/VIDEO
CABLE
TV
VCR
PLAY
STOP
POWER
SHUTTLE
PLUS
VIDEO (MONO) L – AUDIO – R
MULTI BRAND
REMOTE CONTROL UNIT
INSTRUCTIONS
CH
I T R
TIMER
ST
R E C
AM
MENU
VIDEO
SP
SAP
PLAY
M
PM
EP
H
M
S
PAUSE
PLAY
REW
FF
2
2
w
Cable
REC
STOP/EJECT
PAUSE
6
q
5/8
OK
For Customer Use:
Enter below the Serial No. which is
located on the rear of cabinet. Retain
this information for future reference.
Model No.
Serial No.
Channel
Changer
HR-VP636U
PU30425-1787
Advertisement
Table of Contents

Related Manuals for JVC HR-VP636U


Summary of Contents for JVC HR-VP636U
- Page 1 VIDEO CASSETTE RECORDER HR-VP636U POWER ENTER DAILY (M-F) WEEKLY C.RESET CANCEL TIMER CH SKIP VOL. SP/EP DISPLAY TV/VIDEO CABLE PLAY STOP POWER SHUTTLE PLUS VIDEO (MONO) L – AUDIO – R I T R MENU VIDEO MULTI BRAND REMOTE CONTROL UNIT...
- Page 2 Dear Customer, Thank you for purchasing the JVC VHS video cassette recorder. Before use, please read the safety information and precautions contained in the following pages to ensure safe use of your new VCR. CAUTIONS CAUTION RISK OF ELECTRIC SHOCK...
-
Page 3: Important Product Safety Instructions
IMPORTANT PRODUCT SAFETY INSTRUCTIONS Electrical energy can perform many useful functions. But improper use can result in potential electrical shock or fire hazards. This product has been engineered and manufactured to assure your personal safety. In order not to defeat the built-in safeguards, observe the following basic rules for its installation, use and servicing. - Page 4 BEFORE YOU INSTALL YOUR NEW VCR ..please read the sections/literature listed below. ”Cautions” on page 2 ”Important Products Safety Instructions” on the previous pages...
-
Page 5: Table Of Contents
Edit From A Camcorder ... 44 Assemble Editing ... 46 PECIAL FEATURES TV Multi-Brand Remote Control ... 47 Cable Box Multi-Brand Remote Control ... 48 Control Two JVC VCRs ... 49 Child Lock ... 49 ROUBLESHOOTING Power ... 50 Tape Transport ... 50 Playback ... -
Page 6: Nstalling Your New Vcr
Connect the antenna, VCR and TV as shown in the illustration. b– Connect an Audio/Video Cable (not supplied) between the AUDIO OUT and VIDEO OUT jacks on the rear of the VCR and the AV IN jacks on the TV. CONNECT VCR TO POWER SOURCE RF Cable (provided) Connect the power plug to an AC outlet. -
Page 7: Nitial Settings
If you perform Dual Quick Set successfully, D.S.T. will be set to “AUTO”. At the D.S.T. adjustment time ( your VCR's power must be off and your cable box must be set to the host PBS channel in your area for the D.S.T. -
Page 8: Clock
Clock MENU SHUTTLE PLUS 5∞ INITIAL SETTINGS (cont.) Preparation TURN ON THE VCR Press POWER. If watching channel 3 or 4, press TV/VIDEO to select the VIDEO mode. VIDEO is displayed on the front display panel. ACCESS ON-SCREEN MENU Press MENU to bring up the Main Menu screen. -
Page 9: Clock Setting
There are some PBS channels that do not transmit clock setting data. CUSTOM SET =OVERRIDE AUTO CLOCK SET LANGUAGE SELECT VCR PLUS+ SET-UP PRESS (5,∞), THEN (OK) PRESS (MENU) TO END OVERRIDE AUTO CLOCK SET AUTO CLOCK SET =SEMI-AUTO CLOCK SET MANUAL CLOCK SET PRESS (5,∞), THEN (OK) -
Page 10: Select Time Zone
IMPORTANT After performing the Semi-Auto clock set procedure, make sure that the VCR is off before the next hour so that the clock can be set. (The clock is automatically adjusted on the hour except at 11:00 PM, midnight, 1:00 AM and 2:00 AM.) **AUTO DAYLIGHT SAVING TIME This function enables automatic adjustment of the VCR’s clock... -
Page 11: Manual
"0" first). Press or SHUTTLE PLUS 5 ∞ to set AM/PM and D.S.T. (Daylight Saving Time) to “ON” (automatic adjustment based on VCR’s clock) or “OFF” (if D.S.T. doesn’t apply to you). Press OK after AM/PM and D.S.T. settings. The next setting that can be set begins flashing. -
Page 12: Tuner
MENU SHUTTLE PLUS INITIAL SETTINGS (cont.) Set Receivable Channels TURN ON THE VCR Press POWER. If watching on channel 3 or 4, press TV/ VIDEO to select the VIDEO mode. VIDEO is displayed on the front display panel. ACCESS MAIN MENU SCREEN Press MENU as many times as necessary. - Page 13 MENU SHUTTLE PLUS PERFORM AUTO CHANNEL Place the arrow next to "AUTO CHANNEL SET" by pressing CH 5 ∞ or SHUTTLE PLUS 5 ∞, then press OK. Receivable channels in your area are automatically assigned to the CH 5 ∞ buttons, and non-receivable channels are skipped.
-
Page 14: Add Or Delete A Channel
NUMBER CH.SKIP MENU SHUTTLE PLUS INITIAL SETTINGS (cont.) Add Or Delete A Channel ACCESS TUNER SET SCREEN Access by performing steps 2 and 3 of the Tuner procedure on page 12. To add a channel, go to step 2. To delete a channel, skip to step 4. ACCESS AFC SCREEN Place the arrow next to "AFC"... -
Page 15: Tuner And Cable Box Controller
Tuner And Cable Box Controller Suggested Location Place the cable box on top of the VCR. Attach the VCR's Cable Box Controller to the top of the VCR with the Controller’s transmitter pointed towards the cable box’s remote sensor. Your VCR... -
Page 16: Set Cable Box Output Channel
SET”, then press OK. ACCESS VCR PLUS+ SET-UP SCREEN Press CH5∞ or SHUTTLE PLUS 5 ∞ to place the arrow next to “VCR PLUS+ SET-UP”, then press OK. ACCESS CABLE BOX OUTPUT SCREEN Press CH 5 ∞ or SHUTTLE PLUS 5 ∞ to place the arrow next to “CABLE... -
Page 17: Set Cable Box Brand
(2–6). If your cable box is connected to your VCR’s AUDIO/ VIDEO IN connectors ..press CH5∞ or SHUTTLE PLUS 5 ∞ to place the arrow next to “ON LINE”. - Page 18 VCR. The VCR can only change the cable box channel through the Cable Box Controller during timer recording. If your cable box is one that can’t be operated with a remote control (has no remote sensor), you can’t use the Cable Box...
-
Page 19: Vcr Plus+ Setup
If the numbers are different, and you want to be able to timer record programs from those stations, you have to inform the VCR of the mismatch. Go to step 1. If timer recording on those stations is not important to you, you can go directly to “VCR Plus+ Timer Programming”... - Page 20 TV listing. Then press OK. If you receive your channels with a cable box and if you have properly set your Cable Box Controller, “CABLE CH” appears in place of “VCR CH”. If not, refer to pages 15–16 and re-perform the procedure. MAIN MENU...
- Page 21 OK to see the next set of numbers. RETURN TO NORMAL SCREEN Press MENU as many times as necessary. You can now use VCR Plus+ for quick and simple timer programming ( pg. 37). VCR PLUS+ SET-UP GUIDE CHANNEL SET...
-
Page 22: Imple Playback And Recording
Make sure the window side is up, the rear label side is facing you and the arrow on the front of the cassette is pointing towards the VCR. Don’t apply too much pressure when inserting. The VCR’s power comes on automatically. -
Page 23: Simple Recording
START RECORDING Press and hold REC and press PLAY on the remote control, or press REC on the VCR's front panel. Active Video Calibration takes place at the beginning of both the first SP and the first EP recording after... -
Page 24: Playback
PLAYBACK AND RECORDING FEATURES Still Picture PAUSE DURING PLAYBACK Press PAUSE. If there is vertical jitter, press CH 5 or ∞ on the VCR's front panel or remote to stabilize the picture. FRAME-BY-FRAME PLAYBACK Advance the tape one frame by pressing PAUSE again. -
Page 25: Manual Tracking
Watch the screen and continue adjusting until optimum picture and sound quality are achieved. RE-ENGAGE AUTOMATIC TRACKING Press the CH 5 ∞ buttons on the VCR's front panel simultaneously. When automatic tracking is re-engaged, video calibration is automatically activated. -
Page 26: Select The Soundtrack
Your VCR can record two soundtracks simultaneously (Normal and Hi-Fi) and play back the selected one, or both together. ACCESS MAIN MENU SCREEN Press MENU during playback or when VCR is in stop mode. If the VCR Plus+ screen appears press MENU again. ACCESS FUNCTION SET SCREEN Place the arrow next to "FUNCTION SET"... -
Page 27: Superimpose
(No indication during still and search.) Press OSD again to clear the display. The superimposed indication on the TV screen tells you what the VCR is doing. Tuned-in channel or AUX(iliary) mode When the channel is changed, the new channel is displayed on the screen for 5 seconds. -
Page 28: Skip Search
PLAYBACK AND RECORDING FEATURES (cont.) VIDEO Skip Search SKIP OVER UNWANTED SECTIONS Press SKIP SEARCH 1 to 4 times during playback. Each press initiates a 30-second period of fast- motion playback. Normal playback resumes automatically. NOTE: To return to normal playback during a Skip Search, press PLAY. -
Page 29: Instant Review
C.RESET C.MEMORY Instant ReView At the press of a button, you can power up your VCR, rewind the tape and begin viewing the most recent timer-recorded program. ACTIVATE INSTANT REVIEW After ensuring that the VCR is off and the Timer mode is disengaged, press REVIEW. -
Page 30: Tape Position Indicator
REW or FF. AV COMPU LINK Playback Your VCR is compatible with JVC’s AV COMPU LINK components, including amplifiers (or receivers) and televisions. AV COMPU LINK provides one touch control of the audio and video compo- nents that are linked via their AV COMPU LINK connectors. - Page 31 Linked components are turned on, and the TV set to its VIDEO mode, automatically! NOTE: Connection varies depending on the type of JVC TV you have. Please refer to the TV’s instruction manual when making this VIDEO connection.
-
Page 32: Active Video Calibration
Calibration MENU SHUTTLE PLUS Your VCR is equipped with the Active Video Calibration feature, which checks the condition of the tape in use during recording and playback, and compensates to provide the highest-possible recording and playback pictures. *The default setting for both recording and playback is "ON". -
Page 33: Start Recording
As calibration takes place before recording actually starts, there is a delay of about 7 seconds after REC and PLAY on the remote, or REC on the VCR's front panel, are pressed. To make sure you record the desired scene or program... -
Page 34: Playback
PLAYBACK AND RECORDING FEATURES (cont.) Playback The VCR assesses the quality of the tape once you initiate playback. Before beginning, perform steps 1 and 2 on page 22. START PLAYBACK Press PLAY. The VCR adjusts the playback picture quality based on the quality of the tape in use. -
Page 35: Recording
During recording, press OSD at any time to see the elapsed time. All indications corresponding to the current status of the VCR are displayed for 5 seconds. The counter display remains on the screen indicating the elapsed time. Press OSD again to remove the display. -
Page 36: Stereo And Sap (Second Audio Program)
MENU SHUTTLE PLUS Stereo And SAP (Second Audio Program) Your VCR’s built-in MTS decoder enables reception of Multi- channel TV Sound broadcasts. The ST indicator on the front display panel lights during stereo broadcast reception, and SAP lights during SAP program reception. -
Page 37: Imer Recording
"ERROR" may appear on the screen to advise you of the error. This happens when the PlusCode number is for a program which has already passed. "ERROR" is displayed for about 4 seconds and the VCR Plus+ screen reappears (step 2). CHECK INPUT DATA The PlusCode number you entered appears in the Program screen. - Page 38 To disengage the timer before recording starts, press TIMER again. Pressing once more re-engages it. In case of a power failure after programming, the VCR’s memory backup keeps your selections for 10 minutes. When timer-recording cable channels received through a...
-
Page 39: Instant Timer Recording (Itr)
REC to extend the time. Each press extends recording time by 30 minutes. NOTES: You can only perform ITR using the REC button on the VCR's front panel. After you set the time, the previous display reappears. To check remaining recording time, press REC once during... -
Page 40: Select Program Number
To disengage the timer before recording starts, press TIMER again. Pressing once more re-engages it. In case of a power failure after programming, the VCR’s memory backup keeps your selections for 10 minutes. If you select "PROGRAM SET" without having set the date and time, an error message appears. -
Page 41: Check And Cancel Programs
POWER TIMER CANCEL MENU SHUTTLE PLUS Check And Cancel Programs DISENGAGE TIMER Press TIMER, then press POWER. ACCESS PROGRAM SET SCREEN Press MENU, then press OK. CHECK PROGRAM INFOR- MATION Press CH 5 ∞ or SHUTTLE PLUS 5 ∞ to check the programs in succession. -
Page 42: Auto Timer
SHUTTLE PLUS TIMER RECORDING (cont.) Auto Timer When activated, this function automatically engages the timer when the VCR's power is turned off, and disengages it when the power is turned on. ACCESS MAIN MENU SCREEN Press MENU as many times as necessary. -
Page 43: Diting
VIDEO OUT VIDEO IN Recorder NUMBER "0" You can use your VCR as the player or the recorder. MAKE CONNECTIONS Connect an AV cable (not supplied) between the player’s VIDEO OUT and AUDIO OUT connectors and the recorder’s VIDEO IN and AUDIO IN connectors. -
Page 44: Edit From A Camcorder
EDIT Player NUMBER "0" MENU SHUTTLE PLUS You can use a camcorder as the player and your VCR as the recorder. MAKE CONNECTIONS Connect an AV cable (not supplied) between the camcorder’s VIDEO OUT and AUDIO OUT connectors and your VCR’s VIDEO IN and AUDIO IN connectors. - Page 45 Set the camcorder to its play mode. START RECORDER Set your VCR to its record mode. If you are using a Master Edit Control-equipped JVC camcorder, it can put the recorder automatically into Play mode. (Refer to camcorder's instruction manual.)
-
Page 46: Assemble Editing
PLAY to initiate the recorder’s record mode. STOP EDITING Press PAUSE to pause the tape in the recorder. CONTINUE EDITING Repeat steps 4 through 6 to add additional scenes. PAUSE NOTE: Assemble Editing is also possible using your VCR as the playback deck. EDITING (cont.) -
Page 47: Pecial Features
VOL. +/- TV Multi-Brand Remote Control POWER The VCR's remote control can control several functions on JVC remote control TVs and on the brands of remote control TVs listed below. TURN ON THE TV Turn the power on using the TV's remote control. -
Page 48: Cable Box Multi-Brand Remote Control
Cable Box Multi-Brand Remote Control POWER The VCR's remote control can control functions on the brands of cable boxes listed below. Some cable box brands have more than one code. If your cable box does not function with a specified code, try other codes. -
Page 49: Control Two Jvc Vcrs
A/B CODE TIMER Control Two JVC VCRs The supplied remote control is capable of controlling two JVC VCRs independently using the A/B CODE switch. You can set this VCR so it responds to remote commands only when the switch is set to B, and another VCR so it responds to commands when the switch is set to A. -
Page 50: Roubleshooting
Before requesting service for a problem, use this chart and see if you can repair the trouble yourself. Small problems are often easily corrected, and this can save you the trouble of sending your VCR off for repair. POWER SYMPTOM 1. -
Page 51: Recording
POSSIBLE CAUSE There’s no cassette loaded. The loaded cassette has had its record safety tab removed. The VCR has been set to its AUX mode by mistake. The VCRs or the camcorder and the VCR have been incorrectly con- nected. -
Page 52: Other Problems
8. Timer recording begins as sched- uled, but the channel is always incorrect. 9. We moved, and now VCR Plus+ doesn’t work properly. 10.“PROGRAM FULL” is displayed on the VCR Plus+ screen. OTHER PROBLEMS SYMPTOM 1. When scanning channels, some of them are skipped over. -
Page 53: Uestions And Answers
Q. What happens if the end of the tape is reached during playback or search? A. The tape is automatically rewound to the beginning. Q. Can the VCR indefinitely remain in the still mode? A. No. It stops automatically after 5 minutes to protect the heads. -
Page 54: Pecifications
GENERAL Power requirement : AC 120 V` , 60 Hz Power consumption : 21 W Temperature Operating : 5°C to 40°C (41°F to 104°F) Storage : –20°C to 60°C (–4°F to140°F) Operating position : Horizontal only Dimensions (W x H x D) : 360 x 94 x 276 mm (14-3/16"... -
Page 55: Ndex
Specifications ...54 Still Playback ...24 Superimpose ...27 Tape Position Indicator ... 30 Tape Speed Setting ... 23 Time Zone Selection ... 10 Tuner Setting ...12 VCR Plus+ ...19 VCR Plus+ Timer Programming ... 37 VCR Plus+ Timer Recording ... 37... -
Page 56: Front View
FRONT VIEW POWER VIDEO (MONO) L – AUDIO – R 1 Power ON/OFF Button ( pg. 8) 2 Cassette Loading Slot 3 Rewind Button ( pg. 22) Reverse Search Button ( pg. 24) 4 Play Button ( pg. 22) 5 Fast-Forward Button ( pg. -
Page 57: Front Display Panel
& WEEKLY Timer Recording Button ( * TIMER Button ( ( Channel [CH] 5 ∞ Buttons ( ) TV/VIDEO Button ( q TV/CABLE/VCR Switch ( w Fast-Forward [FF] Button ( e PAUSE Button ( r STOP Button ( pg. 22) -
Page 58: Or Servicing
Sophisticated electronic products may require occasional service. Just as quality is a keyword in the engineering and production of the wide array of JVC products, service is the key to maintaining the high level performance for which JVC is world famous. The JVC service and engineering organization stands behind our products. -
Page 59: Limited Warranty
WHAT WE WILL DO: If this product is found to be defective, JVC will repair or replace defective parts at no charge to the original owner. Such repair and replacement services shall be rendered by JVC during normal business hours at JVC authorized service centers. Parts used for replacement are warranted only for the remainder of the Warranty Period. - Page 60 JVC COMPANY OF AMERICA DIVISION OF US JVC CORP. 41 Slater Drive, Elmwood Park, N.J. 07407 Printed in Malaysia COPYRIGHT © 1996 VICTOR COMPANY OF JAPAN, LTD. 0296HOV...
Need help?
Do you have a question about the HR-VP636U and is the answer not in the manual?
Questions and answers