Table of Contents
Advertisement
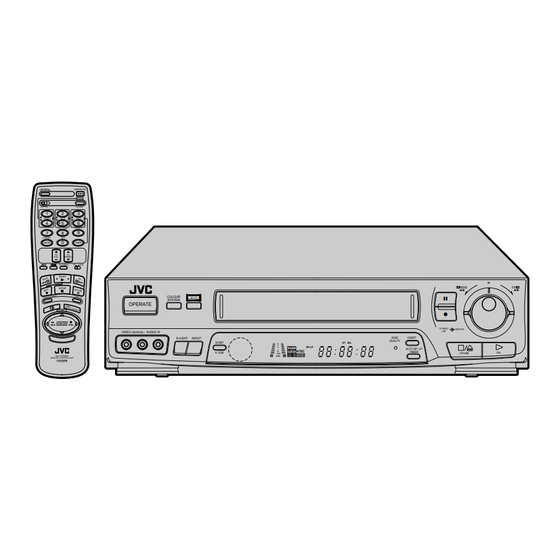
HR-J635EA
OPERATE
PROG.
A
B
CLOCK
1
2
3
START
STOP
DATE
4
5
6
DAILY (M-F)
WEEKLY
7
8
9
C.RESET
AUX
0
CANCEL
TIMER
TV
TV
VOL.
PROG.
TV/VIDEO
TV
VCR
PLAY
STOP
COLOUR
WIDE
SYSTEM
QUALITY
OPERATE
PUSH JOG
VIDEO
(MONO)
L- AUDIO-R
R.A.EDIT
IN/OUT
MULTI BRAND
REMOTE CONTROL UNIT
INSTRUCTIONS
WIDE
CHSET
QUALITY
START
ST BIL
+8
4
0
R E C
SP LP
AUTO SP / LP
6
PLAY
NTSC
TIMER
A. DUB
10
-20dB
TIMER
L
NORM
R
M
CONTENTS
Safety Precautions .................................... 2
Basic Connections ................................... 3
Tune The TV To Your Video Recorder ...... 4
On-Screen Displays ................................. 5
Tuner Set .................................................. 6
Clock Set ................................................. 9
Basic Playback ....................................... 10
Playback Features .................................. 11
Basic Recording ..................................... 15
Recording Features ................................ 16
B.E.S.T. Picture System ........................... 18
G-Code Setup ........................................ 20
G-Code Timer Programming .................. 22
Regular Timer Programming .................. 24
Check And Cancel Programmes ......... 25
Auto SP/LP Timer ............................... 25
REW
FF
Recorder ................................................ 26
6
Edit From A Camcorder ......................... 27
q
Random Assemble Editing ..................... 28
TV PROG /
SHUTTLE
JOG
Audio Dubbing ...................................... 30
OK
STORE
Multi-Brand Remote Control .................. 31
ENGLISH
2
3
5
10
15
20
26
31
32
34
36
37
Back cover
PU30425-1947
Advertisement
Table of Contents

Related Manuals for JVC HR-J635EA


Summary of Contents for JVC HR-J635EA
-
Page 1: Table Of Contents
VIDEO CASSETTE RECORDER HR-J635EA OPERATE PROG. CLOCK START STOP DATE DAILY (M-F) WEEKLY C.RESET CANCEL TIMER VOL. PROG. TV/VIDEO PLAY STOP COLOUR WIDE SYSTEM QUALITY OPERATE PUSH JOG VIDEO (MONO) L– AUDIO–R R.A.EDIT IN/OUT START R E C PLAY A. DUB –20dB... -
Page 2: Video Cassette Recorder
ABOUT HEAD CLEANING Accumulation of dirt and other particles on the video heads may cause the playback picture to become blurred or inter- rupted. Be sure to contact your nearest JVC dealer if such troubles occur. -
Page 3: Installing Your New Recorder
INSTALLING YOUR NEW RECORDER Basic Connections Aerial terminal RF Cable (provided) Back of TV AV-IN terminals AV Cable (provided) Mains Power Cord Mains outlet AUDIO OUT/ VIDEO OUT It's essential that your video recorder be properly connected. Follow these steps carefully. THESE STEPS MUST BE COM- PLETED BEFORE ANY VIDEO OPERATION CAN BE PER- FORMED. -
Page 4: Tune The Tv To Your Video Recorder
Return the TEST switch to OFF. NOTES: If CH37 is occupied by a local station, adjust the RF output channel adjustment screw to use another channel between CH33 and CH41 instead. If some interference noise is continually seen on the screen, consult your JVC dealer. -
Page 5: Initial Settings
INITIAL SETTINGS On-Screen Displays Turn on the TV and select the VIDEO channel (or AV mode). TV PROG.5∞ OSD ( The superimposed indication on the TV screen tells you what the recorder is doing. PR. 12 23 : 59 31. 12. 96 B.E.S.T. -
Page 6: Tuner Set
Tuner Set Turn on the TV and select the VIDEO channel (or AV mode). TV PROG. INITIAL SETTINGS (cont.) Your recorder needs to memorise all necessary stations in channel positions in order to record TV programmes. Once stored, you can call them up with the TV PROG. buttons without going through any vacant channels. - Page 7 SELECT POSITION Turn the TV PROG. dial until an open position in SELECT NUMBER which you want to store a TV PROG. channel appears, then press OK. [TV PROG5∞] = [CH SET] :EXIT STORE CHANNEL If fine tuning is not necessary, simply press STORE.
- Page 8 INITIAL SETTINGS (cont.) Fine-Tuning Channels Already Stored TURN ON THE RECORDER Press OPERATE. ACCESS CHANNEL SET MODE SELECT SCREEN Press and hold CH SET for more than 2 seconds. The Channel Set Mode Select screen appears. SELECT MODE OPERATE Turn the TV PROG. dial to place the pointer next to "FINE TUNING", then press OK.
-
Page 9: Clock Set
Clock Set Turn on the TV and select the VIDEO channel (or AV mode). NUMBER5∞ TV PROG. NOTE: If, in step 7, the year digits are automatically cleared, it is possible that you have input 29th February for a non-leap year. Input the correct data. -
Page 10: Basic Playback
Basic Playback Turn on the TV and select the VIDEO channel (or AV mode). The easiest, most basic operation possible with your video recorder is tape playback. Already-recorded signals on a video tape are read by your video recorder and displayed on your TV just like a TV programme. -
Page 11: Playback Features
Playback Features Take advantage of special functions possible with the recorder’s controls or the remote control. NOTE: Refer to the SHUTTLE ring illustration below as you read the following procedures. Still Still Picture/Frame-By-Frame Playback PAUSE DURING PLAYBACK Press PAUSE. If there is vertical jitter, use the TV PROG. buttons to correct the picture. -
Page 12: Manual Tracking
WIDE QUALITY Indicator C.RESET TV PROG. SP/LP/EP Wide Quality Use this function to improve image contrast which tends to degrade especially with wide-screen TVs. ACTIVATE WIDE QUALITY During playback, press WIDE QUALITY on the recorder. The WIDE QUALITY indicator will light. Pressing the button again turns off the light. -
Page 13: Tape Position Indicator
Index Search Your recorder automatically marks index codes at the beginning of each recording. This function gives you quick access to any one of 9 index codes in either direction. NOTE: Before starting, make sure the recorder is in the Stop mode. ACTIVATE INDEX SEARCH Press PUSH JOG (™... -
Page 14: Activate Repeat Playback
"O.S.D." must be set to "ON" or the on-screen displays will not appear ( Remote A/B Code Switching The remote control is capable of controlling two JVC video recorders independently; one set to respond to the remote control’s A code control signals and another set to respond to B code control signals. -
Page 15: Basic Recording
RECORDING Basic Recording Turn on the TV and select the VIDEO channel (or AV mode). NUMBER TV PROG. SP/LP/EP RECORD TV signals being received by the recorder’s built-in tuner can be recorded onto a video tape. You can “capture” a TV programme using your video recorder. -
Page 16: Recording Features
Recording Features Record One Programme While Watching Another SELECT CHANNEL TO WATCH Once recording is in progress, all you need to do is to set the channel controls on the TV for the station you wish to view. The programme selected with the TV’s channel controls appears on the TV screen while the one selected with the TV PROG. - Page 17 ST BIL SP LP R E C NTSC PLAY –20dB TIMER NORM Stereo indicator Bilingual indicator Receiving Stereo And Bilin- gual Programmes Your recorder is equipped with a Sound-Multiplex decoder, making reception of stereo and bilingual broadcasts possible. When the channel is changed, the type of broadcast being received will be displayed on the TV screen for a few seconds and the corresponding indicator on the display panel will light.
-
Page 18: Picture System
B.E.S.T. Picture System Turn on the TV and select the VIDEO channel (or AV mode). TV PROG. RECORD OSD ( The B.E.S.T. (Biconditional Equalised Signal Tracking) system checks the condition of the tape in use during recording and playback, and compensates to provide the highest-possible recording and playback pictures. -
Page 19: Start Playback
PAUSE RECORD NOTES: The B.E.S.T. system works for SP and LP (or EP) modes only after a tape has been inserted and the Record mode is first initiated. It does not work during recording. In the case of timer recording, the B.E.S.T. system works before recording is initiated. -
Page 20: Timer Recording
G-Code Setup TV PROG. NOTES: You can also use the TV PROG. 5 / ∞ button on the remote control instead of the TV PROG. dial. You can also use the SHUTTLE ring on the recorder instead of the OK button. The G-Code timer programming system eliminates the need to input channel, date, start and stop time data when setting the timer record function. -
Page 21: Start Setting
TV PROG. START SETTING Press OK. The GUIDE PROG. GUIDE PROG. number starts blinking. [TV PROG5 ∞ ] = [CH SET] :EXIT INPUT GUIDE PROG. NUMBER Turn the TV PROG. dial to input the Guide Prog. number, then press OK. GUIDE PROG. -
Page 22: G-Code Timer Programming
G-Code Timer Programming Before performing G-Code timer recording, be sure to read "G-Code Setup" ( pg. 20). NUMBER CANCEL SP/LP/EP To Delay The Stop Time ..press ADD after pressing OK in step 3. Each time you press, the Stop time is delayed by 5 minutes (meaning that 5 minutes of recording time is added). - Page 23 To re-engage the timer, press TIMER. In case of a power failure after programming, the recorder’s memory backup keeps your selections for 18 hours. Backup time becomes shorter as the unit's internal parts become old. When this occurs, please consult your nearby JVC dealer.
-
Page 24: Regular Timer Programming
Regular Timer Programming Remember, the clock must be set before you can programme the timer ( pg. 9). NUMBER DAILY CANCEL SP/LP/EP TIMER RECORDING (cont.) Before performing the following steps: Insert a cassette with the safety tab in place. The recorder will come on automatically. -
Page 25: Check And Cancel Programmes
In case of a power failure after programming, the recorder’s memory backup keeps your selections for 18 hours. Backup time becomes shorter as the unit's internal parts become old. When this occurs, please consult your nearby JVC dealer. Check And Cancel Programmes ACCESS TIMER PROGRAM- –... -
Page 26: Edit To Or From Another Video Recorder
Edit To Or From Another Video Recorder IMPORTANT: To edit, both the player and the recorder must be of the same colour system. Press your recorder's COLOUR SYSTEM button to select the appropriate colour system. For more information on multi-system compatibility, pg. -
Page 27: Edit From A Camcorder
AUDIO IN and VIDEO IN connectors. Use the L connector for monaural connection. When a Master Edit Control-equipped JVC camcorder is used, the camcorder is capable of controlling the recorder. Refer to the camcorder’s instruction manual for operating procedure. -
Page 28: Random Assemble Editing
This function makes it easier to create edited videos when your video recorder is used as the source player in combination with another JVC video recorder equipped with a Remote PAUSE Connector. You can pre-program up to 8 scenes or “cuts” for automatic editing in the sequence you have specified. - Page 29 By connecting this controller to your recorder's R.A. EDIT connector, you can perform Random Assemble Editing in combination with a second non-JVC video recorder. The controller is compatible with various major recorder brands. For compatible systems and availability, please consult your JVC dealer.
-
Page 30: Audio Dubbing
Audio Dubbing CD Player NUMBER "0" NOTES: When monitoring the sound during Audio Dubbing, the normal soundtrack is automatically selected. If you wish to hear the mixed sound (Hi-Fi + Normal soundtracks), press AUDIO MONITOR to select "L+R+NORM" ( Audio dubbing stops automatically when the counter reaches "0:00:00", and the recorder enters the Play mode. -
Page 31: Remote Control
Turn on the TV using its remote control. Set the remote control’s TV/VCR switch to TV. NOTE: If your TV is a JVC, you don’t have to set the code in step 1. Go to step 2. SET TV BRAND CODE Refer to the chart below. -
Page 32: Information On Multi-System Compatibility
AUTO or the MESECAM mode when recording SECAM signals. When playing back a SECAM tape, select the AUTO or the MESECAM mode. The playback picture will always be monochrome. HR-J635EA Recording circuit Multi-system tuner (B/G) Description Usually set to this mode. This mode or MESECAM and adjusts to the colour system being recorded or played back. -
Page 33: Tape-To-Tape Editing
There are 4 different types of recorded tape, depending on the signal recorded. Recorded tape Playback equipment MESECAM MESECAM SECAM NTSC 3.58 MHz NTSC NTSC 4.43 MHz HR-J635EA Built-in RFconverter HR-J635EA MESECAM Recording circuit SECAM NTSC 3.58 MHz NTSC 4.43 MHz... -
Page 34: Tape Transport
Automatic tracking is engaged. Engage and adjust tracking manually. The video heads may be dirty. Consult your JVC dealer. The wrong colour system is selected Select the correct colour system by for the tape being played back. -
Page 35: Other Problems
RECORDING SYMPTOM 1. Recording cannot be started. 2. TV broadcasts cannot be recorded. 3. Tape-to-tape editing is not possible. 4. Camcorder recording is not possible. TIMER RECORDING SYMPTOM 1. Timer recording won’t work. 2. On-screen timer programming is not possible. 3. -
Page 36: Questions And Answers
PLAYBACK Q. What happens if the end of the tape is reached during playback or search? A. The tape is automatically rewound to the beginning. Q. Can the video recorder indefinitely remain in the still mode? A. No. It stops automatically after 5 minutes to protect the heads. -
Page 37: Colour Wide
INDEX FRONT VIEW COLOUR WIDE SYSTEM QUALITY OPERATE VIDEO (MONO) L– AUDIO–R R.A.EDIT IN/OUT START A. DUB 1 OPERATE Button ( pg. 4) 2 COLOUR SYSTEM Button ( pg. 32) 3 WIDE QUALITY Button ( pg. 12) 4 Cassette loading Slot 5 RECORD Button ( pg. -
Page 38: Display Panel
DISPLAY PANEL R E C PLAY –20dB NORM 1 B.E.S.T. Picture System Display ( Audio Level Indicator 2 PLAY Indicator ( pg. 10) 3 REC[ORD] Indicator ( pg. 15) 4 NTSC Indicator ( pg. 32) 5 Tape Speed Indicators ( pg. - Page 39 The remote control can operate most of your video recorder's functions, as well as basic functions of TV sets of JVC and other brands ( Point the remote control toward the sensor window. The maximum operating distance of the remote control is about 8 m.
-
Page 40: Specifications
SPECIFICATIONS GENERAL Power requirement : AC 220 – 240 V`, 50/60 Hz Power consumption : 24 W Temperature Operating : 5°C to 40°C Storage : –20°C to 60°C Operating position : Horizontal only Dimensions (WxHxD) : 400 x 94 x 340 mm Weight : 4.3 kg Format... - Page 41 GENERAL Power requirement Power consumption Temperature Operating Storage Operating position Dimensions (WxHxD) Weight Format Maximum recording time (SP) (LP) (EP) VIDEO/AUDIO Signal system Recording system Signal-to-noise ratio Horizontal resolution Frequency range Input/Output TUNER/TIMER TV channel storage capacity Tuning system Channel coverage VHF 44 –...
Need help?
Do you have a question about the HR-J635EA and is the answer not in the manual?
Questions and answers