Table of Contents
Advertisement
Quick Links
Download this manual
See also:
User Manual
Micro-sized, Portable, Wireless, Covert DVR
Professional Version: SG-1000/ SG-2000/ SG-3000
MANUAL
*EXCEPT FOR SECURITY PURPOSE, DO NOT USE THIS PRODUCT FOR ANY OTHER
PURPOSES WHICH MAY DISTURB PRIVATE LIFE OF OTHERS.
THIS PRODUCT IS REGISTERED WITH ELECTROMAGNETIC WAVE STANDARDS AND
CAN BE USED FOR ANY PLACE INCLUDING RESIDENTIAL AREA. BEFORE USING THIS
PRODUCT, BE SURE TO READ THE PRECAUTIONS CONTAINED IN THE MANUAL.
Advertisement
Table of Contents

Related Manuals for SELF-GUARD SG-1000

Summary of Contents for SELF-GUARD SG-1000
- Page 1 Micro-sized, Portable, Wireless, Covert DVR Professional Version: SG-1000/ SG-2000/ SG-3000 MANUAL *EXCEPT FOR SECURITY PURPOSE, DO NOT USE THIS PRODUCT FOR ANY OTHER PURPOSES WHICH MAY DISTURB PRIVATE LIFE OF OTHERS. THIS PRODUCT IS REGISTERED WITH ELECTROMAGNETIC WAVE STANDARDS AND CAN BE USED FOR ANY PLACE INCLUDING RESIDENTIAL AREA.
- Page 2 Unpacking Check to make sure that all of the items shown below are included with your Self- Guard. If something is missing, contact your dealer as soon as possible. Concealment Case...
-
Page 3: Table Of Contents
4. Applications --------------------------------------------------------------------------------------- 16 QUICK START GUIDE -------------------------------------------------------------------------- 1. Charging the Battery ---------------------------------------------------------------------------- 17 2. Turning the Self-Guard On and Off --------------------------------------------------------- 17 3. To Configure Clock Settings ------------------------------------------------------------------ 17 4. To Record a Moving Image ------------------------------------------------------------------- 19 5. To Playback a Moving Image ---------------------------------------------------------------- 20 6. - Page 4 II-4. Remote File Playback -------------------------------------------------------------------- 105 II-5. Remote File Copy ------------------------------------------------------------------------- 106 II-6. File Search and Playback ------------------------------------------------------------- 107 II-7. Other Functions --------------------------------------------------------------------------- 108 III. Others ----------------------------------------------------------------------------------------------- 113 III-1. Button Camera ---------------------------------------------------------------------------- 113 Trouble Shooting Guide ---------------------------------------------------------------------- 114 (*SG is short for Self-Guard)
- Page 5 The contents of this manual are subject to change without notice. STARNEX CO., LTD. has the responsibilities as the manufacturer of Self- Guard to tell each distributor that using the Self-Guard unit in the public domain may be in violation of federal privacy statues.
-
Page 6: Introduction
General Notice The AC/DC adaptor of this product can be used for both 110V and 220V. Never try to open the case of the Self-Guard or attempt your own repairs. High-voltage internal components create the risk of electric shock when exposed. - Page 7 STARNEX authorized service center. Never use the Self-Guard inside of an aircraft or in any other area where its use is prohibited. Doing so creates the risk of accident.
- Page 8 After “REMOVE USB NOW” message appears on the LCD, you can remove the USB memory device from the Self-Guard. When you back up the Self-Guard’s data to your computer, first, copy the data in the Self-Guard to a USB memory device, and then insert that USB memory device to the USB port in the computer to copy the data in USB memory device to the computer.
- Page 9 Discontinuance of audio sound during playback You may encounter discontinuance of audio sound when you playback files. This does not mean a product defect. Self-Guard is designed and set for the power saving mode to intend longer battery life. Self-Guard goes into sleep mode and does not record when there is no motion detected for selected time (1-9 sec., default 5 sec.) after the very last motion detection.
- Page 10 Do not touch this product with wet hands. Condensation When you bring the Self-Guard indoors on a cold day or otherwise expose it to a sudden change of temperatures, there is the possibility that condensation can form on the exterior or on interior components.
-
Page 11: Features
If the exterior of the Self-Guard needs cleaning, wipe it with a soft cloth. NOTE This equipment has been tested and found to comply with the limits for a Class B digital device, pursuant to Part 15 of the FCC Rules. These limits are designed to provide reasonable protection against harmful interference in a residential installation. - Page 12 By applying this technology, Self-Guard is the Ubiquitous security system. You can connect to the Self-Guard by the internet with a computer, and view the live images of the Self-Guard. Also, you can copy the files saved in the Self-Guard to your local computer and playback.
- Page 13 Snapshot Mode Built-In (128MB) Flash Memory - Free of Data Loss, Images can be recorded without using a memory card Memory Card for Memory Expansion Extensive Recording Time and Data Back-up using External USB HDD or USB Memory Stick Long Battery Life (Low-power Consumption technology for long lasting recording and playback between charges.) File Conversion to .avi or .jpeg User-friendly Operation...
-
Page 14: Specifications And Comparison Of Each Model
3. Specifications and Comparison of each Model 3.1 Specifications SECTION DESCRIPTION REMARKS Internal Storage Device Built-In Flash memory:128 MB (Up to 1 GB) Memory Expansion Micro SD Card: 128MB–Up to 8GB (SDHC) Extensive Storage USB Memory Stick, USB HDD Device & Data Backup 1 CMOS Color (Up to 2EA) Built-In 307,200 pixels... - Page 15 3.2 Comparison of each Model Functions SG-1000 SG-2000 SG-3000 Video Recording Audio Recording Bluetooth Wi-Fi (optional) Sensor Input/Output Network Access TV Output Audio Input Video Input Snap Shot Motion Detection Audio Detection Docking Station...
-
Page 16: Applications
4. Applications House, Apartment (Residential Areas), Hotel, School/University Facility, Daycare Center, Kindergarten Laboratory, Hospital, Law Office, Museum, Church, Public Library, Commercial Buildings Banks, Jewelry Shop, Restaurants, Department Stores, Liquor Stores, Convenience Stores, Book Store, Gas Station Factories, Construction Site, Farm, Powerhouse, Parks, Amusement Park, Public Facility Fire Department (Fire Fighters), Security Guards, Police Units (Police Officers), Mailman, Jailor... -
Page 17: Quick Start Guide
1. Charging the Battery Load the battery into the Self-Guard. Plug the AC/DC adaptor directly into the power input port of Self-Guard. Or, place Self-Guard unit onto the Docking Station to charge the battery. Total recharging time is 3 hours for a full recharge. - Page 18 Press [ENT] for 2 seconds to turn on Self-Guard. Use [ ] and [ ] to s elect “4. OPTION” and press [ENT]. △ ▽ Use [ ] and [ ] to select “ 4.DATE/TIME SET” and press [ENT]. △...
-
Page 19: To Record A Moving Image
Use [△] and [▽] to select RECORD, and then press [ENT]. Then, it will appear with the sight that’s being recorded as below and the Self-Guard starts to record images. Before you start to record, be sure to check from the LCD that the camera can capture the sight where you want it to be recorded. -
Page 20: To Playback A Moving Image
for camera channel numbers. If it shows C1B123, then ‘C1’ indicates of camera number 1 and ‘B123’ indicates of Bluetooth channel 1, 2 and 3. 13:40:34: current time. (10): elapsed recording time (10 minutes). 39%: 39 percent of the total memory(Built-in, MICRO SD, USB) is being used for recording. - Page 21 COPY: To copy all the data of the selected month to the selected memory device. (If USB or MICRO SD memory device is not connected to the Self-guard, then the cursor does not move to COPY.) 1/4: First of four pages of the list Select a Mon/Year, which includes the file you want to playback, and then press [ENT].
- Page 22 Green Colored Date: There exists saved data. • Black Colored Date: There exists no saved data. • Pink Colored Date: Cursor position • Use [ ] and [ ] to select the date you want, and then press [ENT]. Then the list of ◁...
-
Page 23: Bluetooth (Sg-3000 Only)
Please refer to the General Guide for more details about viewing a moving image. 6. BLUETOOTH (SG-3000 Only) First, choose one Self-Guard as a SLAVE (to send the images) and the other unit as a MASTER (to receive the images). - Page 24 2. Select “1. CONNECT SET” 3. Select “1. BT1/CH#1/OFF” 4. “1.CONNECT: ON” 5. “4.00:02:78:0C:60:FF” ->change this ID to the SLAVE’s, which you have written down for your record in step #3 in the "SLAVE" 6. Select “1. RECORD” Please refer to the General Guide for more details about BLUETOOTH.
-
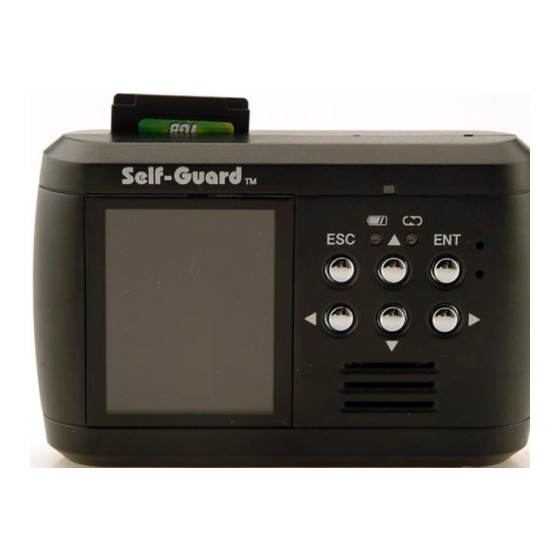
Page 25: Getting Ready
GETTING READY 1. Self-Guard... - Page 26 Self-Guard. Mic Hole 1 (Built-In): This is where a highly efficient microphone is installed on the front side of the Self-Guard. Be sure that this hole is not blocked in order to record the audio.
- Page 27 If you connect the AC adaptor to the Self-Guard when the battery is not full, then it automatically charges up the battery to its fullest. While charging the battery, the lamp blinks with the green light.
- Page 28 USB Port: You use this USB port when you want to save data for a long period of time or need to back up saved data in the Self-Guard to the USB memory such as, USB memory stick or USB hard disk. This port has the USB mastering function, so if you...
-
Page 29: Docking Station
PWR, S2: PWR is where you get the power (below 300mA) from the battery (3.6 V – 4.2 V) of the Self-Guard or from the adaptor (5 V). If the adaptor is connected to the Self- Guard, then it gets the power from the adaptor and the voltage is 5. If there is no adaptor connected to the Self-Guard, then it uses the power from the battery and the voltage is from 3.6 to 4.2. - Page 30 PWR, S3: PWR is where you get the power (below 300mA) from the battery (3.6 V – 4.2 V) of the Self-Guard or from the adaptor (5 V). If the adaptor is connected to the Self- Guard, then it gets the power from the adaptor and the voltage is 5. If there is no adaptor connected to the Self-Guard, then it uses the power from the battery and the voltage is from 3.6 to 4.2.
-
Page 31: General Guide
Push [ENT] for 2 seconds to turn on the power. To turn off the power, push [ESC] for 2 seconds and release it. Main Menu When you turn on the power of the Self-Guard, then a screen appears as below. I. FUNCTIONS 1. RECORD... - Page 32 Self-Guard, then the Self-Guard automatically turns on its power, and returns to the “RECORD” mode. This function is very useful for the users who are in remote places from their Self-Guard, and not able to control it immediately when they need to.
-
Page 33: I-2. Camera
(Bluetooth) from a remote Self-Guard (SG-3000 only). When you connect to the Self-Guard by the network, you need to know the ID and the Password. And when you connect to the Self-Guard wirelessly, then you need to know the Self-Guard’s Bluetooth ID. - Page 34 You can check on the camera’s recording location, and the operating status of it with the Self-Guard’s LCD. When using multiple cameras, you can see up to 4 images simultaneously from the LCD. Every time you press [ ] in “...
-
Page 35: I-3. Search
3. SEARCH Use [ ] and [ ] to select “SEARCH”, and then press [ENT]. Then the next screen △ ▽ appears as below. This function lets you search the data saved by the motion detection of the image and by the sensor detection, or you can search the data saved by the sensor detection only. - Page 36 02/2006: Data exists for the month of February of 2006 COPY: Copy all the data for the selected month to the selected memory (If USB or MICRO SD memory device is not connected to the Self-guard, then the cursor does not move to COPY.)
- Page 37 Green Colored Date: There exists saved data. • Black Colored Date: There exists no saved data. • Pink Colored Date: Cursor position • Use [ ] and [ ] ◁ ▷ to select the date you want, and then press [ENT]. Then the list of saved files appears on the screen as below.
- Page 38 The name of the file is composed of hours, minutes, seconds and the camera’s channel numbers. For example, ‘15373501.sgv’ means that the file has started recording at 3: 37: 35 P.M. with camera 1. For 15224201.sgvx, ‘x’ means the file is locked to protect from deleting.
- Page 39 ||, ->, => : Stop, Play, High-Speed Play; If you press the [ENT], then the status bar changes to “-> (Play)” from the stopped status. If you press the [ENT], then the status bar changes to “=> (High-Speed Play)” from the Play status. If you press the [ENT], then the status bar changes to “->...
- Page 40 The resolution of the current data appears on the lower left side of the magnified screen, and the magnification ratio appears on the lower right side of the LCD screen. In the magnification mode, you can move to the left, right, up, and down direction by using the direction buttons, and press [ENT] to change the magnification ratios, and the ratios repeat x 1 →...
-
Page 41: I-4. Option
4. OPTION Select “OPTION” using the direction buttons, and press [ENT]. Then the next screen appears in the LCD as below. Use [△] and [▽] to select an option and press [ENT]. Then the window displays with next options related to the previous option menu for you to change the values. To change the values, use [▷] and [◁]. - Page 42 LCD as below. In order to return to the previous menu, press [ESC]. Self-Guard has one built-in camera in the front, and can add one more internal camera in the back of the unit. You can connect up to four more external cameras to your Self- Guard through the docking station.
- Page 43 Be sure to turn off the cameras that are not connected to the Self-Guard in the menu. Read below instructions for the “BUTTON CAM” function if you have purchased a SG- 911-“Button Camera with Microphone” <How to connect Button Camera to the Self-Guard>...
- Page 44 Self-Guard may go into the Record or Sleep mode. When this happens, press ESC button to go into main menu. If you turn off “BUTTON CAM” function, then it will turn off button camera and its microphone, and restore the settings before the use of “BUTTON CAM”...
-
Page 45: Record Set
saturation, and contrast, and then use [◁] and [▷] to change the value ranging from 1 to 20. 4-2. RECORD SET Select “2.RECORD SET” using the direction buttons, and press [ENT]. Then the next screen appears in the LCD as below. 4-2-1. - Page 46 “HH”. For example, if you set the level to “LL”, then the Self-Guard continues to record for 4 days. But, if you set the level to “HH” for more clear images, then recording time can last about 2 days. This recording time depends on different recording situations.
- Page 47 There are five noise cutting levels (LL, L, M, H, HH). If you set this level to “LL”, then the Self-Guard cuts the low-level noise only. And if you set this level to “HH”, then the Self-Guard cuts so far as the high-level noise.
- Page 48 At dawn, the light becomes bright from dark, generating a lot of noise when the Self- Guard is in such circumstance. And the Self-Guard may recognize those noises as a motion. In this case, you can set this level to “H” or “HH” to cut the noise.
- Page 49 Self-Guard to detect the motions. Accordingly, be sure to select at least one block in order for the Self-Guard to detect and record the images. 4-2-2. AUDIO SET (SG-2000, SG-3000 only) This function turns on and off audio recording function, and you can select either a built-in microphone or an external microphone.
- Page 50 Self-Guard stops from recording video, and returns back to the initial menu mode, displaying “STOP! MEM FULL” on the LCD screen. Press any button to remove this message from the screen. If “1.AUTO OFF” (“4. OPTION” mode → “9.OTHERS” →...
- Page 51 Self-Guard exits from the Sleep mode and starts to record. If you press [ESC] or [ENT] when the Self-Guard is in the sleep mode, then the LCD will display with a message, “CHECK SCHEDULE” for 5 seconds. During this message is displayed on the LCD, if you press [ESC], then Self-Guard exits from the sleep mode and goes into the menu mode.
- Page 52 4-2-6-3. 11-14 : OFF Recording time schedule number 2. 4-2-6-4. 14-17 : OFF Recording time schedule number 3. 4-2-6-5. 17-20 : OFF Recording time schedule number 4. 4-2-7. Timestamp Set 4-2-7-1. TIMESTAMP This function is to make the time and date information appear and overlap with the recorded image.
-
Page 53: Search Set
4-3. SEARCH SET Select “3.SEARCH SET” using the direction buttons, and press [ENT]. Then the next screen appears in the LCD as below. 4-3-1. REPEAT: OFF If you turn on “a. REPEAT”, then it keeps repeating playback the file. When it is turned off, then the file stops from playing after its first playback. - Page 54 You can select one from the 8 options (OFF, BT1 – BT7). If you select OFF for “3. AUDIO“, then the Self-Guard does not play the audio recorded by the slave Self-Guard via Bluetooth. If you select one from BT1 to BT7, then “2.AUDIO” automatically becomes “OFF”, and the audio from a Bluetooth channel gets played.
-
Page 55: Date/Time Set
If you turn off the Time Sync function, then it does not synchronize with the time even if you change the channels by pressing [ ], or press “ -> (Play)” or “|> (Move forward by ▽ 1 frame)” after changing the channel. But, if you switch into 4-channel mode and press “->... - Page 56 Using [ ] and [ ], you can move the cursor to the Date, Month, Year, and the Time, ◁ ▷ and use [ ] and [ ] to change those variables. There are three ways to arrange these △ ▽...
-
Page 57: Remote Set
4-5. REMOTE SET Select “5.REMOTE SET” using the direction buttons, and press [ENT]. Then the next screen appears in the LCD as below. To go to the previous menu, press [ESC]. 4-5-1. LAN SET... - Page 58 4-5-1-1. LAN: OFF If “1.LAN” is set to on, then you can connect to the Self-Guard with your computer with the ID and the password by the network from a remote place. But, if “1.LAN” is set to off, then you cannot connect to the Self-Guard. When you are not using the LAN, turn it off to save the battery.
- Page 59 Wireless-G Access Point after 5-10 seconds from you set this function to ON. Then a message, “WLAN CONNECTED” will appear on the screen. You have to wait until you can get confirmed of this message to properly connect to the Self-Guard from a remote place with your PC.
- Page 60 “Wireless-G Access Point”. The GLOBAL IP address of the “Wireless-G Access Point” is used to connect to Self-Guard units from a remote place with the provided remote software. If the wireless LAN does not operate normally, then this GLOBAL IP will be indicated as 000.000.000.000.
- Page 61 KEY, and then input the new value using the direction buttons. When you connect to the Self-Guard from a remote place via internet, you need to know the external IP address of the Wireless-G Access Point. In case of using float IP, the IP gets changed when the Modem power goes out and comes back on again.
- Page 62 4-5-3. USER ID When connecting to the Self-Guard from a PC, you need the ID and the password for the remote access program. The initial default IDs are from “user00” to “user07”, and the passwords are “0000”. Move the cursor to the ID that you want to change for using the [ ] and [ ], and press [ENT].
-
Page 63: Sensor Set
(Input/Output), and the kinds (NO/NC). You can turn on and off the sensors connected to the Self-Guard with this function. You can also link the sensors with the cameras to record the images of the camera when there is a change in the state of the sensors. - Page 64 On/Off: On(Sensor On), Off(Sensor Off). You must turn on the sensor port that is selected as the input, so that the Self-Guard can react to a change in the state of the sensor connected to the input port. When you set it to off, Self-Guard does not respond to any changes in the sate of the sensors.
-
Page 65: Usb Set
(0-9 seconds), when there is a change in the state of the sensors. If you set it to 0, then the Self-Guard will not record any images even if there is a change in the state of the sensor. - Page 66 Do not insert or remove USB memory devices from the USB port in the Self-Guard while recording or searching. When you connect an USB memory device to the Self-Guard, a new menu (“REMOVE USB”) will appear in the main menu as below.
-
Page 67: Memory Set
LCD, you can remove the USB memory device from the Self- Guard. When you back up the Self-Guard’s data to your computer, first, copy the data in the Self-Guard to a USB memory device, and then insert that USB memory device to the USB port in the computer to copy the data in USB memory device to the computer. - Page 68 When this function is OFF and there is no external memory device to record the data, Self-Guard records data onto the built-in memory. If external memory device gets available again, then Self-Guard closes the file being recorded to the built-in memory and starts to record the data onto the external memory device.
- Page 69 Self-Guard. Self-Guard detects the existence of the extensive memory devices in the Self-Guard, and you will not be able to select the memory’s name, if it is not in the Self-Guard. If there are no “MICRO SD” and “USB” memories in your Self-Guard, then the self-Guard detects that and, you will not be able to select those memory names in the menu to format.
-
Page 70: 4-9.Others
4-9. OTHERS Select “OTHERS” using the direction buttons, and press [ENT]. Then the next screen appears in the LCD as below. -
Page 71: Password Set
4-9-1. PASSWORD SET You can prohibit people without authority from accessing the Self-Guard by setting up a password for each function (BOOTING, OPTION, SEARCH, and RECORD). You can turn on and off each function in “CHANGE PWD”. Functions When each function is set with a password BOOTING Put in the password for the Self-Guard to operate when you turn it on. -
Page 72: Ext Mon Set
The password reads as “****” as you put in the password. Using [ ] and [ ], choose a △ ▽ number for your password, then the number reads as ‘*’, and the cursor moves to the next position as you press [ ] ▷... -
Page 73: Power Set
Guard. You must set OFF “1.MON OUT to use the magnifying function while playback the data from the LCD of the Self-Guard. In other words, magnifying function cannot be applied to the external monitor. The Self-Guard’s video output type supports for both NTSC and PAL, so choose the correct type for your own external monitor. - Page 74 Self-Guard goes into the sleep-mode. After 2 seconds have elapsed, the Self-Guard wake up and check if there is a motion. If there is no motion then the Self-Guard goes into sleep-mode again, but if there is a motion then the Self-Guard start to record.
- Page 75 2 seconds. Caution: If you set this time to 0, then the Self-Guard will not record any images even if it detects motions.
- Page 76 Audio recording time set is the same as with the above “Video Recording Time Set”. Caution: If you set this time to 0, then the Self-Guard will not record the sound even if it detects sound. 4-9-3-7. AUDIO DET: OFF This is whether to turn on and off audio detection function.
- Page 77 It shows 10 last history of power ON/OFF. The date and time is recorded for each power on and off. If the power of the Self-Guard is gone abnormally such as, detaching the battery from the Self-Guard during the operation, then the Self-Guard will not record it in the power off history.
-
Page 78: Alarm Set
Be cautious when you set the volume to high level. 4-9-4-1. MOTION Set up for alarm functions when the Self-Guard detects motions by the camera. 4-9-4-1-1. CHANNEL SET Turns ON/OFF the alarm for each camera when the Self-Guard detects motion by the each camera. - Page 79 4-9-4-1-2. TIME: 0.2 When a motion is detected by the camera then the Self-Guard generates an alarm from the internal speaker. The duration of the alarm is from 0.2 to 9 seconds. 4-9-4-1-3. TYPE: 1 Set types for the alarm when a motion is detected by the camera. There are 5 different types for the alarm (1 - 5).
- Page 80 Set the alarm function when there is a change in the state of the sensor selected as the input. 4-9-4-2-2. TIME: 0.2 When there is a change in the state of the sensor selected as an input, the Self-Guard generates an alarm from the internal speaker. The duration of the alarm is from 0.2 to 9 seconds.
- Page 81 4-9-4-3-2. TIME: 0.2 When there is a motion detected by the camera of the Self-Guards which are connected wirelessly via Bluetooth, the Self-Guard generates an alarm from the internal speaker. The duration of the alarm is from 0.2 to 9 seconds.
-
Page 82: Language
English, KOR is for Korean, and JAP is for Japanese. 4-9-7. UPGRADE “UPGRADE” is to upgrade the Self-Guard’s software to its latest version. To access this upgrade function, it should have MICRO SD memory card inserted into the unit. Self-Guard must be connected with AC/DC adaptor, and the battery lamp must be... -
Page 83: Default Set
“Version” indicates of the Self-Guard’s version for its software and hardware. 4-9-7-1. SD DOWNLOAD This function can be used only with the MICRO SD memory card for the use of upgrades. You can make a MICRO SD memory card to be upgradeable by copying an upgrade file or a version file for each model to the MICRO SD card’s route directory. -
Page 84: Sg Name
4-9-9. SG NAME This function is to put in the Self-Guard’s name, and used to back up the data of many Self-Guards to the MICRO SD or USB memory devices (USB Memory or USB Hard Disk). Self-Guard creates a directory name by the date, and the file name by the time. -
Page 85: I-5. Transmit
Self-Guard units, this serial number will be used to find out which Self-Guard is used for a certain file. When you playback a file with provided software, it will show with the product serial number so that you know which Self-Guard unit is used for that recorded file. -
Page 86: I-6. Bluetooth (Sg-3000 Only)
And when you want to connect a Self-Guard with other Self-Guards, you need to know the Bluetooth ID of the Self-Guard that you want to access the data In “TRANSMIT” mode, even if the Self-Guard was cut from the power resources (battery or the adaptor), it automatically turns on itself, and returns to “TRANSMIT”... - Page 87 LCD as below. To go to the previous menu, press [ESC]. 6-1. CONNECT SET This function is to connect a master Self-Guard to seven (7) other slave Self-Guards wirelessly via Bluetooth, and “1.CONNECT SET” can only be activated when you select “...
- Page 88 “RECORD” or “TRANSMIT” mode. 6-1-2. SLAVE CAM: 1 If you connect to a slave Self-Guard wirelessly via Bluetooth, then you can request a certain camera number to be transmitted from the slave Self-Guard wirelessly via Bluetooth to your Self-Guard. For example, if you select 2 for the “SLAVE CAM”, then...
- Page 89 2 transmitted to your master Self- Guard. If the camera channel number you have requested is not turned on, then the slave Self-Guard will send the images of the camera channel which is turned on and nearest to the requested channel number.
- Page 90 This function is to find the Bluetooth ID for your Self-Guard. When you want to connect to the slave Self-Guards with your master Self-Guard, then you need to know the Bluetooth ID of the slave Self-Guard. You can confirm those Bluetooth IDs by checking from “3.MY ID”...
-
Page 91: Remote Access And Data Search/Playback Program
Self-Guard’s locations with your computer from anywhere in the world. You can copy the data saved in the Self-Guard to the MICRO SD or USB memory, and then copy this data to your computer to search or playback. -
Page 92: Ii-1. How To Install
You can install the program to your computer with the provided CD. II-1. How to install Insert the CD into the CD-ROM, and check the files below. - Page 93 To install the program, double-click SETUP icon. Then a new window appears as below, and starts installing the program.
- Page 94 Type in the serial number and you can get this number from the back of your Self- Guard where the battery is placed in.
- Page 96 When the processes above are finished, then the program installment is completed. Now you will see an icon for the program on the ground screen.
- Page 97 “Open Site/File”, “Change Remote Date/Time”, “Send Message”, “Pause”, “Play”, “Close Site/Data”, “Select Channel”, “Title on/off”, and “Audio”. Select “Open Site/File” to connect to the Self-Guard by LAN. Then, you should follow next instruction regarding Network Setting.
-
Page 98: Ll-2. Network Setting
II-2 Network Setting... - Page 102 Make sure that TCP/IP Settings on your PC don’t match with that of Self-Guard’s in order to avoid mix-up. However, notice that IP Address in Connection Information of Data Search / Playback Program has to match with that of Self-Guard’s.
-
Page 104: Ii-3. Remote Monitor And Save
This function allows you to see and hear the image and audio being recorded in the Self-Guard, and save these data to your local computer. “Server Name”: Type in the name of the Self-Guard that you want to connect to. (It is the name for you to distinguish from several Self-Guards connected) “IP Address”: Type in the IP Address of the Self-Guard that you want to connect to. -
Page 105: Ii-4. Remote File Playback
II-4. Remote File Playback This function allows you to play the data stored in the Self-Guard with your computer by the date, time, and the camera channel. If you click the bar with a date, then you will see a calendar. Select the date you want and click “OK”, then you can playback the data saved in the selected date. -
Page 106: Ii-5. Remote File Copy
183057.sga under the date’s folder. “sgv” file is an image or video file, and “sga” is an audio file. If there is no data saved in the Self-Guard for the selected date, then you will see an error message on the screen. -
Page 107: Ii-6. File Search And Playback
II-6. File Search and Playback This function enables you to playback the data, which is stored in your computer. You can use the speed bar and the control buttons while you playback the data. Click “Browse” and select the folder and data that you want to playback, and then click “OK”. - Page 108 Self-Guard connected to your local computer. “Sensor Alarm On/Off”: If the state of a sensor of the Self-Guard is changed, then you can choose to notify with an alarm to your local computer. Select an alarm (wave data) from “Browse”, and listen to the sound before you decide the alarm sound.
- Page 109 You can set the alarm duration from 0 to 10 seconds. When your local computer is connected to the Self-Guard by LAN, you can choose to display the “Play status”, “SelfGuard or File Name”, “SG Name”, “Date/Time”, and the “Serial Number”.
- Page 110 For example, if you are connected to 40 locations of the Self-Guards, but if you set it to 9 displaying mode, then you can only see nine locations in the monitor. But, you can use this button to see the rest of the Self-Guard’s locations in nine channels at a time. h. AVI Conversion...
- Page 111 Click on the “OPEN” button to select a file to be converted to AVI file format and click “CONVERT”. ※ If you use “Window Vista” in your PC, please make sure this program runs as an administrator in order to covert files into AVI files.
- Page 112 i. Zoom/Iris/Focus/Move (Available in the next version) This function controls of pan, tilt, and camera with a zoom function (zoom, iris, focus, move), and is reserved for later use. j. Preset (Available in the next version) This function can preset eight different positions of the pan, tilt, and a camera with a zoom function, and is reserved for later use.
-
Page 113: Others
III. OTHERS III-1. How to use Button Camera * How to connect Button Camera to the Self-Guard 1. Press ENT button for 2-3 seconds to turn on the unit. 2. Attach button camera directly to the “Connector to Docking” slot on the bottom of Self-Guard unit. -
Page 114: Troubleshooting Guide
And as soon as the electricity is available to the Self-Guard, it automatically starts to charge the battery with electricity, and returns back to the modes just... - Page 115 Self-Guard again, then you have to go to where the Self-Guard is placed to turn it on, and to set it to the “RECORD” or “TRANSMIT” modes. But the Self-Guards have this “automatic recovery function”, and free the users from the burden.
- Page 116 Warranty Guide This product has passed through quality control and testing. If this product shows any manufacturer’s defects during normal use, then there is a 12 months warranty service period from date of purchase. Check this warranty sheet first. Please contact the distributor or dealer after checking out any problems in the product.
Need help?
Do you have a question about the SG-1000 and is the answer not in the manual?
Questions and answers