Table of Contents
Advertisement
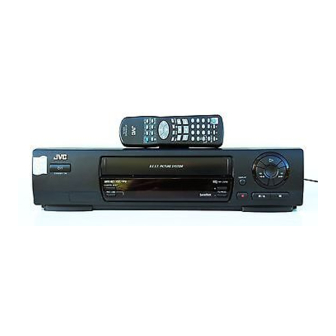
VIDEO CASSETTE RECORDER
HR-J458E
HR-J258E
TV
TV/VCR
AUDIO
- -:- -
1
2
3
2
4
5
6
WEEKLY/HEBDO
VPS/PDC
DAILY/QTDN.
7
8
9
AUX
0000
0
4
START
STOP
DATE
TV
DEBUT
FIN
PROG
EXPRESS
1
?
30 SEC
PROG
STANDBY/ON
The recorder illustrations appearing in this instruction manual are
of the HR-J458E.
SEE
SEE
AUTO SET UP
AUTO SET UP
ON REAR SIDE
ON REAR SIDE
SP/LP
REVIEW
REC LINK
SP
VCR
VPS/PDC
INSTRUCTIONS
DICPLAY
TV PROG
PAL
ENGLISH
CONTENTS
Safety Precautions ...................... 2
Basic Connections ..................... 3
Auto Set Up ............................... 4
Language ................................... 7
Video Channel Set ..................... 8
On-Screen Displays ................. 10
Power Save Mode ..................... 11
Colour System Set .................... 12
Basic Playback ......................... 13
Playback Features .................... 14
Basic Recording ....................... 17
Recording Features .................. 18
B.E.S.T. Picture System ............. 20
V
Express Timer Programming ..... 24
Programme Recording ............. 28
Edit From A Camcorder ............ 29
Recorder .................................. 30
Tuner ....................................... 32
Connecting/Using A Decoder ... 33
Tuner Set .................................. 34
V
Setup ....................... 41
IEW
Clock Set ................................. 42
EN
LPT0046-001A
2
4
12
13
17
22
29
32
34
44
46
47
50
Advertisement
Table of Contents

Related Manuals for JVC HR-J258E


Summary of Contents for JVC HR-J258E
-
Page 1: Table Of Contents
AUTO SET UP AUTO SET UP ON REAR SIDE ON REAR SIDE VIDEO CASSETTE RECORDER HR-J458E HR-J258E TV/VCR AUDIO – –:– – WEEKLY/HEBDO VPS/PDC DAILY/QTDN. 0000 START STOP DATE DEBUT PROG EXPRESS 30 SEC PROG STANDBY/ON SP/LP REC LINK The recorder illustrations appearing in this instruction manual are of the HR-J458E. -
Page 2: Safety Precautions
Use a SECAM-L recorder to record SECAM-L signals. For Italy: "It is declared that this product, brand JVC, conforms to the Ministry Decree n. 548 of 28 Aug.'95 published in the Official Gazette of the Italian Republic n. 301 of 28 Dec.'95"... -
Page 3: Installing Your New Recorder
INSTALLING YOUR NEW RECORDER Basic Connections Aerial terminal Back of TV 21-pin SCART connector RF Cable (provided) 21-pin SCART Cable Mains Power Cord AV1 IN/OUT Mains outlet Make AV connection if your TV has a 21-pin AV input connector (SCART) in order to reduce the possibility of interference. -
Page 4: Auto Set Up
Auto Set Up Auto Channel Set/Auto Clock Set/Auto Guide Program Number Set International Telephone Country Code SUOMI : 358 SUISSE PORTUGAL : 351 ITALIA DEUTSCHLAND : 49 ESPAÑA NORGE : 47 BELGIUM SVERIGE : 46 NEDERLAND : 31 DANMARK : 45 GREECE ÖSTERREICH : 43... -
Page 5: Select Area
SELECT AREA Press OK. The Channel Preset Order display appears on the front display panel and/or on the screen. If you are referring to the front display panel Press % fi to select your area code. For SUISSE DEUTSCHSPR.RAUM : 01 REGION FRANÇAISE : 02 REGIONE ITALIANA : 03 (Ex.) DEUTSCHSPR.RAUM is selected for SUISSE... - Page 6 Auto Set Up results appear on the front display panel You can check if the Guide Program numbers have been set correctly when you perform S pg. 22); if the correct channel position number is displayed in step 3, this confirms that the Guide Program number for the number you enter in step 2 has been set correctly.
-
Page 7: Select Language
Language Be sure to set your Video Channel before performing Language setting ( pg. 8). Turn on the TV and select the VIDEO channel (or AV mode). MENU This recorder offers you the choice to view on-screen messages in English, Deutsch (German) or Français (French). If you want to change the language selected during Auto Set Up ( follow this procedure. -
Page 8: Video Channel Set
If you cannot obtain the two vertical white bars clearly with any channel between 28 and 60, consult your JVC dealer. EXIT VIDEO CHANNEL SET MODE Press OK. - Page 9 TV PROG IMPORTANT: Before performing the following steps, make sure the recorder's power is off and there is no cassette inserted in the recorder. With AV Connection ACCESS VIDEO CHANNEL SET MODE Hold down STOP on the recorder until the display panel shows the following.
-
Page 10: On-Screen Displays
On-Screen Displays Turn on the TV and select the VIDEO channel (or AV mode). MENU The superimposed indication on the TV screen tells you what the recorder is doing. PR. 1 ARD 21 : 00 24. 12. 98 REMAIN 1 : 00 You can choose whether or not to have various operational indicators appear on screen, by setting this function ON or OFF. -
Page 11: Power Save Mode
Power Save Mode Turn on the TV and select the VIDEO channel (or AV mode). MENU You can reduce the power consumption while the recorder is turned off. NOTES: During Power Save, the display panel will be turned off. The Just Clock function ( Power Save mode is engaged. -
Page 12: Information On Colour System
Colour System Set MENU NOTES: About NTSC Playback Some TVs shrink the picture vertically and place black bars at the top and bottom of the screen. This is not a malfunction on the part of either the video recorder or the TV. The picture may roll up and down. -
Page 13: Basic Playback
PLAYBACK Basic Playback Turn on the TV and select the VIDEO channel (or AV mode). The easiest, most basic operation possible with your video recorder is tape playback. Already-recorded signals on a video tape are read by your video recorder and displayed on your TV just like a TV programme. -
Page 14: Playback Features
Playback Features TV PROG REVIEW High-Speed Search ACTIVATE HIGH-SPEED SEARCH During playback or still picture, press FF for forward high-speed search, or REW for reverse high-speed search. To resume normal playback, press PLAY. NOTE: For short searches, press and hold FF or REW for over 2 seconds during playback or still picture. -
Page 15: Next Function Memory
Manual Tracking Your video recorder is equipped with automatic tracking control. During playback, you can override this and adjust the tracking manually by pressing the TV PROG buttons. OVERRIDE AUTOMATIC TRACKING Press on the remote to engage manual tracking. ADJUST TRACKING MANUALLY Press TV PROG + or –... -
Page 16: Activate Repeat Playback
Repeat Playback Your video recorder can automatically play back the whole tape 50 times repeatedly. NOTE: Pressing PLAY, REW, FF or PAUSE also stops Repeat Playback. PLAYBACK (cont.) START PLAYBACK Press PLAY. ACTIVATE REPEAT PLAYBACK Press PLAY and hold for over 5 seconds, then release. The Play indicator ( ) on the display panel blinks slowly. -
Page 17: Recording
B.E.S.T. takes place at the beginning of both the first SP and the first LP recording after inserting the cassette ( pg. 20). With HR-J258E: B.E.S.T. takes place at the beginning of the first recording after inserting the cassette ( PAUSE/RESUME RECORDING Press PAUSE. -
Page 18: Recording Features
Press 0000 before starting recording or playback. The counter is reset to “0:00:00” and shows the exact elapsed time as the tape runs. The HR-J258E owners can use the COUNTER RESET button on the recorder's front panel as well. DISPLAY REMAINING TIME Press DISPLAY (or –... -
Page 19: Instant Timer Recording (Itr)
Instant Timer Recording (ITR) This easy method lets you record for from 30 minutes to 6 hours (selectable in 30-min. increments), and shuts the recorder off after recording is finished. START RECORDING Press RECORD on the recorder. ENGAGE ITR MODE Press RECORD again. -
Page 20: Picture System
B.E.S.T. Picture System Turn on the TV and select the VIDEO channel (or AV mode). RECORD MENU The B.E.S.T. (Biconditional Equalised Signal Tracking) system checks the condition of the tape in use during recording and playback, and compensates to provide the highest-possible recording and playback pictures. - Page 21 Record mode is first initiated. It does not work during recording. With HR-J258E: The B.E.S.T. system works only after a tape has been inserted and the Record mode is first initiated. It does not work during recording.
-
Page 22: Timer Programming
: OK stop time, then the date and "SP" is not displayed channel position. with the HR-J258E. IMPORTANT Make sure the channel position number you wish to record is displayed; if not, see "S on page 41 and set the Guide Program number for that S number correctly. - Page 23 VPS/PDC STOP+/– PROG ATTENTION Regarding Guide Program Number Set "GUIDE PROG SET" appears after performing step 3 if the Guide Program number for the S entered has not been set. Press the NUMBER keys or %fi to input the channel position number on which your recorder receives that station, then press OK or .
-
Page 24: Express Timer Programming
– –:– – DATE – –.– – [+/–] = [PROG] : EXIT The front display panel looks like this: "SP" is not displayed with the HR-J258E. ENTER PROGRAMME START TIME Press START +/– to enter the time you want START recording to start. - Page 25 ENTER CHANNEL POSITION Press TV PROG +/–. SET TAPE SPEED (J458E ONLY) Press SP/LP ( ) to set the tape speed. SET VPS/PDC MODE Press VPS/PDC to select "ON" or "OFF". If "VPS/PDC ON" is displayed on the screen or "VPS/ PDC"...
- Page 26 DATE 24.12 "SP" is not displayed ] : NEXT with the HR-J258E. The display panel shows the programme start time. Pressing OK changes the display to the programme stop time, then the date and the channel position. CANCEL OR REPLACE A...
-
Page 27: Auto Sp Lp Timer
Auto SP LP Timer (HR-J458E only) If, when timer-recording in SP mode, there is not enough tape to record the entire programme, the recorder automatically switches to LP mode to allow complete recording. For Example . . . Recording a programme of 210 minutes in length onto a 180- minute tape Approximately 150 minutes Approximately 60 minutes... -
Page 28: Automatic Satellite Programme Recording
Automatic Satellite Programme Recording REC LINK indicator ATTENTION Be sure to not turn on the satellite tuner before the programme is executed; otherwise, the recorder will start recording when the satellite tuner's power is turned on. If you have connected another appliance other than a satellite tuner to the AV2 IN/DECODER connector, be sure to not engage the Auto Satellite Prog Rec mode;... -
Page 29: Editing
EDITING Edit From A Camcorder NUMBER "0" You can use a camcorder as the source player and your video recorder as the recorder. TV PROG Camcorder MAKE CONNECTIONS Connect the camcorder’s AUDIO/VIDEO OUT connec- tors to the recorder’s AV2 IN/DECODER or AV1 IN/OUT connector via the cable adapter. -
Page 30: Edit To Or From Another Video Recorder
Edit To Or From Another Video Recorder NUMBER "0" MENU You can use your video recorder as the source player or the recording deck. TV PROG NOTES: All necessary cables can be obtained from your dealer. When you use this recorder as the player for editing, be sure to set "O.S.D."... -
Page 31: Av2 Select Setting
TV Receiver RF Cable VIDEO (provided) CHAN- NEL or mode "AUTO SP LP TIMER" is not displayed with the HR-J258E. MODE SET AUTO TIMER O. S. D. B. E. S. T. AUTO SP=LP TIMER POWER SAVE AV2 SELECT COLOUR SYSTEM PAL/NTSC [5∞] =... -
Page 32: System Connections
Connection To A Satellite Tuner Outdoor Unit Satellite Cable Satellite Tuner Unit DECODER Mains outlet Back of Recorder NOTE: For details, check your satellite tuner’s instruction manual. The AV2 IN/DECODER connector on the rear panel of your recorder allows simple connection to a satellite tuner. Aerial TV Aerial cable ENTREE/DECODEUR... -
Page 33: Connecting/Using A Decoder
Connecting/ Using A Decoder TV Receiver RF Cable (provided) AV2 IN/DECODER AV1 IN/OUT Satellite antenna Satellite tuner The AV2 IN/DECODER connector can be used as an input terminal for an external decoder (descrambler). Simply connect a decoder and you can enjoy the variety of programming that is available through scrambled channels. -
Page 34: Subsidiary Settings
Tuner Set Turn on the TV and select the VIDEO channel (or AV mode). MENU IMPORTANT Perform the following steps only if — — Auto Channel Set has not been set correctly by Auto Set Up function ( — you have moved to a different area or if a new station starts broadcasting in your area. -
Page 35: Showv
MENU IMPORTANT In certain reception conditions, station names may not be stored correctly, and auto Guide Program Number Set may not work properly. If the Guide Program numbers are not set properly, when you timer-record a TV programme using , the recorder will record a TV programme of a different station. -
Page 36: Storing Channels Manually
NUMBER MENU Storing Channels Manually Store channels that were not stored during Auto Set Up ( or Auto Channel Set ( pg. 34). ACCESS MAIN MENU Press MENU. ACCESS CONFIRMATION SCREEN Press %fi to place the pointer next to “MANUAL CH SET”, then press OK or . -
Page 37: Change Station Channel Position
Delete A Channel Perform steps 1 and 2 of "Storing Channels Manually" on page 36 to access the Confirmation screen before continuing. SELECT ITEM Press % fi until the item you want to delete begins blinking. DELETE CHANNEL Press The item directly beneath the cancelled one moves up one line. - Page 38 Set Stations (A) Set station names that are registered in your recorder. Perform steps 1 and 2 of "Storing Channels Manually" on page 36 to access the Confirmation screen before continuing. SELECT ITEM Press %fi until the item you want begins blinking. ACCESS MANUAL CHANNEL SET SCREEN Press OK twice.
-
Page 39: Tv Station And Id List
TV Station And ID List STATION NAME 1000 TV1000 3SAT 3SAT ADLT ADULT ANT3 ANTENA3 ARTE ARTE BBC GROUP BBC1 BBC1 BBC2 BBC2 BAYERN3 CANAL PLUS PORTUGUSES CAN5 CANALE5 CHANNEL4 CHANNEL5 CHLD CHILD CINE CINEMA CLUB TELECLUB CSUR ANDALUCIA DISC DISCOVERY DR TV ETB1... -
Page 40: Fine-Tuning Channels Already Stored
MENU SUBSIDIARY SETTINGS (cont.) Fine-Tuning Channels Already Stored Perform steps 1 and 2 of "Storing Channels Manually" on page 36 to access the Confirmation screen before continuing. SELECT CHANNEL TO FINE-TUNE Press % fi until the channel you want to tune begins blinking. -
Page 41: Guide Program Number Set
IMPORTANT Normally, Auto Set Up ( pg. 4) or Auto Channel Set ( the Guide Program Numbers manually only in the following cases. When timer-programming with S recorder, is not selected. — Set the Guide Program Number for that station manually. When you add/delete a channel or change channel positions manually after Auto Set Up or Auto Channel Set has taken place. -
Page 42: Set Date And Time
Clock Set Turn on the TV and select the VIDEO channel (or AV mode). MENU Just Clock The Just Clock function provides accurate time keeping through automatic adjustments at regular intervals, by reading data from a PDC signal. The Just Clock option can be set "ON" or "OFF" at the Clock Set screen (the default setting is "OFF"). - Page 43 MENU SET CLOCK DATA SOURCE CHANNEL POSITION The recorder is preset to receive clock setting and adjustment data from channel position 1. Press %fi to set the channel position to the number representing the station transmitting clock setting data, then press OK or START CLOCK OPERATION Press MENU.
-
Page 44: Tape Transport
If you are using the AV connection, set the TV to its AV mode. Try manual tracking. ( pg. 15) Consult your JVC dealer. CORRECTIVE ACTION Insert a cassette, or using adhesive tape, reseal the slot where the tab was removed. -
Page 45: Other Problems
TIMER RECORDING SYMPTOM 1. Timer recording won’t work. 2. Timer programming is not possible. 3. “‰“ and “]“ on the display panel won’t stop blinking. 4. The cassette is automatically ejected, and “‰“ and “]“ on the display panel won’t stop blinking. 5. -
Page 46: Questions And Answers
PLAYBACK Q. What happens if the end of the tape is reached during playback or search? A. The tape is automatically rewound to the beginning. Q. Can the video recorder indefinitely remain in the still mode? A. No. It stops automatically after 5 minutes to protect the heads. -
Page 47: Index
8 REC LINK Button 9 REC LINK Indicator 0 Display Panel ! Infrared Beam Receiving Window @ TV PROG +/– Buttons # RECORD Button $ STOP/EJECT Button pg. 18 (HR-J258E) % PAUSE Button DISPLAY TV PROG # $ % pg. 28 pg. 28 pg. -
Page 48: Display Panel
20 5 "Timer" Indicator 6 Tape Remaining Time Indicator 7 Channel/Clock Display 8 Instant REVIEW Indicator 9 VPS/PDC Indicator 0 VCR Indicator ! "Cassette Loaded" Mark @ Counter/Remain Display pg. 17 # Mode Display (L-1 or L-2) pg. 24 INDEX (cont.) -
Page 49: Remote Control
EXPRESS PROG Buttons with a small dot on the left side of the name can also be used to operate your JVC TV while holding down the TV button. "Operating JVC TVs" below. This remote control transmits A code signals only; it is not applicable to B code signals. -
Page 50: Specifications
CCIR monochrome signal,625 lines 50 fields Recording system : DA4 (Double Azimuth) head helical scan system (HR-J458E) Rotary two-head helical scan system (HR-J258E) Signal-to-noise ratio : 45 dB Horizontal resolution : 250 lines Frequency range : 70 Hz to 10,000 Hz... - Page 51 MEMO...
- Page 52 Auto Set Up The Auto Set Up function sets the tuner channels, clock and Guide Program numbers automatically. BEFORE YOU START PLEASE MAKE SURE THAT: The TV aerial cable is connected to the ANT. IN jack on the rear panel of the video recorder. The video recorder's mains power cord is connected to a mains outlet.
Need help?
Do you have a question about the HR-J258E and is the answer not in the manual?
Questions and answers