Table of Contents
Advertisement
Advertisement
Table of Contents

Related Manuals for RIEJU RS Sport 50


Summary of Contents for RIEJU RS Sport 50
- Page 1 RS SPORT SCOOTER MANUALE DELL’UTENTE...
- Page 2 DESCARGA EL MANUAL USUARIO desde nuestra página Web: www.riejumoto.com TELECHARGER LE MANUEL DE PROPIETÁIRE directement de notre page Web: www.riejumoto.com DOWNLOAD PROPIERTY USER BOOK directly at our Web: www.riejumoto.com SCARICA IL MANUALE UTENTE dalla nostra pagina Web: www.riejumoto.com...
- Page 3 OWNER’S MANUAL SCOOTER RS SPORT...
- Page 5 RIEJU S.A. is very grateful for the trust you have placed in our company and congratulates you on your excellent choice. The SCOOTER RS SPORT 50 model is the result of RIEJU’s extensive experience developing vehicles with high-quality features. The purpose of this Owners Manual is to indicate how to use and maintain your vehicle.Please carefully read the information and instructions that it contains.
-
Page 6: Table Of Contents
CONTENTS Page Page Motorbike description ....4 Pre-delivery service ....13 Checks before starting-up . - Page 7 Page Page Front suspension ....22 Technical specifications and characteristics . .28 Rear suspension .....22 Sparkplug checks .
-
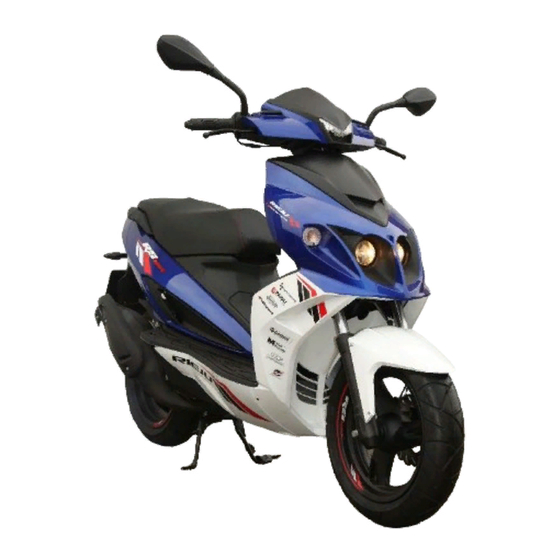
Page 8: Motorbike Description
MOTORCYCLE DESCRIPTION This motorcycle incorporates a single cylinder 2 stroke liquid cooled engine, electrical starting engine. Its cylinder capacity is 49 cubic cm, with a bore and stroke of 40 x 39,2 mm. Starting up is electric and through a kickstarter, with an automatic centrifuge clutch. The motor is fixed to a steel tube and a high resistant stamped plate frame. -
Page 9: Motorbike Identification
MOTORCYCLE IDENTIFICATION You will find the identification number engraved on the motorcycle’s frame. The number engraved on the middle part of the frame, underneath rear chassis, will be used by us for all pur- poses (specifications certificate, insurance and licence number etc), and should be included in any suggestion or complaint, as well as when ordering spare parts. -
Page 10: Main Motorbike Components
PRINCIPAL ELEMENTS OF THE MOTORCYCLE KEYS With this model a set of keys is handed over. These are for the ignition, steerage blocking, petrol tank lid and seat lock. It is recommended to keep a set in a safe place so that it can be available at any time in case of loss. - Page 11 5.- Petrol reserve indicator This indicator shows the level of petrol we have at any given moment. 6.- Oil Level Indicator This indicicator shows us when the oil level is below the minimum. 7.- Temperature Indicator This indicator shows us when the temperature in the engine is dangerously high.
-
Page 12: Handlebar Switches
HANDLEBAR SWITCHES 1.- Turn signal switch This has three positions: In the central position the indicators are switched off, when turned to the right, the right-hand indicator is switched on, and when turned to the left, the left-hand indicator comes on. Note that the switch will automatically return to the central position. -
Page 13: Front Brake Lever
FRONT BRAKE LEVER 1.- The front brake lever is located on the right-hand side of the handlebar. To engage it, the lever should be pressed towards the grip or handlebar. REAR BRAKE LEVER 2.- The back brake lever is located on the left-hand side of the handlebar. -
Page 14: Battery
BATTERY AND FUSE 1.- Battery The battery is situated in the upper compartment of the left hand side leg protector. The battery terminal status should be checked, together with the fixation of the terminals themselves. If any rusting is observed on the battery ter- minals or on the ends of the terminals, this should be cleaned off with a metal bristle brush, sandpaper or similar. -
Page 15: Petrol Tank
PETROL TANK To access the fuel tank, do the following. Park the vehicle on the centre stand. Take the ignition key and insert it into the lock on the left hand side of the seat and turn clockwise whilst applying pressure to the seat. Unscrew the cap loca- ted at the rear to refuel. -
Page 16: Oil Tank
OIL TANK To access the oil tank, do the following. Rest the vehicle on its centre stand. Place the ignition key into the lock situated on the left hand side of the seat. The Oil tank cap is situated near the front labelled “Motor Oil”. Do not forget to fill the tank when the oil level gauge is illuminated. -
Page 17: Pre-Delivery Service
PRE-DELIVERY CHECK 1 Clean the vehicle CHECK LIGHTS 2 Charge the battery (if necessary) 12 Low beams (verify illumination height) 3 Bleeding the braking system (if necessary) 13 High beams 4 Brake tensing and greasing (if necessary) 14 Rear sidelights LEVEL CHECKS 15 Rear brake light 5 Transmission oil... -
Page 18: Checks Before Starting-Up
CHECKS TO BE CARRIED OUT BEFORE OPERATING Check the following points before using your motorcycle. Elements Checks Engine Check the oil level Lights and indicators Check for correct operation Speedometer cable Check for smooth operation and lubrication Front and rear brakes Check both free-play and operation Throttle Check free-play, adjust and lubricate as necessary... -
Page 19: Routine Checks
ROUTINE CHECKS Brake liquid level FRONT BRAKE Braking is made possible with a disc brake of a 190-mm diameter triggered by a caliper and a hydraulic pump. The braking surface should be free from both grease and dirt to ensure perfect operation. Should it be neces- sary to empty and refill the brake fluid circuit, proceed in the following manner: Remove the pump cover and fill almost completely with... -
Page 20: Rear Brake
If the hydraulic clip brake pads are worn, they must be replaced. The minimum thickness of the Ferodo pads has to be 2 mm. Brake liquid level Please remember that these operations should be carried out by an official RIEJU service centre. -
Page 21: Accelerator Grip
THROTTLE Check for correct operation by rotating the grip and verifying if the free-play is correct. The grip should return when the accelerator is released. LIGHTS AND INDICATORS Check the sidelights and headlights, the turn signals, rear pilot light, dashboard indicators, assuring yourself that everything works correctly. -
Page 22: Cooling System
COOLING SYSTEM The radiator can be found in the front internal part of the moped. The radiators propose is to maintain a constant engine tem- perature by cooling the hot water which is pumped around the engine. To check the level of coolant, carefully undo the radiator cap off and top up if necessary. -
Page 23: Engine Starting And Operation
ENGINE STARTING AND OPERATION It is very important to know your vehicle well and also its functioning. WARNING: The engine should never be left running in an enclosed space because the toxic exhaust fumes could have serious consequences on your health. STARTING THE ENGINE Turn the key clockwise, close the throttle completely and engage the electric starter button. -
Page 24: Running-In
RUNNING-IN The most important time in the life of a motorbike is between 0 and 1000 km. For this reason, we recommend that you carefully read the following instructions. During the first 1000 km. You shouldn’t overload the motorbike because the motor is new and the diffe- rent parts wear and rub among themselves, until they come to work perfectly together. -
Page 25: Stopping
This is one of the most important components with respect to good engine performance because this is where petrol and air are mixed, poor carburator operation means poor engine performance which, in turn, could lead to damaged engine parts. It is therefore recommended that its adjustment be checked at an authorised RIEJU repair shop. -
Page 26: Front Suspension
FRONT SUSPENSION The suspension consists of hydraulic telescopic forks measuing 30mm by 88mm. equipped with the most advanced means with regard to technology and design. REAR SUSPENSION The rear suspension is equipped with a Mono – Shock type shock absorber. -
Page 27: Sparkplug Checks
SPARK PLUG INSPECTION The sparkplug is a very important engine component and is easy to inspect. It should be removed and inspected on a regular basis because heating and soot deposits will slowly deteriorate it. If the electrode is excessively eroded or there is heavy soot or other deposits, then the sparkplug should be replaced using a recommended type and thermal grade spare part. -
Page 28: Air Filter
AIR FILTER Good performance and durability of the engine organs depends to a great extent on the good state of cleanliness and greasing of the air filter. In order to reach the air filter, loosen the screws that hold the lid of the air filter box, whereby the filtering mass becomes visible so as to be able to extract it. -
Page 29: Oil Level Check
Once empty, put the screw in place again and proceed to refill, removing the dip-stick. WARNING: RIEJU recommends the oil level check, always before taking off, with the motor- bike in a level position and always when it's cold. -
Page 30: Cleaning And Storage
3.- Remover the degreasing agent, together with the dirt, using a hosepipe, but only with the minimum pressure necessary. WARNING: Rieju cannot be held responsible for the use of degreasing agents which stain or cause deteriora- tion the the motorbike components. Rieju cannot be held responsible for any possible damage resulting from the use of pressurised... - Page 31 4. Once all dirt has been cleaned off, the surfaces should be washed with warm water and a mild deter- gent. Difficult areas to access can be washed with a bottle-brush or similar. 5. Rinse immediately with cold water and dry all surfaces. 6.
- Page 32 TECHNICAL SPECIFICATIONS AND CHARACTERISTICS ENGINE FRAME T T y y p p e e T T y y p p e e Single cylinder Steel tube C C y y c c l l e e Two stroke F F r r o o n n t t s s u u s s p p e e n n s s i i o o n n hydraulic telescopic forks of 30mm R R e e a a r r s s u u s s p p e e n n s s i i o o n n Monoshock...
Need help?
Do you have a question about the RS Sport 50 and is the answer not in the manual?
Questions and answers