Advertisement
PROPER INSTALLATION IS IMPORTANT. IF YOU NEED ASSISTANCE, CONSULT A CONTRACTOR, ELECTRICIAN
OR TELEVISION ANTENNA INSTALLER (CHECK WITH YOUR LOCAL BUILDING SUPPLY, OR HARDWARE STORE
FOR REFERRALS). TO PROMOTE CONFIDENCE, PERFORM A TRIAL WIRING BEFORE INSTALLATION.
Mount the temperature sensor assembly with the two
large wood screws. Select a location that is protected
from direct sunlight and sheltered from rain and physical
damage. (A north exposure, six feet above the ground
will give the best results.)
Form a drip loop with the wire at least eight inches
below the exit from the sensor and at least eight inches
below the point of entry into the building. Anchor any
exposed wire with insulated cable clips. Run the wire
through the building to the location where the indicator
will be located. Caulk any holes when done.
5
Unplug the AC adaptor and disconnect the wires. Mystic is now ready for the final installation.
The adjustment that you have made will always remain intact.
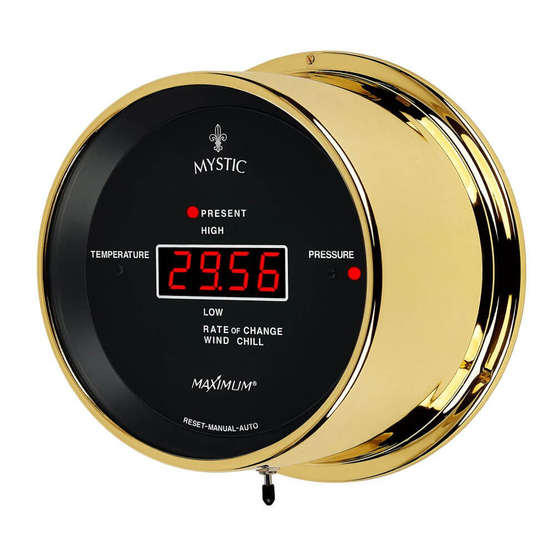
MYSTIC
INSTALLATION
Connect the AC adapter to Mystic and plug into outlet. The display will
1
briefly light up all the indicator lights (self test). Next the display will show
the unit of measurement codes and then will show the barometer function
light and the center display will show a pressure reading. Leave Mystic in
this mode for two hours. Do not activate the switch at the bottom of
the case. At the end of this two hour period, Mystic will be ready to have
the pressure adjustment performed.
4
Now calibrate the barometer for your altitude. Obtain the current barometric
pressure for your area by calling a near-by airport or an individual who has a
properly set barometer. Insert a small screw driver into the recessed slotted
screw at the back of Mystic. Turn the screw while observing the pressure read
out on the front of Mystic. Due to the sensitivity of this adjustment, the numbers
on the display may fluctuate during this procedure. It may take a minute to
achieve the exact setting.
right (auto) one time to lock in the setting.
30 Samuel Barnet Boulevard
New Bedford, MA 02745
Once the unit is set, move the toggle switch to the
(508) 995-2200
2
3
CAULK
CABLE
CLIP
8"
MIN
DRIP
LOOP
Advertisement
Table of Contents

Related Manuals for Maximum MYSTIC

Summary of Contents for Maximum MYSTIC
- Page 1 Leave Mystic in this mode for two hours. Do not activate the switch at the bottom of the case. At the end of this two hour period, Mystic will be ready to have the pressure adjustment performed.
- Page 2 Auto and releasing it. NOTE: After any full reset, Mystic will display the pressure adjustment mode. It is never necessary to perform the pressure adjustment again. Simply exit this mode by moving the switch to Auto and releasing it.
- Page 3 If Mystic is Auto sequencing and you wish to turn that function off - move the toggle switch to the right (auto) and release it. You can now manually step through the functions as previously mentioned.
- Page 4 It will preserve the previously accumulated data for up to 10 years. Moving the switch to "Auto" does not erase stored information. You do not need to time the 6 second reset time. Mystic will blank out the display to indicate that the memory has been erased.
-
Page 5: Troubleshooting
MYSTIC TROUBLESHOOTING If at any time the temperature reading seems to be giving you difficulty, prodeed as follows: Remove the instrument from the wall. At the back of the indicator, disconnect the sensor wires from terminals #4 and #5. The current temperature reading should drop to -40 F (-40 C) or below. - Page 6 MYSTIC INFORMATION FOR THE MERLIN USER Warning: Changes or modifications to this unit not expressly approved by the party responsible for compliance could void the user's authority to operate the equipment. NOTE: This equipment has been tested and found to comply with the limits for a Class B digital device, pursuant to Part 15 of the FCC Rules.
- Page 7 AC Adaptor: This instrument requires its own AC Adaptor. Due to the various power requirements of each Maximum instrument, attempting to run more than one instrument on a single adaptor could cause improper operation and/or damage to the instrument(s) thereby voiding your 5-year warranty.
Need help?
Do you have a question about the MYSTIC and is the answer not in the manual?
Questions and answers