Prodigy Voice User Manual
Blood glucose monitoring system
Hide thumbs
Also See for Voice:
- Owner's manual (45 pages) ,
- Owner's manual (82 pages) ,
- Quick reference manual (2 pages)
Table of Contents
Advertisement
Blood Glucose Monitoring System - User's Manual
Dear PRODIGY Voice System Owner:
This manual contains important information you must know about the
system. Please read it thoroughly and carefully.
The greatest feature of the Voice system is its speaking function which is an
acoustic aid for users especially with visual disability. Please note that this
function is optional.
Another unique feature is its autocode function which means no need
to calibrate your meter, therefore making it easier for you to monitor your
blood glucose at home.
Diagnostic Devices, Inc
www.prodigymeter.com
1.800.243.2636
1
Advertisement
Table of Contents

Related Manuals for Prodigy Voice


Summary of Contents for Prodigy Voice
- Page 1 This manual contains important information you must know about the system. Please read it thoroughly and carefully. The greatest feature of the Voice system is its speaking function which is an acoustic aid for users especially with visual disability. Please note that this function is optional.
- Page 2 Blood Glucose Monitoring System - User’s Manual IMPORTANT SAFETY INSTRUCTIONS READ THIS BEFORE USING The following basic safety precautions should always be taken. 1. Close supervision is necessary when the device is used by, on, or near children, handicapped persons or invalids. 2.
-
Page 3: Table Of Contents
Meter Display Segments Appearance of the Test Strip PREPARATION BEFORE USE Battery Replacement Setting the Meter and Deleting the Memory BEFORE TESTING About Prodigy ® Control Solutions Important Control Solution Information How to Perform a Control Solution Test TESTING YOUR BLOOD... -
Page 4: Important Information
Blood Glucose Monitoring System - User’s Manual IMPORTANT INFORMATION • Severe dehydration and excessive water loss may cause false low results. If you believe you are suffering from severe dehydration, consult your healthcare professional immediately. • Test results below 60 mg/dL (3.3mmol/L)* mean low blood glucose (hypoglycemia). -
Page 5: About Aternative Site Testing (Ast)
Blood Glucose Monitoring System - User’s Manual ABOUT ALTERNATIVE SITE TESTING (AST) Important: There are limitations for doing AST. Please consult your healthcare professional before you do AST. What is AST? Alternative site testing (AST) means that people use parts of the body other than fingertips to check their blood glucose levels. - Page 6 Blood Glucose Monitoring System - User’s Manual Do NOT use AST if: • You think your blood glucose is low. • You are unaware of hypoglycemia. • Your AST results do not match the way you feel. • You are testing for hyperglycemia. •...
-
Page 7: Introduction Of The System
Blood Glucose Monitoring System - User’s Manual INTRODUCTION OF THE SYSTEM • Intended Use The system is intended for use outside the body (in vitro diagnostic use only). It should be used only for testing glucose (sugar) and only with fresh capillary whole blood samples (from the finger, the palm, the forearm, the upper arm, the calf and the thigh). -
Page 8: Contents Of The System
Blood Glucose Monitoring System - User’s Manual • Contents of the System The Prodigy ® Voice system consists of three main products: Prodigy ® Voice blood glucose meter, Prodigy ® Voice test strips, and a Prodigy ® control solution. These products have been designed, tested, and proven to work together as a system to produce accurate blood glucose test results. -
Page 9: Appearance And Key Function Of The Meter
Blood Glucose Monitoring System - User’s Manual • Appearance and Key Function of the Meter 1. LCD DISPLAY- Guides you through the test using symbols and simple messages. 2. STRIP-EJECT BUTTON- The used strip will be ejected after you push up the button. 3. -
Page 10: Meter Display Segments
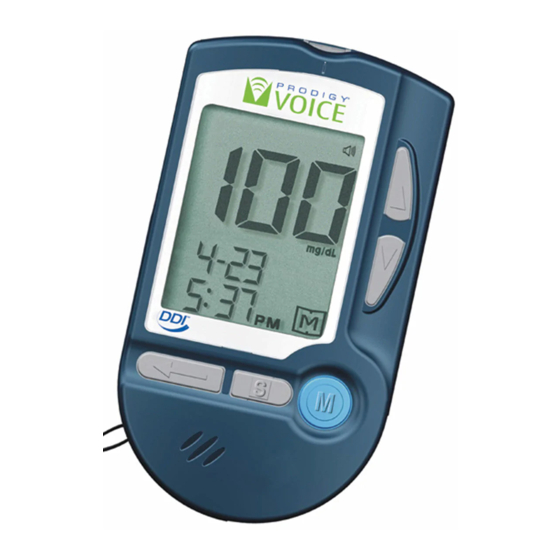
SYMBOL Appears when the meter Flashes when it is ready to apply the is turned on. sample. VOICE SYMBOL Indicates if audio TEST RESULT AREA function is on or off. Displays glucose results. A decimal point appears when the measurement unit is mmol/L. -
Page 11: Appearance Of The Test Strip
Blood Glucose Monitoring System - User’s Manual • Appearance of the Test Strip Your system measures the amount of sugar (glucose) in whole blood. Blood is applied to the absorbent channel of the test strip and is automatically drawn into the reaction cell where a chemical reaction takes place. -
Page 12: Preparation Before Use
1. The symbol appears together with other display messages: the meter is functional and the result remains accurate, but it is time to change the batteries. Voice SPEAKS: “Battery is low, please replace.” 2. The symbol appears with the “E-b” symbol, “Error” and “low”: the batteries can not provide enough power to do a test. - Page 13 Blood Glucose Monitoring System - User’s Manual To replace the batteries, make sure that the meter is turned off. Press the edge of the Remove the old Close the battery battery cover and lift batteries and replace cover. If the batteries it up to remove.
-
Page 14: Setting The Meter And Deleting The Memory
STEP 1 Set the Year Press the “Up” or “Down” button until the desired year appears. Press the S button and then the month segment flashes. Voice SPEAKS: “You are now in setting mode. The year is 2007.” STEP 2 Set the Month Press the “Up”... - Page 15 STEP 3 Set the Day Press the “Up” or “Down” button until the desired day appears. Press the S button and then the hour segment flashes. Voice SPEAKS: “The day is the 18th.” STEP 4 Set the Hour Press the “Up” or “Down” button until the desired hour appears.
- Page 16 Number 1 to 7 indicates speaking volume from low to high, where “ ” displays on LCD during testing. Press the S button and the meter will display “dEL” with flashing “ ” symbol. Voice SPEAKS: “Voice volume is 7.” Diagnostic Devices, Inc www.prodigymeter.com 1.800.243.2636...
- Page 17 The memory of this meter is empty now. The meter will automatically turn off. Voice SPEAKS: “Delete memory record function. Press “up” button to clear all records. Are you sure you want to delete ALL records? Press “up” button again to clear all records.”...
-
Page 18: Before Testing
Control Solutions PRODIGY ® control solutions contain a known amount of glucose that reacts with Prodigy ® test strips. By testing your control solution and comparing the test results with the expected range printed on the test strip vial label, you can make sure that the meter and the test strips are working properly together as a system and that you are performing the test correctly. -
Page 19: Important Control Solution Information
• Store the control solution tightly closed at temperatures below 86ºF (30ºC). Do not refrigerate. PLEASE NOTE The control solution range printed on the test strip vial is for Prodigy ® control solutions only. It is used to test meter and test strip performance. It is not recommended range for your blood glucose level. -
Page 20: How To Perform A Control Solution Test
Today’s date is (Today’s date; Example: November 18th, 2007). The time is (The time it is at time of test, Example: 10:08AM). Prodigy Voice works only with the Prodigy Voice test strips. Please apply blood to the test strip.” Diagnostic Devices, Inc www.prodigymeter.com... - Page 21 “M” button and then “CTL” will appear on the display. With the “CTL” symbol on the display, the meter will not store your test result in memory. Voice SPEAKS: “You are now in control solution mode.” If you decide not to perform a control solution test, press the “M”...
- Page 22 (where it meets the narow channel) until the drop is drawn into the test strip and the confirmation window is filled. The meter begins to count down. Voice SPEAKS: “Now testing.” CAUTION: To avoid contaminating the control solution with the content of the test strip, you...
-
Page 23: Testing Your Blood
Blood Glucose Monitoring System - User’s Manual TESTING YOUR BLOOD Be sure to read this section and the test strip package insert found in the test strip box carefully before testing. Make sure you have all items needed to test: A. -
Page 24: Testing Procedure
Blood Glucose Monitoring System - User’s Manual • Testing Procedure Wash and dry your hands first, before start testing. STEP 1 Set the Lancing Device Insert a lancet in the adjustable lancing device. Screw off the cap of lancing device. Insert a lancet into the lancet holder and push down firmly until it is fully seated. - Page 25 Blood Glucose Monitoring System - User’s Manual Cock the lancing device Slide the ejection/cocking control back until it clicks. If it does not click the device may have been cocked when the lancet was inserted. AST - Alternative Site Testing * Blood from sites other than the fingertip A clear cap, included in the kit, makes it easier to get a drop of blood for AST.
- Page 26 “Thank you for using Prodigy Voice. Test Strip Inserted. Today’s date is (today’s date). The time is (the time). Prodigy Voice works only with the Prodigy Voice test strips. Please apply blood into the test strip.” Diagnostic Devices, Inc www.prodigymeter.com...
- Page 27 Blood Glucose Monitoring System - User’s Manual STEP 3 Get a Drop of Blood Select the puncture site either in fingertip or in other parts (AST). Wash your hands and the puncture site. Use warm, soapy water. Rinse and dry thoroughly. •...
- Page 28 The meter then begins to count down automatically. Correct Voice SPEAKS: “Now Testing.” Incorrect STEP 5 Obtain an Accurate Result in 6 Seconds The result of your blood glucose test is shown after the meter counts from 6 to 0.
- Page 29 You must remove and reinsert the test strip to restart the test procedure. • Anytime you can press the “M” button to skip the current voice message and go to the next step. • If you want to hear the previous voice message, you can press the “Repeat” button to replay it.
- Page 30 Blood Glucose Monitoring System - User’s Manual STEP 7 Remove the Lancet Always use caution when removing the lancet. Take the lancet out carefully. Place the protective cap back on the lancet exposed tip or if using a twist lancet place the cap on a hard surface and push the exposed tip into protective cap and discard properly.
-
Page 31: Expected Test Results
60%* . The results you get with the PRODIGY Voice system can help you and your healthcare professional monitor and adjust your treatment plan to gain better control of your diabetes. -
Page 32: Comparing Meter And Laboratory Results
Blood Glucose Monitoring System - User’s Manual COMPARING METER AND LABORATORY RESULTS The result you obtain from your meter may differ somewhat from your laboratory result due to normal variation. Meter results can be affected by factors and conditions that do not affect laboratory results in the same way (See test strip package insert for typical accuracy and pre- cision data, and for important information on limitations). -
Page 33: Using The Meter Memory
The Prodigy ® Voice stores the 450 most recent blood glucose test results with date and time in its memory. It also provides you with 7, 14, 21, 28, 60 and 90 day averages of your blood glucose test results. You can review the test results in memory with these easy steps. - Page 34 Blood Glucose Monitoring System - User’s Manual STEP 2. Press the “Up” and “Down” button to recall the test results stored in the meter. Voice SPEAKS: “Memory Record for August 23rd, 2007. 8:36 AM. Your blood glucose was 80 milligrams per deciliter.”...
- Page 35 Keep pressing the “M” button for 2-3 seconds, until blinking “ ” appears. Release the “M” button and then the 7-day average result will appear on the screen. Voice SPEAKS: “Thank you for using Prodigy Voice. Today’s date is (today’s date). The time is (the time). Press “M” key for memory recall mode.”...
- Page 36 Blood Glucose Monitoring System - User’s Manual STEP 3. Exit the memory mode, press and hold down the “M” button, and the meter will turn off. Voice SPEAKS: “Have a nice day.” NOTE • The control solution results are NOT stored in the memory (please turn to page 22-23 for WARNING information).
-
Page 37: Viewing Results On A Personal Computer
Software and an Interface Cable are required before installation. The software can be downloaded from www.prodigymeter.com. The interface cable is an optional accessory. To learn more about Prodigy Diabetes Management Software or to obtain an Interface Cable sold separately, please contact your local retailer or distributor. -
Page 38: Caring For Your Meter And Test Strips
Blood Glucose Monitoring System - User’s Manual CARING FOR YOUR METER AND TEST STRIPS To avoid the meter and test strips getting dirt, dust or other contaminants, please wash and dry your hands thoroughly before use. • Cleaning Your meter does not require special maintenance. As long as no blood or control solution comes in direct contact with the meter, there is no special cleaning required. -
Page 39: Storage
Blood Glucose Monitoring System - User’s Manual 2. Strip Storage • Storage condition: 39.2ºF~104ºF (4ºC~40ºC), below 85% relative humidity. Do not refrigerate. • Store your test strips in their original vial only. Do not transfer to other container. • Store test strip packages in a cool and dry place. Keep away from direct sunlight and heat. - Page 40 Blood Glucose Monitoring System - User’s Manual 3. Control solution storage • Storage condition: Store the control solution tightly closed at temperatures below 86ºF (30ºC). Do not refrigerate. • Record the discard date (date opened plus 90 days) on the control solution vial.
-
Page 41: Problem-Solving Guide
Blood Glucose Monitoring System - User’s Manual PROBLEM-SOLVING GUIDE The following is a summary of some display messages and symbols. These messages help to identify certain problems but do not appear in all cases when a problem has occurred. Improper use may cause an inaccurate result without producing an error message. In the event of a problem, refer to the information under “action”. -
Page 42: Special Message
Blood Glucose Monitoring System - User’s Manual • Special Message MESSAGE WHAT IT MEANS ACTION Appears when your result is This indicates hypoglycemia below measurement limit, which (low blood glucose.) is less than 20 mg/dL. You should immediately treat (1.1 mmol/L) hypoglycemia as recommended by your healthcare professional. -
Page 43: Error Message
Blood Glucose Monitoring System - User’s Manual • Error Message WHAT DOES WHAT IT MESSAGE ACTION METER SAY? MEANS Appears when the Battery is dead. batteries cannot Replace the batteries Please replace. provide enough immediately. power for a test. Strip has been used. Appears when Test with a new Please replace. - Page 44 Blood Glucose Monitoring System - User’s Manual WHAT DOES WHAT IT MESSAGE ACTION METER SAY? MEANS Remove the strip Re-test with a new Please ensure proper after applying blood test strip. operation then try to the absorbent again. channel. Test strip is inserted Remove the test Please remove strip.
-
Page 45: Problem In Operation
Blood Glucose Monitoring System - User’s Manual • Problem in Operation 1. If the meter does not display a message after inserting a test strip: PROBABLE CAUSE WHAT TO DO Battery exhausted. Replace the batteries. Battery incorrectly installed or absent. Check that the battery is correctly installed. - Page 46 Blood Glucose Monitoring System - User’s Manual 3. If the control solution test result is out of range. POSSIBLE CAUSE WHAT TO DO Error in performing the test. Read the instruction thoroughly and repeat the test again. Did not shake the control solution Shake the control solution vigorously bottle very well.
-
Page 47: Specifications
Blood Glucose Monitoring System - User’s Manual SPECIFICATIONS Model No.: 51900 Dimension & Weight: 3.74”(L) x 2.17”(W) x 0.71(H) 2.6 oz. 95mm(L) x 55mm(W) x 18mm(H), 75 g Power Source: two(2) 1.5V AAA alkaline batteries Display: LCD Memory: 450 measurement results with date and time External output: RS232 PC interface Auto electrode inserting detection Auto sample loading detection... - Page 48 Blood Glucose Monitoring System - User’s Manual Diagnostic Devices, Inc www.prodigymeter.com 1.800.243.2636...
- Page 49 Blood Glucose Monitoring System - User’s Manual Diagnostic Devices, Inc www.prodigymeter.com 1.800.243.2636...
Need help?
Do you have a question about the Voice and is the answer not in the manual?
Questions and answers