Table of Contents
Advertisement
Quick Links
Advertisement
Table of Contents

Related Manuals for Afinia H480


Summary of Contents for Afinia H480
- Page 1 Afinia H480 3D Printer Version 1.3...
- Page 2 Afinia H480 3D Printer User’s Manual...
-
Page 3: Table Of Contents
Introduction ..........................5 Safety Precautions ......................5 Protection ..........................5 Overview ........................... 6 Unpacking the Afinia H480 3D Printer ................7 Installing the Afinia H480 3D Printer ..................8 Attaching the Material Spool ....................8 Driver and Software Installation ..................9 Installing the Printer ...................... - Page 4 Afinia warrants to the original purchaser that this product is free from defects in material and workmanship. Afinia will for one year, at its option, repair or replace at no charge for parts and labor from the date you purchased the product from an authorized Afinia reseller. Nozzles and Cell/Perf Boards are warranted for ninety (90) days.
-
Page 5: Introduction
The printer must not be exposed to water or rain, or damage may occur. • Do not shut down the Afinia H480 3D System or pull out the USB cable when loading a • digital model or the model data may be lost. -
Page 6: Overview
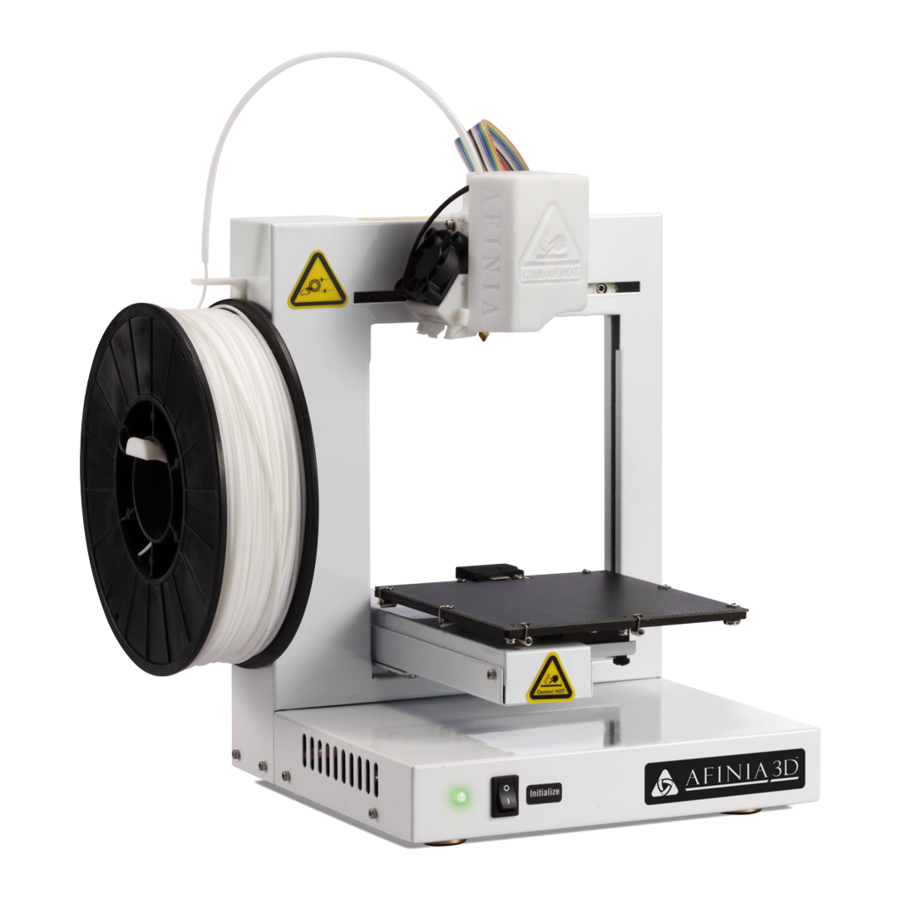
Afinia software. The Afinia 3D software sends the print data from a Mac or PC to the Printer over a single USB cable. The Print Platform moves both vertically and front-to-back while the Extruder moves left-to-right, providing the necessary 3 axes of operation (see Figure 2). -
Page 7: Unpacking The Afinia H480 3D Printer
Remove the Installation Disc, Manual, Quick Start Guide, and Accessories Pack from the box. Next, lift the Afinia H480 3D printer from the box. Remove the foam from both sides of the Printer and set the Printer on its base with the back of the Printer facing you. -
Page 8: Installing The Afinia H480 3D Printer
Afinia H480 3D Printer User’s Manual Installing the Afinia H480 3D Printer Attaching the Material Spool Attach the Material Spool with these steps: A. Connect the power adapter to the power interface and turn on the power switch. B. Install the ABS plastic spool holder and filament guide. -
Page 9: Driver And Software Installation
Insert the Installation Disc into your PC. If the installer does not launch automatically, start the Afinia H480 3D Printer setup.exe file in the PC directory on the installation disc and install to the specified directory (default is Program files\Afinia\Afinia 3D Printer). - Page 10 Afinia H480 3D Printer User’s Manual C. Select the option to Search removable media; the drivers are located on the installation disc. If you are installing from a download, click then navigate Browse, C:\Program files\Afinia\Afinia 3D Printer\Driver, then Next. D. If the following dialog box appears, click Continue Anyway, and the drivers will install automatically.
-
Page 11: Getting Ready To Print
Getting Ready to Print Starting the Afinia 3D Program If the application is not already open, click the Afinia 3D icon on the desktop (Windows) or in the Applications folder (Mac). The program should open and appear as shown below:... -
Page 12: Preparing The Platform
Be sure to position the BuildTak surface on the actual print zone – the FR-4 board is longer than the surface, with the front and back ends of the board not actually within the print zone. Borofloat glass and BuildTak are available at store.afinia.com. Whichever platform preparation method you use, the factors that most reduce the risk of warping on large prints are ensuring that the platform is well leveled, ensuring that the nozzle height is set correctly, and having a well pre-heated print surface. -
Page 13: Leveling The Print Platform
If the platform surface cannot be leveled after performing the manual leveling as described above, there is a utility in the Afinia software that allows you to adjust the printing of the raft to level the model printing layers by dividing the print platform into several zones and entering adjustments for each. - Page 14 3. Route the cable around the right side of the printer as shown to the right and connect the other end of the data cable to the green data connection on the back of the Afinia H480 printer. NOTE: Do not attempt to pass the cable over or through the frame of the printer, as this will interfere with the calibration process.
- Page 15 Afinia H480 3D Printer User’s Manual If the message to the right appears when you choose the Auto Level option, check that the data cable is securely connected to both the Platform Probe and the data connection on the back of the printer. After verifying the connections, select Auto Level again.
-
Page 16: Calibrating The Nozzle Height
Afinia H480 3D Printer User’s Manual The adjustments in the example shown, for instance, indicate that the print surface is warped, with the center higher than both the front and back edges. Using the Platform Level Calibration utility, you can correct for this warping. - Page 17 Afinia H480 3D Printer User’s Manual Manual Nozzle Height Calibration To manually determine the correct nozzle distance, please follow these steps: 1. Open the Maintenance dialog box from the 3D Print menu and click the Center button. The current nozzle height is indicated as shown in the Maintenance dialog images below. In the Windows example, the platform is currently at the bottom of the printer;...
-
Page 18: Loading The Print Material Filament
Loading the Print Material Filament This process will be the same on both Mac and Windows. A. Launch the Afinia 3D Software (refer to the software install procedure if you have not already installed it), and select Maintenance from the 3D Print menu. Click the Extrude button. - Page 19 Afinia H480 3D Printer User’s Manual TIP: An empty Afinia Premium spool weighs about 280 grams. If you are installing a partially used Afinia Premium filament spool, weigh it, and subtract 280 grams from the weight. Enter that value into the material Weight text box.
-
Page 20: Printing With The H480 3D Printer
Click File / Open or the Open icon on the toolbar (Windows only) and select the model you want to open. The Afinia 3D Printer software only supports files (which is the standard input format for 3D printing files), the formats. - Page 21 Fixing STL Files The Afinia 3D Printer software includes a Fix option that attempts to fix any model that includes bad surfaces. Under the Edit menu in Windows you will see the Fix option, and under the Tools menu in Mac will be the Autofix option. Select the model with inverted surfaces, and click the Fix or Autofix option to attempt a repair of the bad surfaces.
-
Page 22: View Options
Afinia H480 3D Printer User’s Manual View Options To observe the target model in different ways, use the mouse to control the view. Rotate Press the middle mouse button and move the mouse. The view can be rotated and observed from different angles. - Page 23 Afinia H480 3D Printer User’s Manual For example: To move the model -5mm along Z axis (or down 5mm): Windows 1. Select the Move option 1. Click Move 2. Input in the text box 2. Input in the text box 3.
-
Page 24: Placing Models Onto The Build Platform
Occasionally an stl file may appear much smaller or much larger than designed. This is due to the design software saving the units of measure as inches rather than millimeters; the Afinia 3D software uses millimeters only, so a 1 inch model would appear as 1 millimeter. -
Page 25: Print Setup Options
Afinia H480 3D Printer User’s Manual Print Setup Options Click the Setup option in the 3D Print menu or the Preferences button on the Print and Print Preview windows. The following dialog box will appear: Mac version Windows version Print Settings Z Resolution This setting specifies the print resolution or layer thickness of the printer. - Page 26 Afinia H480 3D Printer User’s Manual Fill Settings There are four ways to fill the interior of the parts, as described below. The part is nearly solid plastic, giving you the The interior of the part is filled with a strongest structure.
- Page 27 Afinia H480 3D Printer User’s Manual Support Settings Dense This represents how many layers of dense support material is printed directly beneath the model. The greater the number of dense support layers, the more stable the print will be but the support will be more difficult to remove.
-
Page 28: Printing
TIP: All setup and configuration settings aside from the Nozzle Height Calibration and Platform Leveling parameters are stored in the software, not on the Afinia H480 3D Printer. If you move the printer to a different computer, you will need to repeat all the calibration and setup procedures. -
Page 29: Print Options
Afinia H480 3D Printer User’s Manual The software prepares and sends the instructions for printing each layer of the model to the printer. When that is complete, the material usage and estimated print time is displayed. The USB connection to the printer can be unplugged at this point. -
Page 30: Save As Project
Use the full weight of the filament that you purchased, not the current weight of the spool. For instance, if you purchased a 700g spool of Afinia Premium ABS filament, you would divide the cost of the spool by 700g to get the cost per gram of material. -
Page 31: Model Removal
Afinia H480 3D Printer User’s Manual Model Removal When the model has finished printing, the printer will beep, the nozzle and platform will stop heating, and the printer platform will lower. You should never attempt to remove the finished model from the print surface while it is still in the printer. -
Page 32: Removing Support Material
Afinia H480 3D Printer User’s Manual Removing Support Material Printed models are composed of two parts. One part is the model itself, and the other part is the support material used to support any overhanging parts of the model. The support material is the same physical material as the model material, but printed at a much lower density. -
Page 33: Maintenance
First, print the supplied Calibration model on your printer at the scale of the part when initially opened. The calibration file is in C:\Program Files\Afinia\Example on PCs and in the Afinia directory off the root of the main drive on Macs. -
Page 34: Cleaning The Nozzle
Afinia H480 3D Printer User’s Manual Open the Calibrate dialog from the 3D Print menu. Measure the X1 and X2 length, as shown in the pictures below. IMPORTANT NOTE: Before you enter any new calibration values, always click the Reset button, otherwise the new values get added to the old ones. -
Page 35: Removing / Changing The Nozzle
Spare parts Most of the plastic parts on the printer can be printed by the Afinia H480 3D Printer itself. If you need spare parts for your printer, the files for the printable parts can be found in the C:\Program Files\Afinia\Example\Spare Part folder on PCs and in the Afinia directory off the root of the current User directory on Macs. -
Page 36: Tips & Tricks
Scaling your Model Not only can the Afinia 3D software scale your model in all three dimensions, you can use the Scale function to change the size in any one of the three dimensions independently. For instance, you can make your model taller by setting the scale factor and clicking just the Z Axis button without affecting the width or depth (see pages 23-24). - Page 37 The most common way for non-normalized surfaces to appear is when two surfaces cross each other in the model. The Fix function in the Edit menu of the Afinia 3D software may resolve the surface problems, but the best solution is to correct any problems in your design software. Many software packages have functions to check for and remove any non-normalized surfaces –...
-
Page 38: Status Indicator
Changing Languages The Afinia software interface can use multiple languages. To change the language in the software, open the application and enter the key sequence from the table below for the correct language. The language will change the next time the application is launched. -
Page 39: Troubleshooting
3. Click the right mouse button and select the Uninstall option. The confirm dialog box will appear. Click OK. 4. Install the latest Afinia H480 3D software. 5. Unplug the USB cable, then plug it back in. Windows will find a new device. Manually select the driver... - Page 40 Option 2: Update the driver manually 1. Install the latest Afinia H480 3D Printer software. 2. Find 3DPrint@FreeMC driver in the Device Manager dialog box (it should be located in the USB section).
-
Page 41: Updating The Printer Rom
Updating the Printer ROM Note: This is a function that should only be performed if necessary. The H480 Printer ROM can only be updated using the Windows version of the Afinia Software. Follow these steps to perform the update: 1. With the H480 Printer on and initialized, select Update ROM from the Tools menu. -
Page 42: Technical Support
Technical Support For technical questions or support issues, contact Afinia Technical Support: PH: 952-279-2643 support@afinia.com www.afinia.com Please have the Model and Serial Number of your Afinia H480 3D Printer available when contacting Technical Support. Date of Purchase: Place Purchased: Serial Number:... - Page 43 Afinia H480 3D Printer User’s Manual...
Need help?
Do you have a question about the H480 and is the answer not in the manual?
Questions and answers