Advertisement
Quick Links
lg¥31Suburban
AIRXCEL,
INC. - SUBURBAN DIVISION
676 Broadway Street
Dayton,
Tennessee 37321
423-775-2131
www.RVComfort.com
SUBURBAN
GAS FURNACES
INSTALLATION INSTRUCTIONS
FOR
MODEL~
SF-20Q • SF-25Q • SF-30Q • SF-35Q • SF-42Q
The
design of the
furnace has
been listed for installation
in
recreational vehicles
only.
In order for
the
fu rnace
to
operate in
conformity
with
generally
accepted safety
regulations,
the installation instructions
must
be followed.
Failure to comply with the installation instructions
will
void the warranty
on the furnace
and any responsibility
on th
e
part
of
AIRXCEL,
INC.
-
SUBURBAN DIVISION
.
The furn
ace
was
in
spected before it left the
factory.
If
any parts
are found
to
be damaged
,
do not install the
furnace.
Immediately
contact th
e
transportation
company
and file a
claim.
FOR YOUR
SA FET
Y
WHAT TO DO IF YOU SMELL GAS:
•
Extinguish any open flame.
•
Evacuate all persons
from
the vehicle.
•
Shut off the gas supply
at
t
he gas container or
source.
•
Do not touch any electrical
switch,
or use any
phone or radio in the vehi cle.
•
Do not start the
vehicle's
engi ne
or
electric
generator.
•
Contact the nearest gas
s
upplier or qualified
service technician for repairs.
•
If you cannot reach a gas supplier
or
qualified
service technician, contact the nearest
fi
re
department.
Do not turn on the gas
s
upply until the gas
leak(s) has been repaired.
This book contains instructions covering the operation and
maintenance of your furnace.
INSTALLER: LEAVE THIS MANUAL WITH THE APPLIANCE.
CONSUMER: RETAIN THIS MANUAL FOR FUTURE REFERENCE.
Should you require further
informatio
n, contact
your
dealer or
nearest Suburban Service Center.
FOR YOUR
SAFETY
DO NOT STORE OR USE
GAS
OLINE OR OTHER
FLAMMABLE VAPORS AN
D
LIQUIDS IN THE
VICINITY OF THIS OR ANY OTHER APPLIANCE.
WARNING!
Improper
installation,
adjustment,
alteration
,
service or maintenance can cause property
damage,
personal
injury or loss of
life.
Refer to the installation instructions and/
or owners manual provided with this
appliance.
Installation
and service must be performed by a qualified
installer,
service
agency or the gas supplier.
WARNING!
Be sure the furnace and all ignition systems
are
"OFF"
during any type of refueling and while vehicle is in
motion or being towed
.
Part Number 204768
01-14-2014
INSTALL
ATION
INSTRUCTION
S
WARNING!
Installation of this appliance must be made
in
accordance
with the
written
instructions provided
in
this manual. No agent, representative or employee
of
Suburban or
other person has the authority to
change,
modify
or waive
any provision of the
instructions
contained in this
manual.
THESE FURNACES ARE DESIGNED TO BE INSTALLED IN SUCH A
MANNER THAT THEY CAN BE REMOVABLE FROM THE EXTERIOR OF THE
RECREATIONAL
VEHICLE.
IF UNIT IS TO BE INSTALLED VERTICALLY, YOU MUST USE KIT #520965
(INSTALLATION INSTRUCTIONS ARE ENCLOSED IN KIT)
.
CAUTION
:
If possible, do not install the furnace to where the vent can be
covered or obstructed when any door on the trailer is opened. If this is not
possible, then the travel of the door must be restricted in order to provide
a
6"
minimum clearance between the furnace vent and any door whenever
the door is opened.
NOTE:
The exhaust temperature of
this
furnace could discolor or wa rp
some
materia
ls.
You should
verify
that the material used on
the
coach
door,
panel.
or
cover will not discolor or wa rp from the exhaust temperature whenever
any
door,
panel, or
cover
is in
th
e
open
position.
CAUTION: Due to the differences in vinyl
siding,
this appliance should not be
installed on vinyl siding without first consulting with the manufacturer of the
siding or cutting the siding away from the area around the appliance vent.
CAUTION: In any
installation
in which the vent of this appliance can be
covered due to the construction of the RV or some special feature of the
RV such as slide
out,
pop-up
etc.
always insure that the appliance cannot
be operated by setting the thermostat to the positive
"
OFF"
position and
shutting off all electrical and gas supply to
t
he
appliance.
Never operate
furnace with vent covered
.
CAUTION
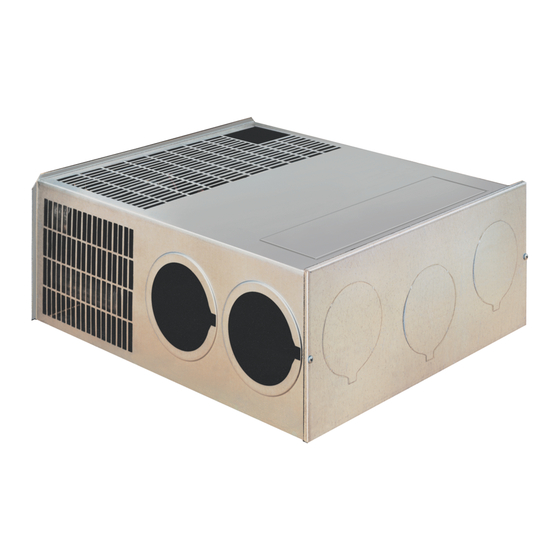
:
This furnace was shipped from the factory set up for the gas
connection to be made at the right rear of
t
he unit as illustrated in Figure
1. lfyou wish to make gas connection through the top
of cabinet,
you must
remove furnace from cabinet and turn gas inlet fitting 90
°
CLOCKWISE.
DO
NOT TURN FITTING
COUNTER-CLOCKWISE,
this will loosen fitting and
result in a gas
leak.
WARNING!
Hold manifold firm
ly
when turning elbow to prevent any force from being
inserted on
the valve and to prevent any leaks
from
developing.
Be sure to
check all
fittings
for leaks including the
inlet
and outlet on the va
lve
before reinsta lling furnace into
cabinet.
Correct all
leaks
immediately.
NOTE:
The
furnace
must be in
operation
to properly
check
for
leaks.
NOTE: These
furn
aces
mu st be installed and vented
as
described in th
is
manu al
so
that the
negative
pressu re
created
by the
air
circulating
(return
ai r)
fan cannot
affect
the
combustion air intake or
venting
of any other
appliance.
It is
imperative
that
the products
of
com
bu stion
be properly vented to the atmosphere
and
that
all
combustion air supplied
to burner
be drawn from the outside
atmosphere. (See
Installing
Vent Assembly.)
NOTE
: Do
not insta ll
the furnace with
the vent facing toward the forward end of
the
coach.
IMPORTANT: If
this
furn
ace is to
be
co
nnected
to
a common
duct
system
also
serving a
cooling
unit,
a manual
or
automatic damper
is
req uired
to prevent any
cold
co nditioned
air from
circu lating back into the fu
rn
ace. Cold air passi
ng over
the furnace combustion chamber during
the
operation of
the
cooling
unit
can resu
lt
in the form
ation
of condensation
inside the
furn ace combustion
chamber. This
condensatio
n
may promote
corrosion and
prematu re failure
of
the
combustion
chamber.
Advertisement


Need help?
Do you have a question about the SF-20Q and is the answer not in the manual?
Questions and answers