Advertisement
Quick Links
1
!
Release the bottom 2 adjuster levers and position the
The quick release action should be firm for both opening
carrier as illustrated with the bend at the centre of the
and closing. The tension may be set by releasing the
bottom support tube pointing downwards towards the floor.
handle and turning clockwise.
There are indicator marks on the ratchet adjusters. Using
Note: It is important that indicator marks on the ratchet
adjusters are in the same positions on both sides.
these as a guide, lift the bottom support tube counting 5
teeth spacing, then lock in position.
2
3
Lower strap assembly
Feed the strap through the lower set of cambuckles.
Select 2 x 95cm straps and assemble the chassis hooks
WARNING: ENSURE THAT THE STRAPS ARE INSERTED
as illustrated.
THROUGH THE CAMBUCKLES IN THE CORRECT DIRECTION.
Warning: Ensure that the straps are fully tightened on the
chassis hooks.
4
5
Side strap assembly
Feed the strap through the middle set of cambuckles.
Select 2 x 95cm straps and assemble panel hooks
WARNING: ENSURE THAT THE STRAPS ARE INSERTED
as illustrated.
THROUGH THE CAMBUCKLES IN THE CORRECT DIRECTION.
Note: Ensure that the straps are fully tightened on the
panel hooks.
6
Top edge fittings
Attachment of the upper
straps to the vehicle.
Top edge fittings
Open the tailgate, and from inside your vehicle thread the
Select 2 x 160cm straps and assemble dumbells
straps over the top edge leaving the dumbells hanging free.
as illustrated.
Carefully close the tailgate then gently pull the straps until
the dumbells sit firmly against the interior trim.
7
ABOVE
HORIZONTAL
Offer the carrier to the vehicle with the lower tube RESTING
The carrier main frame should be leaning towards your
on the upper area of the bumper. If necessary adjust the
vehicle with reasonable clearance, typically approx.
upper arm to sit against the tailgate of your vehicle or the
8cm (3 inches). This will reduce as the straps are tightened.
upper surface of the boot lid.
Ensure the cycle support arms point slightly upwards. Fully
tighten quick release adjusters.
8
Feed the strap through the top set of cambuckles.
WARNING: ENSURE THAT THE STRAPS ARE INSERTED
THROUGH THE CAMBUCKLES IN THE CORRECT DIRECTION.
9
10
Position the lower strap chassis hooks to an appropriate
Position the side panel hooks on the edges of the
location under the car for example; towing eye, steel
tailgate/boot. Tighten all straps alternately. Check that the
chassis section or bumper support.
carrier sits firmly in position and there is a minimum
Note: It is vital that you use a strong metal location to secure
5cm (2 inches) clearance between main carrier frame and
these chassis hooks. Ensure the webbing straps do not touch
your vehicle. To increase the clearance you may have
the vehicle exhaust.
to adjust the angles of the support tubes.
Tuck any excess strap into the plastic strap tidies.
11
12
45mm
minimum
Position your cycle(s) into the saddle area of the frame
IMPORTANT: Using the fitted RED webbing straps, secure the
locator. Pass the webbing strap over the frame of the cycle
first cycle to the carrier main frame. Failure to use these straps
will result in the cycles falling off the carrier.
and thread through the metal loop. Pull the strap back
tightly and press the hook and loop fastener to secure.
Note: there must be a minimum 45mm of overlap (See
Diagram). The straps supplied with this product are suitable
for cycle frames up to 40mm in diameter. For larger frames,
longer straps are available as an accessory. Please contact
your nearest Halfords store.
Stand back from your vehicle and check that the lights and
13
number plate are not obscured. To gain additional clear-
ance, the cycle support arm ratchet adjuster can be moved
to the upper holes on the carrier main frame. If however,
after making this adjustment the lights or
number plate are still obscured, to comply with road and
traffic regulations, a lighting board must be used.
When carrying a second or third cycle, feed the RED straps
around all cycles, and fully tighten.
Failure to use these
straps will result in the cycles falling off the carrier.
To reduce obstruction from the handle bars alternate the
direction of each cycle during loading.
14
The cycle frame locators can be adjusted to best suit the angle
IMPORTANT:
Re-tighten all cycle carrier-webbing straps after loading the cycle(s).
of ladies' and children's etc, cycle frames. A false cross bar
Do not open your boot/tailgate with the panel hooks in position.
is available, for the easy mounting of full suspension and
For ease of storage the cycle carrier may be folded flat by
low cross bar cycle frames.
loosening all six ratchet adjusters.
When re-assembling the carrier to your vehicle, it is important to fully
tighten the ratchet adjusters on the lower support tube first.
Advertisement

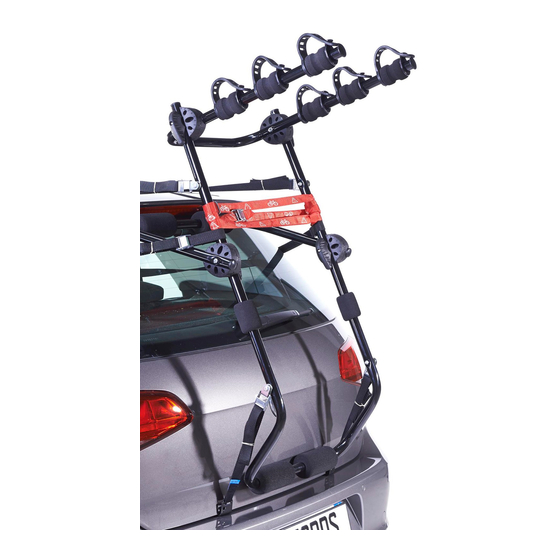
Summary of Contents for Halfords High 3
- Page 1 40mm in diameter. For larger frames, longer straps are available as an accessory. Please contact your nearest Halfords store. Stand back from your vehicle and check that the lights and number plate are not obscured. To gain additional clear- ance, the cycle support arm ratchet adjuster can be moved to the upper holes on the carrier main frame.
- Page 2 Kit Contents when the carrier is used on a booted saloon. cycles and the cycle carrier. Halfords foam pad cycle protectors are available. To ensure full compliance with the road NON-RECOMMENDED FITS...


Need help?
Do you have a question about the High 3 and is the answer not in the manual?
Questions and answers