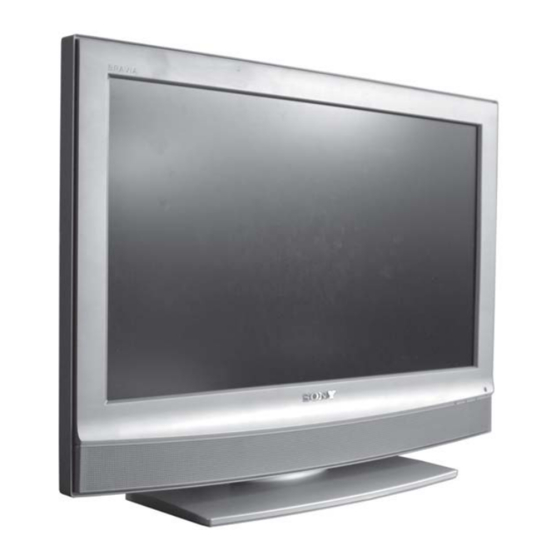
DUE TO LIVE CHASSIS, THE CHASSIS OF THIS RECEIVER IS PARTS LIST ARE CRITICAL FOR SAFE OPERATION. REPLACE DIRECTLY CONNECTED TO THE POWER LINE. THESE COMPONENTS WITH SONY PARTS WHOSE PART NUMBERS APPEAR AS SHOWN IN THIS MANUAL OR IN SUPPLEMENTS PUBLISHED BY SONY.
Due to the higher melting point of Lead Free Solder the soldering iron tip temperature needs to be set to 370 degrees centigrade. This requires soldering equipment capable of accurate temperature control coupled with a good heat recovery characteristics. For more information on the use of Lead Free Solder, please refer to http://www.sony-training.com - 3 -...
SE-1 RM-ED007 Sound Output LCD (Liquid Crystal Display) Panel KDL-26P2520/P2530 (26inches) Projected Picture Size KDL-32P2520/P2530 (32inches) Right and Left speaker 2 x 10W (RMS) KDL-40P2530 (40inches). Sub-woofer Input/Output Terminals [REAR] General Specifications Power Requirements 220 - 240V KDL-26P2520/P2530: Approx. 100W or less/1W or less Inputs for Audio and Video signals.
Page 5
SE-1 RM-ED007 Model Name (AEP) (UK) Item RGB Priority Sub Woofer Scart 1 Scart 2 Front in (4) Projector Norm B/G Norm I Norm D/K Norm AUS Norm L Norm SAT Norm M Teletext Nicam Stereo WARNING (UK Models only) The flexible mains lead is supplied connected to a B.S.
SE-1 RM-ED007 21 pin connector Pin No Signal Signal level Audio output B Standard level : 0.5V rms (right) Output impedence : Less than 1kohm* Audio input B Standard level : 0.5V rms (right) Output impedence : More than 10kohm* Audio output A Standard level : 0.5V rms (left)
SE-1 RM-ED007 SE-1 SELF DIAGNOSTIC SOFTWARE The identification of errors within the SE-1 chassis is triggered in one of two ways :- 1: Busy or 2: Device failure to respond to IIC. In the event of one of these situations arising the software will first try to release the bus if busy (Failure to do so will report with a continuous flashing LED) and then communicate with each device in turn to establish if a device is faulty.
The operating instructions mentioned here are partial abstracts from the Operating Instruction Manual. The page numbers of the Operating Instruction Manual remain as in the manual. 1: Checking the 2: Connecting an aerial/ 3: Bundling the cables 4: Preventing the TV accessories from toppling over Remote RM-ED007 (1)
Page 9
Press to select the language Watching TV 6: Auto-tuning the TV Overview of the TV displayed on the menu screens, then press buttons and indicators Watching TV After selecting the language and country/region, a Auto Start Up message confirming the TV start auto-tuning appears Language on the screen.
Using MENU Functions Checking the Digital Electronic Programme Guide (EPG) Navigating through menus “MENU” allows you to enjoy various convenient features of this TV. You can easily select channels or external In digital mode, press to display the inputs with the remote. Also, settings for your TV can be changed easily using “MENU”. Digital Electronic Programme Guide Press MENU to display the menu.
Picture Adjustment menu Sound Adjustment menu You can select the options listed below on the You can select the options listed below on the Picture Adjustment Sound Adjustment Picture menu. To select options in “Settings”, Sound menu. To select options in “Settings”, Sound Effect Picture Mode Custom...
Timer Sets the timer to turn on/off the TV. Features menu • Sleep Timer Sets a period of time after which the TV automatically switches itself into standby You can select the options listed below on the Features mode. Features menu. To select options in “Settings”, Screen When the Sleep Timer is activated, the (Timer) indicator on the TV (front)
“Software Download”: Enables the TV to automatically receive software updates, free through your existing aerial (when issued). Sony recommends that this option is S VHS/Hi8/DVC set to “On” at all times. If you do not want your software to be updated, set this option camcorder to “Off”.
Specifications CATV: S1–S20 Connecting to the TV (rear) HYPER: S21–S41 D/K: R1–R12, R21–R69 To connect Do this Display Unit F2–F10, B–Q, F21–F69 PC D Connect to the PC Power Requirements: UHF B21–B69 player sockets. It is recommended to use 220–240 V AC, 50 Hz Digital: VHF/UHF Digital...
Press 1 on the TV (top side) to switch it off, disconnect the mains lead, and inform your dealer or Noisy sound • See the “Picture noise” causes/remedies on page 27. Sony service centre of how the indicator flashes (duration and interval). When it is not flashing Channels Check the items in the tables below.
SE-1 RM-ED007 SECTION 3 CIRCUIT ADJUSTMENTS 3-1. Electrical Adjustments Service adjustments to this model can be performed using the supplied remote Commander RM-ED007. How to enter into the Service Mode Turn on the main power switch. Press the following sequence of buttons on the Remote Commander.
SE-1 RM-ED007 3-2. TEST MODE 2 Test Mode 2 is available by setting the TV for operation in Service Mode [ As shown on Page 21 ] , OSD ‘TT’ appears. The functions de- scribed below are available by selecting the two numbers. To release the ‘Test mode 2’, press 00, 10, 20 ... twice or switch the TV set into Stand-by mode.
13. M (Default value) is shown when AM sound is demodulated in MSP; A is shown when AFRIC demodulator is used (TT63). 14. S is shown when a SONY tuner is selected; P is shown when a PHILIPS tuner is selected (TT55).
4-1. BLOCK DIAGRAMS (1) TU1300 TUNER BLOCK TUNER ANALOG AGC SW TU AGC 12C SCL SW 12C SDA SW SW1201 ANALOG IF BLOCK AUDIO SWITCH IC2000 FILTER 4 CHANNEL SURFACE WAVE ANALOG +5VA MULTIPLEXER/ DEMULTIPLEXER IF ANALOG D1200 ANALOG IF RECTIFIER PC-R J2023...
4-1. BLOCK DIAGRAMS (4) (KDL-26/32P2520/30 ONLY) D6000 BRIDGE IC6000 PH6002 T6000 RECTIFIER SWITCHING CONTROL PHOTOCOUPLER V SENSE CN6003 PS6002 SIGNAL VCC D6011 3.15A DIODE VG(H) Q6003 SIGNAL VCC IC6002 TIMER VG(L) SIGNAL VCC SHUNT REGULATOR TO BDTR-2 BOARD L6001 Q6004 L IN CN6500 INDUCTOR...
~ A1/A1P Printed Wiring Board Conductor Side A ~ ~ A1/A1P Printed Wiring Board Conductor Side B ~ ~ A1/A1P Board Semiconductor Voltage Table ~ ~ A1/A1P Board IC Voltage Table ~ (e)(s) (b)(g) (c)(d) Ref No Pin No Volts (V) Ref No Pin No Volts (V)
Page 35
BDTR-2.-SE-1(KDL-26/32P2520/KDL-26/32/40P2530) 3.3V_MAIN FB5680 C5680 C5682 NAND FLASH C5683 C5684 BDTR-2 2/10 IC5680 K9F2808U0C-PCB0T 16 BIT NAND FLASH/MEMORY R5686 R5691 +2V5D_DDR PLACE THESE CAPACITORS CLOSE TO IC PINS. NOTE PIN 6 IS NOT GND ON SAMSUNG IO/8 NAND FLASH, ONLY TOSHIBA RDATA[7] C5695 C5698...
~ BDTR-2 Printed Wiring Board Conductor Side A ~ ~ BDTR-2 Board IC Voltage Table ~ Ref No Pin No Volts (V) Ref No Pin No Volts (V) Ref No Pin No Volts (V) Ref No Pin No Volts (V) Ref No Pin No Volts (V)
Page 45
~ BDTR-2 Printed Wiring Board Conductor Side B ~ - 45 -...
Page 48
~ G1 Printed Wiring Board Conductor Side A ~ ~ G1 Board Semiconductor Location Table Side A ~ DIODE D6014 D - 5 IC6201 F - 7 D6000 K - 6 D6015 D - 7 IC6000 I - 3 IC6300 C - 4 D6008 I - 4...
Page 49
~ G1 Printed Wiring Board Conductor Side B ~ ~ G1 Board Semiconductor Location Table Side B ~ DIODE D6007 G - 4 D6012 L - 5 D6018 M - 7 D6203 H - 6 IC6001 I - 3 TRANSISTOR Q6005 N - 7 D6000...
~ G2 Printed Wiring Board Conductor Side A ~ ~ G2 Board Semiconductor Location Table Side A ~ DIODE D6206 I - 8 D6003 B - 8 D6207 I - 9 D6004 H - 8 D6012 D - 4 IC6001 F - 5 D6028 H - 4...
Page 53
~ G2 Printed WiringBoard Conductor Side B ~ ~ G2 Board Semiconductor Location Table Side B ~ DIODE D6200 F - 7 D6000 L - 8 D6203 F - 8 D6001 M - 1 D6204 F - 8 D6002 L - 8 D6206 E - 8 D6005...
~ H1/H1P Printed Wiring Board Conductor Side A ~ ~ H1/H1P Printed Wiring Board Conductor Side B ~ ~ H2/H2P Printed Wiring Board Conductor Side A ~ ~ H2/H2P Printed Wiring Board Conductor Side B ~ ~ H3/H3P Printed Wiring Board Conductor Side A ~ ~ H3/H3P Printed Wiring Board Conductor Side B ~ - 55 -...
SECTION 5 EXPLODED VIEWS NOTE : Items with no part number and no description are not Items marked “*” are not stocked since they are seldom required for stocked because they are seldom required for routine service. routine service. Some delay should The construction parts of an assembled part are indicated be anticipated when ordering these with a collation number in the remarks column. items. 5-1. CHASSIS Note : The components identified by mark contain confidential information. Strictly follow the instructions when ever the components are repaired and/or replaced. REF.NO.
Page 59
5-1. CHASSIS Cont. REF.NO. PART.NO DESCRIPTION REMARK REF.NO. PART.NO DESCRIPTION REMARK 1-802-268-11 LCD PANEL (26 WXGA TFT) (26P2520/30UK/AEP) 1-802-237-21 LCD PANEL (32 WXGA TFT) (32P2520/30UK/AEP) 1-802-386-21 LCD PANEL (40 WXGA TFT) (40P2530UK/AEP) *A-1247-113-A H3 BOARD, COMPLETE (26/32P2520/30UK/AEP) *A-1247-117-A H3P BOARD, COMPLETE (40P2530UK/AEP) 2-674-189-02 GUIDE, LIGHT NOT SERVICEABLE PART NOT SERVICEABLE PART NOT SERVICEABLE PART NOT SERVICEABLE PART - 59 -...