
Related Manuals for peerless-AV peerAir HDS-WHDI100T

Summary of Contents for peerless-AV peerAir HDS-WHDI100T
- Page 1 User Manual and Installation Guide W I R E L E S S H D MULTIMEDIA TRANSMIT TER ® Models: HDS-WHDI100T ISSUED: 01-09-13 SHEET #: 180-9045-1...
-
Page 3: Table Of Contents
Pairing The Transmitter To An Existing Wireless HD Multimedia Kit ............11 Alternate Pairing Option ..........................13 AV Device Setup ............................15 IR Flasher Setup ............................15 Wall Mounting the HDS-WHDI100T (Optional) ....................16 Operation .................................17 Powering up the Multiple Transmitter System ....................17 Indicator Lights Decoded ..........................17 Checking IR Flasher Frequency ........................18... -
Page 4: Safety Precautions
Safety Precautions WARNING! RISK OF ELECTRICAL SHOCK DO NOT OPEN WARNING: TO REDUCE THE RISK OF ELECTRICAL SHOCK DO NOT REMOVE THE COVER. NO USER-SERVICEABLE PARTS ARE INSIDE. REFER SERVICING TO QUALIFIED PERSONNEL • Power to the units must be switched off before any work is undertaken, such as any AV device connection or TV connection. -
Page 5: Important Information
Important Information • Never use this product in an aircraft or a medical facility as it can cause interference or an undesirable effect. • The use of this product in the following locations may result in abnormal video and audio output (noise, blocked image...etc,). -
Page 6: Introduction
Package Contents Ensure that the following items are present in the package. If any items are missing or damaged, please call Peerless-AV Customer Care at 1-800-865-2112. (available 7:00am - 7:00pm (CST) Monday - Friday). Transmitter DC Power Adapter... -
Page 7: Product Overview
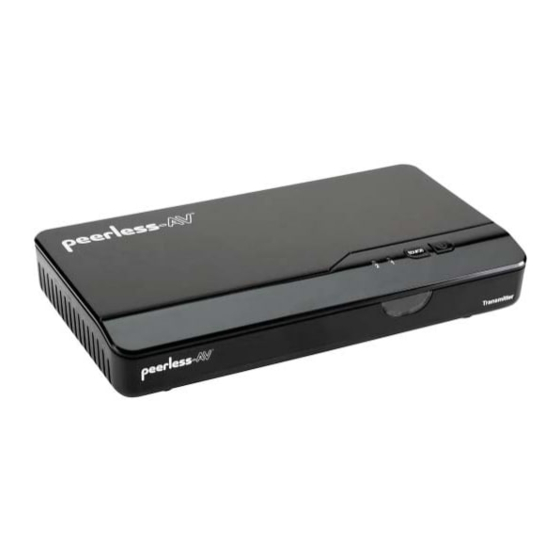
Product Overview Transmitter Transmitter Top 1. POWER Button • Press to turn the Transmitter ON/OFF. The indicator light in the power button will be illuminated blue when the power is on, glows red in standby mode, and glows purple in pairing mode. 2. - Page 8 Transmitter Back DC 5V HDMI 1 HDMI 2 HDMI OUT IR OUT SERVICE 1. DC 5V • DC power input port. 2. HDMI 1 • HDMI 1 input port. 3. HDMI 2 • HDMI 2 input port. 4. HDMI OUT •...
-
Page 9: Remote Control
Remote Control 1. POWER Button • Turns the Transmitter and Receiver power ON/OFF. 2. INFO Button • Press to display OSD (On Screen Display) for system related information on HDTV connected to the Receiver. 3. IR Button • Press to change the IR Flasher frequency to meet the AV device’s requirement. 4. - Page 10 Installing the Remote Control Batteries Remove the battery compartment cover. Place two AAA batteries (included) into the remote control as shown. Replace the battery compartment cover. Battery Compartment Cover 10 of 34 ISSUED: 01-09-13 SHEET #: 180-9045-1...
-
Page 11: Installation
Installation Pairing The Transmitter To An Existing Wireless HD Multimedia Kit Note: The system will allow up to 4 Transmitters to be paired to 1 Receiver. Note: If the following steps are not followed in the order listed, the Transmitter will not enter pairing mode. Step 1 A. - Page 12 C. Select SETUP using the up or down buttons on the remote control and Press OK to display the SETUP screen. SETUP: Select Transmi er Number: Add New Transmi er WHD200-1 Remove Transmi er WHD200-2 Modify Transmi er Name SETUP Return D.
-
Page 13: Alternate Pairing Option
Alternate Pairing Option You can use this alternate method as a way to pair the Transmitter to the Receiver without using the Remote Control. Note: If the following steps are not followed in the order listed, the unit will not enter pairing mode. Step 1 Follow Step 1 under Pairing and Installing the Transmitter to Already Existing Wireless HD Multimedia Kit. - Page 14 When the Receiver is in pairing mode the OSD will show: Searching…. When both units are in pairing mode, and have found each other the OSD will show: Adding WHD200 Note: When both the Transmitter and Receiver are in pairing mode they will fi nd each other and pair automatically.
-
Page 15: Av Device Setup
AV Device Setup Step 1 A. Connect HDMI cable (not included) from AV device's HDMI out port to Transmitter's HDMI 1 port. Repeat for HDMI 2 port if a second AV device is to be connected. B. (Optional) If connecting to HDTV using wired connection, plug HDMI cable (not included) from Transmitter's HDMI OUT port to HDTV's HDMI in port. -
Page 16: Wall Mounting The Hds-Whdi100T (Optional)
Wall Mounting the HDS-WHDI100T (Optional) The Transmitter can be mounted to a wall using the keyhole mounting slots located on the back of the unit. Note: Wall mounting the Transmitter will reduce IR functionality. Step 1 Transfer the dimensions shown below to the desired mounting location on the wall and mark with a pencil. -
Page 17: Operation
Operation Powering up the Multiple Transmitter System When powering up a multi-Transmitter system, the Transmitter that will turn ON when using the remote pointing at the Receiver will be the Transmitter that the Receiver is set too. When the source Transmitter is changed on the Receiver unit, the new Transmitter will turn on automatically. -
Page 18: Checking Ir Flasher Frequency
Checking IR Flasher Frequency Step 1 Using the remote control for your AV device, point the remote control at the Receiver and press the Power button. If the power on the AV device turns ON/OFF, the remote frequency is set for the AV device. If the power on the AV device does not turn ON/OFF, the remote frequency needs to be changed. - Page 19 During warm-up, the Power indicator light will blink blue until the signal link between the Transmitter and Receiver is established, between 15 - 20 seconds. Step 3 Check that your output device is turned on and set to the proper HDMI input. Y/Pb/Pr Video HDMI...
-
Page 20: Toggling Between Paired Transmitters
Toggling Between Paired Transmitters Step 1 Point the remote control at the Receiver and press the TRANSMITTER NO. button. The OSD (On Screen Display) will appear showing the number of Transmitters paired to the Receiver. Select Transmi er Number: WHD200-1 WHD200-2 SETUP Step 2... - Page 21 Step 3 Use the up or down buttons on the remote to select Modify Transmitter Name from the OSD options then press OK. SETUP: Add New Transmi er Remove Transmi er Modify Transmi er Name Return Step 4 Using the up or down buttons on the remote select the desired Transmitter to rename and press OK. Step 5 Use the left or right buttons on the remote to move the cursor.
-
Page 22: Removing A Transmitter That Has Been Paired To The Receiver
Removing a Transmitter that Has Been Paired to the Receiver Step 1 Press the TRANSMITTER NO. button on the remote control. The OSD (On Screen Display) will appear showing the number of Transmitters paired to the Receiver. Select SETUP using the up or down buttons on the remote control and Press OK to display the SETUP screen. -
Page 23: Troubleshooting
Troubleshooting Problem Solution The power indicator light • Check the power connections on the Transmitter and Receiver to ensure they are properly inserted into a functioning power does not light up. outlet. • Verify that the proper cables have been selected and installed between the Transmitter input and your AV device output. •... -
Page 24: Appendix
Appendix Supported Resolution If the SOURCE indicator light continues to blink blue (slower than “no signal” mode); OSD display: and there is no video displayed or the video quality is poor, it may indicate that the video frame rate from your e from you AV device is not supported. -
Page 25: Audio Bit Rate Support
2-channel PCM: 16 - 24 bits audio sampling with 32 - 96KHz sampling rate as below: 2 Channel PCM 32KHz 44.1KHz 48KHz 96KHz 16 bits 24 bits Product Specifi cations HDS-WHDI100T Supported Video Resolutions HDMI Input 1080p, 1080i, 720p, 480p Supported Audio Formats... - Page 26 Federal Communication Commission Interference Statement This device complies with Part 15 of the FCC Rules. Operation is subject to the following two conditions: (1) This device may not cause harmful interference, and (2) this device must accept any interference received, including interference that may cause undesired operation.
-
Page 27: Declaration Of Conformity
Declaration of Conformity This device complies with Part 15 of the FCC Rules. Operation is subject to the following two conditions: 1. This device may not cause harmful interference, and 2. This device must accept any interference received, including interference that may cause undesired operation. -
Page 28: Industry Canada Statement
Industry Canada Statement This device complies with RSS-210 of the Industry Canada Rules. Operation is subject to the following two conditions: (1) This device may not cause harmful interference, and (2) this device must accept any interference received, including interference that may cause undesired operation. Ce dispositif est conforme à... - Page 29 Radiation Exposure Statement: The product comply with the Canada portable RF / IC radiation exposure limit set forth for an uncontrolled environment and transmitter are safe for intended operation as described in this manual. The further RF exposure reduction can be achieved if the product can be kept as far as possible from the user body or set the device to lower output power if such function is available.
-
Page 30: Limited Warranty
Peerless-AV® products will be free from defects in material and workmanship, under normal use, for the periods listed below, from the date of purchase by the original end-user. At its option, Peerless-AV® will repair or replace with new or refurbished products or parts, or refund the purchase price of, any Peerless-AV™ product which fails to conform with this warranty. -
Page 31: Wireless Hd Multimedia System Offering
Wireless HD Multimedia System Offering Model Description HDS-WHDI100 Wireless HD Multimedia System HDS-WHDI100T Wireless HD Multimedia Transmitter HDS-ASR1 Shelf for use with HDS-WHDI100 Receiver HDS-PSR1 Projector Support for use with HDS-WHDI100 Receiver EC-HD015F 1.5ft. (.5m) High speed HDMI Cable with... -
Page 32: Contact Information
Contact Information Customer Care Need help with set up? Call Peerless-AV Customer Care 1-800-865-2112 (available 7:00am- 7:00pm CST, Monday - Friday), or email us at info@peerless-av.com. Peerless -AV 2300 White Oak Circle Aurora, IL 60502 USA www.peerless-av.com peerair.peerless-av.com 32 of 34... - Page 33 Notes...
- Page 34 Notes...
- Page 35 Notes...
- Page 36 2300 White Oak Circle, Aurora, IL 60502 USA 1-800-865-2112 www.peerless-av.com peerair.peerless-av.com ©2013 Peerless-AV. All rights reserved. Peerless-AV is a trademark of Peerless Industries, Inc. Other parties’ marks are the property of their respective owners.
Need help?
Do you have a question about the peerAir HDS-WHDI100T and is the answer not in the manual?
Questions and answers