
Subscribe to Our Youtube Channel
Related Manuals for Buderus Logano G125 BE US/CA


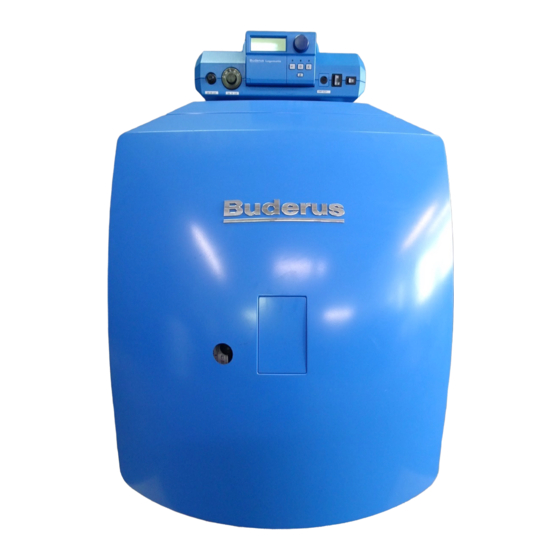
Summary of Contents for Buderus Logano G125 BE US/CA
- Page 1 Installation and Service Low Emissions and High Efficiency Oil Instructions Boiler Logano G125 BE US/CA For trained and certified installers Read carefully prior to installation, maintenance and service.
- Page 1 Installation and Service Low Emissions and High Efficiency Oil Instructions Boiler Logano G125 BE US/CA For trained and certified installers Read carefully prior to installation, maintenance and service.
-
Page 2: Table Of Contents
Table of Contents Safety Considerations and Symbol Descriptions ....4 1.1 Regarding this Manual ........4 1.2 Guideline of Notices . -
Page 2: Table Of Contents
Table of Contents Safety Considerations and Symbol Descriptions ....4 1.1 Regarding this Manual ........4 1.2 Guideline of Notices . - Page 3 Table of Contents Placing the Boiler in Operation ....... . . 39 8.1 Setting the Initial System Pressure .
- Page 3 Table of Contents Placing the Boiler in Operation ....... . . 39 8.1 Setting the Initial System Pressure .
-
Page 4: Safety Considerations And Symbol Descriptions
NOTICE Use only original Buderus spare parts. Guideline of Notices Buderus can not be held liable for dam- age caused by non-Buderus parts. Two levels of danger are identified by the following warning labels: NOTICE DANGER... -
Page 4: Safety Considerations And Symbol Descriptions
NOTICE Use only original Buderus spare parts. Guideline of Notices Buderus can not be held liable for dam- age caused by non-Buderus parts. Two levels of danger are identified by the following warning labels: NOTICE DANGER... -
Page 5: Installation Guidelines
In addition, the following components are useful: CAUTION! Do not work on electrical components unless you have the required qualifica- – Boiler cart with rope or Buderus boiler cart. tion and applicable certification. – Wood blocking. Do not work on electrical components –... -
Page 6: Product Description
Product Description Product Description Product Applications The boiler is designated for use as a hot water heating boiler for space heating applications and to heat domes- tic hot water by means of an indirect fired tank for single and multi-family homes and small commercial heating applications. -
Page 7: Technical Information
Technical Information Technical Information Technical Data less Burner 25 1/2" 23 1/2" 12 1/4" 14 1/2" Fig. 2 Dimensions and connections (measurements in inches) Connections (For Measurements see following tables): = Boiler supply = Connection (plugged) = Boiler return = Connection (plugged) = Boiler drain (Connection for drain valve) VSL = Connection (plugged) Boiler Model... -
Page 8: Operating Conditions
Technical Information Boiler Model G125/21-BE G125/28-BE G125/34-BE Total boiler length (L) 34 5/8” 39 3/8” 44” Boiler block length (LK) 21 1/8” 25 3/4” 30 1/2” Combustion chanber length 16” 20 1/2” 25 1/4” Firebox diameter 10 5/8” Burner door thickness 3 1/2”... -
Page 8: Operating Conditions
Technical Information Boiler Model G125/21-BE G125/28-BE G125/34-BE Total boiler length (L) 34 5/8” 39 3/8” 44” Boiler block length (LK) 21 1/8” 25 3/4” 30 1/2” Combustion chanber length 16” 20 1/2” 25 1/4” Firebox diameter 10 5/8” Burner door thickness 3 1/2”... -
Page 9: General Operating Requirements
Technical Information 3.2.1 General Operating Requirements Operating Conditions Minimum Boiler tempera- Boiler Shutdown Boiler Shutdown/ Minimum return temperature ture Mixed temperature Systems controlled by R2107 controls for outdoor reset operation No requirements Automatic with Logamatic No requirement, yet beneficial No requirement R2107 with low temperature boiler with 130/113 °F system design... -
Page 9: General Operating Requirements
Technical Information 3.2.1 General Operating Requirements Operating Conditions Minimum Boiler tempera- Boiler Shutdown Boiler Shutdown/ Minimum return temperature ture Mixed temperature Systems controlled by R2107 controls for outdoor reset operation No requirements Automatic with Logamatic No requirement, yet beneficial No requirement R2107 with low temperature boiler with 130/113 °F system design... - Page 10 If not possible, provide fresh outside air for combustion. Please observe the following: – Product information of Buderus catalog. – Also observe guidelines in K3 chapter of Buderus catalog. Fans, removing air from boiler – Avoid forced air removal by mechanical means during boiler operation such as: room –...
- Page 10 If not possible, provide fresh outside air for combustion. Please observe the following: – Product information of Buderus catalog. – Also observe guidelines in K3 chapter of Buderus catalog. Fans, removing air from boiler – Avoid forced air removal by mechanical means during boiler operation such as: room –...
- Page 11 Technical Information 3.2.5 Requirements for Power Supply Operating Conditions Comments – Detailed Information Main power supply 120 V Provide proper grounding for equipment and personal protection. High amp protection 10 A Frequency 60 Hz Protection – Group all equipment per local code Table 7 Power supply 3.2.6 Conditions Pertaining to Piping and Water Quality Operating Conditions...
- Page 11 Technical Information 3.2.5 Requirements for Power Supply Operating Conditions Comments – Detailed Information Main power supply 120 V Provide proper grounding for equipment and personal protection. High amp protection 10 A Frequency 60 Hz Protection – Group all equipment per local code Table 7 Power supply 3.2.6 Conditions Pertaining to Piping and Water Quality Operating Conditions...
-
Page 12: Packaging And Components
Packaging Boiler block Pallet Boiler jacket, installed on boiler Burner door and burner door cover installed on boiler block Buderus oil burner mounted on cus- tomized burner door B-Kit-Components: Plastic pack- aging with boil- Supply manifold (1¼" NPT) 30 psi relief valve (¾") boiler drain... -
Page 13: Moving The Boiler
Moving the Boiler Moving the Boiler This chapter describes how to move the boiler. SYSTEM DAMAGE due to bumps. CAUTION! Protect the boiler from bumps and rough treatment. NOTICE Protect the boiler from connections from damage and dirt, when the boiler is not installed immediately. -
Page 14: Lifting And Carrying The Boiler
By tipping the cart you can install the boil- er feet ( Chapter 6.3, page 17). Fig. 6 Moving the boiler with a Buderus cart You can order a Buderus cart from your local wholesaler. Logano G125 BE - Specifications subject to change without notice. -
Page 14: Lifting And Carrying The Boiler
By tipping the cart you can install the boil- er feet ( Chapter 6.3, page 17). Fig. 6 Moving the boiler with a Buderus cart You can order a Buderus cart from your local wholesaler. Logano G125 BE - Specifications subject to change without notice. -
Page 15: Placing The Boiler
Placing the Boiler Placing the Boiler This chapter discusses how to place the boiler in the boiler room. SYSTEM DAMAGE due to freezing temperatures CAUTION! Place the boiler in a frost free room. Clearances Position the boiler while observing the clearances in Fig. -
Page 15: Placing The Boiler
Placing the Boiler Placing the Boiler This chapter discusses how to place the boiler in the boiler room. SYSTEM DAMAGE due to freezing temperatures CAUTION! Place the boiler in a frost free room. Clearances Position the boiler while observing the clearances in Fig. -
Page 16: Reversing The Burner Door Swing
Placing the Boiler Reversing the Burner Door Swing The burner door hinges are factory installed on the right handside the burner door swings to the right. You can adjust the hinges so that the burner door swings to the left in the field. Note: the front panel must first be removed. -
Page 17: Installation Of Boiler Feet (Components Of B-Kit)
Chapter 5.1, page 13). NOTICE When installing a G125 BE boiler on top of a horizontal Buderus DHW indirect tank, do not use the boiler feet on the boil- er, but rather use the feet to level the tank. Tip the boiler slightly using the boiler cart Chapter 5.3, page 14) or put a piece of wood un-... -
Page 18: Boiler Installation
Boiler Installation Boiler Installation Installation of Venting Systems This chapter describes the installation of the venting system and the combustion air supply system for the G125 BE boiler. Following venting options are available: Venting system Comment Draft Combustion air Chapter Page 19 Masonry chimney (no liner) Barometric... -
Page 19: Vertical Venting Systems
Boiler Installation NOTICE Due to tight construction of modern homes, Buderus recommends drawing combustion air from outdoors. The boiler is factory prepared for connecting 4" rigid pipe ducted directly to the increaser at the rear of the boiler. For further directions Chapter 7.2, page 28. -
Page 19: Vertical Venting Systems
Boiler Installation NOTICE Due to tight construction of modern homes, Buderus recommends drawing combustion air from outdoors. The boiler is factory prepared for connecting 4" rigid pipe ducted directly to the increaser at the rear of the boiler. For further directions Chapter 7.2, page 28. - Page 20 Boiler Installation 7.1.1.2 Chimney with 5" Liner Venting system: Chimney with 5" Liner Comment Draft Combus- Max. Vent length tion air Barometric Negative Outside air 60 ft. damper required or room air Install liner according to manufacturer’s instructions. Follow all applicable local and national codes and regu- lations.
- Page 20 Boiler Installation 7.1.1.2 Chimney with 5" Liner Venting system: Chimney with 5" Liner Comment Draft Combus- Max. Vent length tion air Barometric Negative Outside air 60 ft. damper required or room air Install liner according to manufacturer’s instructions. Follow all applicable local and national codes and regu- lations.
- Page 21 Boiler Installation 7.1.1.3 Vertical Vent Venting system: 5" Vertical Vent Comment Draft Combus- Max. Vent length tion air Barometric Negative Outside air 60 ft. damper required or room air Extend the vertical vent pipe sufficiently far above the roof per NFPA 31. Follow all applicable local and nation- al codes and regulations.
- Page 21 Boiler Installation 7.1.1.3 Vertical Vent Venting system: 5" Vertical Vent Comment Draft Combus- Max. Vent length tion air Barometric Negative Outside air 60 ft. damper required or room air Extend the vertical vent pipe sufficiently far above the roof per NFPA 31. Follow all applicable local and nation- al codes and regulations.
-
Page 22: Horizontal Venting
10 ft. The following two direct vent terminations are approved with the G125 BE, and are available for purchase from your Buderus supplier. Both exhaust terminations are approved for use with two different exhaust vent pipe options. -
Page 22: Horizontal Venting
10 ft. The following two direct vent terminations are approved with the G125 BE, and are available for purchase from your Buderus supplier. Both exhaust terminations are approved for use with two different exhaust vent pipe options. - Page 23 Boiler Installation 7.1.2.1 Location of Exhaust Wall Termination 1,5' Boiler exhaust Boiler exhaust Gravity air inlet Forced air inlet Exhaust terminal at least 1 ft. above grade must be at least 3 ft. above any forced air inlet within 10 ft. Fig.
- Page 23 Boiler Installation 7.1.2.1 Location of Exhaust Wall Termination 1,5' Boiler exhaust Boiler exhaust Gravity air inlet Forced air inlet Exhaust terminal at least 1 ft. above grade must be at least 3 ft. above any forced air inlet within 10 ft. Fig.
- Page 24 Boiler Installation 7.1.2.2 Installation of Aerocowl exhaust termination (Part No. AT-4) Follow guidelines in section 7.1.2.1 regarding the rel- ative position of the exhaust and terminal. Follow manufacturer’s installation guidelines of the AT-4. This system consists of a 4" air intake hood, a 5" x 4" re- ducer and a 26½"...
- Page 24 Boiler Installation 7.1.2.2 Installation of Aerocowl exhaust termination (Part No. AT-4) Follow guidelines in section 7.1.2.1 regarding the rel- ative position of the exhaust and terminal. Follow manufacturer’s installation guidelines of the AT-4. This system consists of a 4" air intake hood, a 5" x 4" re- ducer and a 26½"...
- Page 25 Boiler Installation 7.1.2.4 Sealing of the Vent Pipe DANGER TO LIFE DANGER OF FIRE from toxic flue gases. from combustible material or liquid. CAUTION! WARNING! Establish a safe clearance between The discharge side of the direct vent com- the vent termination and the combusti- bustion system operates under positive ble material per NFPA 31.
- Page 25 Boiler Installation 7.1.2.4 Sealing of the Vent Pipe DANGER TO LIFE DANGER OF FIRE from toxic flue gases. from combustible material or liquid. CAUTION! WARNING! Establish a safe clearance between The discharge side of the direct vent com- the vent termination and the combusti- bustion system operates under positive ble material per NFPA 31.
- Page 26 Boiler Installation 7.1.2.6 Installation of Insulated Flexible Oil Vent Apply a ¼" wide bead of high temperature silicone all around the boiler vent connection 1" from the end. Install 5" to 4" reducer on boiler vent connection. Se- cure properly with a clamp. Carefully measure the required length of vent pipe.
- Page 26 Boiler Installation 7.1.2.6 Installation of Insulated Flexible Oil Vent Apply a ¼" wide bead of high temperature silicone all around the boiler vent connection 1" from the end. Install 5" to 4" reducer on boiler vent connection. Se- cure properly with a clamp. Carefully measure the required length of vent pipe.
- Page 27 Boiler Installation 7.1.2.7 Installation of Galvanized Vent Pipe Apply a ¼" wide bead of high temperature silicone HEALTH DANGER (500°F rated silicone, G.E. 106 or equivalent) all When using galvanized vent pipe a around the boiler vent connection (breech) 1" from proper protection (e.g.
- Page 27 Boiler Installation 7.1.2.7 Installation of Galvanized Vent Pipe Apply a ¼" wide bead of high temperature silicone HEALTH DANGER (500°F rated silicone, G.E. 106 or equivalent) all When using galvanized vent pipe a around the boiler vent connection (breech) 1" from proper protection (e.g.
-
Page 28: Installation Of Combustion Air Supply System
Buderus strongly recommends using fresh air ducted directly from the out- The boiler can not be placed in opera- side to the boiler. -
Page 28: Installation Of Combustion Air Supply System
Buderus strongly recommends using fresh air ducted directly from the out- The boiler can not be placed in opera- side to the boiler. - Page 29 Boiler Installation 7.2.1 All air drawn from inside the building The G125 BE boiler has been approved for operation drawing all combustion air from the room, provided the installation meets the requirements of NFPA 31, and the boiler is NOT vented horizontally. 7.2.2 All air drawn from outdoors The boiler has been approved for operation drawing all combustion air from the outside, provided the combus-...
- Page 29 Boiler Installation 7.2.1 All air drawn from inside the building The G125 BE boiler has been approved for operation drawing all combustion air from the room, provided the installation meets the requirements of NFPA 31, and the boiler is NOT vented horizontally. 7.2.2 All air drawn from outdoors The boiler has been approved for operation drawing all combustion air from the outside, provided the combus-...
- Page 30 Boiler Installation 7.2.3 Guidelines for the location of the air intake terminal In addition to the minimum clearances of terminations Chapter „7.1.2.1 Location of Exhaust Wall Termina- tion“, page 23), observe the following rules: – Both the intake and exhaust terminations must be lo- cated on the same outside wall in order to balance wind pressure effects.
- Page 30 Boiler Installation 7.2.3 Guidelines for the location of the air intake terminal In addition to the minimum clearances of terminations Chapter „7.1.2.1 Location of Exhaust Wall Termina- tion“, page 23), observe the following rules: – Both the intake and exhaust terminations must be lo- cated on the same outside wall in order to balance wind pressure effects.
-
Page 31: Installation Of Water Connections
Boiler Installation Installation of Water Connections SYSTEM DAMAGE due to leaking connections. CAUTION! Install the piping connections to the boiler without having undue stress on the near boiler piping. 7.3.1 B-Kit Installation The relief valve and pressure/temperature gauge are in- stalled into the supply manifold as described below: Use the 1-1/4"... -
Page 32: Installation Of Boiler Drain (B-Kit Component)
Boiler Installation 7.3.2 Installation of Boiler Drain (B-Kit Component) Install the ¾" boiler drain (B-kit component) into the EL tapping. NOTICE Install a fill connection in the supply piping to the boiler. Fig. 24 Boiler Drain installation 7.3.3 Installation of System Components Use the adjacent diagram as an aid during the installa- tion of near boiler components. -
Page 33: Filling And Checking For Water Leaks
Boiler Installation Filling and Checking for Water Leaks The boiler must be tested hydrostatically for leaks. Check the entire system for leaks prior to placing the system in operation to prevent leaks during operation. SYSTEM DAMAGE Be careful not to expose the system to ex- cessive test pressures during the hydro- CAUTION! static test as it can damage pressure,... -
Page 34: Installation Of Oil Line
Boiler Installation HEALTH DANGER due to contamination of drinking water. CAUTION! Please observe local and state require- ments regarding avoidance of contami- nation of drinking water (e.g. due to water from closed loop heating sys- tems). Open the automatic air vent to allow air to escape. Slowly fill the heating system. -
Page 35: Electrical Connections
Observe all installation instructions. 7.6.1 Installation of Aquasmart An Aquasmart controls the boiler water supply tempera- ture when not using a Buderus Logamatic control. If a Beckett AquaSmart is being installed the factory-fit- ted immersion well must be replaced by the immersion well supplied with the control. -
Page 36: Control System Installation
Boiler Installation 7.6.2 Control System Installation To remove rear top cover first unscrew two rear sheet metal screws. Carefully route the burner cable on the outside of the insulation from the front of the boiler to the controls location at the top of the boiler. Fig. -
Page 36: Control System Installation
Boiler Installation 7.6.2 Control System Installation To remove rear top cover first unscrew two rear sheet metal screws. Carefully route the burner cable on the outside of the insulation from the front of the boiler to the controls location at the top of the boiler. Fig. - Page 37 Boiler Installation 7.6.3 Installation of Temperature Sensor and Burner Cables NOTICE When installing a Logamatic control, you must replace the installed brass well with the chrome well supplied with the Logam- atic control. Remove factory installed sensor well. Apply sealant to Logamatic well and screw into tap- ping.
- Page 37 Boiler Installation 7.6.3 Installation of Temperature Sensor and Burner Cables NOTICE When installing a Logamatic control, you must replace the installed brass well with the chrome well supplied with the Logam- atic control. Remove factory installed sensor well. Apply sealant to Logamatic well and screw into tap- ping.
-
Page 38: Strain Relief Installation
Boiler Installation 7.6.4 Electrical Connections Install a power supply point near the boiler in accor- dance with local and state code. DANGER OF FIRE Electrical wiring can be damaged by hot boiler parts. WARNUNG! Make sure that all tubing and wiring components are all placed on top of the boiler insulation. -
Page 39: Placing The Boiler In Operation
Placing the Boiler in Operation Placing the Boiler in Operation This chapter describes the initial start-up procedure for the G125 BE boiler irrespective of the employed control system. Please fill out the start-up protocol during this pro- cess ( Chapter 8.11, page 46). Further information regarding boiler room lay-out and clearances, combustion air requirements and venting system as well as boiler operational requirements, refer-... -
Page 40: Checking The Relief Valve
Placing the Boiler in Operation HEALTH DANGER due to contamination of drinking water. CAUTION! Please observe local and state re- quirements regarding avoidance of contamination of drinking water (e.g. due water from closed loop heating systems). Vent the system during the initial fill. Checking the Relief Valve Make sure nobody is near the discharge of the relief valve. -
Page 41: Check Position Of Flue Baffle Plates (Outside Air Operation)
Placing the Boiler in Operation Check Position of Flue baffle Plates (Outside Air Operation) NOTICE In case of outside air operation, you must check the position of 8 flue baffles. The check is identical as described in Chapter 8.3. In addition, make sure to fully close the burner door and tighten the burner door bolts. -
Page 42: Adjusting Stack Temperatures
Placing the Boiler in Operation NOTICE Improper burner adjustments can lead to improper combustion and sooting of the boiler. Burner lock-outs can also occur as a result. Always check the combustion with the following instruments. Never check and/or adjust burner op- eration by eye sight. -
Page 43: Adjusting/Removing Flue Baffles
Placing the Boiler in Operation When you determine that the stack temperature is too low, and condensate formation might take place in the chimney, the stack temperature can be increased by the following steps: – Adjust the flue baffles – Remove the flue baffles –... -
Page 44: Removing Flue Blocking Plate
Placing the Boiler in Operation Pull flue baffles slightly out of the flue passages. Fig.44 Removal of the flue baffles When you need/want to remove flue baffles for fresh air operation, you can use the Table 13 below to estimate the effect on stack temperature. -
Page 45: Installation Of Front Burner Cover
Placing the Boiler in Operation 8.10 Installation of Front Burner Cover Hang burner cover into the hooks of the boiler jacket. Secure burner cover with s screws into the side pan- els. DANGER TO LIFE from electric shock. Operate the boiler only with an installed WARNING! burner cover. -
Page 46: Detailed Start-Up Procedure
Placing the Boiler in Operation 8.11 Detailed Start-up Procedure Check off performed start-up steps, sign and date. Start-up Procedure Page Value Measured Comments Filling of system and check for leaks __________ psi Set operating pressure Vent heating system __________ psi Check operation of relief valve Pre-set expansion tank pressure ( see expansion tank manufacturer in-... -
Page 47: Taking The Boiler Out Of Operation
Taking the Boiler Out of Operation Taking the Boiler Out of Operation Normal Boiler Shut-down With Buderus Logamatic controls: Turn the main switch to "0" position. This shuts off power to compo- nents wired directly to the control panel. Fig. 48 Shutting down heating system (Logamatic 2000) -
Page 48: Boiler Maintenance
( Chapter 10.6, page 52). NOTICE Spare parts can be ordered by contacting your Buderus wholesaler. 10.2 Prepare Boiler for Cleaning Shut down the heating system ( Chapter 9.1, page 47). DANGER due to electricity. -
Page 48: Boiler Maintenance
( Chapter 10.6, page 52). NOTICE Spare parts can be ordered by contacting your Buderus wholesaler. 10.2 Prepare Boiler for Cleaning Shut down the heating system ( Chapter 9.1, page 47). DANGER due to electricity. -
Page 49: Boiler Cleaning
NOTICE Burner door sealing rope is available through your local Buderus wholesaler. Fig. 52 Brushing out the combustion chamber Close burner door by tightening the burner door bolts (Torque to 90 Lbs-in ). Torque burner door evenly for proper door closure. -
Page 49: Boiler Cleaning
NOTICE Burner door sealing rope is available through your local Buderus wholesaler. Fig. 52 Brushing out the combustion chamber Close burner door by tightening the burner door bolts (Torque to 90 Lbs-in ). Torque burner door evenly for proper door closure. -
Page 50: 2Wet Cleaning
Boiler Maintenance 10.3.2 Wet Cleaning Use for the wet cleaning a suitable cleaning agent de- signed to dissolve the internal build-up or clean the soot. Following the wet cleaning, proceed with the brushing steps outlined in Chapter 10.3.1, page 49. NOTICE Observe and follow recommendations of the cleaning agent’s manufacturer. -
Page 51: Testing System Pressure
Boiler Maintenance 10.4 Testing System Pressure The system pressure should be 12 to 30 psi for a closed system. Check system pressure. When the pressure gauge shows less than 15 psi, the pressure is too low. Add fill water as described in Chapter 8.1, page 39 and check system pressure once again. -
Page 52: Inspection And Maintenance Procedure
Boiler Maintenance 10.6 Inspection and Maintenance Procedure Sign off and date performed service work. This service and maintenance protocol can also be copied for further use. Service Work Page Date: ______ Date: ______ Date: ______ Check general status of system Do visual performance test on system Check fuel and water components for: Leaks during operation... -
Page 52: Inspection And Maintenance Procedure
Boiler Maintenance 10.6 Inspection and Maintenance Procedure Sign off and date performed service work. This service and maintenance protocol can also be copied for further use. Service Work Page Date: ______ Date: ______ Date: ______ Check general status of system Do visual performance test on system Check fuel and water components for: Leaks during operation... - Page 53 Boiler Maintenance Date: ______ Date: ______ Date: ______ Date: ______ Date: ______ Date: ______ Date: ______ Sign/Date Sign/Date Sign/Date Sign/Date Sign/Date Sign/Date Sign/Date NOTICE When you find conditions during the an- nual service/maintenance work that re- quire attention, please perform the necessary remedial steps.
- Page 53 Boiler Maintenance Date: ______ Date: ______ Date: ______ Date: ______ Date: ______ Date: ______ Date: ______ Sign/Date Sign/Date Sign/Date Sign/Date Sign/Date Sign/Date Sign/Date NOTICE When you find conditions during the an- nual service/maintenance work that re- quire attention, please perform the necessary remedial steps.
- Page 54 Boiler Maintenance Maintenance Procedure Page Date: ______ Date: ______ Date: ______ Take the boiler out of operation Remove flue baffles from passages and clean flue fire baffles Clean flue passages and the combustion chamber, Insert the flue baffles into the boiler in their original position Check burner door sealing rope.
- Page 54 Boiler Maintenance Maintenance Procedure Page Date: ______ Date: ______ Date: ______ Take the boiler out of operation Remove flue baffles from passages and clean flue fire baffles Clean flue passages and the combustion chamber, Insert the flue baffles into the boiler in their original position Check burner door sealing rope.
- Page 55 Boiler Maintenance Date: ______ Date: ______ Date: ______ Date: ______ Date: ______ Date: ______ Date: ______ Sign/Date Sign/Date Sign/Date Sign/Date Sign/Date Sign/Date Sign/Date Logano G125 BE - Specifications subject to change without notice.
- Page 55 Boiler Maintenance Date: ______ Date: ______ Date: ______ Date: ______ Date: ______ Date: ______ Date: ______ Sign/Date Sign/Date Sign/Date Sign/Date Sign/Date Sign/Date Sign/Date Logano G125 BE - Specifications subject to change without notice.
-
Page 56: Restoring System Lock-Outs
Restoring System Lock-outs 11 Restoring System Lock-outs One can identify two different types of lock-outs: – Burner lock-outs. – Control and system lock-outs. A lock-out light will typically be lit on the burner ( burner manual) during its lock-out. Press the burner re- set button once to restart the burner. -
Page 57: Piping Diagrams
Piping Diagrams 12 Piping Diagrams Explanation of the abbreviations Flow Check 2-way motorized valve MAG Expansion tank Boiler bypass Heating pump Relief valve/ Air elimination DHW charging pump Zone valve Fig. 56 Zoning with zone valve Logano G125 BE - Specifications subject to change without notice. -
Page 57: Piping Diagrams
Piping Diagrams 12 Piping Diagrams Explanation of the abbreviations Flow Check 2-way motorized valve MAG Expansion tank Boiler bypass Heating pump Relief valve/ Air elimination DHW charging pump Zone valve Fig. 56 Zoning with zone valve Logano G125 BE - Specifications subject to change without notice. - Page 58 Piping Diagrams Fig. 57 Zoning with pumps Fig. 58 Zoning with zone valves and built in bypass for larger water volume systems Logano G125 BE - Specifications subject to change without notice.
- Page 58 Piping Diagrams Fig. 57 Zoning with pumps Fig. 58 Zoning with zone valves and built in bypass for larger water volume systems Logano G125 BE - Specifications subject to change without notice.
- Page 59 Piping Diagrams Fig. 59 Multiple zones with DHW, high temperature and low temperature circuits with a motorized 3-way valve Logano G125 BE - Specifications subject to change without notice.
- Page 59 Piping Diagrams Fig. 59 Multiple zones with DHW, high temperature and low temperature circuits with a motorized 3-way valve Logano G125 BE - Specifications subject to change without notice.
-
Page 60: Spare Parts
Spare Parts 13 Spare Parts The following parts are available through Buderus Hy- Legend for Table 13 and 14: dronic Systems. Model specific part numbers are listed = no spare part under the various models. In other cases the table (x) = not available as individual part, only as a kit shows the number of components for each model. -
Page 60: Spare Parts
Spare Parts 13 Spare Parts The following parts are available through Buderus Hy- Legend for Table 13 and 14: dronic Systems. Model specific part numbers are listed = no spare part under the various models. In other cases the table (x) = not available as individual part, only as a kit shows the number of components for each model. - Page 61 Spare Parts Item Description Part Number G125/21-BE G125/28-BE G125/34-BE 3 Section 4 Section 5 Section Door hinge G105/G115 05327033 Gasket DIN125-A10.5-A3K Hex. head bolt ISO4017-M10x25-8.8 Hex. head bolt ISO4014-M10x65-8.8 Washer DIN125-A10.5-A3K Boiler feet M10x51mm complete 05236440 Gasket for flue collar DN130 complete 05354010 Flue silencer DN130 complete, without condensate drain;...
- Page 61 Spare Parts Item Description Part Number G125/21-BE G125/28-BE G125/34-BE 3 Section 4 Section 5 Section Door hinge G105/G115 05327033 Gasket DIN125-A10.5-A3K Hex. head bolt ISO4017-M10x25-8.8 Hex. head bolt ISO4014-M10x65-8.8 Washer DIN125-A10.5-A3K Boiler feet M10x51mm complete 05236440 Gasket for flue collar DN130 complete 05354010 Flue silencer DN130 complete, without condensate drain;...
- Page 62 Spare Parts Item Description Part Number G125/21-BE G125/28-BE G125/34-BE 3 Section 4 Section 5 Section B-KIT G125"US" 63029762 Components: 1 Supply manifold G115"US" 1 90 degree 1 1/4 NPT elbow 1 90 degree 3/4 NPT elbow 1 Conversion nipple R11/4-11/4NPTx75 1 Boiler drain valve 3/4 1 Relief valve 3/4Mx3/4F 30PSI 1 Pressure / Temperature gauge 1/4NPT...
- Page 62 Spare Parts Item Description Part Number G125/21-BE G125/28-BE G125/34-BE 3 Section 4 Section 5 Section B-KIT G125"US" 63029762 Components: 1 Supply manifold G115"US" 1 90 degree 1 1/4 NPT elbow 1 90 degree 3/4 NPT elbow 1 Conversion nipple R11/4-11/4NPTx75 1 Boiler drain valve 3/4 1 Relief valve 3/4Mx3/4F 30PSI 1 Pressure / Temperature gauge 1/4NPT...
- Page 63 Spare Parts 7747101419-01-Kesselblock G125 BE US Fig. 60 Boiler block and burner door Logano G125 BE - Specifications subject to change without notice.
- Page 63 Spare Parts 7747101419-01-Kesselblock G125 BE US Fig. 60 Boiler block and burner door Logano G125 BE - Specifications subject to change without notice.
- Page 64 Spare Parts Boiler Jacket Component (Fig. 61) Item Description Part Number G125/21-BE G125/28-BE G125/34-BE 3 Section 4 Section 5 Section The complete boiler jacket for a G125 boiler contains the follow- ing components: Front panel, name plate, front insulation, top gross bracket, 2 side panels, boiler block insulation, holding clips, top front cover, top rear cover, rear panel and mounting material set.
- Page 64 Spare Parts Boiler Jacket Component (Fig. 61) Item Description Part Number G125/21-BE G125/28-BE G125/34-BE 3 Section 4 Section 5 Section The complete boiler jacket for a G125 boiler contains the follow- ing components: Front panel, name plate, front insulation, top gross bracket, 2 side panels, boiler block insulation, holding clips, top front cover, top rear cover, rear panel and mounting material set.
- Page 65 Spare Parts Item Description Part Number G125/21-BE G125/28-BE G125/34-BE 3 Section 4 Section 5 Section Clamp 60/80 mm 63024917 Adapter RLU 60 mm/ 4“ 7747013576 Mounting material for boiler jacket G115, GC115, G125, G134 63031847 Components: 17 Screw St3,9x9,5-A3T05180842 3 Sheet metal screw C-St3,9x13-A3T 1 Screw DIN7985-M6x16-4.8-A3T 2 Clip 4 Hex.
- Page 65 Spare Parts Item Description Part Number G125/21-BE G125/28-BE G125/34-BE 3 Section 4 Section 5 Section Clamp 60/80 mm 63024917 Adapter RLU 60 mm/ 4“ 7747013576 Mounting material for boiler jacket G115, GC115, G125, G134 63031847 Components: 17 Screw St3,9x9,5-A3T05180842 3 Sheet metal screw C-St3,9x13-A3T 1 Screw DIN7985-M6x16-4.8-A3T 2 Clip 4 Hex.
- Page 66 Spare Parts 40 70 7747101420-01-Verkleidung G125 BE US Fig. 61 Boiler jacket Logano G125 BE - Specifications subject to change without notice.
- Page 66 Spare Parts 40 70 7747101420-01-Verkleidung G125 BE US Fig. 61 Boiler jacket Logano G125 BE - Specifications subject to change without notice.
-
Page 67: Burner Wiring Examples
Burner Wiring Examples 14 Burner Wiring Examples Fig. 62 Wiring diagram 1 Logano G125 BE - Specifications subject to change without notice. -
Page 67: Burner Wiring Examples
Burner Wiring Examples 14 Burner Wiring Examples Fig. 62 Wiring diagram 1 Logano G125 BE - Specifications subject to change without notice. - Page 68 Burner Wiring Examples Fig. 63 Wiring diagram 2 Logano G125 BE - Specifications subject to change without notice.
- Page 68 Burner Wiring Examples Fig. 63 Wiring diagram 2 Logano G125 BE - Specifications subject to change without notice.
-
Page 69: Glossary
Glossary 15 Glossary Air inlet temperature ....42 Aquasmart ..... 35 B-Kit Component . -
Page 69: Glossary
Glossary 15 Glossary Air inlet temperature ....42 Aquasmart ..... 35 B-Kit Component . - Page 70 Glossary Operating conditions ....8 Original spare parts ....4 Over fire pressure .
- Page 70 Glossary Operating conditions ....8 Original spare parts ....4 Over fire pressure .
- Page 71 Notes Logano G125 BE - Specifications subject to change without notice.
- Page 71 Notes Logano G125 BE - Specifications subject to change without notice.
- Page 72 BBT North America Corporation 50 Wentworth Avenue Londonderry, NH 03053 Tel. 603-552-1100 Fax 603-584-1681 www.buderus.net Products manufactured by BBT Thermotechnik GmbH D-35573 Wetzlar www.buderus.de BBT North America Corporation reserves the right to make changes without notice due to continuing engineering and technological advances.
- Page 72 BBT North America Corporation 50 Wentworth Avenue Londonderry, NH 03053 Tel. 603-552-1100 Fax 603-584-1681 www.buderus.net Products manufactured by BBT Thermotechnik GmbH D-35573 Wetzlar www.buderus.de BBT North America Corporation reserves the right to make changes without notice due to continuing engineering and technological advances.
Need help?
Do you have a question about the Logano G125 BE US/CA and is the answer not in the manual?
Questions and answers