Bose Lifestyle 535 Series III Setup Manual
Bose lifestyle home entertainment system setup guide
Hide thumbs
Also See for Lifestyle 535 Series III:
- Setup manual (68 pages) ,
- Owner's manual (221 pages) ,
- Operating manual (34 pages)
Table of Contents
Advertisement
Advertisement
Table of Contents

Related Manuals for Bose Lifestyle 535 Series III


Summary of Contents for Bose Lifestyle 535 Series III
- Page 1 Setup Guide | Guía de instalación | Guide d’installation...
-
Page 2: Important Safety Information
The terms HDMI and the HDMI Logo are trademarks or registered trademarks of HDMI Licensing LLC in the United States and other countries. Wi-Fi is a registered mark of the Wi-Fi Alliance. ©2014 Bose Corporation. No part of this work may be reproduced, modified, distributed, or otherwise used without written permission. 2 - English... -
Page 3: Important Safety Instructions
• The speaker wire and interconnect cables included with the system are not approved for in-wall installation. Please check your local building codes for the correct type of wire and cable required for in-wall installation. • Changes or modifications not expressly approved by Bose Corporation could void the user’s authority to operate this equipment. - Page 4 Important Safety Information Names and Contents of Toxic or Hazardous Substances or Elements Part Name Toxic or Hazardous Substances and Elements Lead Mercury Cadmium Hexavalent Polybrominated Polybrominated (Pb) (Hg) (Cd) (CR(VI)) Biphenyl (PBB) diphenylether (PBDE) PCBs Metal parts Plastic parts Speakers Cables 0: Indicates that this toxic or hazardous substance contained in all of the homogeneous materials for this part is below the limit...
-
Page 5: Table Of Contents
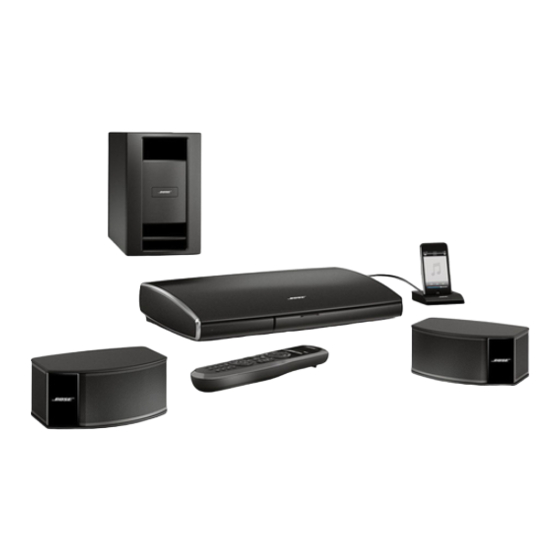
Contents Introduction About your Lifestyle system ................® Introducing SoundTouch™ from Bose ............® Key Benefits ....................About SoundTouch™on your system ............. System Features ..................Unpacking ......................System Setup Control console box ................... Acoustimass module box ................® Speaker box ...................... -
Page 6: About Your Lifestyle ® System
Introduction About your Lifestyle system ® Thank you for choosing a Bose Lifestyle system for your home. This elegant and ® ® easy-to-use system delivers superior performance for both music and video. This guide provides step-by-step instructions for setting up your new system. Refer to the Operating guide for system features. -
Page 7: Unpacking
Be sure to save all of the packing materials. These provide the safest means for any necessary shipping or transporting. If part of the system is damaged, do not use it. Notify Bose or your authorized Bose dealer immediately. Refer to the contact sheet in Box 4. -
Page 8: System Setup
System Setup Control console box What you need from box 1: From box 1: Control console Power supply Audio input cable High-speed HDMI cable ™ What you need from the power cord box: From the power cord box: Power cord A. - Page 9 System Setup B. Insert one end of the High-speed HDMI cable into an HDMI INPUT connector ™ on your TV. If an HDMI cable is already connected to an HDMI input on your TV, you can use this one. Just disconnect the other end. Note: If you plan on viewing 3D content, make sure you use the supplied high-speed HDMI cable.
- Page 10 System Setup D. Connect one end of the audio input cable into the control console Audio OUT connector. Make sure the flat surface with the arrow on the plug faces up. You will be asked to connect the other end of the audio input cable while setting up the contents of the next box.
-
Page 11: Acoustimass ® Module Box
System Setup Acoustimass module box ® What you need for the following steps: From box 2: From the power cord box: Acoustimass module Power cord A. Place the Acoustimass module on the floor at the same end of the room as the TV. - Page 12 System Setup CAUTION: DO NOT stand the Acoustimass module on its front or back end. ® C. Insert the end of the audio input cable into the Media Center connector on the Acoustimass module. Make sure the flat surface with the arrow faces the front of the module. Media center D.
-
Page 13: Speaker Box
System Setup Speaker box What you need for the following steps: System speakers (one set of the two types shown) Jewel Cube series II speakers ® (1) Horizontal (4) Left, right, front or center channel rear speakers speaker Direct/Reflecting series II speakers ®... - Page 14 • At least 6 in. (15 cm) away from any CRT (picture tube) TV. Note: You can place system speakers on wall brackets, table stands or floor stands. To purchase these accessories, contact your local Bose dealer or ®...
- Page 15 System Setup C. Place the rear speakers toward the back of the room behind the viewers at ear height (when seated) or higher, if possible. Left rear speaker Right rear speaker • Make sure the 50 ft (15.2 m) rear speaker cables will reach from the speakers to the Acoustimass module.
- Page 16 System Setup Locate the speaker position markings on the ends of the speaker cables. Speaker position marking (L, C, R, LR, or RR) G. Using the speaker position markings, run each cable out to its respective speaker. Front speakers Rear speakers 16 - English...
- Page 17 System Setup H. Insert the plug into the speaker connector, with the label facing down. Jewel Cube Series II ® speaker Put the Acoustimass module in its final position: ® • Upright (BEST) or on either side (ALTERNATE). • With the front opening facing into the room. •...
-
Page 18: Interactive Box
System Setup Interactive box What you need for the following steps: ADAPTiQ audio calibration headset Remote control with batteries SoundTouch wireless adapter USB cable ™ IMPORTANT! Before you start, make sure your speakers and Acoustimass module are in ® their final positions. Do not connect any devices to the control console at this time. - Page 19 • Optimize the system audio using the ADAPTiQ audio calibration system. ® • Connect audio/video devices to the control console. • Configure your Bose remote to control your connected devices. ® • Complete network setup with the SoundTouch wireless adapter.
-
Page 20: Install The Soundtouch™ App
See “Add the system to your existing SoundTouch account.” ™ On your computer, open a browser and go to http://www.Bose.com/soundtouch_app Tip: Use the computer where your music library is stored. http://www.Bose.com/soundtouch_app Download and install the SoundTouch app. -
Page 21: Other Box 4 Items
If using the optical cable, remove the cap from both ends of the cable, and insert the cable with the Bose logo facing down. Inserting the plug in the wrong orientation can damage the plug and the connector. -
Page 22: Applying Rubber Feet
System Setup Applying rubber feet When placing the Acoustimass module on bare floors, you can attach the ® included rubber feet to the bottom of the module for greater stability and to protect your floor. Rubber feet Bottom panel 22 - English... -
Page 23: If You Have Setup Problems
Refer to “Using the Setup Mode” in your operating guide. For help in trying to resolve any problems, see the troubleshooting table in your operating guide. Contacting customer service For additional help in solving problems, contact Bose Customer Service. See the ® address sheet included in Box 4. - Page 24 ©2014 Bose Corporation, The Mountain, Framingham, MA 01701-9168 USA AM719710 Rév. 00...
Need help?
Do you have a question about the Lifestyle 535 Series III and is the answer not in the manual?
Questions and answers