Bose LIFESTYLE 535 Setup Manual
Lifestyle 535/525 series ii home entertainment systems lifestyle 520/510 home theater systems
Hide thumbs
Also See for LIFESTYLE 535:
- Setup manual (24 pages) ,
- Owner's manual (221 pages) ,
- Operating manual (34 pages)

Related Manuals for Bose LIFESTYLE 535


Summary of Contents for Bose LIFESTYLE 535
-
Page 1: Home Theater Systems
® ® Setup Guide | Guía de instalación | Guide d’installation... -
Page 2: Safety Information
Please take the time to follow the instructions in this owner’s guide carefully. It will help you set up and operate your system properly and enjoy its advanced features. Please save this guide for future reference. All Bose ® products must be used in accordance with local, state, federal, and industry regulations. - Page 3 This product is intended to be used only with the power supply provided. The speaker wire and interconnect cables included with the system are not approved for in-wall installation. , following any local regulations. Do not incinerate. Bose ® Part Name PCBs...
-
Page 4: Important Safety Instructions
1. Read these instructions. 2. Keep these instructions. 3. Heed all warnings. 4. Follow all instructions. Do not use this apparatus near water. Clean only with a dry cloth. 7. Do not block any ventilation openings. Install in accordance with the manufacturer’s instructions. 8. -
Page 5: System Setup
Thank You......................Unpacking ......................Control console box................... Acoustimass ® module box ................Speaker box ......................Interactive box ....................Other Box 4 items....................Applying rubber feet ..................20 If you have setup problems ................Contacting customer service ................English - 5... -
Page 6: Thank You
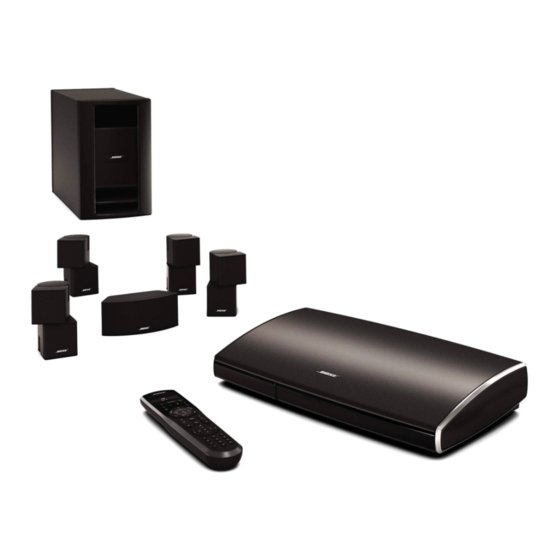
Be sure to save all of the packing materials. These provide the safest means for any necessary shipping or transporting. If any part appears damaged, do not attempt to use it. Notify Bose or your authorized Bose dealer immediately. For Bose contact information, refer to the address sheet included in Box 4. - Page 7 What you need from box 1: From box 1: Control console Power supply Audio input cable HDMI ® cable What you need from the power cord box: From the power cord box: Power cord Place the control console on a flat, stable surface near your TV. Control console Until your system is completely installed, it may be helpful to keep the control console positioned for easy access to its rear connection panel.
- Page 8 Plug one end of the HDMI cable into an HDMI INPUT connector on your TV. ® If an HDMI cable is already connected to an HDMI input on your TV, you can use this one. Just disconnect the other end. Plug the other end of the HDMI cable you are using into the connector labeled on the control console.
- Page 9 Plug one end of the audio input cable into the control console connector labeled . Make sure the flat surface with the arrow on the plug faces up. Leave the other end of the cable on the floor. You will be asked to connect it while setting up the contents of the next box.
- Page 10 What you need for the following steps: From box 2: From the power cord box: Acoustimass module Power cord Place the Acoustimass module on the floor at the same end of the room as the TV. Make sure there is a live AC (mains) power outlet nearby. Acoustimass module Lay the module on its side and locate the connector panel.
- Page 11 DO NOT stand the Acoustimass module on its front or back end. ® Plug the free end of the audio input cable into the connector on the Acoustimass module. Make sure the flat surface with the arrow faces the front of the module. Media center Remove a power cord from the power cord box.
-
Page 12: Speaker Box
Right front (R) Light blue Right rear (RR) Left rear (LR) Purple Light green You can place system speakers on wall brackets or floor stands. To purchase these accessories, contact your local Bose ® dealer or visit www.Bose.com. 12 - English... - Page 13 Place the center front speaker on a stable and level surface directly above or below the center of your TV screen as in the following example. Left front (L) Center front (C) Right front (R) Place one speaker to the left and one to the right of the TV. –...
- Page 14 Place the rear speakers toward the back of the room behind the viewers at ear height (when seated) or higher, if possible. Left rear (LR) Right rear (RR) – Make sure the 50 ft (15.2 m) rear speaker cables will reach from the speak- ers to the Acoustimass ®...
- Page 15 Locate the speaker position markings on the free ends of the speaker cables. Speaker position marking (L, C, R, LR, or RR) Using the speaker position markings, run each cable out to its respective speaker as in the following setup example of a room. Front speakers Rear speakers English - 15...
- Page 16 Connect the speaker cable to the type of speaker you have. Insert the plug into the speaker connector. Press the button and insert the wires. Connect the red-collared wire to the red connector. Connect the other wire to the black connector. The rear speaker cables for Direct/Reflecting ®...
-
Page 17: Interactive Box
What you need for the following steps: Remote control with batteries ADAPTiQ ® audio calibration headset ® Slide the battery compartment cover off the back of the remote control. AA (IEC LR6) batteries (4) Battery compartment cover Install four AA (IEC LR6) batteries, matching the polarity markings (+ and –) to the markings inside the battery compartment. - Page 18 Follow the instructions on your TV. You will be prompted to do the following: Select your language. Optimize the system audio using the ADAPTiQ ® audio calibration system. Connect audio/video devices to the control console. Configure your Bose ® remote to control your connected devices. 18 - English...
-
Page 19: Other Box 4 Items
The remaining items in Box 4 may or may not be required to set up your LIFESTYLE ® system. For more information on using these accessories or adding other devices to your system at another time, see the operating guide. Stereo audio cable IR emitter cable Rubber feet for... -
Page 20: Applying Rubber Feet
When placing the Acoustimass module on bare floors, you can attach the ® included rubber feet to the bottom of the module for greater stability and to protect your floor. Rubber feet Bottom panel Vibration can cause speakers to move, particularly if placed on a smooth surface like glass or highly polished wood. -
Page 21: If You Have Setup Problems
Setup Mode” in your system operating guide. For help in trying to resolve any problems, see the troubleshooting table in your system operating guide. For additional help in solving problems, contact Bose ® Customer Service. See the address sheet included in Box 4. - Page 22 ©2013 Bose Corporation, The Mountain, Framingham, MA 01701-9168 USA AM372631_00 Rev. 00...
- Page 28 Contents Playing content from an iPod or iPhone (535/525/235/135 series II systems only)............ Using the front console inputs............... Front USB input..................Front Analog A/V input................Front HOM I™ input..................Changing the image view................. Changing System Options Using system OPTIONS menu..............
- Page 41 Operating Your System Sources Selecting the radio (535, 525, 235 and 135 series II systems only) Press the SOURCE button. Keep pressing the SOURCE button to select FM or AM in the SOURCE list. Tuning to a station • Press (increase) or (decrease) to tune up or down the 111-1...
- Page 59 Japan Saturdays 9 a.m. to 3 p.m. owners.Bose.com Bose K.K. Shibuya YT Building Canada 28-3 Maruyama-cho Bose Ltd., 1-35 East Beaver Creek Road Shibuya-ku, Tokyo 150-0044 Richmond Hill, Ontario L4B 1 B3 +81-3-5489-0955 FAX +81-3-5489-1 041 1-800-465-2673 www.Bose.co.jp Phone hours - ET (Eastern Time): Mexico Weekdays 9 a.m.
- Page 60 15. To prevent risk of fire or electric shock, avoid and as directed by overloading wall outlets, extension cords, or Bose® Corporation. Unplug this product from the integral convenience receptacles. wall outlet before cleaning. not let objects or liquids enter the product - 7.
- Page 65 Warranty information inside Register your product now Contiene informaciOn sabre Ia garantfa Registre su producto ahora Renseignements sur Ia garantie l'interieur Enregistrez votre produit des maintenant...
- Page 66 Framingham, MA 01701-9168 EE.UU. PO Box 9168 Si vous residez hors des Etats-Unis, consultezle guide de l'utilisateur Ia Gufa del usuario o ira Globai.Bose. com para encontrar Ia direcci6n Framingham, MA 01701-9168 Etats-Unis au le Globai.Bose.com pour obtenir l'adresse postale Ia plus proche.
Need help?
Do you have a question about the LIFESTYLE 535 and is the answer not in the manual?
Questions and answers