Table of Contents
Advertisement
Installation and Operating Instructions for
Smoke Exempt Multifuel Stove.
Please read this booklet thoroughly before attempting to install or use
Also detailed on data plate located on the back of the stove door.
A new era in clean, effective multi-fuel stoves.
The Workshop, Wheatcroft Farm, Cullompton, Devon EX15 1RA
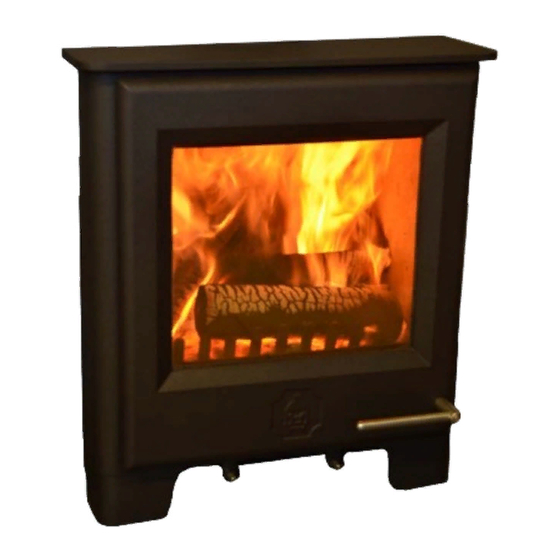
Firebright Inset
this appliance.
Includes Registration and Guarantee Document.
Serial Number
Please quote when making an enquiry.
M______SE:__________
Woodwarm Stoves
Woodwarm Stoves
Woodwarm Stoves (Est. 1974)
By
Metal Developments Ltd
Tel : 01884 35806 Fax : 01884 35505
www.woodwarmstoves.co.uk
Advertisement
Table of Contents

Subscribe to Our Youtube Channel
Related Manuals for Woodwarm Stoves Firebright Inset


Summary of Contents for Woodwarm Stoves Firebright Inset
-
Page 1: Serial Number
Please quote when making an enquiry. M______SE:__________ A new era in clean, effective multi-fuel stoves. Woodwarm Stoves Woodwarm Stoves Woodwarm Stoves (Est. 1974) Metal Developments Ltd The Workshop, Wheatcroft Farm, Cullompton, Devon EX15 1RA Tel : 01884 35806 Fax : 01884 35505 www.woodwarmstoves.co.uk... -
Page 2: Table Of Contents
List of Contents 01/06/13 Version INSSE General Specifications……………………………………………………. Page 3 Regulations and Installation Instructions……………………………… Page 4 Hearth………………………………………………………………………..Page 4 Stove Site and Minimum Clearances…………………………………… Page 5 Chimney and Flue………………………………………………………….. Page 5 Air Ventilation and Free Air………………………………………………. Page 5 Flue Appliance Outlet Positions………………………………………… Page 6 Flue Outlet Configuration…………………………………………………... -
Page 3: General Specifications
General Specifications - Inset Stove Class 1: BS EN 13229:2001 + Amd 2:2004. For Intermittent use only. Unsuitable for use in a shared flue system. Use only seasoned wood logs only. Table 1 Air Inlet grills must be so positioned that they are not liable to blockage. Nominal Heat Output Kw Space Heating Kw Efficiency% (wood) -
Page 4: Regulations And Installation Instructions
REGULATIONS AND INSTALLATION INSTRUCTIONS FOR WOODWARM STOVES All local regulations, including those referring to national and European Standards (BS 6461, Installation of chimneys and flues for domestic appliances burning solid fuel (including wood and peat) & BS 8303, Code of practice for installation of domestic heating and cooking appliances burning solid mineral fuel) need to be complied with when installing this appliance. -
Page 5: Stove Site And Minimum Clearances
STOVE SITE AND MINIMUM CLEARANCES There must be no combustible material (i.e. plaster board, wooden wall panels, skirting boards, beams etc) within a specified distance to the rear and sides of the stove, these can be found on table 1 page 3. CHIMNEY AND FLUE The chimney should be thoroughly swept and examined for soundness. -
Page 6: Flue Appliance Outlet Positions
Flue - Appliance Outlet Positions Fig. 1 Point where flue passes through Clearances to flue outlet weather surface (Notes 1,2) at or within 600mm at least 600mm of the ridge. above the ridge. Datum for horizontal elsewhere on a roof at least 2300mm horizontally from measurements (weather pitched or flat) -
Page 7: Flue Outlet Configuration
Flue Outlet Configuration Fig. 2 Fig. 2a Fig. 2b Rain Cap Flue Vent Flexible Liner Solid flue sec- tion to prevent Brush damage M.A. Adaptor Vertical Outlet position 45 Degree Outlet position... -
Page 8: Installing The Stove
INSTALLING THE STOVE Warning: — Use packing to avoid damage to underside Air Controls when moving on trucks! Ensure that the Air Controls move freely before final positioning and installing Always leave Air Controls open to shake out any loose material when moving stove ( If jammed, spin off the 6no domed nuts and clear obstruction) Remember to leave sufficient clearance in front of the stove for the fire door to open fully when finally positioned. - Page 9 Fig. 4 The prepared opening awaiting installation of Rockwool slab material prior to the Cassette box . In this case the opening was high enough to allow insulation to be fitted around the flue after the Cassette was installed Fig. 5 The Cassette Box will need fixing in to avoid it moving out of position after a period of time...
-
Page 10: Fireboards
With the Cassette Box, the Adaptor and it’s 2no M8 threads should come through their respective holes and the ‘Joining Nuts’ can be screwed on and tightened fully. IMPORTANT Press down the retainers to captivate the ‘Joining Nuts’ (Arrowed Fig. 7) Push the Pre formed circular 8mm Rope Seal , into the groove (visible in Fig. -
Page 11: Baffle
Fig. 10 Side Fire Board Rear Fire Board BAFFLE The smoke baffle sits on the Fire boards as shown in Fig.11 and Fig.12. Ensure baffle seats squarely on boards and is pushed fully to the rear. Baffle in position Fig. 11 How to insert Baffle through doorway Fig. -
Page 12: Logguard
LOGGUARD Fig. 13a Fig. 13b FIRE DOOR - ALL MODELS Replace the door by aligning it over the hinges and working the door downwards whilst at the same time, gently swinging it. Warning: Use a second person to take the weight, as the door is heavy. Check when refitting the fire door that the rope seal on the inner face of the door is making an even contact with the stove body when the door is closed. -
Page 13: Commissioning
DOOR CATCH Fig. 15 COMMISSIONING On completion of the installation and after allowing a suitable period of time for any fire cement or mortar joints to dry out, the stove should be cleaned using a soft dry cloth. Check joints and seals. The stove can then be lit and checked to ensure that smoke is taken from the appliance up the chimney and emitted safely. -
Page 14: Glass Panels - Cleaning And Replacement
GLASS PANELS There are two panels of glass in each door. They are made of a heat resistant ceramic product which will not break with the heat of the fire. However, it is important to maintain the movement of the glass within the door as, if the glass is restricted, it is likely to crack with the expansion or contraction of the cast door. -
Page 15: The Clean Air Act 1993 And Smoke Control Areas
THE CLEAN AIR ACT 1993 AND SMOKE CONTROL AREAS Under the Clean Air Act, local authorities may declare the whole or part of the district of the authority to be a smoke control area. It is an offence to emit smoke from a chimney of a building, from a furnace or from any fixed boiler if located in a designated smoke control area. -
Page 16: How Clean Burn Works
OPERATING INSTRUCTIONS OPERATING INSTRUCTIONS Before lighting check with the installer that the work and checks described in the previous pages of this booklet have Before lighting check with the installer that the work and checks described in the previous pages of this booklet have been carried out correctly and that the chimney is sound, has been swept and is free from any obstructions. -
Page 17: Running The Stove
RUNNING - SAFELY, CLEANLY, EFFICIENTLY WOOD FUEL (less than 20% moisture) When the fire is well established, (the stove body has reached a temperature of 250-280 C (450-500 F) on a Stove thermometer), close the primary air control. The stove may now be run on the secondary air control . ( Fig.17) SOLID FUEL (must be smokeless fuel in a smoke control zone) When the fire is well established (the stove body has reached a temperature of 250-280 C (450-500... -
Page 18: Operation Of The Grate
OPERATION OF GRATE Your stove is fitted with a multi-fuel grate (Fig. 18a and 18b) which will enable you to burn wood or solid fuel equally effectively. It consists of a grate lever operating handle (shown in yellow), grate bars (shown in blue) and the grate link bar (shown in pink). -
Page 19: Daily Routine, Maintenance And Servicing
DAILY ROUTINE , MAINTENANCE AND SERVICING Daily - run the stove hot for a time using the procedure as explained on pages 16 and 17, along with a surface mounted thermometer to ensure optimum temperature is reached. This will assist in cleaning any marginal deposits of tar from the door glass, stove, flue and chimney internally. -
Page 20: Chimney Fires
CHIMNEY FIRES If the chimney is thoroughly and regularly swept, chimney fires should not occur. However, if a chimney fire does occur turn the air control setting to the minimum, and tightly close the doors of the stove. This should cause the chimney fire to go out in which case the control should be kept at the minimum setting until the fire in the stove has gone out. -
Page 21: Maximum Operating Temperature
THE WOODWARM STOVES GUARANTEE Metal Developments Ltd offer a five year guarantee which covers the main structure of the stove including the construction and quality of workmanship. -
Page 22: Details Of Product Registration
DETAILS OF PRODUCT REGISTRATION FOR OWNER RETENTION MODEL NUMBER AND SERIAL NUMBER OF STOVE (Found on the data plate located on the rear of stove also on the front of this booklet) Date of Purchase ../..20..Date of Installation .. -
Page 23: Useful Contacts
USEFUL CONTACTS HETAS PO Box 37 Bishops Cleeve Gloucestershire GL52 9TB www.HETAS.co.uk Solid Fuel Association The Old School House Church Street Sutton In Ashfield Nottinghamshire NG17 1AE Tel: 0800 600000 Guild of Master Sweeps Tel: 01953 451322 www.guild-of-master-sweeps.co.uk The National Association of Chimney Sweeps Unit 15 Emerald Way Stone Business Park... - Page 24 01/06/13 Version INSSE...
Need help?
Do you have a question about the Firebright Inset and is the answer not in the manual?
Questions and answers