Table of Contents
Advertisement
Quick Links
Advertisement
Table of Contents

Related Manuals for RO Aerodyne 500 scale fuselage Airwolf

Summary of Contents for RO Aerodyne 500 scale fuselage Airwolf
-
Page 1: Instruction Manual
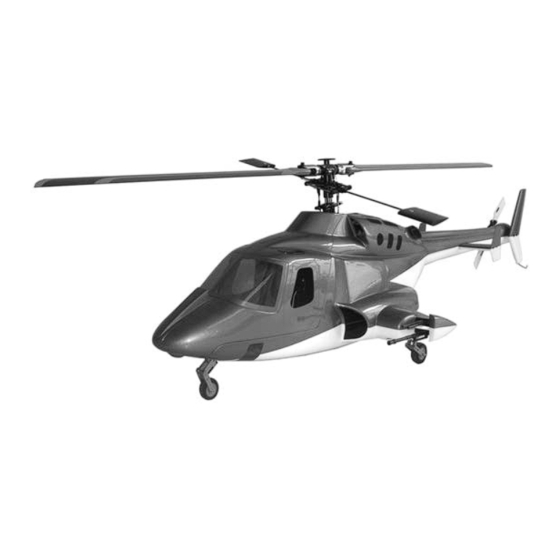
500 scale fuselage Airwolf INSTRUCTION MANUAL Produced By:... -
Page 2: Table Of Contents
Airwolf. Disclaimer R.C. Aerodyne Heli’s and Aircraft are not to be treated as toys. Although every effort is made to provide a superior and dependable product, improper use can cause serious injury and death. Be sure to read this manual carefully, paying close attention to all warnings, precautions and recommendations. -
Page 3: Parts Sheet
Parts and service can, of course, be obtained thru R.C. Aerodyne or our authorized service centers. When flying for the first time or if you are an inexperienced flyer, we strongly recommend you obtain assistance from an experienced pilot. -
Page 4: Initial Setup
INITIAL SET UP 1. Assemble the control arms and add the ball links to the arms. Attach the ball links to the control rods. 2. Attach the control arms to the control rods. Attach the small rod to the nose control arm. Attach the nose gear to the control arms with the smaller carbon fiber rod. -
Page 5: Installing The Mechanics
4. Install the carbon fiber brace rod into the fuselage. Install the main retract into the fuselage as shown above. 5. Attach the control arm to the retract rod and secure. INSTALLING THE MECHANICS 6. Glue the wood spacers into 2 even blocks. Attach them to the bottom of the mechanics using the skid bolts from the mechanics. - Page 6 7. Detach the tail cover and place aside. Insert the mechanics into the fuselage. 8. Install the foam spacer and attach the tail case to the tail boom. Attach the tail cover to the fuselage. 9. Secure the mechanics to the fuselage using the screws provided. Attach the vertical fin to the tail of the helicopter.
-
Page 7: Final Steps
10. Install the retract servo to the nose of the fuselage and connect the ball link to the retract system. FINAL STEPS 11. Glue the horizontal stab to the tail of the fuselage using epoxy. Attach the vertical fins to the horizontal stabs. - Page 8 13. Install the weapons cap to the weapons. Install the windshield to the fuselage body.
-
Page 10: Flying Characteristics
FLYING CHARACHTERISTICS Since this fuselage adds weight to the helicopter we advise that you do not attempt any 3D maneuvers to ensure the integrity of the helicopter. With the added weight the blades may come into contact with the fuselage and destroy the helicopter if any were attempted.
Need help?
Do you have a question about the 500 scale fuselage Airwolf and is the answer not in the manual?
Questions and answers