Table of Contents
Troubleshooting

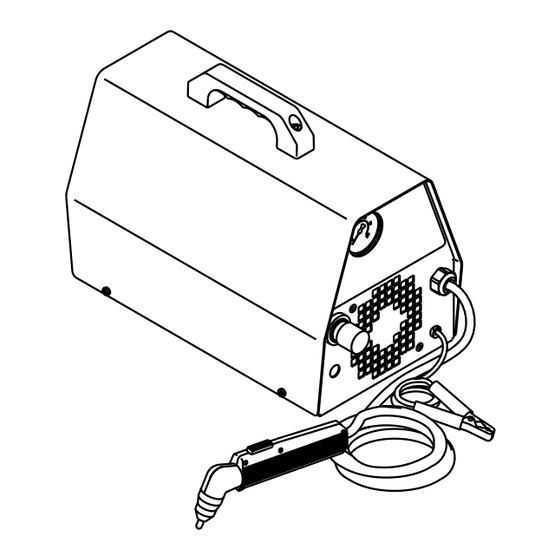
Related Manuals for Thermal Dynamics COUGAR 125


Summary of Contents for Thermal Dynamics COUGAR 125
- Page 1 Service Manual Includes: For Models: • 12 Amp Power Supply • 100 VAC 50Hz, 110 VAC 60Hz • 120 VAC 50Hz • PCH-10 Torch with Leads • 120 VAC 60Hz • Work Cable with Clamp • 220 VAC 50Hz • Input Power Cable •...
- Page 3 Read and understand this entire manual and your employer’s safety practices before installing, operating, or WARNING servicing the equipment. While the information contained in this manual represents our best judgement, Thermal Dynamics Corporation assumes no WARNING liability for its use. COUGAR 125 Plasma Cutter Service Manual Number 0-2717...
-
Page 4: Table Of Contents
TABLE OF CONTENTS 1: GENERAL INFORMATION ....................... 1 1.1 Notes, Cautions and Warnings ..................1 1.2 Important Safety Precautions ..................1 1.3 Publications ........................2 1.4 Note, Attention et Avertissement ..................3 1.5 Precautions De Securite Importantes ................3 1.6 Documents De Reference ....................5 1.7 Declaration of Conformity .................... -
Page 5: 1: General Information
1: GENERAL GASES AND FUMES INFORMATION Gases and fumes produced during the plasma cutting process can be dangerous and hazardous to your health. 1.1 Notes, Cautions and Warnings • Keep all fumes and gases from the breathing area. Keep your head out of the welding fume plume. Throughout this manual, notes, cautions, and warnings are used to highlight important information. -
Page 6: Publications
• Install and maintain equipment according to NEC • To protect your eyes, always wear a welding hel- code, refer to item 9 in Subsection 1.3, Publications. met or shield. Also always wear safety glasses with side shields, goggles or other protective eye wear. •... -
Page 7: Note, Attention Et Avertissement
8. NFPA Standard 51, OXYGEN-FUEL GAS SYSTEMS FOR WELDING, CUTTING AND ALLIED PRO- AVERTISSEMENT CESSES, obtainable from the National Fire Protection Association, Batterymarch Park, Quincy, MA 02269 Toute procédure pouvant provoquer des blessures 9. NFPA Standard 70, NATIONAL ELECTRICAL CODE, de l’opérateur ou des autres personnes se trouvant obtainable from the National Fire Protection Asso- dans la zone de travail en cas de non-respect de la... - Page 8 procédés. Vous devez prendre soin lorsque vous coupez ou soudez tout métal pouvant contenir un INCENDIE ET EXPLOSION ou plusieurs des éléments suivants: antimoine cadmium mercure Les incendies et les explosions peuvent résulter des scories argent chrome nickel chaudes, des étincelles ou de l’arc de plasma. Le procédé arsenic cobalt plomb...
-
Page 9: Documents De Reference
• Use the shade of lens as suggested in the following 4. Norme ANSI Z87.1, PRATIQUES SURES POUR LA chart per ANSI/ASC Z49.1: PROTECTION DES YEUX ET DU VISAGE AU TRAVAIL ET DANS LES ECOLES, disponible de • Utilisez la nuance de lentille qui est suggèrée dans l’Institut Américain des Normes Nationales (Ameri- le recommendation qui suivent ANSI/ASC Z49.1: can National Standards Institute), 1430 Broadway,... - Page 10 14. Norme AWSF4.1 de l’Association Américaine de Soudage, RECOMMANDATIONS DE PRATIQUES SURES POUR LA PRÉPARATION À LA COUPE ET AU SOUDAGE DE CONTENEURS ET TUYAUX AYANT RENFERMÉ PRODUITS DANGEREUX , disponible auprès de la American Welding Society, 550 N.W. LeJeune Rd., Miami, FL 33126 15.
-
Page 11: Declaration Of Conformity
Rigorous testing is incorporated into the manufacturing process to ensure the manufactured product meets or exceeds all design specifications. Thermal Dynamics has been manufacturing products for more than 30 years, and will continue to achieve excellence in our area of manufacture. -
Page 12: Statement Of Warranty
None Warranty repairs or replacement claims under this limited warranty must be submitted by an authorized Thermal Dynamics® repair facility within thirty (30) days of the repair. No transportation costs of any kind will be paid under this warranty. Transportation charges to send products to an authorized warranty repair facility shall be the responsibility of the customer. -
Page 13: Introduction
Service Technicians Department in West Lebanon for assistance. familiar with this equipment. 2.4 Technical Specifications Read this manual and the COUGAR 125 Operating Manual, 0-2716, thoroughly. A complete understanding A. System Specifications of the capabilities and functions of the equipment will assure obtaining the performance for which it was de- signed. -
Page 14: Dimensions
208/230V 3.2 Periodic Inspection & 2.5 Dimensions Maintenance The COUGAR 125 Operating Manual 0-2716, describes the inspection and maintenance procedures which should A-02235 be performed at periodic intervals. Routine Maintenance 10.0 in. ensures optimum performance of equipment and can pre-... -
Page 15: Common Operating Problems
In some cases, the service NOTE circuit breaker may open during use. Some things that Although the COUGAR 125 will cut using stand- will help: off, this unit is primarily a drag-cutting machine. • Use a service fused or circuit breaker for correct amperage (Refer to Operator Manual 0-2716, sub- 3.5 Troubleshooting Guide... - Page 16 If the circuit breaker or fuse opens after the good and the PCB should be replaced. power switch is switched on, go to next step. If the circuit breaker or fuse is okay, replace Fan. COUGAR 125 Plasma Cutter Service Manual 0-2717...
- Page 17 PCH-10 torch. Re- 6. Excessive parts wear. place worn parts as necessary. a. Inspect torch consumables and replace as nec- 2. Parts not assembled correctly. essary. a. Reassemble torch parts. Service Manual 0-2717 COUGAR 125 Plasma Cutter...
-
Page 18: Torch & Leads Troubleshooting
Manual 0-2716. (Refer to Appendix I, in this continuity between the electrode seat (negative) and manual, for leads connection diagram.) the brass threads of the torch assembly. Infinite resis- • Most replacement hardware can be purchased locally. COUGAR 125 Plasma Cutter Service Manual 0-2717... -
Page 19: Removing Cover/Handle
4. Pull torch head away from torch lead to expose 1/ 2"-3/4" of cable. 5. Clamp down with vise grips on black sleeve of lead so that cable cannot spring back into lead (E). Service Manual 0-2717 COUGAR 125 Plasma Cutter... -
Page 20: Torch Switch Only Replacement
Make sure torch switch wires are seated in their guides so that the wires are not pinched when the 4-2 Installing Torch Head Assembly handle is secured. 7. Install consumables parts in front end of torch. COUGAR 125 Plasma Cutter Service Manual 0-2717... -
Page 21: Capacitor Replacement
5. Remove PC Board from unit by completing the fol- lowing: a. Remove two (2) fastener plastic push ons from key slotted holes in corners of PC Board. Service Manual 0-2717 COUGAR 125 Plasma Cutter... -
Page 22: On/Off Power Switch Replacement
5. To connect the input wiring to the ON/OFF Switch refer to subsection 4.16, steps 6-7. 6. Install cover/handle by reversing step 1, keeping in mind the following: COUGAR 125 Plasma Cutter Service Manual 0-2717... -
Page 23: Resistor Replacement
NOTE a. Pull L4 through loose tie wrap if available. The COUGAR 125 has two Resistors. The top Re- sistor is 1K ohm and the bottom Resistor is .5 ohm. b. Position wire connector L4 so that it runs along These parts are not interchangeable. -
Page 24: Torch & Leads Replacement
(Install 5 1/2" from Faston) tab at bottom of Rectifier) 8. Reconnect all connections by reversing step 2. Figure 4-5 Work Cable Replacement 9. Replace cover by reversing step 1. COUGAR 125 Plasma Cutter Service Manual 0-2717... -
Page 25: Primary Input Power Cable Replacement
5.1 Returns A-02652 If a product must be returned for service, contact your authorized distributor. Items return to the manufac- Figure 4-6 Input Power Cable Replacement turer without proper authorization will not be accepted. Service Manual 0-2717 COUGAR 125 Plasma Cutter... -
Page 26: Power Supply Replacement Parts
9-0012 Work Cable, 15 ft. (4.6 m) w/Red Handles 9-0013 Input Power Cable, 6.5 ft. min. (2 m): COUGAR 125 100V 50Hz, 110V 60Hz, Power Cable, 14/3 w/molded plug 9-0052 COUGAR 125 120V 50Hz, Power Cable "CE", ** 9-0044 COUGAR 125 120V 60Hz, Power Cable, 16/3 w/molded plug 9-0014 COUGAR 125 220V 50Hz, Power Cable, "CE"... - Page 27 To remove cover, unfasten: • 4 side panel screws • 2 handle screws • 2 end panel screws ????? 22x661 Rotation Torch & Leads Direction A-02371 Air Flow Direction Figure 6-1 Power Supply - Exploded View Service Manual 0-2717 COUGAR 125 Plasma Cutter...
-
Page 28: Parts Replacement
Description Catalog # A. Complete Systems Includes Power Supply, PCH-10 70° Torch with Leads, Spare Consumable Parts, Input Power Cord, and Work Cable. COUGAR 125 100V 50Hz, 110V 60Hz, PCH-10 1-2111-3 COUGAR 125 120V 50Hz, PCH-10, "CE" 1-2811-6 COUGAR 125 120V 60Hz, PCH-10 1-2111-1 COUGAR 125 220V 50Hz, PCH-10, "CE"... -
Page 29: Torch Replacement Parts
* To be replaced by Qualified Technician only. A-02360 HARDWARE #2-56 x 5/16" LG Phillips Pan Head #6 Internal Star Washer #6-32 x 3/16" Phillips Pan Head M.S., Zinc Plated Figure 6-2 Torch - Exploded View Service Manual 0-2717 COUGAR 125 Plasma Cutter... -
Page 30: Appendix I: Interconnecting Diagram
APPENDIX I: INTERCONNECTING DIAGRAM A-02250 COUGAR 125 Plasma Cutter Service Manual 0-2717... - Page 31 A-02250 Service Manual 0-2717 COUGAR 125 Plasma Cutter...
Need help?
Do you have a question about the COUGAR 125 and is the answer not in the manual?
Questions and answers