Table of Contents
Advertisement
Quick Links
Advertisement
Table of Contents

Related Manuals for Acer Aspire S5


Summary of Contents for Acer Aspire S5
- Page 1 Acer Aspire S5 User's Manual...
- Page 2 © 2012 All Rights Reserved. Acer Aspire S5 User's Manual This revision: 01/2013 Model number: Serial number: Date of purchase: Place of purchase:...
-
Page 3: Table Of Contents
Which devices are compatible? ....52 Playing to another device......53 Your Acer notebook tour Power management Screen view............17 Acer Green Instant On........54 Keyboard view..........18 Saving power........... 55 Rear view ..............20 Information on USB 3.0......21 Battery pack Left view............... - Page 4 Entering passwords ........71 Requesting service .......... 92 Acer Theft Shield Troubleshooting..........94 Troubleshooting tips......... 94 Using Acer Theft Shield ........74 Error messages........94 General ............. 74 Tips and hints for using Windows 8....96 Settings ............. 75 Three concepts you might want to MagicFlip port door keep in mind..........
-
Page 5: Safety And Comfort
AFETY AND COMFORT AFETY INSTRUCTIONS Read these instructions carefully. Keep this document for future reference. Follow all warnings and instructions marked on the product. Turning the product off before cleaning Unplug this product from the wall outlet before cleaning. Do not use liquid cleaners or aerosol cleaners. - Page 6 - If an extension cord is used with this product, make sure that the total ampere rating of the equipment plugged into the extension cord does not exceed the extension cord ampere rating. Also, make sure that the total rating of all products plugged into the wall outlet does not exceed the fuse rating.
- Page 7 - Do not increase the volume to block out noisy surroundings. - Decrease the volume if you can't hear people speaking near you. Bundled dummy cards - Note: Information in this section may not apply to your computer. Your computer shipped with plastic dummies installed in the card slots. Dummies protect unused slots from dust, metal objects or other particles.
- Page 8 Product servicing Do not attempt to service this product yourself, as opening or removing covers may expose you to dangerous voltage points or other risks. Refer all servicing to qualified service personnel. Unplug this product from the wall outlet and refer servicing to qualified service personnel when: - The power cord or plug is damaged, cut or frayed.
- Page 9 Wireless devices may be susceptible to interference from the battery, which could affect performance. - Note: Please refer to www.acer.com for battery shipping documents. - Warning! Batteries may explode if not handled properly. Do not disassemble or dispose of them in fire. Keep them away from children. Follow local regulations when disposing of used batteries.
- Page 10 data files or messages, this device requires a good quality connection to the network. In some cases, transmission of data files or messages may be delayed until such a connection is available. Ensure that the above separation distance instructions are followed until the transmission is completed.
- Page 11 information, check with the manufacturer, or its representative, of your vehicle or any equipment that has been added. Only qualified personnel should service the device, or install the device in a vehicle. Faulty installation or service may be dangerous and may invalidate any warranty that may apply to the device.
- Page 12 Products that are ENERGY STAR qualified use less energy and prevent greenhouse gas emissions by meeting strict energy efficiency guidelines set by the U.S. Environmental Protection Agency. Acer is committed to offering products and services worldwide that help customers save money, conserve energy and improve the quality of our environment.
- Page 13 IPS AND INFORMATION FOR COMFORTABLE USE Computer users may complain of eyestrain and headaches after prolonged use. Users are also at risk of physical injury after long hours of working in front of a computer. Long work periods, bad posture, poor work habits, stress, inadequate working conditions, personal health and other factors greatly increase the risk of physical injury.
- Page 14 - If you view your monitor more than your documents, place the display at the center of your desk to minimize neck strain. Taking care of your vision Long viewing hours, wearing incorrect glasses or contact lenses, glare, excessive room lighting, poorly focused screens, very small typefaces and low-contrast displays could stress your eyes.
- Page 15 Developing good work habits The following work habits make computer use more relaxing and productive: - Take short breaks regularly and often. - Perform some stretching exercises. - Breathe fresh air as often as possible. - Exercise regularly and maintain a healthy body. - Warning! We do not recommend using the computer on a couch or bed.
-
Page 16: Your Acer Notebook Tour
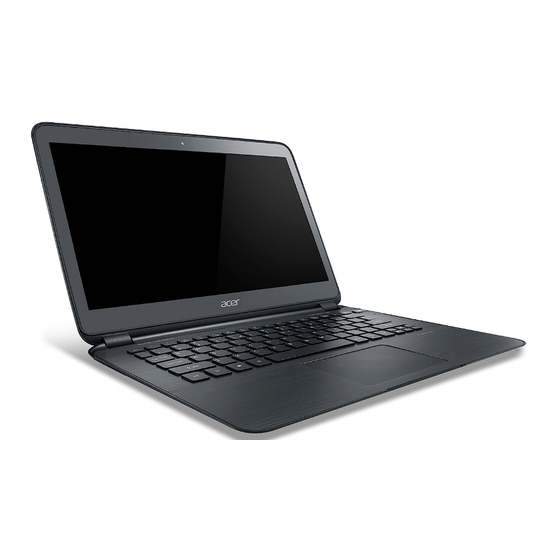
OU R CER N OT E B O OK TOUR After setting up your computer as illustrated in the setup poster, let us show you around your new Acer computer. Acer Aspire S5 16 - Your Acer notebook tour... -
Page 17: Screen View
Screen view Icon Item Description Web camera for video communication. Webcam A light next to the webcam indicates that the webcam is active. Screen Displays computer output. Your Acer notebook tour - 17... -
Page 18: Keyboard View
Keyboard view Icon Item Description Indicates the computer’s power Power indicator status. Indicates battery status. Battery Charging: The light is amber when indicator the battery is charging. Fully charged: The light is blue. 18 - Your Acer notebook tour... - Page 19 Internal microphone for sound Microphone recording. MagicFlip port Opens or closes the MagicFlip port door button door. Warning! Ensure all devices are unplugged before manually closing the MagicFlip port door. Your Acer notebook tour - 19...
-
Page 20: Rear View
Provides access to USB and Thunderbolt ports. MagicFlip port door Note: Opens automatically when ventilation is needed. Allows the computer to stay cool. Ventilation and Do not cover or obstruct the cooling fan openings. 20 - Your Acer notebook tour... -
Page 21: Information On Usb 3.0
Connects to an AC adapter. Information on USB 3.0 • Compatible with USB 3.0 and earlier devices. • For optimal performance, use USB 3.0-certified devices. • Defined by the USB 3.0 specification (SuperSpeed USB). Your Acer notebook tour - 21... -
Page 22: Left View
Power button Turns the computer on and off. Accepts one Secure Digital (SD or SDHC) card or one MultiMediaCard 2-in-1 card reader (MMC). Note: To remove the card, simply pull it from the slot. 22 - Your Acer notebook tour... -
Page 23: Right View
Insert a paperclip into the hole and press for four seconds to Battery reset reset the computer (simulates pinhole removing and reinstalling the battery). Connects to audio devices (e.g., Headset/speaker speakers, headphones) or a jack headset with microphone. Your Acer notebook tour - 23... -
Page 24: Base View
Base view # Icon Item Description Speakers Deliver stereo audio output. 24 - Your Acer notebook tour... -
Page 25: Touchpad
OUCHPAD Touchpad basics The touchpad controls the arrow (or 'cursor') on the screen. As you slide your finger across the touchpad, the cursor will follow this movement. Note: The touchpad is sensitive to finger movement; the lighter the touch, the better the response. Please keep the touchpad and your fingers dry and clean. -
Page 26: Touchpad Gestures
• Drag: Press and hold the bottom left corner of the touchpad, or tap twice anywhere on the touchtap, then slide a second finger across the touchpad to select all items in an area. Touchpad gestures Windows 8 and many applications support touchpad gestures that use one or more fingers. -
Page 27: Using The Keyboard
SING TH E KEYBOARD The keyboard has full-sized keys and an embedded numeric keypad, separate cursor, lock, Windows, function and special keys. Lock keys and embedded numeric keypad Note: Information in this section may not apply to your computer. The keyboard has three lock keys which you can toggle on and off. Lock key Description When Caps Lock is on, all alphabetic characters typed... -
Page 28: Hotkeys
keycaps. To simplify the keyboard legend, cursor-control key symbols are not printed on the keys. Desired access Num Lock on Num Lock off Number keys on Type numbers in a normal embedded keypad manner. Cursor-control keys Hold <Shift> while using Hold <Fn>... - Page 29 Hotkey Icon Function Description Switches display output between the display screen, <Fn> + <F5> Display toggle external monitor (if connected) and both. Turns the display screen <Fn> + <F6> Display off backlight off to save power. Press any key to return. Turns the built-in touchpad on <Fn>...
-
Page 30: Windows Keys
Windows keys The keyboard has two keys that perform Windows-specific functions. Description Pressed alone it returns to the Start screen. Windows key It can also be used with other keys for special functions, please check Windows Help. This key has the same effect as clicking the right Application mouse button;... -
Page 31: Recovery
(see page 90) do not help, you can 'recover' your computer - i.e. return it to an earlier state. This section describes the recovery tools available on your computer. Acer provides Acer Recovery Management, which allows you to create a recovery backup, a drivers and applications backup, and to start recovery options, either using Windows tools, or the recovery backup. - Page 32 1. From Start, type 'Recovery' and then click Acer Recovery Management in the list of apps. 2. Click Create Factory Default Backup. The Recovery Drive window opens. 32 - Recovery...
- Page 33 Make sure Copy contents from the recovery partition to the recovery drive is selected. This provides the most complete and safest recovery backup. 3. Plug in the USB drive then click Next. • Make sure your USB drive has enough capacity before continuing. The recovery backup requires at least 16 GB of storage 4.
-
Page 34: Creating A Drivers And Applications Backup
7. Unplug the USB drive and label it clearly. Important: Write a unique, descriptive label on the backup, such as 'Windows Recovery Backup'. Make sure you keep the backup in a safe place that you will remember. Creating a drivers and applications backup To create a Drivers and Applications Backup, that contains the factory- loaded software and drivers needed by your computer, you may use either a USB storage drive or, if your computer features a DVD recorder, one or... - Page 35 1. From Start, type 'Recovery' and then click Acer Recovery Management in the list of apps. 2. Click Create Drivers and Applications Backup. Plug in the USB drive or insert a blank DVD into the optical drive, then click Next.
- Page 36 • If you are using a USB drive, make sure your USB drive has enough capacity before continuing. • If using DVDs, it will also show the number of blank, recordable discs you will need to complete the recovery discs. Make sure that you have the required number of identical, blank discs.
-
Page 37: Recovering Your System
3. Click Start to copy files.You will be shown the backup progress on the screen. 4. Follow the process until it completes: • If you are using optical discs, the drive ejects each disc as it completes burning it. Remove the disc from the drive and mark it with a permanent marker. -
Page 38: Reinstalling Drivers And Applications
solved by returning your system to a previous state when everything was working correctly. For instructions, see "Returning to an earlier system snapshot" on page 41. 3. Reset your operating system. If nothing else has solved the problem and you want to reset your system, but keep your user information, see "Returning your system to its factory condition"... - Page 39 If you are reinstalling using Windows and the recovery information stored on your computer: • From Start, type 'Recovery' and then click Acer Recovery Management in the list of apps. • Click Reinstall Drivers or Applications. Recovery - 39...
- Page 40 1. Insert the Drivers and Applications Backup into the disc drive or connect it to a free USB port. • If you inserted a DVD wait for Acer Resource Center to start. • If Acer Resource Center does not start automatically, press the Windows key + <E>, then double-click on the optical drive icon.
-
Page 41: Returning To An Earlier System Snapshot
2. You should see the Contents section of the Acer Resource Center. 3. Click the install icon for the item you want to install, then follow the onscreen prompts to complete the installation. Repeat this step for each item you want to reinstall. -
Page 42: Returning Your System To Its Factory Condition
apps. Type 'Windows system restore' in the Search Help box, then press Enter. Returning to a restore point 1. From Start, type 'Control Panel' and then click Control Panel in the list of apps. 2. Click System and Security > Action Center, then click Recovery at the bottom of the window. -
Page 43: Recovering From Windows
Recovering from Windows Start Acer Recovery Management: • From Start, type 'Recovery' and then click Acer Recovery Management in the list of apps. Two options are available, Restore Factory Settings (Reset my PC) or Customized Restore (Refresh my PC). Restore Factory Settings deletes everything on your hard drive, then reinstalls Windows and all software and drivers that were pre-installed on your system. - Page 44 Restore Factory Settings with Acer Recovery Management 1. Click Restore Factory Settings. Caution: 'Restore Factory Settings' will erase all files on your hard drive. 2. If your computer is configured with two operating systems (only available on certain systems), a window opens with the option to restore either Windows 7 or Windows 8.
- Page 45 3. The Reset your PC window opens. Images for reference only. 4. Click Next, then choose how to erase your files: a. Just remove my files quickly erases all files before restoring your computer and takes about 30 minutes. b. Fully clean the drive completely cleans the drive after each file is erased, so no files can be viewed after the recovery.
- Page 46 Customized Restore with Acer Recovery Management 1. Click Customized Restore (Retain User Data). 2. The Refresh your PC window opens. 3. Click Next, then Refresh. 4. The recovery process begins by restarting your computer, then continues by copying files to your hard drive. This process takes about 30 minutes.
-
Page 47: Recovering From A Recovery Backup
Recovering from a recovery backup To recover from a recovery backup on a USB drive: 1. Find your recovery backup. 2. Plug in the USB drive and turn on your computer. 3. If it is not already enabled, you must enable the F12 Boot Menu: a. - Page 48 a. Click Advanced then System Restore to start Microsoft System Restore: Microsoft System Restore periodically takes a 'snapshot' of your system settings and saves them as restore points. In most cases of hard-to-resolve software problems, you can return to one of these restore points to get your system running again.
- Page 49 Reset your PC from the recovery backup Caution: Reset your PC will erase all files on your hard drive. 1. The Reset your PC window opens. Images for reference only. 2. Click Next. 3. Select the operating system to recover (normally only one option is available).
- Page 50 drive takes much longer, up to 5 hours, but is much more secure as old files are completely removed. 6. Click Reset. 7. After the recovery has finished, you can start using your computer by repeating the first-start process. Refresh your PC from the recovery backup 1.
-
Page 51: Acer Clear.fi
CER CLEAR Note: Only for certain models. With Acer clear.fi, you can enjoy videos, photos and music. Stream media from, or to, other devices with Acer clear.fi installed. Note: All devices must be connected to the same network. To watch videos or listen to music open clear.fi Media, to browse photos open clear.fi Photo. -
Page 52: Shared Files
Open clear.fi on the device that stores the files, select Edit then make sure Share my library on local network is active. Which devices are compatible? Certified Acer devices with clear.fi or DLNA software can be used with the clear.fi software. These include DLNA-compliant PCs, smartphones, and NAS (Network Attached Storage) devices. -
Page 53: Playing To Another Device
Player... 3. Select a file in the main window, then use the media controls in the bar across the bottom of the screen to control the remote device. For more help, go to http://www.acer.com/clearfi/download/. Acer clear.fi - 53... -
Page 54: Power Management
Acer Green Instant On Note: For selected models only. The Acer Green Instant On feature allows your computer to wake up from Sleep mode in less than the time it takes to open the lid. When you close the lid, or leave your computer for a while, your computer enters Sleep mode. -
Page 55: Saving Power
Fast startup: Note: If Fast startup is off, your computer will take longer to start from Sleep. If your computer features Acer Instant On or Acer Instant Connect, these will also be turned off. Your computer will also not start if it receives an instruction to start over a network (Wake on LAN). - Page 56 1. Open the Desktop. 2. Click Power Options in the Notification area. 3. Select More Power Options. 4. Select Choose what the power buttons do. 5. To access Shutdown Settings, select Change settings that are currently unavailable. 56 - Power management...
- Page 57 6. Scroll down and disable Turn on fast startup. 7. Select Save changes. Power management - 57...
-
Page 58: Battery Pack
ATTERY P A C K The computer uses a battery pack that gives you long use between charges. Battery pack characteristics The battery pack has the following characteristics: • Employs current battery technology standards. • Delivers a battery-low warning. The battery is recharged whenever you connect the computer to the AC adapter. - Page 59 2. Connect the AC adapter and fully charge the battery. 3. Disconnect the AC adapter. 4. Turn on the computer and operate using battery power. 5. Fully deplete the battery until the battery-low warning appears. 6. Reconnect the AC adapter and fully charge the battery again. Follow these steps again until the battery has been charged and discharged three times.
-
Page 60: Charging The Battery
• Not discharging and recharging the battery to its extremes, as described above. • Frequent use; the more you use the battery, the faster it will reach the end of its effective life. A standard computer battery has a life span of about 300 charges. -
Page 61: Checking The Battery Level
• Store the battery pack in a cool, dry place. The recommended temperature is 10° C (50° F) to 30° C (86° F). Higher temperatures cause the battery to self-discharge faster. • Excessive recharging decreases the battery life. • Look after your AC adapter and battery. Checking the battery level The Windows power meter indicates the current battery level. -
Page 62: Installing And Removing The Battery Pack
When the battery-low warning appears, the recommended course of action depends on your situation: Situation Recommended Action 1. Plug the AC adapter into the computer, and then The AC adapter connect to the mains power supply. and a power 2. Save all necessary files. outlet are 3. - Page 63 Important: Before removing the battery from the unit, connect the AC adapter if you want to continue using your computer. Otherwise, turn off the computer first. To install a battery pack: 1. Align the battery with the open battery bay; make sure that the end with the contacts will enter first, and that the top surface of the battery is facing up.
-
Page 64: Traveling With Your Computer
RAVELING W I T H YOUR COMPUTER This section gives you tips and hints to consider when moving around or traveling with your computer. Disconnecting from the desktop Follow these steps to disconnect your computer from external accessories: 1. Save any open files. 2. -
Page 65: Preparing The Computer
Preparing the computer Before moving the computer, close and latch the display cover to place it in Sleep mode. You can now safely take the computer anywhere you go within the building. To bring the computer out of Sleep mode, open the display;... -
Page 66: Taking The Computer Home
Taking the computer home When you are moving from your office to your home or vice versa. Preparing the computer After disconnecting the computer from your desktop, follow these steps to prepare the computer for the trip home: • Check that you have removed all media and compact discs from the drive(s). -
Page 67: Setting Up A Home Office
• If you need to stop for an extended period of time and cannot carry the computer with you, leave the computer in the trunk of the car to avoid exposing the computer to excessive heat. • Changes in temperature and humidity can cause condensation. Allow the computer to return to room temperature, and inspect the screen for condensation before turning on the computer. -
Page 68: What To Take With You
What to take with you Take the following items with you: • AC adapter • Additional printer driver files if you plan to use another printer Special considerations In addition to the guidelines for taking the computer home, follow these guidelines to protect your computer while traveling: •... -
Page 69: Special Considerations
• Additional printer driver files if you plan to use another printer. • Proof of purchase, in case you need to show it to customs officials. • International Travelers Warranty passport. Special considerations Follow the same special considerations as when traveling with the computer. -
Page 70: Securing Your Computer
ECURING Y O U R COMPUTER Your computer is a valuable investment that you need to take care of. Learn how to protect and take care of your computer. Using passwords Passwords protect your computer from unauthorized access. Setting these passwords creates several different levels of protection for your computer and data: •... -
Page 71: Entering Passwords
Entering passwords When a password is set, a password prompt appears in the center of the display screen. • When the Supervisor Password is set, a prompt appears when you press <F2> to enter the BIOS utility at boot-up. • Type the Supervisor Password and press <Enter> to access the BIOS utility. -
Page 72: Acer Theft Shield
Note: Acer Theft Shield needs a Windows Log On password. If you have not set a password, you will be reminded to set one. Once Acer Theft Shield is running, you will be asked to select the type of detection you wish to use. You may select: •... - Page 73 Android app to your phone. Tip: If you do not select to use an Android phone at this stage, you can select to use an Android phone at any time from "Settings" on page Acer Theft Shield - 73...
-
Page 74: Using Acer Theft Shield
QR code. Once you have downloaded the Android app to your phone, click Next to start setting up Acer Theft Shield. Click Start to turn on your notebook’s Wi-Fi hotspot feature, this will allow your phone to detect the notebook. -
Page 75: Settings
SSID that your notebook will broadcast while linking to your Android cellphone. You can also change the alarm notification duration from the drop-down menu under Alarm mode settings. Tip: To view the QR code to download the Android app again, click the icon. Acer Theft Shield - 75... -
Page 76: Magicflip Port Door
AGIC LIP PORT D O O R Your computer offers you a complete mobile computing experience. The MagicFlip port door serves to both make your computer slimmer and easier to carry, as well as protect the ports from damage. Connectivity options The ports in the port door allow you to connect peripheral devices to your computer as you would with a desktop PC. -
Page 77: Magicflip Port Door Notification
MagicFlip port door notification When the door opens or closes, a notification will appear at the bottom of the screen. To hide the notification, click the icon. If you press the MagicFlip port door button while there is a device plugged into one (or more) of the ports, the notification will flash red borders around the port icon(s) for the occupied port(s). -
Page 78: Wireless Networks
Select your network and enter the password if required. Otherwise, open Internet Explorer and follow the instructions. Please refer to your ISP or router documentation. Acer Instant Connect Instant Connect ensures a faster connection to any of the networks that your computer connects to most frequently. - Page 79 is easy and allows you to share files, peripheral devices and an Internet connection. What are benefits of a wireless network? Mobility Wireless LAN systems allow you and other users of your home network to share access to files and devices connected to the network, for example a printer or scanner.
-
Page 80: Using A Bluetooth Connection
S I N G A LUETOOTH C O N N E C T I O N Bluetooth is a technology enabling you to transfer data wirelessly over short distances between many different types of devices. Bluetooth- enabled devices include computers, cell phones, tablets, wireless headsets, and keyboards. - Page 81 Then, from the notification area, click the Bluetooth icon, and select Open Settings. Select the Allow Bluetooth devices to find this computer check box, click Apply, and then click OK. Using a Bluetooth connection - 81...
-
Page 82: Adding A Bluetooth Device
The Bluetooth adapter in your computer is now enabled and ready for you to add Bluetooth devices. To disable your computer’s Bluetooth adapter, do the following: 1. Press the Windows key + <W> and then type Wireless. 2. In the results, click on Wireless. 3. - Page 83 Click on the device you want to add. A code displays on your computer, which should match the code displayed on your device. Select Yes. Then, accept the pairing from your device. Using a Bluetooth connection - 83...
- Page 84 Note: Some devices using older versions of the Bluetooth technology require both devices to enter a PIN. In the case of one of the devices not having any inputs (as in a headset), the passcode is hardcoded into the device (usually "0000" or "1234"). Consult your device’s user manual for more information.
- Page 85 The operation window enables you to play music and audio from your device through your computer, send files to your device and change Bluetooth settings. Using a Bluetooth connection - 85...
-
Page 86: Thunderbolt
HUNDERBOLT Thunderbolt is a high-speed connection that supports storage devices as well as external displays. It is compatible with the DisplayPort standard. Note: Up to six Thunderbolt devices and one DisplayPort display can be daisy-chained, however, the DisplayPort display will be the last device in the chain, and it cannot be preceeded by a Thunderbolt display. -
Page 87: Hdmi
HDMI HDMI (High-Definition Multimedia Interface) is an industry-supported, uncompressed, all-digital audio/video interface. HDMI provides an interface between any compatible digital audio/video source, such as a set-top box, DVD player, and A/V receiver and a compatible digital audio and/or video monitor, such as a digital television (DTV), over a single cable. -
Page 88: Universal Serial Bus (Usb)
(USB) N I V E R S A L E R I A L The USB port is a high-speed serial bus which allows you to connect USB peripherals without taking up system resources. 88 - Universal Serial Bus (USB) -
Page 89: Bios Utility
BIOS UTILITY The BIOS utility is a hardware configuration program built into your computer's BIOS. Your computer is already properly configured and optimized, and you do not need to run this utility. However, if you encounter configuration problems, you may need to run it. To activate the BIOS utility, press <F2>... -
Page 90: Frequently Asked Questions
REQUENTLY ASKED QUESTIONS The following is a list of possible situations that may arise during the use of your computer. Easy solutions are provided for each one. I turned on the power, but the computer does not start or boot up Look at the power indicator: •... - Page 91 If pressing a key does not turn the display back on, three things might be the cause: • The brightness level might be too low. Press <Fn> + < > (increase) to adjust the brightness level. • The display device might be set to an external monitor. Press the display toggle hotkey to toggle the display back to the computer.
-
Page 92: Requesting Service
The keyboard does not respond Try attaching an external keyboard to a USB port on the computer. If it works, contact your dealer or an authorized service center as the internal keyboard cable may be loose. The printer does not work Check the following: •... - Page 93 If the country you are traveling in does not have an Acer-authorized ITW service site, you can still get in contact with our offices worldwide. Please visit www.acer.com. Before you call Please have the following information available when you call Acer for online service, and please be at your computer when you call.
-
Page 94: Troubleshooting
Troubleshooting This chapter shows you how to deal with common system problems. Read it before calling a technician if a problem occurs. Solutions to more serious problems require opening up the computer. Do not attempt to open the computer yourself; contact your dealer or authorized service center for assistance. - Page 95 Error messages Corrective action Insert a system (bootable) disk, then press Disk boot failure <Enter> to reboot. Press <F2> (during POST) to enter the BIOS Equipment utility, then press Exit in the BIOS utility to configuration error reboot. Contact your dealer or an authorized service Hard disk 0 error center.
-
Page 96: Tips And Hints For Using Windows 8
Tips and hints for using Windows 8 We know this is a new operating system that will take some getting used to, so we've created a few pointers to help you get started. Three concepts you might want to keep in mind 1. -
Page 97: How Do I Jump Between Apps
How do I turn off my computer? Press the Windows key + <C>, click Settings > Power and select the action you'd like to take. Alternatively, from Desktop, click Acer Power Button and select the action you'd like to take. -
Page 98: How Do I Unlock My Computer
How do I unlock my computer? Press the any key and click on a user account icon to unlock the computer. If your account has a password set, you will need to enter the password to continue. How do I personalize my computer? You can personalize Start with a different background image or by arranging the tiles to suit your personal needs. -
Page 99: I Want To Use Windows In The Way That I'm Used To - Give Me My Desktop Back
To change the background, press the Windows key + <C> and click Settings > Change PC settings > Personalize. Click Lock screen at the top of the page and select the image and apps you would like to see on the lock screen. - Page 100 To view the complete list of apps, press the space bar or the Menu key and click All apps. How do I make an app appear on Start? If you're in All apps and you want to make an app appear on Start, you can select the app and right-click on it.
-
Page 101: What Is A Microsoft Id (Account)
What is a Microsoft ID (account)? A Microsoft account is an email address and password that you use to sign in to Windows. You can use any email address, but it is best if you choose the one you already use to communicate with friends and sign in to your favorite websites. -
Page 102: How Do I Check For Windows Updates
Press the Windows key + <C> and click Settings > Change PC settings > Windows Updates. Click Check for updates now. Where can I get more information? For more information please visit: • Windows 8 tutorials: www.acer.com/windows8-tutorial • Support FAQs: www.acer.com/support 102 - Frequently asked questions... -
Page 103: Regulations And Safety Notices
EGULATIONS AND SAFETY N OT IC E S STATEMENT This device has been tested and found to comply with the limits for a Class B digital device pursuant to Part 15 of the FCC rules. These limits are designed to provide reasonable protection against harmful interference in a residential installation. - Page 104 Caution: Changes or modifications not expressly approved by the manufacturer could void the user's authority, which is granted by the Federal Communications Commission, to operate this computer. OTICE FOR ANADA This Class B digital apparatus complies with Canadian ICES-003. Remarque à l'intention des utilisateurs canadiens Cet appareil numérique de la classe B est conforme a la norme NMB-003 du Canada.
- Page 105 Declaration of Conformity for EU countries Hereby, Acer, declares that this computer is in compliance with the essential requirements and other relevant provisions of Directive 1999/5/EC. Wireless operation channels for different domains N. America 2.412-2.462 GHz Ch01 through Ch11 Japan 2.412-2.484 GHz...
- Page 106 Departments in which the use of the 2400 - 2483.5 MHz band is permitted with an EIRP of less than 100 mW indoors and less than 10 mW outdoors: 01 Ain Orientales 25 Doubs 59 Nord 71 Saone et Loire 02 Aisne 26 Drome 60 Oise...
- Page 107 List of national codes This equipment may be operated in the following countries: Country ISO 3166 Country ISO 3166 2 letter code 2 letter code Austria Malta Belgium Netherlands Cyprus Poland Czech Republic Portugal Denmark Slovakia Estonia Slovenia Finland Spain France Sweden Germany...
- Page 108 This device complies with RSS210 of Industry Canada. This Class B digital apparatus complies with Canadian ICES-003, Issue 4, and RSS-210, No 4 (Dec 2000) and No 5 (Nov 2001). "To prevent radio interference to the licensed service, this device is intended to be operated indoors and away from windows to provide maximum shielding.
- Page 109 The FCC RF safety requirement The radiated output power of the wireless LAN Mini PCI Card and Bluetooth card is far below the FCC radio frequency exposure limits. Nevertheless, the computer shall be used in such a manner that the potential for human contact during normal operation is minimized as follows: 1.
- Page 110 3. An improper installation or unauthorized use may cause harmful interference to radio communications. Also any tampering of the internal antenna will void the FCC certification and your warranty. — L (RSS-210) ANADA POWER LICENSE EXEMPT RADIO COMMUNICATION DEVICES Exposure of humans to RF fields (RSS-102) The computer employs low gain integral antennas that do not emit RF field in excess of Health Canada limits for the general population;...
- Page 111 The maximum allowed antenna gain for use with this device is 6 dBi in order to comply with the E.I.R.P limit for the 5.25- to 5.35 and 5.725 to 5.85 GHz frequency range in point- to-point operation. Ver.: 02.01.06 - 111...
Need help?
Do you have a question about the Aspire S5 and is the answer not in the manual?
Questions and answers