GENUINE Buddy 50 User Manual

GENUINE Buddy 50 User Manual

Genuine scooter company

Advertisement

Dear Customers:
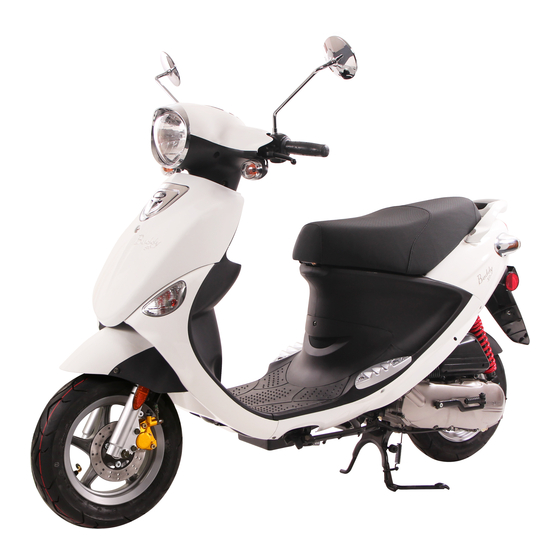
Thank you for purchasing the Buddy from Genuine Scooter Company. The
efficiency and longevity of each scooter will depend heavily on the operating
method of each user. This owner's manual will provide you with operating
instructions, precautions, and general maintenance information required to
safely operate and maintain your scooter. Please read the entire manual before
operating your scooter.
The Buddy comes in three different engine configurations. The Buddy 50 has a
2-stroke 50cc engine, the Buddy 125 has a 4-stroke 125cc engine, and the Buddy
150 has a 4-stroke 150cc engine and Buddy 170 has a 4-stroke 170cc EMS engine.
Please be aware of your scooter 's engine configuration while reading this
manual.
If you have any questions, please ask your dealer for assistance.
1

Advertisement

Table of Contents
loading

Summary of Contents for GENUINE Buddy 50

  • Page 1 Please read the entire manual before operating your scooter. The Buddy comes in three different engine configurations. The Buddy 50 has a 2-stroke 50cc engine, the Buddy 125 has a 4-stroke 125cc engine, and the Buddy 150 has a 4-stroke 150cc engine and Buddy 170 has a 4-stroke 170cc EMS engine.
  • Page 2: Table Of Contents

    CONTENT Scooter Safety Important Notes for Operation & Riding Limited warranty for GENUINE SCOOTERS Starting the Engine Part Location Warming up the Engine Identification Engine Break-in Switches & Controls Periodic Maintenance Speedometer Periodic Maintenance Table Handlebar Controls The Air Cleaner...
  • Page 3 GENUINE Warranty Card Name Telephone Address Displacement Engine NO. Vin NO. Model Customer Signature Dealer Signature...
  • Page 4: Scooter Safety

    Scooter Safety ▲ Warning Scooter riding requires special effort on your part to ensure your safety. Know these requirements before you ride: Safe Riding Rules 1.Always make a pre-ride inspection (page ) and perform any needed adjustments or repairs before you ride the scooter.
  • Page 5: Limited Warranty For Genuine Scooters

    LIMITED WARRANTY FOR GENUINE SCOOTERS ■ This is to be presented by the authorized GENUINE dealer to the purchaser of GENUINE scooters. We provide the following services: 1.TO OBTAIN THE WARRANTY SERVICE A.Effectiveness of the warranty a.After completing the warranty card, the GENUINE selling dealer will give you the warranty card.
  • Page 6 • Any accidents caused by natural disasters or out of human’s control. • Did not use fuel or spare parts provided or recommended by the GENUINE , or made any modification of the scooter. • Scooters used for competition , performance or rental vehicle.
  • Page 9 CAUTION: CHARGING SEAT 1.Buddy is equipped with cell phone charging seat, as right figure shown: 2.Before using it, please read the warning labels first and obey it. 3.The fuse (1A) is located inside the Windshield as shown. FUSE...
  • Page 10: Identification

    Identification 1. Engine Number is located (stamped) on the rear side of the left crankcase. 50 CC 100 / 125 / 150 /170 CC NOTE: 1.The first two digits designate model type, the others are production serial numbers. Your dealer may need this number for ordering replacement parts. Please write down the Engine Number for reference.
  • Page 11 2. Vehicle Identification Number (VIN) is located (stamped) inside the inner front cover. NOTE: The first nine digits are model type, the last eight digits are production serial numbers. Your dealer may need this number for ordering replacement parts. Please write down the VIN for reference.
  • Page 12: Switches & Controls

    Switches and Controls 1. Main Switch The main switch controls the ignition and lighting system. The power is connected, engine can be started. Headlight is on. Tail light is on. The key cannot be pulled out from this position. All the power is cut off. The key can be pulled out from this position.
  • Page 13: Speedometer

    2. Gauges & Indicators 1.Signal Indicator (Green) When the blinker switch is shifted, this indicator will flash. 2.High Beam Indicator (Blue) When the HI/LO beam switch is set on ‘HI’, this indicator will be lit. 3.Oil Warning Indicator Check/fill engine oil immediately. 4.Speedometer 5.Fuel Gauge T h e f u e l g a u g e s h o w s t h e a p p r o x i m a t e...
  • Page 14 1. Hi/Lo Beam Switch Hi – The high beam is on Lo – The low beam is on 2. Turn Signal Switch Move to ← to signal a left turn, → to signal a right turn. Press to turn signal off. 3.
  • Page 15 Fuel Injection Engine possible. Speedometer ODO meters: when the hundred digital become ① EMS selfish check indicator RED, you have to replace the engine oil ASAP. 1. EMS: Engine Management System, that  SIGNAL INDICATOR (GREEN) means this vehicle must equipped with When the blinker switch is shifted, this ECU (Electric Control Unit), injector and indicator will flash and tickling.
  • Page 16: Handlebar Controls

    3. Handlebar Controls LH switches 1. Hi/Lo Beam Switch Hi – The high beam is on Lo – The low beam is on 2. Turn Signal Switch Move to ← to signal a left turn, → to signal a right turn. Press to turn signal off.
  • Page 17: Steering Lock

    4.Steering Lock 5.SEATLOCK To lock the steering, turn the handlebars all the way Push the key in and turn counterclockwise to open to the left and turn the key from the seat. Remove the key. Note: Do not turn the key to while riding.
  • Page 18: Fuel Tank Cap

    6.Fuel Tank Cap 7. Kick Starter Lever Insert the key into ignition switch. Push the key and turn counterclockwise to open the seat and Swing the lever outward. Kick the lever down expose the fuel tank cap. slowly until the gear stops, then kick the lever down strongly to start the engine.
  • Page 19: Luggage Compartment

    8. Luggage Compartment The luggage compartment is under the seat. Maximum load capacity: 11 lbs (5 kg) NOTE: 1. The maximum load capacity is 11 lbs (5 kg). 2. If engine has been operating for a long time, the luggage compartment can become hot.
  • Page 20: Pre-Ride Inspection

    PRE-RIDING INSPECTION Please do the inspection as following before riding: ITEM PROCEDURE PAGE FRONT BRAKE Check brake function, clearance, brake oil level. Check for leaking. If necessary, fill 34-35 with FMVSS DOT3(4) r SAEJ 1703 brake oil. REAR BRAKE Check brake function and clearance; adjust if necessary. THROTTLE GRIP Check if it is smooth.
  • Page 21: Rear Brake

    Brake Adjustment: Front Brake 1. Measure the ‘play’ of the rear brake lever The front brake will function when the right hand before the brake starts to take hold. lever is squeezed. Free play should be 10-20mm. 2. Adjust the amount of free play by turning the adjusting nut at the brake lever.
  • Page 22: Brake Fluid

    Please refer to page xx. Please consult your dealer CAUTION when the disk pads need to be replaced. Go to your Genuine Scooters dealer immediately if you find the brake fluid is leaking. A leak could mean the braking system has a dangerous problem.
  • Page 23: Throttle Grip

    • Make sure the twist grip automatically returns to the original position. • Consult your Genuine Scooters dealer for adjusting advice, if necessary. Engine Oil 1. 4-stroke engine (125cc / 150cc) • Check engine oil level after engine has been running 2-3 minutes.
  • Page 24: Air Cleaner

    Air Cleaner 2. 2-stroke engine (50cc) The air filter will keep dust away from the engine Sponge filter element and also protect it against wearing out. Please check and clean the filter periodically (ref: page 1. 4-stroke engine (125cc / 150cc) Wet paper filter element...
  • Page 25: Tire

    Tires Rear: 25 psi To ensure the best performance and extend the life of your scooter’s tires, please pay attention to 2. Simple Check the following: Check tire appearance before riding. If tires are worn out significantly or 1. Tire Pressure damaged/punctured by debris, do not ride the Be sure that tire pressure is in accordance scooter.
  • Page 26: Catalytic Converter

    Catalytic Converter (standard on California models) The catalytic converter is designed to reduce the emissions produced by the motor. It is located inside the muffler. Precautions: 1. Make sure to park your scooter away from flammable material or pedestrians to avoid contact with the hot muffler cover.
  • Page 27: Important Notes For Operation & Riding

    • Please make sure you are familiar with all the operation and functions before riding. Please contact your Genuine Scooters dealer with any questions. • Exhaust fumes are dangerous. Be sure you are in a well-ventilated area when the engine is started.
  • Page 28: Warming Up The Engine

    Warming Up the Engine To protect the engine, please warm up the engine 1-3 minutes before riding. Do not immediately accelerate when the engine is cold. Note: Please read the section on “Engine Break-In” on page xx before initial riding. •...
  • Page 29: Engine Break-In

    Note: Change gear (2 stroke & 4 stroke engine)& engine (4 stroke engine) oil after 190 mile. 3. 310-620 mile Avoid applying more than ¾ throttle. 4. Over 620 mile Avoid applying full throttle for extended periods of time. Note: Please contact your Genuine Scooter dealer if any problems take place during the break-in process.
  • Page 30: Periodic Maintenance Table

    Periodic Maintenance Table-please execute the recommended maintenance accordingly. Months/Distance (mile) Item Checking Content 1 or 3 or 6 or 9 or 12 or 15 or 18 or 200mile 1800mile 3600mile 5400mile 7200mile 9000mile 10800mile Engine Oil ○ According to oil warning light Engine Oil*(4T) Replace (800cc, total 900cc) ○...
  • Page 31 Periodic Maintenance Table-please execute the recommended maintenance accordingly. Months/Distance (mile) Item Checking Content 1 or 3 or 6 or 9 or 12 or 15 or 18 or 200mile 1800mile 3600mile 5400mile 7200mile 9000mile 10800mile Rear Absorber Shock Check for leaks/functionality ○...
  • Page 32: The Air Cleaner

    The Air Cleaner 4T Engine(100/125/150/170cc) 2T Engine (50 cc) If the air filter element is clogged, it will reduce engine performance and cause abnormal fuel consumption. Changing the air filter element: 1. Take off the air filter cover. 2. Remove the air filter element. 3.
  • Page 33: The Spark Plug

    The Spark Plug The spark plug is an important part of the engine and is easily checked. The ideal color of the electrode should be light brown. If the spark plug electrode is a different color, please ask your dealer for assistance. Standard spark plug: 125cc / 150 cc engine C7HSA (NGK) 170cc engine C7RHSA(NGK)
  • Page 34: Brake Adjustment

    Front Brake Check Remove the inspection hold cover from the brake caliper to view the brake pad wear indicators. If the indicators almost reach the brake disk, the brake pads should be changed. Note: Be sure to re-install the inspection hole cover. If the cover is not re-installed, water may enter through the inspection hole and compromise brake performance.
  • Page 35: Front Fork Check

    Front Fork Check 1. Visual check  Visually inspect forks for scratches or other damage and leaks.  If damage or leaks are found, do not ride the scooter and consult with your dealer for service. 2. Function check  Park the scooter on level ground. ...
  • Page 36: Fuel Draining Device

    Fuel draining device (fuel injection engine only): If the vehicle is stored continually more than 1 month, the fuel inside the hose might be bad for starting the engine, then you have to: 1. Withdraw the rubber cap inside the luggage.
  • Page 37: Ems Quick Diagnostic

    EMS quick diagnostic (only the well trained dealer can do it) 1. prepare the quick diagnostic tool, plug into the seat below the seat. illuminate, that means EMS is well working. 2. If the EMS led (on dashboard) doesn’t If there is any EMS problem, the EMS led will flash to remind you the condition, we suggest you to find a PGO dealer to make further inspection for you.
  • Page 38 EMS defect code reference table: DEFECT PART EMS LED CODE Throttle valve sensor defect 0 LONG 6 SHORT Intake manifold pressure sensor defect 0 LONG 9 SHORT Oil temperature sensor defect 1 LONG 1 SHORT Oxygen sensor defect 1 LONG 7 SHORT Injector defect 3 LONG 3 SHORT Ignition coil defect...
  • Page 39: Fuse Replacement

    The battery is a maintenance-free battery. It is not necessary to check or refill the liquid. If the battery is leaking, contact your Genuine Scooter dealer immediately. Note: Do not try to take off the rubber seal even when charging the battery. Doing this will damage your battery.
  • Page 40: Specification

    SPECIFICATIONS Buddy 50 Buddy 125 Buddy 150 Buddy 170 Dimension Overall length 1710mm 1710mm 1710mm 1780mm Overall width 645mm 645mm 645mm 645mm Overall height 1060mm 1060mm 1060mm 1090mm Wheelbase 1210mm 1210mm 1210mm 1210mm Dry Weight 100kg 101kg 101kg 107kg Engine...
  • Page 41: Specifications

    SPECIFICATIONS Buddy 50 Buddy 125 Buddy 150 Buddy 170 Gear Oil Type SAE 140 SAE 140 SAE 140 SAE 140 Min. volume 90 cc 90 cc 90 cc 90 cc Total volume 110 cc 110 cc 110 cc 110 cc...
  • Page 42 SPECIFICATIONS Buddy 50 Buddy 125 Buddy 150 Buddy 170 Bulb Volt / Watt * QTY Headlight (Hi/Lo) 12V 35W/30W * 1 12V 35W/30W * 1 12V 35W/35W *1 12V 35W/35W *1 Rear/Stop Lamps 12V 5W/21W *1 12V 5W/21W *1 12V 5W/21W*1 12V 5W/2.65W*1...
  • Page 43: Periodic Maintenance Record

    Periodic Maintenance Record Scheduled Actual Date Dealer Sig. Scheduled Actual Date Dealer Sig. 200 mile 15200 mile 1800 mile 17000 mile 3600 mile 18800 mile 5400 mile 20600 mile 7200 mile 22400 mile 9000 mile 24200 mile 10800 mile 26000 mile 12600 mile 27800 mile 13400 mile...
  • Page 44: Reporting Safety Detects

    If you believe your vehicle has a defect that could cause an accident, or could cause injury or death, you should immediately inform the National Highway Safety Administration (NHTSA) in addition to notifying Genuine Scooter Company. If NHTSA receives similar complaints, it may open an investigation, and if it finds that a...

This manual is also suitable for:

Buddy 125Buddy 150Buddy 170

Table of Contents