Table of Contents
Advertisement
Quick Links
Advertisement
Table of Contents

Subscribe to Our Youtube Channel
Related Manuals for GENUINE CU 500


Summary of Contents for GENUINE CU 500
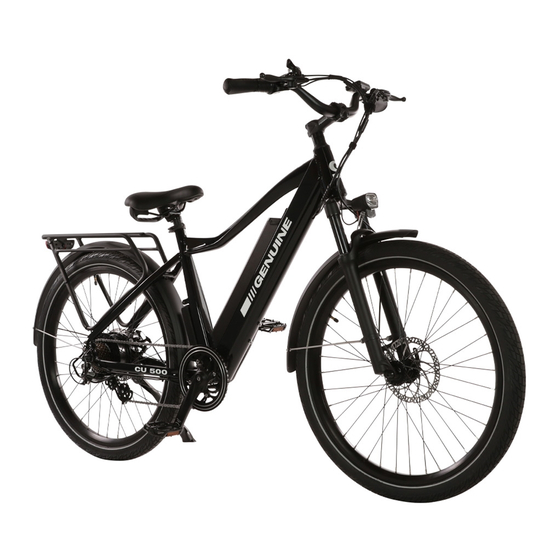
- Page 1 CU 500 Owner’s Manual...
-
Page 2: Notice
If you are a parent or guardian, you are responsible for the activities and safety of your children. The CU 500 E-Bike is not designed for use by children. If you have any questions, please ask your customer service representative for assistance. -
Page 3: Introduction
Visit https://www.genuinescooters.com/owners-manuals/ to download the latest version. GENUINE makes every effort to ensure accuracy of its documentation and assumes no responsibility of liability if any errors or inaccuracies appear within. -
Page 4: Table Of Contents
TABLE OF CONTENTS NOTICE ................SAFETY CHECKLIST ..........16,17 INTRODUCTION ............OPERATION Sidestand, Pedal Assist Level Selection ....18 TABLE OF CONTENTS ..........Pedal Assist, Throttle, USB Charging ....19 PRODUCT SPECIFICATIONS ........4, 5 Shifting Gears, Brakes ..........20 SAFE RIDING Wear Safety Gear, Make Yourself Visible ..... -
Page 5: Product Specifications
Product Specifications 300 Ibs Max Load Battery 13Ah Lithium Battery 500W Brushless Geared Motor Motor 26” * 18” 6061 Aluminum Frame LCD Display Display Tektro Aries 180mm Brake Shimano-Altus-7 Speed Derailleur Charger US Standard 3.0 A Quick Charger Shimano 7 Speed Freewheel Max Speed 20mph throttle, 25mph pedal assist... - Page 6 Product Specifications Maximum Load Capactiy Handlebar Reach 300 LBS 28 inch Seat Height 34+ Inches Tires 27.5" X 2.4" Total Length inch Motor 500W Wheelbase 46.5 inch...
-
Page 7: Safe Riding
Safe Riding Wear a Helmet Rider safety begins with quality head protection. A head injury is one of the most serious injuries that can occur. Always wear a quality DOT approved helmet that is properly buckled. If the helmet does not have a face shield, wear suitable eye protection. -
Page 8: Recommended Torque Values
Recommended Torque Values Hardware Location Torque Required (Nm) Handlebar 18-20 Stem 18-20 Saddle 18-20 Front Wheel (For Bikes with Bolt on Front Wheel) 16-25 Rear Wheel 35-40 Bottom Bracket Parts 35-55 Pedals Disk Mounting Bolts Disk Caliper Mount Crank Bolts Rear Derailleur Cable Pinch Front Derailleur Clamp... -
Page 9: Bicycle Layout
Bicycle Layout Gear Selector Rear Brake On / Off Front Brake Handle Throttle Digital Display Handle Grip Grip Seat Motor Controller LED Head Light LED Rear Light Front Fork Tire Front Brake Motor Rear Derailleur Battery Pedal... -
Page 10: Handlebar Controls
Bicycle Layout After the bike has been properly assembled, all components are secured correctly, and you have run through all safety checks, you may now proceed to set up and operate the vehicle. Familiarize yourself with all controls and settings prior to operation. Digital Display Front Brake Lever Left Grip... -
Page 11: Suspension
Bicycle Layout After the bike has been properly assembled, all components are secured correctly, and you have run through all safety checks, you may now proceed to set up and operate the vehicle. Familiarize yourself with all controls and settings prior to operation. Fork Pre-Load Adjuster Fork Rebound Adjuster / Lockout WARNING... -
Page 12: Digital Display Layout
Digital Display Layout Current Motor Output Power Current Speed Units of Speed Battery Capacity Remaining USB Charging Activated Time Elapsed Setting Mode Activated Max Speed Error Code Displayed Trip Odometer Pedal Assist Level Units of Distance Lighting Walk Mode Total Activated Distance Activated... -
Page 13: Digital Display Operation
Digital Display Operation ◆ POWER ON / OFF Long Press the "M" Mode button for 2 seconds to power on the E-bike. Once on, Long press the "M" Mode button for 2 seconds to power off. If the electric bike is not used for more than 10 minutes, the E-bike will automatically power off. ◆... -
Page 14: Settings
Digital Display Operation In the power-on state, while the vehicle is stationary, press and hold the “+” and “-” buttons simultaneously for more than 2 seconds to enter "Settings" mode. The "SET" icon will flash while you are in setting mode. Each setting item needs to be carried out while the e-bike is stationary. -
Page 15: Battery Capacity, Motor Output, Usb Charging
Digital Display Operation ◆ BATTERY CAPACITY INDICATION The display on the handlebar of your bike features a battery capacity gauge . It is recommended that users charge the battery as soon as possible once there is one bar remaining on the display. Once the battery is fully depleted, the last remaining bar will being to flash communicating to the user that they should cease power assisted operation immediately and charge the battery as soon as possible. -
Page 16: Walk Mode, Lighting, Pedal Assistance
Digital Display Operation ◆ WALKING MODE Press and HOLD the " ̶ " Decrease button. After 2 seconds, the electric bike enters power-assisted "Walking" mode. The electric bike travels at a constant speed of 2.6 miles per hour. At the same time, the screen displays the walk icon next to power level. -
Page 17: Safety Checklist
Safety Checklist NOTICE: Before every ride, it is important to carry out the following safety checks. Safety Check Basic Steps o Ensure front and rear brakes function properly with sufficient lever pressure. o Ensure brake pads are not over worn and are correctly positioned in relation to the calipers. Brakes o Ensure brake cables show no obvious signs of fraying or damage. - Page 18 Safety Checklist NOTICE: Before every ride, it is important to carry out the following safety checks. Safety Check Basic Steps o Ensure hub motor is spinning smoothly and the motor bearings are in good working order. o Ensure all power cables on the bicycle are secured and undamaged. Motor Drive Assembly and Throttle o Make sure the hub motor axle bolts are secured and all torque arms and torque washers are in place.
-
Page 19: Sidestand, Pedal Assist Level Selection
Bicycle Operation ◆ SIDESTAND Before you ride your E-Bike, raise the side stand upward to a secure position. Increase ◆ PEDAL ASSIST POWER LEVEL Press the "M" button to turn the E-Bike on or off. Pedal Assist Level Press the Increase button to increase the motor power Press the Decrease button to decrease the motor power. -
Page 20: Pedal Assist, Throttle, Usb Charging
Bicycle Operation ◆ PEDAL ASSIST When the E-Bike power is on, the power level is set to 1 or higher, and you are pedaling your bicycle, your E-Bike will provide pedal assistance via the motor. When the E-Bike power is on, and the power level is set to 0, or the power is off, the motor will not provide pedal assistance while you are pedaling your bicycle. -
Page 21: Shifting Gears, Brakes
Bicycle Operation UP SHIFT DOWN SHIFT ◆ GEAR SHIFT The gear shift control is located on the right handlebar. ONLY CHANGE GEARS WHILE PEDALING THE BICYCLE. To Up Shift into a higher gear, press the "+" button with your thumb toward the handlebar while pedaling the bicycle. -
Page 22: Suspension Preload Adjustment
Bicycle Operation ◆ SUSPENSION PRELOAD ADJUSTMENT Preload is the measurement of how much a fork or shock spring is mechanically compressed. Preload adjustment allows you to change how the bicycle reacts to weight that’s applied via loading or through surface irregularities. Increasing preload will increase the amount of force required to compress the spring making the suspension firmer. -
Page 23: Suspension Rebound Adjustment
Bicycle Operation ◆ SUSPENSION REBOUND ADJUSTMENT Rebound Dampening is the measurement of how quickly a fork or shock returns to fully extended after compression. Rebound Dampening adjustment allows you to change how responsive the bicycle suspension is to surface irregularities. Increasing rebound dampening will increase the amount of dampening force within the fork and the fork will extend at a slower rate after compression. -
Page 24: Battery
Battery ◆ BATTERY REMOVAL / INSTALLATION To remove the battery from the E-Bike: 1) Insert the key into the key fob on the left side of the downtube 2) Turn the key clockwise. 3) Pull outward then upward on lever to remove battery from frame. 4) Turn the key counterclockwise and remove the key from the E-Bike. -
Page 25: Battery Charging
Battery ◆ BATTERY CHARGING The battery is the single most complex and expensive part of your E-Bike. Properly maintaining the battery state of charge is a very important part of owning an electric bicycle. The battery can be charged while it is connected to your E-Bike or you can remove the battery for charging. -
Page 26: Battery Range, Battery Safety
Battery ◆ BATTERY RANGE The battery range is the distance the E-Bike will travel on a single full charge of the onboard battery pack. The range will vary greatly based on usage including tire presuure, elevation change, speed, payload, acceleration, number of starts and stops, surface type, ambient air temperatue and level of pedal assist among other factors. -
Page 27: Troubleshooting
Troubleshooting SYMPTOMS COMMON CAUSES POSSIBLE SOLUTIONS 1. Insufficient battery power 1. Charge the battery pack 2. Faulty connections 2. Clean and repair connectors 3. Battery not fully seated in tray 3. Install battery correctly E-Bike won't power on 4. Improper power on sequence 4. - Page 28 Troubleshooting SYMPTOMS COMMON CAUSES POSSIBLE SOLUTIONS 1. Brake pads worn Replace the brake pads Inspect free play, adjust or replace 2. Cable stretched Brake power diminished 3. Brake rotor worn or warped 3. Replace the brake rotor 4. Brake overheating 4.
-
Page 29: Parking, Transport, Storage
Parking, Transport and Storage Please follow these basic parking, storage and transport tips to ensure your bike is well cared for on and off the road. ◆ PARKING • Park in a flat, steady, well-ventilated and dry area if available. It is recommended to park indoors whenever possible. •... -
Page 30: Cargo
Cargo ◆ LOADING Total maximum payload: 300 lb. • The total maximum weight limit of your E-Bike includes the weight of the rider, riding gear, cargo, etc. • The kickstand is not designed to be used for loading cargo. Do not assume the bike is stable and balanced when using the kickstand, always hold onto the bike firmly when cargo is being loaded or unloaded. -
Page 31: Bicycle Care
Bicycle Care To ensure safe riding conditions you must ensure your bike is properly maintained. You should follow these basic guidelines and see your certified bicycle mechanic at regular intervals to ensure your bike is safe for use. 1. Properly maintain batteries by keeping them fully charged when not in use. 2. -
Page 32: Maintenance Schedule
Maintenance Schedule Perform maintenance actions as instructed per the periodic schedule shown below I - Inspect L - Lubricate C - Clean E - Exchange First 250 miles 500 miles 1000 miles 2000 miles Component Action or Every or Every or Every or Every miles... -
Page 33: Maintenance Log
Maintenance Log Maintenance Performed Mileage Mileage Date Maintenance Performed Date... - Page 34 GENUINESCOOTERS. COM 2700 W Grand Ave. Chicago, IL USA...
Need help?
Do you have a question about the CU 500 and is the answer not in the manual?
Questions and answers