Table of Contents
Advertisement
Advertisement
Table of Contents

Related Manuals for Howe Rapid Freeze


Summary of Contents for Howe Rapid Freeze
- Page 1 Rapid Freeze SERVICE MANUAL and parts catalog Selective Purpose Flake Ice Machines 2000 - 20000 lb. Seawater Models Howe Corporation 1650 N Elston Ave Chicago, IL. 60622-1530 www.howecorp.com E-Mail: howeinfo@howecorp.com TECHNICAL ASSISTANCE LINE 1-773-235-0200 REV. 07-05...
- Page 2 This manual and all information contained herein are provided “as is” and are subject to change without notice. Howe Corporation makes no warranty of any kind with regard to this manual, including, but not limited to, the implied warranties of merchantability and fitness for a particular purpose. Howe Corporation shall not be liable for any errors or for incidental or consequential damages in connection with the furnishing, performance, or use of this manual.
- Page 3 INTRODUCTION Strategic Vision Rapid Freeze Energy Efficiency Important Safety Information Safety Symbols and their meanings INSTALLING THE RAPID FREEZE FLAKER Installation Conditions Installation Without Ice Bin Installation On Ice Bin Recommended Installation Method On Ice Bin (Exhibit 2) Water Supply & Filter Connections...
- Page 4 Rapid Freeze Manual Information HOW THE RAPID FREEZE FLAKER OPERATES Ice Flaker Cut-Away (Exhibit 26) The Inside Story 23-24 START and ADJUST Checklist Sump Assembly Water Level (Exhibit 27) Distribution Pan Water Level (Exhibit 28) Expansion Valve (Exhibit 29) ELECTRIC CONTROL PANEL Components &...
- Page 5 TROUBLESHOOTING CHART Photo Eye Control Module 43-45 Ice Storage Freezing 45-49 Drive Motor 49-50 Speed Reducer 50-51 SERVICE and ADJUSTMENT Warnings & Safety Information Ice Deflector 2000 - 6000 lb model (Exhibit 37) Ice Deflector 5 - 10 ton models (Exhibit 38) Ice Deflector Scraper (Exhibit 39)
-
Page 7: Strategic Vision
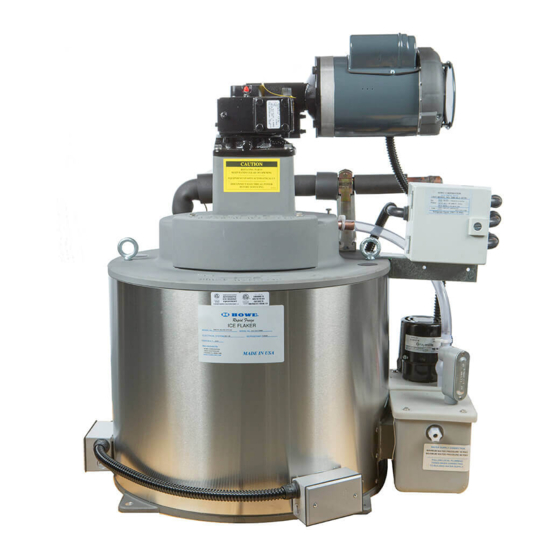
Available in a wide variety of sizes and configurations, the rugged Rapid Freeze Flaker can be found in diverse applications from supermarkets and food processors to remote fishing villages. - Page 8 Safety Symbols & What They Mean Please read and understand this manual prior to installing or operating this Rapid Freeze® Ice Flaker. You must be completely familiar with the start-up, operation and service of this flaker BEFORE you attempt to start, operate or adjust this piece of equipment.
- Page 9 *** CAUTION *** Upon receipt of your Rapid Freeze Ice Flaker, you should first inspect the carton very carefully to determine if any damage may have occurred during shipment. If you suspect any damage has occurred, it should be noted immediately on the freight bill.
-
Page 10: Installation Conditions
F (32 Installation without ice bin Rapid Freeze Ice Flakers may be installed under certain conditions without a typical ice bin. When the flaker is installed without a bin, it must have a drainable condensate pan located under the machine. The flaker must also be mounted high enough off the floor so there is no chance that somebody may reach into the evaporator from below either with a pole, or their arm, while the flaker is operating. - Page 11 Rapid Freeze Ice Flaker model installed on it. The ice bin should be designed to support the weight of the flaker, and the ice stored inside the bin. Most ice storage bins can handle the weight of a 2000, 3000, 4000 or 6000 pound capacity bare ice flaker without any additional bracing.
- Page 12 3 Installing the Rapid Freeze Flaker Step 7. Repeat steps 5 & 6 on the other side. Step 8. With the flaker sitting on one (1) block under each corner, repeat steps 5, 6 & 7 removing the remaining blocks. Drip pan flanges MAY bend slightly.
- Page 13 3 Installing the Rapid Freeze Flaker WATER LINE: Connect a 2" galvanized or 2" ODS COPPER water pipe from the closest convenient water line to within 2 to 4 feet of the ice flaker water sump. Install a water line shutoff valve near the ice flaker.
-
Page 14: Refrigerant Charging
Verify that thermostatic expansion valve supplied with the ice flaker matches the refrigerant for the refrigeration system or condensing unit. *** WARNING *** All Rapid Freeze BARE and Remote model ice flakers are shipped with a small holding charge of dry Nitrogen. SYSTEM MUST BE EVACUATED PRIOR TO CHARGING REFRIGERANT. - Page 15 Failure to do so may result in compressor burn-out. After the third evacuation, notice that the "eye" in the liquid indicator is green, (supplied by Howe on all flakers except bare flakers) indicating that the system is clean and dry. Then continue to charge the system (using gas not liquid).
- Page 16 6 SEAWATER MODEL INSTALLATION ASSEMBLY DRAWING 11ESS-21ESS...
- Page 17 6 SEAWATER MODEL INSTALLATION ASSEMBLY DRAWING 31ES-31ESS...
- Page 18 6 SEAWATER MODEL INSTALLATION ASSEMBLY DRAWING 51ES-51ESS...
- Page 19 6 SEAWATER MODEL INSTALLATION ASSEMBLY DRAWING 11EFS-21EFS...
- Page 20 6 SEAWATER MODEL INSTALLATION ASSEMBLY DRAWING 51EFS...
- Page 21 6 SEAWATER MODEL INSTALLATION ASSEMBLY DRAWING 10ESS-20ESS...
- Page 22 6 SEAWATER MODEL INSTALLATION ASSEMBLY DRAWING 30ES - 30ESS...
- Page 23 6 SEAWATER MODEL INSTALLATION ASSEMBLY DRAWING 50ES -50ESS...
-
Page 24: Freon Piping
6 SEAWATER MODEL INSTALLATION WIRING & ELECTRICAL CONNECTIONS *** CAUTION *** ELECTRICAL WIRING SHOULD BE PERFORMED BY QUALIFIED TECHNICIANS FOLLOWING LOCAL ELECTRICAL CODES. *** CAUTION *** All internal wiring on the remote model seawater ice flakers between the control panel and components are pre-wired at the factory. - Page 25 6 SEAWATER MODEL INSTALLATION *** IMPORTANT NOTICE *** When piping ice flaker to a central refrigeration rack, liquid line must be connected to the receiver side of any defrost solenoid/control valve to insure uninterrupted liquid feed/supply during normal defrost cycles of the rack. *** IMPORTANT NOTICE *** When installing a seawater ice flaker, it is important that the flaker is properly piped as shown on the piping schematic on page 26.
-
Page 26: Electric Eye Ice Level Control (Exhibit 23)
Accessories ELECTRIC EYE ICE LEVEL CONTROL Electric Eye Ice Level Control The use of a suitable ice level control to shut off the ice flaker when the bin fills up is mandatory. Failure to use the proper ice level control will cause ice to build up within the ice flaker evaporator after the bin is full to capacity. -
Page 27: Why Ice Bin Thermostats Are Not Used
Accessories WHY ICE BIN THERMOSTATS ARE NOT USED. The use of a bin thermostat is not recommended and not permitted. The Rapid freeze ice flaker is ° ° designed so that the freezing drum (operating @ -5 F to -10 F) is located directly over the ice drop opening in the bin. - Page 28 How The Rapid Freeze Flaker Operates ICE FLAKER CUTAWAY DRAWING (EXHIBIT 26)
-
Page 29: The Inside Story
This assures a very long life and substantially lower maintenance cost compared to commercial flakers. The advantage of Rapid Freeze flake ice offers over the "granular" ice produced on commercial machines is the greater surface area, dryness, lower temperature and longer life. Rapid Freeze flake ice contains over 17,000 sq. - Page 30 Refrigerant identified on the ice Flaker label, you may proceed with the check and adjust section. The following checklist is provided as a reference of start-up check out procedure, This check list assumes the use of the Howe electronic control panel. Checklist 1)_________ Before power is turned on, open inlet water valve, (field supplied &...
- Page 31 Start & Adjust 7)________ After a few minutes, the ice maker will begin to freeze the water circulating over the evaporator into ice. 8)________ Allow 10-15 minutes to let the ice flaker come down to temperature and balance out. 9)________ Looking down into the evaporator, through the hand hole cover, check to make sure the ice is being frozen and harvested over the entire surface of the evaporator.
- Page 32 13a)________On ice flakers with the solenoid valve interlocked with the condensing unit, the compressor will pump down and cycle off once the compressor reaches the low pressure switch cut-out point. 14)________ Ice flaker is pumped down, (Solenoid valve is de-energized) drive motor & water pump continue to run until the off delay cycle opens.
- Page 33 11 Electric Control Panel THIS SECTION APPLIES ONLY TO CONTROL PANELS SUPPLIED BY HOWE, ORDERED AS AN OPTION WITH THE MACHINES (Bare Machines). Components & functions Panel Layout Motor Contactor Provides power to the drive motor & water pump. Energized during freezing and pump down cycle, then timed off for shut down.
- Page 34 11 Electric Control Panel ice bin is full to prevent damage to the flaker from ice backing up into the evaporator section. L1 L2 L3 Terminals Main power terminals for field wiring electric power to control panel. Single phase units (standard) wired to L1 &...
- Page 35 11 Electric Control Panel Low Oil Pressure Failure light. Red Indicating light is on when low oil pressure switch opens shutting down the compressor. Light will stay on until pressure switch is manually reset. High Discharge Pressure Light Red indicating light is on when high discharge pressure switch opens shutting down the compressor. Light will stay on until pressure switch is manually reset.
- Page 36 11 Electric Control Panel E20T48 CONTROL MODULE The E20T48 control module is the main processor for the ice flaker control panel. It incorporates the timer functions, control relay functions, and overload relay functions Terminals 1 & 2 : 24 VAC input power. Terminal 3 : Ice Flaker Run input signal (all on-off switches, ice level controls and any special controls installed must be in this circuit.)
- Page 37 11 Electric Control Panel Control panel door layout (E20T40-RL) (Exhibit 31) Control Panel Door Layout (E20T40-SCA)
-
Page 38: Wiring
12 Control Panel Wiring Diagrams Control Panel Schematic (E20T40-RL) -
Page 39: Wiring
12 Control Panel Wiring Diagrams 460/3/60 WIRING (E20T47) - Page 40 12 Control Panel Wiring Diagrams 460/3/60 Control Panel Schematic (E50U8-RL ) Large Capacity Single Circuit...
-
Page 41: Wiring
12 Control Panel Wiring Diagrams 460/3/60 Control Panel Schematic (E50U9-RL) Large Capacity Dual Circuit... -
Page 42: Wiring
12 Control Panel Wiring Diagrams 220/1/50 Control Panel Schematic (E20T40-RL-50) - Page 43 12 Control Panel Wiring Diagrams 380/3/50 Control Panel Schematic (E20T60)
- Page 44 12 Control Panel Wiring Diagrams 380/3/50 Control Panel Schematic (E50U14-RL) Large Capacity Single Circuit...
-
Page 45: Evaporator
13 Maintenance Evaporator To keep the evaporator in peak performance, the ice maker should be cleaned with an approved ice machine cleaner at least twice a year, more often if water conditions cause mineral build up, using an approved food grade ice machine cleaner. The water pump is used to circulate ice machine cleaner through the system. -
Page 46: Water Distribution Tubes
13 Maintenance Pour solution of ice machine cleaner into sump, to normal operating level. Do not overfill because it may overflow into bin. Start the ice flaker drive motor and water pump to circulate cleaning solution over the freezing surface and all water passages. Operate until all scale is removed. This may require from half hour up to about 2 hours if scale build up is heavy. -
Page 47: Cleaning Procedure
13 Maintenance Lubrication Bearings & Seals Main Bearings on the ice flaker must be lubricated every 3 months with a FDA approved edible grease. The grease fittings are easily accessible from the front of the flaker; the top bearing is lubricated through the inspection (service) opening, the bottom bearing is lubricated through one of the ribs located on the front of the machine in the lower right corner near the water sump. -
Page 48: Preventative Maintenance
13 Maintenance Preventative maintenance means that the store or department manager (or a designated employee) make a daily visual check of the ice flaker. Check for... Bin doors are working (closing) properly Bin doors are kept closed Photo eyes and brackets are in proper alignment Ice Quality (Size of flakes) Ice Quantity (Normal amounts of ice produced) Bubbles in sight glass... -
Page 49: Photo Eye
14 Trouble Shooting Chart PHOTO EYE PROBLEM PROBABLE CAUSE REMEDY Ice maker is NOT Photo-eye not installed. Install photo-eye control. shutting off when bin is Output relay on power module is Power module defective, full, and, signal light on not transferring. replace module. -
Page 50: Troubleshooting Chart
14 TroubleShooting Chart PROBLEM PROBABLE CAUSE REMEDY VAC). control module, voltage reading should be 24 VAC. If 24 VAC is not present, control transformer may be defective, check & replace. Control switch(es) open. Check Check switches and ice voltage between terminals # 1 level control for proper &... -
Page 51: Control Module
14 Trouble Shooting Chart PROBLEM PROBABLE CAUSE REMEDY Liquid line solenoid Control module isolated contacts Replace defective control valve energized always. will not open. module. ICE STORAGE & REMOVAL Ice flakes frozen together Lead tube splashing water off Adjust lead tube, so that it into a hard block of ice the ice deflector, into the doesn't splash water over... - Page 52 Adjust drive motor cuts out on in receiver. TXV if necessary. overload a few minutes after start-up. Ice freezing hard on entire Water quality not suitable (hard Install Howe Phosphate length of drum, but water). Filters. harvesting poorly and at...
- Page 53 14 Trouble Shooting Chart PROBLEM PROBABLE CAUSE REMEDY random, with no specific Freezing surface coated with hard Clean evaporator with ice pattern. Leaves strips of machine cleaner to water deposits. ice at upper end of drum, remove deposits. some at lower end, etc. No ice freezing on drum ) Loss of refrigerant charge.
- Page 54 14 TroubleShooting Chart PROBLEM PROBABLE CAUSE REMEDY Head pressure controls defective. Replace defective head pressure control. (Headmaster Control) Condensing unit undersized. Replace unit with properly sized condensing unit. Ice flakes too small and Evaporating temp. too low because Install EPR and adjust too "powdery"...
-
Page 55: Freezing
14 Trouble Shooting Chart PROBLEM PROBABLE CAUSE REMEDY Water overflowing top water distribution pan because: Water distribution tubes plugged. Unplug all distribution tubes. Water pump delivering too much Adjust water regulating water to pan. valve (ball valve located near water pump) One or more water distribution Replace all defective tubes broken. -
Page 56: Speed Reducer
Repair speed reducer. Control circuit has off delay timer, Disconnect switch should but disconnect switch was used to stay on continuously start and stop ice flaker instead of except for servicing. on-off switches. Install new Rapid Freeze control panel. -
Page 57: Speed Reducer
14 Trouble Shooting Chart PROBLEM PROBABLE CAUSE REMEDY Repair speed reducer Ice blade frozen to evaporator Electronic overload may during power failure. be set too high. Adjust so it will trip upon overload condition before damaging gearbox, motor or coupling. Repair speed reducer. - Page 58 15 Service & Adjustment *** IMPORTANT SAFETY NOTICE *** his information is intended for use by individuals possessing adequate background in lectrical, refrigeration and mechanical experience. Any attempt to repair major equipment may result in personal injury and / or property damage. The manufacturer or seller cannot be esponsible for the interpretation of this information, nor can it assume any liability in onnection with its use.
- Page 59 15 Service & Adjustment REPLACEMENT & ADJUSTMENT OF ICE DEFLECTOR 2000 - 6000 POUND MODELS To properly install, the upper edge of the deflector should be positioned approximately 1/8" BELOW the aluminum lip under the evaporator. The ice deflector should be centered beneath the ice cutter blade so that as the ice is removed from the evaporator, it will be deflected into the ice bin opening, away from the water collecting trough.
- Page 60 15 Service & Adjustment REPLACEMENT & ADJUSTMENT OF ICE DEFLECTOR 5 TON - 10 TON MODELS To properly install, the upper edge of the deflector should be positioned approximately 3" BELOW the aluminum lip under the evaporator. The ice deflector should be centered beneath the ice cutter blade so that as the ice is removed from the evaporator, it will be deflected into the ice bin opening, away from the water collecting trough.
- Page 61 15 Service & Adjustment REPLACEMENT & ADJUSTMENT OF ICE DEFLECTOR SCRAPER. 2000 - 6000 pound models only! The ice deflector scraper is mounted on one of the three bottom ribs using two 3-20 stainless bolts and nuts. The scraper's primary purpose is to clear any buildup of ice on the ice deflector as the deflector passes by the scraper.
-
Page 62: Water Distribution Tubes
15 Service & Adjustment Re-install water distribution tubes. Remove all tools from inside the machine and re-attach the service access cover. Remove lock-out devise from the main power disconnect and turn on the main power. Turn on the ice flaker switch, (you may need to press the overload reset button) and check the squeegee to ensure that it touches the evaporator on the entire circumference of the freezing chamber. -
Page 63: Drive Motor
15 Service & Adjustment two threaded holes on the motor mounting plate. They will be on the horizontal center line, one on each side of the input shaft. Insert one of the mounting bolts into each threaded hole so they push against the drive motor ( you may have to rotate motor housing so the bolts can press against the mounting lugs on the motor, making sure the bolts do not thread into the mounting lugs.) Turn both bolts until they are hand tight, then turn each bolt 2 turn at a time, alternately until the motor if free... - Page 64 15 Service & Adjustment (EXHIBIT 40)
- Page 65 15 Service & Adjustment REPLACEMENT OF MAIN BEARINGS 2000-6000 lb MODELS 1) Remove motor and speed reducer by taking out the 4 - 3/8" cap screws, from the top aluminum casting. 2) Remove the lower half of the flexible coupling. 3) Remove rivets which retain the outer stainless steel jacket around the ice flaker.
- Page 66 15 Service & Adjustment REPLACEMENT OF MAIN BEARINGS 5 – 10 TON MODELS Bearing replacement on large capacity machines is accomplished without removing the shaft from the flaker. Turn ice flaker off and pump down until all ice is removed from the evaporator. Shut main disconnect off and lock out power.
-
Page 67: Ice Level Control
15 Service & Adjustment REPLACEMENT OF ELECTRIC EYES (ICE LEVEL CONTROL) Turn off the main power and remove the 11-pin power module. Locate the sensor to be replaced, and remove the sensor housing cover (if present). Using two open-ended wrenches, and placing one on the back nut and one on the forward nut, remove the sensor. Disconnect the sensor from the terminal strip (under the relay base). -
Page 68: Expansion Valve
*** SPECIAL NOTE *** REPLACEMENT OF SOLENOID VALVE *** SPECIAL NOTE *** On flakers SUPPLIED WITH HOWE CONTROL PANELS that are connected to a central refrigeration rack system, a jumper wire must be placed between terminal "Line " and terminal "L ". - Page 69 Pump down the ice flaker and evacuate refrigerant from the liquid line. Turn off main power to ice flaker, disconnect wires leads from solenoid valve and remove armored cable. Loosen and remove flare nuts (or unsolder) on the solenoid valve and remove the old valve. Install the new valve and tighten the flare nuts (or re-solder).
- Page 70 Replacement parts for electric control panel, & misc. Accessories Replacement Expansion Valves Please have model number and serial number of ice flaker ready when ordering replacement parts. Howe Corporation • 1650 N. Elston Ave. • Chicago, IL. 60622 Tel 773-235-0200 • Fax 773-235-0269 E-mail: howeinfo@howecorp.com Website: www.howecorp.com...
- Page 71 Models 2000, 10EA, 10EAR, 11ES, 11ESS, 3000, 15EA, 15EAR 16ES, 16ESS, 4000, 20EA, 20EAR, 21ES, 21ESS, 6000, 30EA 30EAR, 31ES, 31ESS ICE FLAKERS CROSS-SECTION SELECTIVE PURPOSE Manual Page (65)
- Page 72 2000,10E, 11E 3000, 15E, 16E 4000, 20E, 21E 6000, 30E, 31E TABLE 3: Replacement Parts for Models Listed to Right 10EA, 10EAR, 15EA, 15EAR 20EA, 20EAR 30EA, 30EAR 11ES, 11ESS 16ES, 16ESS 21ES, 21ESS 31ES, 31ESS Item No. PART DESCRIPTION PART NUMBER Insulated Lug Spacers (8) E20J4...
- Page 73 E10H29 E10H29 E10H29 E50H18 For more detailed information, contact Howe customer service department with ice flaker serial number. Speed Reducer field replacement parts are no longer available. Speed reducers can be sent into factory to be rebuilt. See our website or Contact Howe for information on rebuilding http://www.howecorp.com/speed_reducer.htm...
- Page 74 Models 51E, 50EA, 50EAR, 76E-1, 76E-2 75EA, 75EAR, 101E-2, 101E-2, 100EA, 100EAR FRESHWATER ICE FLAKERS CROSS-SECTION SELECTIVE PURPOSE Manual Page (68)
- Page 75 SELECTIVE PURPOSE Manual Page (69)
- Page 76 50E, 51E 75E, 76E 100E, 101E TABLE 4: Replacement Parts for Models Listed to Right 50EA, 50EAR 75EA, 75EAR 100EA, 100EAR Item No. PART DESCRIPTION PART NUMBER Insulated lug spacers (8) E50J2 Main shaft E50D1 E75D1 E100D1 Shaft sleeve E50D2 Top ice blade 202@ L, 122@L, 202@L E30E3 E20E2...
- Page 77 50E, 51E 75E, 76E 100E, 101E TABLE 4: Replacement Parts for Models Listed to Right 50EA, 50EAR 75EA, 75EAR 100EA, 100EAR Item No. PART DESCRIPTION PART NUMBER Handhole cover removable E50A2 Table 5: Electric Panel Parts & Misc. Part Description Part No.
- Page 78 Table 6: Replacement Expansion Valves (for Freshwater flakers) R-404A R-22 Ice Flaker Standard Balanced Port Standard Balanced Port Model Part # Part # Part # Part # 1000 F5V18 F5V20 F5V17 F5V19 2000 E10V23 E10V25 E10V22 E10V24 3000 E15V6 E15V7 E15V5 E10V24 E20V11...
Need help?
Do you have a question about the Rapid Freeze and is the answer not in the manual?
Questions and answers